Home>How-to Guides>For Men>How To Change Incontinence Briefs In Bed
For Men
How To Change Incontinence Briefs In Bed
Published: July 31, 2023
Learn how to change incontinence briefs in bed for men and maintain comfort and dignity. Step-by-step guide and tips to make the process easier.
(Many of the links in this article redirect to a specific reviewed product. Your purchase of these products through affiliate links helps to generate commission for Under-tec.com, at no extra cost. Learn more)
Table of Contents
- Introduction
- Step 1: Gather necessary supplies
- Step 2: Prepare the bed
- Step 3: Put on disposable gloves
- Step 4: Position the person correctly
- Step 5: Unfasten the briefs
- Step 6: Roll the person onto their side
- Step 7: Roll up and remove the soiled brief
- Step 8: Clean the person’s skin
- Step 9: Apply a fresh pair of briefs
- Step 10: Position the person back onto their back
- Step 11: Secure the new briefs in place
- Step 12: Dispose of the used briefs
- Step 13: Remove gloves and wash hands
- Conclusion
Introduction
Welcome to our comprehensive guide on how to change incontinence briefs in bed. Dealing with incontinence can be challenging, but with the right knowledge and approach, you can provide the necessary care and support for yourself or a loved one. Whether you are a professional caregiver or assisting a family member or friend, this step-by-step guide will help you navigate the process of changing incontinence briefs in bed with confidence.
Living with incontinence can lead to feelings of embarrassment and discomfort, but it’s important to remember that it is a common condition affecting millions of people worldwide. Incontinence briefs, also known as adult diapers, provide a practical solution for managing incontinence and maintaining hygiene.
Changing incontinence briefs in bed requires a careful and compassionate approach to ensure the person’s comfort and dignity throughout the process. Following proper techniques and using the right supplies will help prevent skin irritation, leaks, and other complications.
In this guide, we will take you through the step-by-step process of changing incontinence briefs in bed, from gathering the necessary supplies to disposing of the used briefs. We will also provide tips and advice to ensure a smooth and efficient caregiving experience.
Whether you are a caregiver or someone managing their own incontinence, learning how to change incontinence briefs in bed is an essential skill that can make a significant difference in the quality of life for those affected by incontinence. So let’s get started with the first step: gathering the necessary supplies.
Step 1: Gather necessary supplies
Before you begin the process of changing incontinence briefs in bed, it is important to gather all the necessary supplies. This will ensure a smooth and efficient changing process, minimizing any discomfort or inconvenience for the person you are assisting. Here are the essential supplies you will need:
- Incontinence briefs: Select the appropriate size and absorbency level of incontinence briefs for the person you are caring for. Make sure to have a sufficient supply on hand.
- Disposable gloves: It is crucial to maintain proper hygiene during the changing process. Disposable gloves protect both you and the person from potential infections or cross-contamination.
- Wet wipes or washcloths: These are used for cleaning the person’s skin before applying the fresh pair of briefs, ensuring cleanliness and reducing the risk of skin irritation.
- Disposable bags: Have a few disposable bags nearby to dispose of the soiled briefs and gloves safely and hygienically.
- Protective pad or disposable bed pad: Placing a protective pad or disposable bed pad under the person can prevent any leakage or spills onto the bed, making the process easier to manage.
- Extra bedding: In case the bed becomes soiled during the changing process, have extra bedding nearby to ensure a comfortable and clean sleeping environment for the person.
Ensure all the supplies are within easy reach before you start. This will help you maintain a smooth workflow and minimize any unnecessary movements or interruptions during the changing process.
Gathering the necessary supplies is the first step in changing incontinence briefs in bed. By being prepared, you can create a comfortable and efficient environment for both you and the person you are assisting. Now that you have everything you need, let’s move on to preparing the bed for the changing process.
Step 2: Prepare the bed
Preparing the bed before changing incontinence briefs is an important step to ensure cleanliness and comfort for the person you are caring for. Taking a few moments to make the bed ready will make the changing process smoother and more efficient. Here are the steps to prepare the bed:
- Remove any unnecessary items: Clear the area around the bed, removing any objects or obstacles that may hinder the changing process. This includes pillows, blankets, and personal belongings.
- Place a protective pad or disposable bed pad: Lay a protective pad or disposable bed pad on the bed, positioning it underneath the person’s hips and buttocks. This will provide an additional layer of protection for the bed and make cleanup easier.
- Adjust the bed height: If the bed is adjustable, make sure to position it at a comfortable height that allows easy access to the person. This will help prevent strain or discomfort during the changing process.
- Ensure adequate lighting: Check that the room has sufficient lighting, either natural or artificial, to ensure clear visibility during the changing process. Proper lighting is essential for maintaining hygiene and safety.
Taking the time to prepare the bed properly will create a clean and comfortable environment for the person you are caring for. It will also make the changing process more organized and efficient. Once the bed is ready, you can proceed to the next step: putting on disposable gloves.
Step 3: Put on disposable gloves
Before you begin the process of changing incontinence briefs, it is essential to prioritize hygiene and protect yourself and the person you are assisting. Putting on disposable gloves is a crucial step to prevent the spread of germs and potential contamination. Follow these steps to put on disposable gloves:
- Wash your hands: Start by washing your hands thoroughly with soap and water for at least 20 seconds. This step ensures that your hands are clean before putting on the gloves.
- Select the right-sized gloves: Choose disposable gloves that fit your hands properly. Gloves that are too tight may cause discomfort, while loose-fitting gloves may compromise dexterity and grip.
- Open the glove packaging: Open the packaging carefully, avoiding contact with the inside of the gloves. Ensure that the gloves are not damaged or torn before proceeding.
- Put on the first glove: Insert your dominant hand into the first glove, ensuring that all fingers are completely covered. Gently pull the glove up towards your wrist, leaving no exposed skin.
- Put on the second glove: Using your gloved hand, insert your non-dominant hand into the second glove. Gently pull the glove up towards your wrist, overlapping the cuff of the first glove to provide a secure and snug fit.
- Adjust the gloves if necessary: Check the fit of the gloves and ensure that they are comfortable and provide full coverage. Make any necessary adjustments to ensure a proper fit.
Disposable gloves create a barrier between your skin and any potential contaminants, reducing the risk of infection and promoting hygiene during the changing process. Remember to avoid touching your face or other surfaces while wearing gloves to maintain their effectiveness.
Putting on disposable gloves is an essential step in the process of changing incontinence briefs. It protects both you and the person you are caring for, ensuring a safe and hygienic environment. With your gloves on, you’re now ready to proceed to the next step: positioning the person correctly.
Step 4: Position the person correctly
Proper positioning is key to the comfort and safety of the person you are assisting while changing incontinence briefs. Positioning them correctly allows for easier access and maneuverability during the process. Follow these steps to position the person correctly:
- Communicate and obtain consent: Before moving the person, communicate with them and obtain their consent. Respect their autonomy and involve them in the process to the best of their abilities.
- Assess the person’s mobility: Evaluate the person’s mobility and physical condition to determine the most suitable positioning method. If they are able to assist, encourage them to participate and provide support as needed.
- Ensure a stable and comfortable position: Make sure the person is positioned comfortably on the bed. Use pillows or cushions to provide support and maintain a stable position if necessary.
- Support the person’s head and neck: If the person requires additional head and neck support, use a pillow or rolled-up towel to provide comfort and maintain proper alignment.
- Keep their knees slightly bent: Position the person with their knees slightly bent, as this can help reduce strain and make it easier to change their briefs.
- Ensure their feet are flat on the bed: Confirm that the person’s feet are flat on the bed, providing a stable base and preventing slipping or sliding during the changing process.
Remember to be gentle and mindful of the person’s comfort and any potential pain or discomfort they may experience. Regularly communicate with them throughout the process and make any necessary adjustments to ensure their well-being.
Properly positioning the person sets the foundation for a smooth and comfortable changing experience. With the person correctly positioned, you can proceed to the next step: unfastening the briefs.
Step 5: Unfasten the briefs
Once you have positioned the person correctly, the next step in changing incontinence briefs is to unfasten the current briefs. This process requires careful handling to ensure the person’s comfort and prevent any mess or leakage. Follow these steps to unfasten the briefs:
- Locate the fasteners: Identify the fastening tabs or adhesive strips on the sides of the briefs. These are used to secure the briefs in place and will need to be opened.
- Start with one side: Begin by unfastening one side of the briefs. Gently lift and peel back the fastening tab or strip, taking care not to tug or pull harshly to avoid discomfort or accidental tearing.
- Move to the other side: Once one side is unfastened, move to the other side and repeat the process of gently lifting and peeling back the fastening tab or strip. Take your time and be gentle to avoid any unnecessary discomfort.
- Check for additional fasteners: Some briefs may have additional fasteners at the front or back. Ensure all fasteners are unfastened before proceeding.
- Tuck the front panel downwards: If the briefs have a front panel, gently tuck it downward to help prevent any mess or leakage during the changing process.
Throughout this process, it is important to be mindful of the person’s comfort and dignity. Take cues from them, and if they express any discomfort or pain, adjust your movements accordingly.
Unfastening the briefs is a crucial step in the changing process, allowing you to remove the soiled briefs and prepare the person for the next step of the process. Once the briefs are unfastened, you can proceed to the next step: rolling the person onto their side.
Step 6: Roll the person onto their side
After unfastening the briefs, the next step in changing incontinence briefs is to roll the person onto their side. This maneuver allows for easy removal of the soiled briefs while minimizing discomfort and mess. Follow these steps to roll the person onto their side:
- Communicate and obtain consent: Before moving the person, communicate with them and obtain their consent. Respect their autonomy and involve them in the process to the best of their abilities.
- Stand on the side of the bed: Stand on the side of the bed that you will roll the person toward. Position yourself to have good leverage and support during the rolling process.
- Place one hand on their shoulder and the other on their hip: Gently place one hand on the person’s shoulder and the other on their hip or upper thigh. This will provide support and stability as you roll them onto their side.
- Instruct the person to bend their top knee: Ask the person to bend their top knee, so their legs are slightly angled towards their chest. This position helps maintain balance and stability during the rolling process.
- Use a smooth, coordinated motion to roll them onto their side: With your hands providing support, initiate a smooth rolling motion, guiding the person onto their side while keeping their head, neck, and body aligned. Take your time and be gentle to ensure their comfort.
- Position a pillow or rolled-up towel behind their back: Once the person is on their side, position a pillow or rolled-up towel behind their back. This provides support and helps maintain their position during the changing process.
Throughout the rolling process, maintain open communication with the person and check for any signs of discomfort or pain. Adjust your movements accordingly and ensure their well-being.
Rolling the person onto their side is a critical step that allows for easy access to remove the soiled briefs and clean the person. With the person appropriately positioned on their side, you can move on to the next step: rolling up and removing the soiled brief.
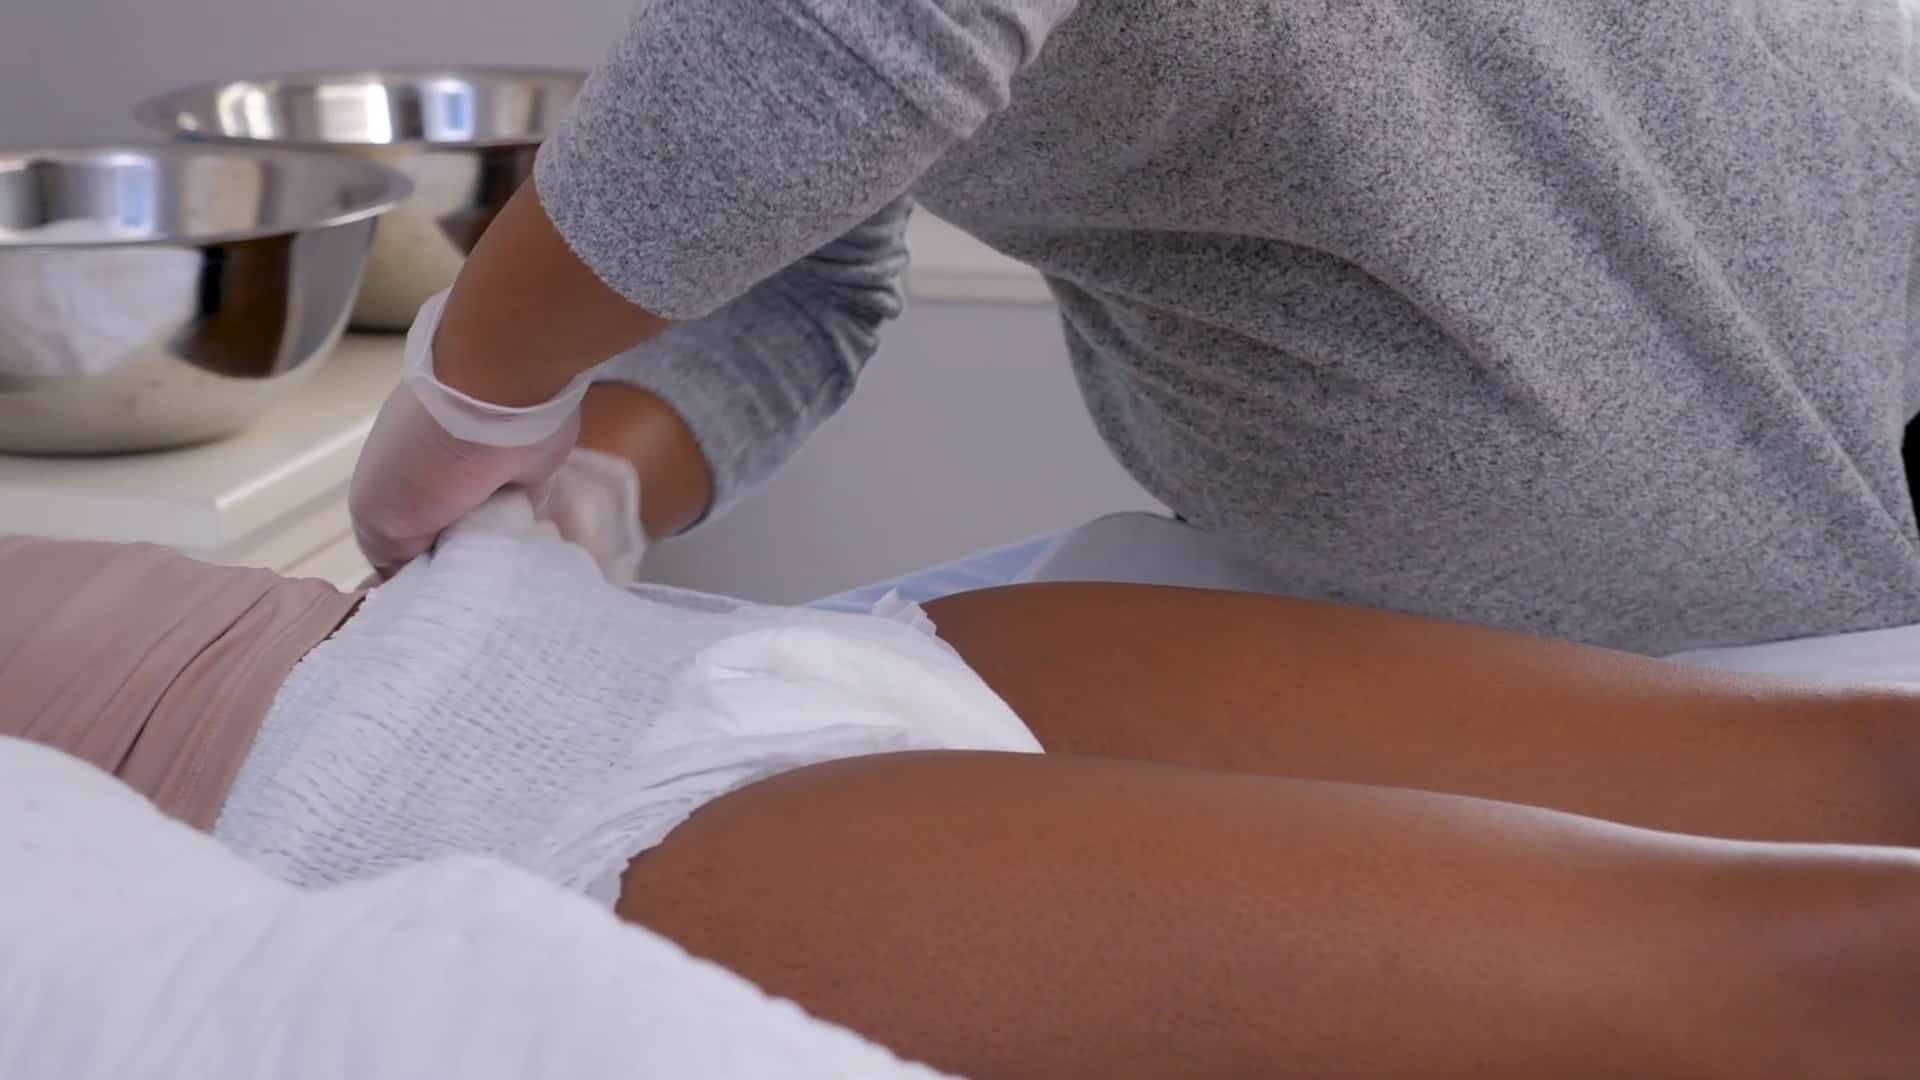
Step 7: Roll up and remove the soiled brief
After rolling the person onto their side, the next step in changing incontinence briefs is to roll up and remove the soiled brief. Proper technique and care are essential to minimize mess and maintain cleanliness. Follow these steps to roll up and remove the soiled brief:
- Ensure a firm grip: With one hand on the person’s hip or upper thigh, use your other hand to gently grasp the clean portion of the brief material. This will provide a firm grip for rolling up the brief.
- Roll up the brief towards the person’s back: Starting from the front of the brief, gently roll it up towards the person’s back. Take your time and ensure that there are no spillages or leaks during this process.
- Hold the rolled-up brief in place: Once the brief is rolled up, use your free hand to hold it in place against the person’s body. This will prevent any potential mess or leakage while you prepare for disposal.
- Slide a clean, disposable bag underneath the rolled-up brief: Open a clean, disposable bag and slide it underneath the rolled-up brief. Ensure that the entire soiled area is enclosed within the bag to contain any odors or moisture.
- Gently unroll the brief into the bag: Slowly and carefully unroll the brief, allowing it to fall neatly into the disposable bag. Be cautious not to shake or disturb the brief, as this can cause spillages or odors.
- Seal and secure the bag: Once the brief is completely inside the bag, carefully seal and secure it to prevent any leakage or odor. Dispose of the bag in an appropriate waste bin.
Throughout the process of rolling up and removing the soiled brief, maintain a calm and supportive demeanor. This helps to promote the person’s comfort and dignity, as well as prevent any unnecessary mess or complications.
With the soiled brief removed and properly disposed of, you can move on to the next step: cleaning the person’s skin.
Step 8: Clean the person’s skin
After removing the soiled brief, it is crucial to clean the person’s skin thoroughly to maintain hygiene and prevent any potential skin irritations or infections. Taking the time to clean and care for their skin promotes comfort and overall well-being. Follow these steps to clean the person’s skin:
- Put on a fresh pair of disposable gloves: Before proceeding with the cleaning process, ensure that you are wearing a fresh pair of disposable gloves to maintain hygiene and minimize the risk of cross-contamination.
- Use disposable wipes or a washcloth: Grab a clean disposable wipe or dampen a washcloth with warm water. Choose a wipe or washcloth that is gentle on the skin and free of any harsh chemicals or fragrances.
- Begin cleaning from front to back: Starting from the front, gently clean the person’s genital area. Use a gentle wiping motion, ensuring thorough cleansing and removing any residue or odor.
- Continue with the perineal area: Move to the perineal area (the area between the genitals and anus) and clean with gentle wiping motions. Pay extra attention to areas with folds or creases.
- Clean the buttocks and surrounding areas: Extend the cleaning process to the buttocks and surrounding areas, ensuring all areas are adequately cleaned and any remaining residue or moisture is removed.
- Pat the skin dry: After cleaning, use a clean, dry disposable wipe or towel to gently pat the skin dry. Avoid rubbing, as it can irritate the skin. Ensure that the skin is completely dry before proceeding.
- Apply a moisture barrier cream or powder (if needed): If necessary, apply a moisture barrier cream or powder to protect the skin from moisture and potential irritation. Follow any specific instructions or recommendations from healthcare professionals.
Throughout the cleaning process, maintain open communication with the person and ensure their comfort and privacy. Be gentle and mindful of their skin’s sensitivity, taking extra care if they have any existing skin conditions.
Cleaning the person’s skin is an essential step in maintaining their hygiene and preventing any discomfort or complications. With their skin clean and dry, you can now move on to the next step: applying a fresh pair of briefs.
Step 9: Apply a fresh pair of briefs
After cleaning the person’s skin, the next step in changing incontinence briefs is to apply a fresh pair to ensure comfort, protection, and hygiene. Properly putting on a new pair of briefs is vital to prevent leaks, maintain cleanliness, and promote the person’s well-being. Follow these steps to apply a fresh pair of briefs:
- Ensure the person is in a comfortable position: Before putting on the new briefs, ensure that the person is in a stable and comfortable position, whether lying on their side or back.
- Open the fresh pair of briefs: Carefully open the packaging of the new briefs, ensuring not to touch the interior surfaces with your gloved hands.
- Position the briefs correctly: Position the briefs, making sure the back part is aligned with the person’s lower back and the front part is covering their abdomen and genitals.
- Slide the briefs underneath the person: Gently slide the clean briefs underneath the person, ensuring it is properly centered and snug against their body.
- Fasten the briefs securely: Secure the briefs in place using the fastening tabs or adhesive strips. Start with one side and then fasten the other side, checking that the fit is snug but comfortable.
- Ensure proper positioning and comfort: Adjust the briefs if needed to ensure a proper fit and comfort. Make sure they are not too tight or too loose, with no wrinkles or gaps.
Throughout the process of applying the fresh pair of briefs, be mindful of the person’s comfort and dignity. Communicate with them and make any necessary adjustments to ensure their well-being.
Applying a fresh pair of briefs completes the main process of changing incontinence briefs. With the new briefs in place, you can now move on to the next step: repositioning the person onto their back.
Step 10: Position the person back onto their back
After applying a fresh pair of briefs, the next step in changing incontinence briefs is to reposition the person onto their back. Returning them to their back ensures their comfort and stability as they rest or continue with their daily activities. Follow these steps to position the person back onto their back:
- Communicate and obtain consent: Before moving the person, communicate with them and obtain their consent. Respect their autonomy and involve them in the process to the best of their abilities.
- Stand on the side of the bed: Stand on the side of the bed opposite to where you rolled the person earlier. Position yourself to have good leverage and support during the repositioning process.
- Place one hand on their shoulder and the other on their hip: Gently place one hand on the person’s shoulder and the other on their hip or upper thigh. This will provide support and stability as you reposition them onto their back.
- Instruct the person to straighten their legs: Ask the person to straighten their legs, aligning them parallel to the bed. This helps maintain balance and a neutral position during the repositioning.
- Use a smooth, coordinated motion to roll them onto their back: With your hands providing support, initiate a smooth rolling motion, guiding the person back onto their back while keeping their head, neck, and body aligned. Take your time and be gentle to ensure their comfort.
- Ensure their head and neck are properly supported: Once the person is back on their back, check that their head and neck are well-supported with a pillow or rolled-up towel if needed.
Throughout the repositioning process, be empathetic and mindful of the person’s comfort and safety. Take cues from them, and if they express any discomfort or pain, adjust your movements accordingly.
Repositioning the person back onto their back completes the changing process and ensures their comfort as they continue with their day or rest. With the person properly positioned on their back, you have successfully completed the main steps of changing incontinence briefs.
Step 11: Secure the new briefs in place
After positioning the person back onto their back, the next step in changing incontinence briefs is to secure the new briefs in place. Properly securing the briefs ensures a snug fit, preventing leaks and providing comfort and confidence. Follow these steps to secure the new briefs in place:
- Check the fit of the briefs: Before securing the briefs, ensure that they are properly positioned and that the person is comfortable. Check for any wrinkles or gaps that may compromise the fit.
- Fasten the adhesive strips or tabs: Secure the briefs in place by fastening the adhesive strips or tabs. Start with the bottom tabs and then secure the top tabs, ensuring a secure and snug fit.
- Adjust the leg cuffs: Ensure that the leg cuffs of the briefs are properly positioned around the person’s thighs. Smooth out any wrinkles or adjustments to prevent leaks.
- Check for comfort and freedom of movement: Take a moment to ensure that the briefs are not too tight or restrictive. The person should have freedom of movement and feel comfortable wearing the briefs.
During this step, it is important to take into consideration the person’s preferences and any specific instructions from healthcare professionals. Communication with the person is key, as their comfort and satisfaction are of utmost importance.
Securing the new briefs in place completes the changing process and provides the person with the necessary protection and support. With the briefs securely fastened, you have successfully completed the main steps of changing incontinence briefs.
Step 12: Dispose of the used briefs
Once the new briefs are securely in place, the next step in changing incontinence briefs is to properly dispose of the used briefs. Proper disposal is essential to maintain cleanliness, hygiene, and prevent the spread of germs. Follow these steps to dispose of the used briefs:
- Put on a fresh pair of disposable gloves: Before handling the used briefs, ensure that you put on a fresh pair of disposable gloves to maintain hygiene and minimize the risk of contamination.
- Roll up the used briefs: Start by rolling up the used briefs tightly to contain any moisture or odor. Ensure that the rolled-up briefs are secure and won’t come undone during disposal.
- Place the used briefs in a disposable bag: Open a clean, disposable bag and place the rolled-up briefs inside, making sure the bag is fully sealed to prevent any leakage or odor.
- Seal the disposable bag securely: Once the used briefs are inside the disposable bag, securely seal the bag by tying it tightly or using any provided adhesive strips or closures.
- Dispose of the bag in an appropriate waste bin: Dispose of the securely sealed bag containing the used briefs in an appropriate waste bin designated for disposal of soiled items. Follow any local regulations or guidelines for waste disposal.
It’s important to maintain proper hygiene and cleanliness during the disposal process. Avoid shaking the bag and handle it with care to prevent any accidental spills or contamination.
Disposing of the used briefs responsibly ensures a clean and safe environment for the person you are assisting and helps maintain overall hygiene. With the used briefs properly disposed of, you have successfully completed the main steps of changing incontinence briefs.
Step 13: Remove gloves and wash hands
The final step in changing incontinence briefs is to remove the disposable gloves and thoroughly wash your hands. Proper hand hygiene is essential to prevent the spread of germs and maintain overall cleanliness. Follow these steps to remove gloves and wash your hands:
- Carefully remove the first glove: With one hand still gloved, use your other hand to grasp the outside of the glove near the wrist. Gently peel the glove away from your hand, inside out, turning it into a ball as you remove it.
- Hold the removed glove in your gloved hand: Once the first glove is removed, hold it in your gloved hand, being careful not to touch the outer surface.
- Slide two fingers under the remaining glove: With the gloved hand, slide two fingers under the cuff of the second glove, near the wrist, without touching the outer surface.
- Peel the second glove off: Gently peel the second glove off, turning it inside out as you remove it, ensuring that it covers the first glove. This encapsulates the soiled gloves inside for proper disposal.
- Discard the gloves in a designated waste bin: Dispose of the used gloves in a designated waste bin for potentially contaminated items. Follow any local guidelines or regulations for waste disposal.
- Thoroughly wash your hands: Proceed to wash your hands thoroughly with soap and running water. Rub your hands together vigorously, ensuring you cover all surfaces, including between your fingers, nails, and wrists, for at least 20 seconds.
- Rinse your hands: Rinse your hands under running water, allowing the soap to be washed away along with any dirt or germs.
- Dry your hands: Use a clean towel or disposable tissue to dry your hands thoroughly.
- Turn off the faucet with a towel: If possible, use a towel or tissue to turn off the faucet, avoiding direct contact with your clean hands.
Properly removing gloves and washing your hands completes the changing process and ensures a high standard of hygiene. Regular handwashing is an essential practice to protect yourself and others from potential infections or contamination.
With the gloves removed and your hands thoroughly washed, you have successfully completed all the necessary steps in changing incontinence briefs, leaving the person clean, comfortable, and well-cared for.
Conclusion
Changing incontinence briefs in bed may seem like a challenging task, but with the right knowledge and approach, you can provide the necessary care and support for yourself or a loved one. By following the step-by-step guide outlined in this article, you can navigate the process with confidence, ensuring the utmost comfort, hygiene, and dignity for the person you are caring for.
From gathering the necessary supplies to disposing of the used briefs, each step plays a crucial role in maintaining cleanliness and minimizing discomfort. Remember to prioritize communication, obtaining consent, and respecting the person’s autonomy throughout the entire process. Pay attention to their comfort and well-being, making adjustments as necessary to ensure their satisfaction.
Along with the practical steps, it is important to maintain a compassionate and empathetic approach. Incontinence can be a sensitive and personal matter, and your understanding and support can greatly impact the emotional well-being of the person you are assisting.
Additionally, while following the steps, be mindful of maintaining proper hygiene practices: washing your hands before and after the process, wearing disposable gloves, and ensuring the cleanliness of the surrounding area. These practices help prevent the spread of germs and maintain a safe environment for everyone involved.
Remember, changing incontinence briefs is not just a routine task; it is an opportunity to show care, compassion, and respect. Each step contributes to the overall comfort and well-being of the person you are assisting, allowing them to maintain their dignity and improve their quality of life.
By following this comprehensive guide, you can confidently navigate the process of changing incontinence briefs in bed, promoting hygiene, comfort, and maintaining the utmost care for those affected by incontinence.