Home>How-to Guides>For All>How To Make A Kimono From A Bed Sheet
For All
How To Make A Kimono From A Bed Sheet
Modified: August 2, 2023
Learn how to make a stylish kimono from a simple bed sheet, ideal for all occasions and suitable for everyone. Step-by-step guide for a trendy DIY project.
(Many of the links in this article redirect to a specific reviewed product. Your purchase of these products through affiliate links helps to generate commission for Under-tec.com, at no extra cost. Learn more)
Table of Contents
How To Make A Kimono From A Bed Sheet
Have you ever wished you could wear a stylish kimono but didn’t want to spend a fortune? Look no further! With just a few simple steps, you can transform a regular bed sheet into a beautiful kimono. Not only is it a cost-effective option, but it also allows you to unleash your creativity and customize your kimono to suit your personal taste. So, let’s get started on this fun and rewarding DIY project!
Before we dive into the step-by-step process, let’s gather the materials needed for this project:
- One bed sheet (preferably a lightweight fabric with a nice drape)
- Measuring tape
- Fabric scissors
- Sewing machine or needle and thread
- Pins
- Iron and ironing board
- Optional: decorative trimmings or accessories to add a personal touch
Once you have all the materials ready, let’s move on to the first step: choosing the right bed sheet.
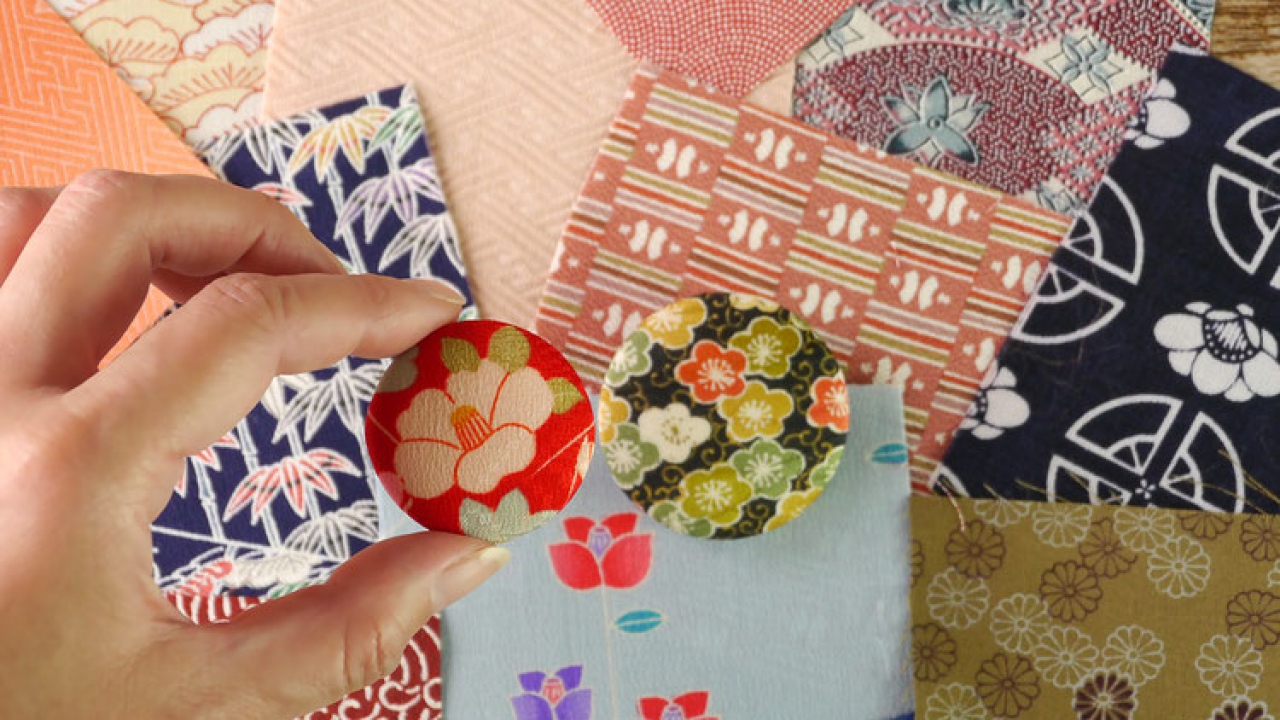
When selecting a bed sheet for this project, opt for a lightweight fabric with a beautiful pattern or color that you love. The fabric should have a good drape, as this will contribute to the flowy and elegant look of your kimono.
Now that you have your chosen bed sheet, it’s time to measure and cut it to create the body of the kimono. Lay the sheet flat on a large, smooth surface and measure the desired length of your kimono. Keep in mind that the length should reach just above your ankles for a traditional kimono look. Once you have determined the length, mark it with pins or fabric chalk and cut along the line.
With the body of the kimono ready, it’s time to create the seams. Fold the fabric in half lengthwise, with the pattern facing inward. Pin along the sides, leaving armholes open. Use a sewing machine or hand sew along the pinned edges, creating a straight seam. Trim any excess fabric and iron the seams flat for a clean finish.
Next, it’s time to add sleeves to your kimono. Measure and cut two rectangular pieces from the remaining fabric of your bed sheet. The length of each sleeve should be approximately three-quarters of your arm length. Fold each sleeve piece in half lengthwise and sew along the edges to create a tube. Attach the sleeves by sewing them to the armhole openings on the kimono body.
The final step is to hem the kimono to give it a polished look. Fold under the raw edges of the kimono cuff, neckline, and bottom hemline, and sew them in place using a sewing machine or hand stitch.
Add any optional trimmings or accessories, such as a belt or tassels, to complete your kimono. Ensure that these additions are securely attached and enhance the overall aesthetic.
And there you have it – your very own kimono made from a bed sheet! Don’t be afraid to get creative and experiment with different fabrics and embellishments to make the perfect kimono for any occasion. Flaunt your unique style and enjoy the satisfaction of wearing a handmade garment.
Introduction
Immerse yourself in the elegance and allure of a traditional kimono, without the hefty price tag. With a simple yet creative approach, you can transform a plain bed sheet into a stunning kimono masterpiece. This do-it-yourself project not only allows you to exercise your creativity but also provides you with a unique and personalized garment that reflects your style.
In this step-by-step guide, we will walk you through the process of creating your very own kimono from a bed sheet. From selecting the right fabric to adding the finishing touches, you’ll learn the essential techniques needed to turn a simple sheet into a fashionable kimono.
By repurposing a bed sheet, you not only save money but also contribute to sustainable fashion practices. It’s a creative way to reduce waste and give new life to materials that would otherwise remain unused.
This project is perfect for those who are intrigued by the beauty of a kimono but may not have access to traditional Japanese garments. It’s also an excellent opportunity to explore your sewing skills and showcase your personal style.
Whether you’re planning to wear your kimono for a special occasion, as a cozy loungewear option, or simply as a unique fashion statement, this DIY project opens the door to endless possibilities. You can choose a bed sheet with a vibrant pattern or a solid color that complements your skin tone and personality.
So, gather your materials, prepare your sewing tools, and let’s embark on a journey of creativity and fashion. In the following sections, we’ll guide you through the step-by-step process of making your very own kimono from a bed sheet. Get ready to unveil your inner designer and craft a garment that exudes style and originality.
Materials Needed
Before you start making your kimono from a bed sheet, it’s essential to gather all the necessary materials. Having everything prepared and within reach will make the process smoother and more enjoyable.
Here’s a list of the materials you’ll need:
- One bed sheet: Choose a lightweight fabric with a nice drape for the best results. Look for a bed sheet that has a pattern or color that you love and that suits your personal style.
- Measuring tape: This will help you accurately measure and cut the bed sheet to the desired length.
- Fabric scissors: Make sure you have a sharp pair of fabric scissors to cut the bed sheet cleanly and precisely.
- Sewing machine or needle and thread: Whether you prefer using a sewing machine or hand sewing, ensure you have the necessary tools to join the fabric pieces together.
- Pins: Pins are essential for securing the fabric in place during the sewing process. They will help ensure that your kimono turns out symmetrical and well-fitted.
- Iron and ironing board: Having an iron and ironing board handy will ensure that your fabric is wrinkle-free and ready for cutting and sewing.
- Optional: decorative trimmings or accessories: If you want to add an extra touch of flair to your kimono, consider using decorative trimmings, such as lace or ribbons. You can also accessorize your kimono with a belt or tassels to elevate its overall look.
By having all these materials ready, you’ll be well-prepared to start your kimono-making journey. So, gather your supplies, clear a space to work in, and let’s move on to the next steps of creating your very own kimono from a bed sheet.
Step 1: Choosing the Right Bed Sheet
When it comes to making a kimono from a bed sheet, selecting the right fabric is crucial. The fabric should not only be comfortable but also have the right weight and drape to achieve the desired look and feel of a kimono.
Here are a few factors to consider when choosing the bed sheet for your kimono:
- Lightweight fabric: Look for a bed sheet made from a lightweight fabric such as cotton, silk, or rayon. These fabrics have a natural flow and drape that are ideal for capturing the essence of a kimono.
- Pattern or color: Choose a bed sheet with a pattern or color that resonates with your personal style. Whether you prefer bold and vibrant patterns or subtle and delicate designs, the bed sheet’s visual appeal will greatly contribute to the overall aesthetic of your kimono.
- Comfort: Consider the comfort of the fabric against your skin. Opt for a bed sheet that feels soft and breathable, ensuring a comfortable kimono-wearing experience.
- Quality: Check the quality of the sheet to ensure it is durable enough to withstand the sewing process and regular wear. Look for a bed sheet with tightly woven threads and strong seams.
Keep in mind that the size of the bed sheet will dictate the length and fullness of your kimono. A larger bed sheet will provide more fabric to create a flowing and voluminous kimono, while a smaller bed sheet may result in a more fitted and tailored style.
Another important consideration is the occasion or purpose for which you’re making the kimono. If you plan to wear it for a formal event, a solid color or subtle pattern may be more appropriate. For a casual or festive look, you can experiment with bolder patterns and colors.
Take your time to find a bed sheet that meets your preferences and aligns with the vision you have for your kimono. Remember, the fabric you choose will play a significant role in bringing your DIY kimono to life.
Once you’ve selected the perfect bed sheet, it’s time to move on to the next exciting step: measuring and cutting the fabric to create the body of your kimono.
Step 2: Measuring and Cutting
Now that you have chosen the ideal bed sheet for your kimono, it’s time to measure and cut the fabric to create the body of your garment. This step is crucial in achieving the desired length and fit of your kimono.
Follow these steps to measure and cut your bed sheet:
- Lay the bed sheet flat: Find a large, smooth surface to lay your bed sheet flat. Ensure that there are no wrinkles or folds that could affect the accuracy of your measurements.
- Determine the desired length: Decide on the length you want your kimono to be. Traditional kimonos usually reach just above the ankles, but you can customize the length to your preference.
- Measure and mark: Use a measuring tape to measure the desired length from the top edge of the bed sheet. Mark this point with fabric chalk or pins.
- Cut along the marked line: Use a pair of fabric scissors to cut along the line you marked in the previous step. Make sure to cut in a straight line to ensure a clean edge.
It’s important to note that the width of the bed sheet will determine the fit of your kimono when wrapped around your body. If you prefer a more fitted look, you can trim the width before cutting the length. However, if you want a loose and flowing kimono, keep the full width of the bed sheet as is.
Always measure twice and cut once to avoid any errors or unnecessary fabric waste. Double-check your measurements before making any cuts to ensure the accuracy of your kimono’s length.
With the body of your kimono cut to the desired length, you’re one step closer to completing your DIY project. In the next step, we will guide you through the process of creating the main body of the kimono, bringing your design closer to reality.
Step 3: Creating the Body of the Kimono
With the fabric cut to size, it’s time to transform it into the main body of your kimono. This step involves folding the fabric and sewing the seams to create the signature loose and flowing shape of a kimono.
Follow these steps to create the body of your kimono:
- Fold the fabric in half: Take the bed sheet and fold it in half lengthwise, with the pattern or color facing inward. This will create the back and front panels of your kimono.
- Pin the sides: Along the open sides of the folded fabric, pin them together from the hemline to the sleeves’ opening. The pins will hold the fabric in place during the sewing process.
- Sew the seams: Using a sewing machine or needle and thread, sew along the pinned edges, creating straight seams. Start sewing from the bottom hemline and continue all the way up to the armpit area, leaving the armholes open for the sleeves.
- Trim excess fabric: After sewing the seams, carefully trim any excess fabric near the seam allowance. This will help reduce bulkiness and make the finished kimono look neater.
- Press the seams: Use an iron and ironing board to press the seams flat. This helps to achieve a clean and professional finish.
When sewing the seams, make sure to use a straight stitch and sew with a seam allowance that feels comfortable for you. It’s essential to maintain a consistent and even stitching line throughout the process.
As you sew, pay attention to aligning the fabric edges and ensuring that the seams are straight. Taking your time during this step will result in a beautifully tailored kimono that fits well and drapes elegantly.
Once you have sewn the seams and pressed them, you have successfully created the body of your kimono. The next step involves adding sleeves, which will further enhance the authentic kimono look. Let’s move on to the next exciting step!
Step 4: Sewing the Seams
Now that you have created the main body of your kimono, it’s time to sew the seams to secure the fabric panels together and give your kimono its shape.
Follow these steps to sew the seams of your kimono:
- Ensure the fabric is still folded: Make sure the folded bed sheet is still in the double-layered position, with the pattern or color facing inward.
- Pin along the sides: Starting from the bottom hemline, carefully pin the sides of the fabric panels together. Pin from the hemline up to the armpit area, leaving the armholes open for the sleeves.
- Prepare your sewing machine: If you’re using a sewing machine, thread it with a thread color that matches the fabric, and select a straight stitch. Adjust the stitch length and tension according to your machine’s manual or personal preference.
- Sew the side seams: Slowly sew along the pinned edges, removing the pins as you go. Start from the bottom hemline and continue up to the armpit area, making sure to maintain a straight seam. Backstitch at the beginning and end of the seam to secure it.
- Trim excess fabric: After sewing the side seams, trim any excess fabric near the seam allowance to reduce bulkiness and create a clean finish.
Remember to maintain a consistent seam allowance throughout the sewing process for a polished look. Take your time and sew with precision, ensuring that the fabric panels are aligned and the seams are straight.
Once you have sewn the side seams and trimmed the excess fabric, your kimono is taking shape. The next step involves adding sleeves, which will further enhance the aesthetic and functionality of your garment. Let’s dive into the exciting world of kimono sleeves in the next step!
Step 5: Adding Sleeves
With the main body of your kimono assembled, it’s time to add sleeves to complete the traditional kimono look. Sleeves not only add style and elegance but also provide ease of movement and comfort.
Follow these steps to add sleeves to your kimono:
- Measure and cut the sleeve fabric: Take the remaining fabric from your bed sheet and measure and cut two rectangular pieces for the sleeves. The length of each sleeve should be approximately three-quarters of your arm length.
- Fold each sleeve piece in half: Take one sleeve piece and fold it in half lengthwise, with the pattern or color facing inward. Align the raw edges of the fabric.
- Sew the long edge of the sleeve: Using a sewing machine or needle and thread, sew along the long edge of the folded sleeve, creating a tube. Start from the top and sew all the way down, leaving the top and bottom ends open.
- Repeat for the second sleeve: Repeat the same steps to create the second sleeve.
- Attach the sleeves to the kimono body: Take one sleeve and insert it into one of the armhole openings of the kimono body. Align the raw edges of the sleeve and the armhole, ensuring that the folded edge of the sleeve faces outward. Pin the sleeve in place, and sew along the raw edges to attach the sleeve to the kimono body. Repeat this process for the other sleeve.
When attaching the sleeves, make sure to distribute the fabric evenly around the armholes to maintain a balanced and symmetrical look. Secure the fabric in place with pins before sewing to ensure accurate placement. You can use a straight stitch or a decorative stitch, depending on your desired aesthetic.
Once the sleeves are attached, try on the kimono to ensure a comfortable fit. Make any necessary adjustments, such as adjusting the length or taking in the seams, to achieve a personalized fit that suits your preferences.
Adding sleeves to your kimono not only enhances the visual appeal but also adds functionality and freedom of movement. You’re now one step closer to completing your handmade kimono. Read on to learn how to give your kimono a polished finish by hemming the edges.
Step 6: Hemming the Kimono
Now that you’ve added the sleeves to your kimono, it’s time to give it a polished finish by hemming the edges. Hemming not only provides a clean and professional look but also prevents the fabric from fraying and unraveling over time.
Follow these steps to hem your kimono:
- Prepare your sewing machine or needle and thread: If you’re using a sewing machine, select a straight stitch and adjust the stitch length and tension according to your preference. Thread your machine with a thread color that matches or compliments your fabric. If you prefer hand sewing, thread your needle with thread of the same color.
- Fold under the raw edges: Starting with the cuffs of the sleeves, fold under the raw edges about ¼ to ½ inch (0.6 to 1.3 cm). Pin the folded edge in place to secure it.
- Sew the hem: Using your sewing machine or needle and thread, sew along the folded edge to create a neat and secure hem. Begin at one end of the cuff and continue all the way around. Repeat this process for the neckline and the bottom hemline of the kimono.
- Trim any excess fabric: After sewing the hems, trim any excess fabric or threads for a clean and finished look. Be careful not to cut into the stitches.
While folding the edges, you can iron them gently to create a crisp fold and make it easier to sew. Pressing the fabric also helps in achieving a polished and professional finish.
As you sew the hem, make sure to maintain a consistent seam allowance and sew in a straight line. Take your time and sew with precision to ensure a neat and even hem all around.
Once the hems are sewn and trimmed, take a moment to inspect your work. Any loose threads or uneven stitches can be tidied up by trimming or re-stitching before moving on.
With the hems done, your kimono is almost complete! The final step involves adding any finishing touches or accessories to personalize your creation to your liking. Continue reading to learn more.
Step 7: Adding Finishing Touches
You’ve reached the final step in creating your kimono from a bed sheet: adding the finishing touches. This step allows you to truly make the kimono your own and add unique elements that reflect your personal style and creativity.
Consider the following ideas to add those final touches:
- Decorative trimmings: Enhance the aesthetic of your kimono by adding decorative trims such as lace, ribbons, or sequins along the edges or cuffs. Simply sew or glue them onto the fabric to give your kimono a touch of elegance and individuality.
- Embellishments: You can further personalize your kimono by adding embellishments, such as embroidery, appliques, or beading. These unique details will make your kimono stand out and showcase your creativity.
- Belt or sash: To enhance the silhouette and define the waist, consider adding a belt or sash to your kimono. You can use a matching or contrasting fabric, or even experiment with different styles of belts to create various looks.
- Tassels or fringe: For a bohemian or playful touch, consider attaching tassels or fringe to the hemline or sleeves of your kimono. This adds movement and a whimsical element to your creation.
Whichever finishing touches you choose, ensure they are securely attached to withstand regular wear and gentle laundering. Take your time to arrange and attach them carefully, ensuring they complement the overall design and do not overwhelm the kimono’s silhouette.
Remember, the finishing touches are an opportunity to let your creativity shine and make your kimono truly unique. Feel free to experiment and express your personal style through your choices. It’s your chance to add that extra flair and make your kimono a one-of-a-kind garment.
Once you have added these final touches, step back and admire your handiwork. You have transformed a simple bed sheet into a beautiful and fashionable kimono, customized to your taste and style.
Wearing your handmade kimono will not only be a source of pride but also a reminder of your creative abilities. So, put on your kimono with confidence and embrace the elegance and comfort it provides.
Congratulations on completing this DIY project and creating your very own kimono from a bed sheet!
Conclusion
Congratulations on successfully creating your own kimono from a bed sheet! Through careful selection, measuring, cutting, sewing, and adding finishing touches, you have transformed a simple fabric into a beautiful and personalized garment.
By choosing the right bed sheet and considering factors such as fabric weight, pattern, and comfort, you set the foundation for a stunning kimono. The measuring and cutting process ensured that your kimono fits you well and achieves the desired length.
Crafting the body of the kimono and sewing the seams brought the fabric panels together, creating the signature loose and flowing shape. Adding sleeves enhanced the traditional kimono appearance and provided mobility and comfort.
Hemming the kimono added a polished and professional finish while preventing fraying and unraveling. Finally, adding the finishing touches allowed you to add your personal touch and make the kimono truly unique.
Creating a kimono from a bed sheet not only saved you money but also provided an opportunity for creative self-expression. You demonstrated your skills, attention to detail, and the ability to repurpose materials. This project also contributed to sustainable fashion by reducing waste and giving new life to existing fabric.
Now that you have your very own kimono, it’s time to show it off and enjoy the comfort, elegance, and style it offers. Wear it with pride for special occasions, as loungewear, or even as standout everyday attire.
Remember, this DIY project is just one example of the endless possibilities for repurposing materials and unleashing your creativity. Continue exploring different projects and honing your skills to bring your unique ideas to life.
Whether you choose to make more kimonos, experiment with other garment creations, or explore entirely different crafts, embrace the joy and satisfaction that comes from making something by hand.
Now, go ahead and enjoy your handmade kimono. Embrace its beauty, wear it with confidence, and revel in the knowledge that you created something truly special.