Home>How-to Guides>For All>How To Make A Kimono Cardigan

For All
How To Make A Kimono Cardigan
Modified: August 5, 2023
Learn how to make a stylish kimono cardigan that is perfect for all occasions. Step-by-step guide with easy-to-follow instructions and tips.
(Many of the links in this article redirect to a specific reviewed product. Your purchase of these products through affiliate links helps to generate commission for Under-tec.com, at no extra cost. Learn more)
Table of Contents
Introduction
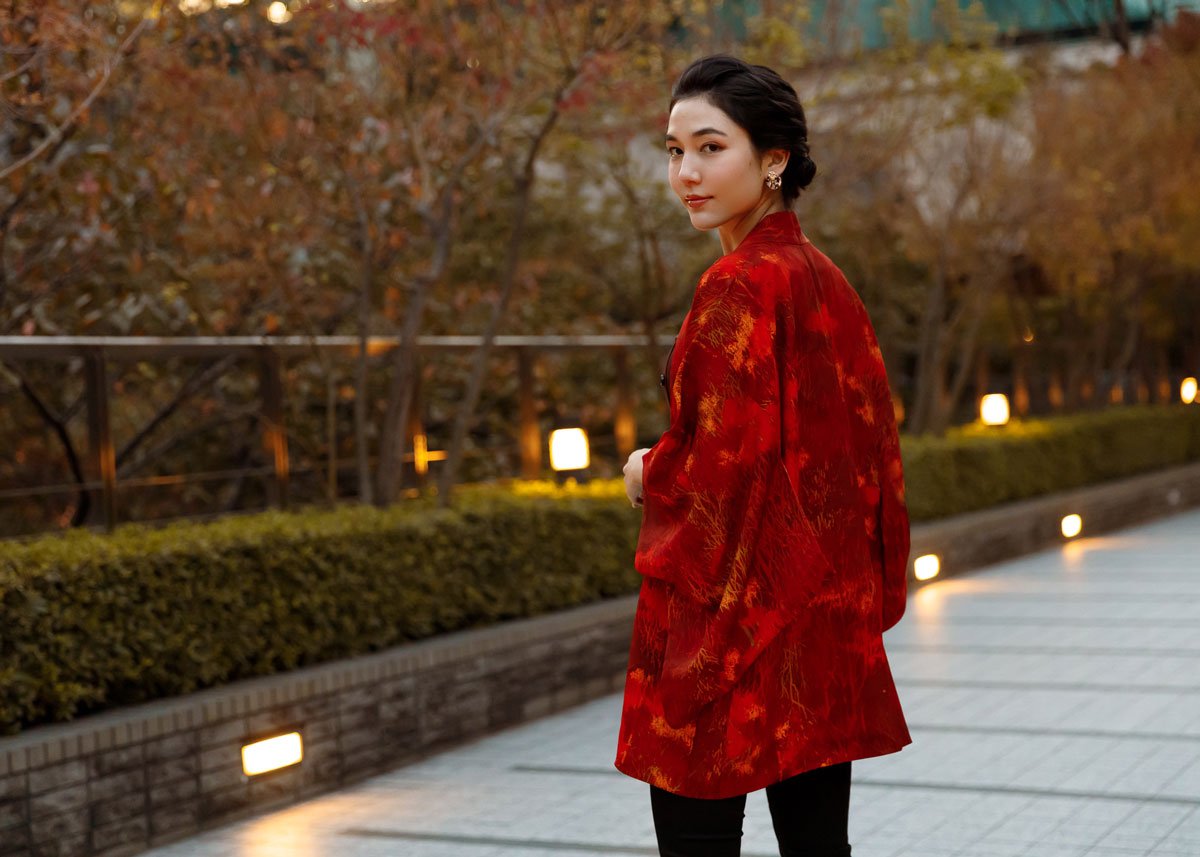
Are you looking for a stylish and versatile addition to your wardrobe? Look no further than a kimono cardigan! Kimono cardigans, with their loose-fitting and flowy design, have become a popular fashion trend in recent years. They are not only comfortable to wear but also effortlessly elevate any outfit. The best part? You can easily make your own kimono cardigan at home, using just a few materials and some basic sewing skills.
In this article, we will guide you through the step-by-step process of making a kimono cardigan. Whether you are a beginner or an experienced seamstress, this DIY project is perfect for anyone looking to add a unique and personalized piece to their wardrobe.
By making your own kimono cardigan, you have the freedom to choose the fabric, color, and pattern that best suit your style. You can also customize the length and width to ensure the perfect fit. Plus, the satisfaction of wearing something that you created yourself is truly unbeatable!
So, gather your sewing supplies and let’s get started on making your very own kimono cardigan that will become your go-to piece for any occasion.
Materials Needed
Before we begin making your kimono cardigan, it’s important to gather all the necessary materials. Here’s a list of what you’ll need:
- Fabric: Choose a lightweight fabric with a beautiful drape, such as chiffon, silk, or rayon. The amount of fabric will depend on your measurements and desired length of the cardigan.
- Scissors: A good pair of fabric scissors is essential for cutting the fabric neatly and accurately.
- Measuring Tape: This will help you measure your body and the fabric correctly.
- Pins: Use pins to hold the fabric in place while sewing.
- Sewing Machine: A sewing machine will make the process faster and more efficient. However, if you don’t have one, you can hand sew the cardigan using a needle and thread.
- Thread: Choose a thread color that matches or complements the fabric.
- Iron: An iron is necessary for pressing the fabric and creating crisp, professional-looking seams.
- Trim (optional): If you want to add some decorative elements to your kimono cardigan, consider getting some lace trim, pom-pom trim, or fringe.
- Needle and Thread: If you decide to add trim, you’ll need a needle and thread to sew it onto the cardigan.
Once you have gathered all the materials, you’re ready to move on to the next step: choosing the fabric for your kimono cardigan.
Step 1: Choosing the Fabric
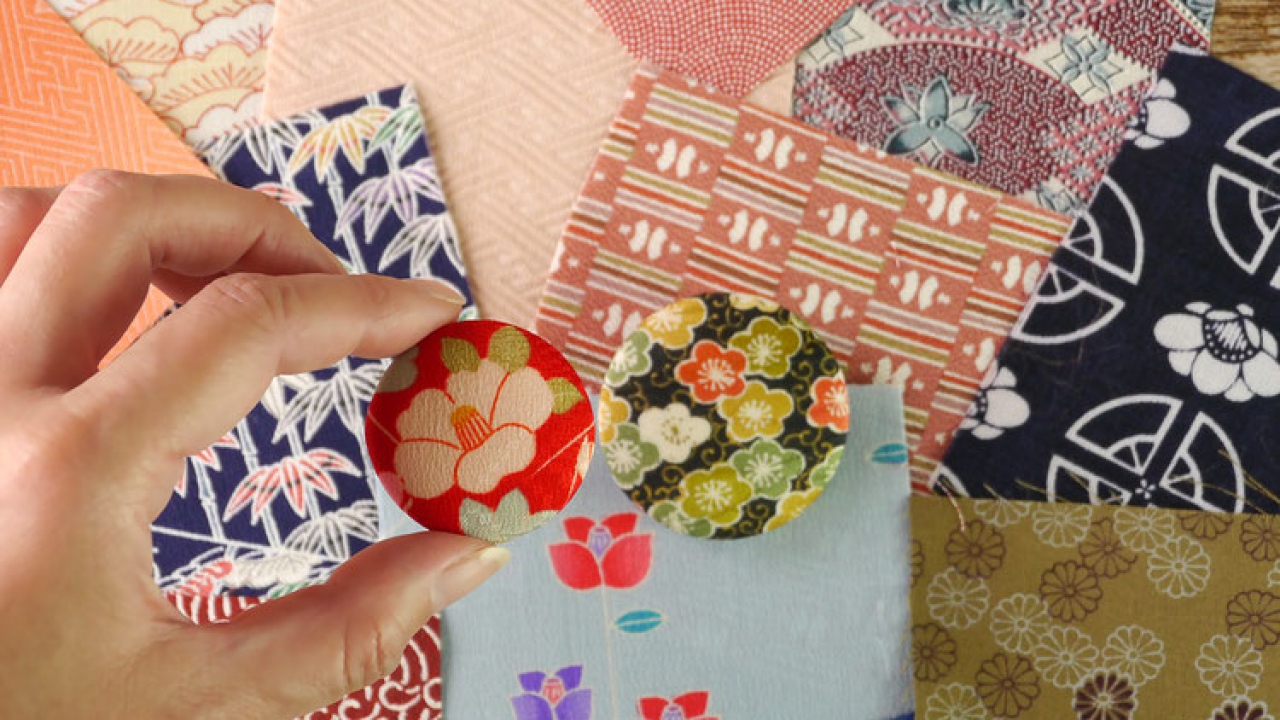
Choosing the right fabric is crucial for the success of your kimono cardigan. You want a fabric that is lightweight, has a beautiful drape, and feels comfortable against your skin. Here are a few fabric options to consider:
- Chiffon: Chiffon is a delicate and flowy fabric that is perfect for creating a breezy and feminine kimono cardigan. It comes in a wide range of prints and colors, allowing you to showcase your personal style.
- Silk: Silk is a luxurious fabric that exudes elegance and sophistication. It drapes beautifully and feels incredibly soft against the skin. Choose silk with vibrant colors or intricate patterns to create a statement kimono cardigan.
- Rayon: Rayon is a versatile fabric that mimics the look and feel of silk but at a more affordable price point. It has excellent drape and breathability, making it an excellent choice for a lightweight kimono cardigan.
When choosing your fabric, consider the occasion you’ll be wearing it for. If you’re aiming for a casual and everyday kimono cardigan, opt for a fun and vibrant print. For a more formal or evening look, solid colors or subtle patterns can add a touch of sophistication.
Before purchasing your fabric, don’t forget to check the washing and care instructions. Some fabrics may require special care or dry cleaning, while others can be machine washed and ironed at home.
Once you have selected your fabric, move on to the next step: measuring and cutting.
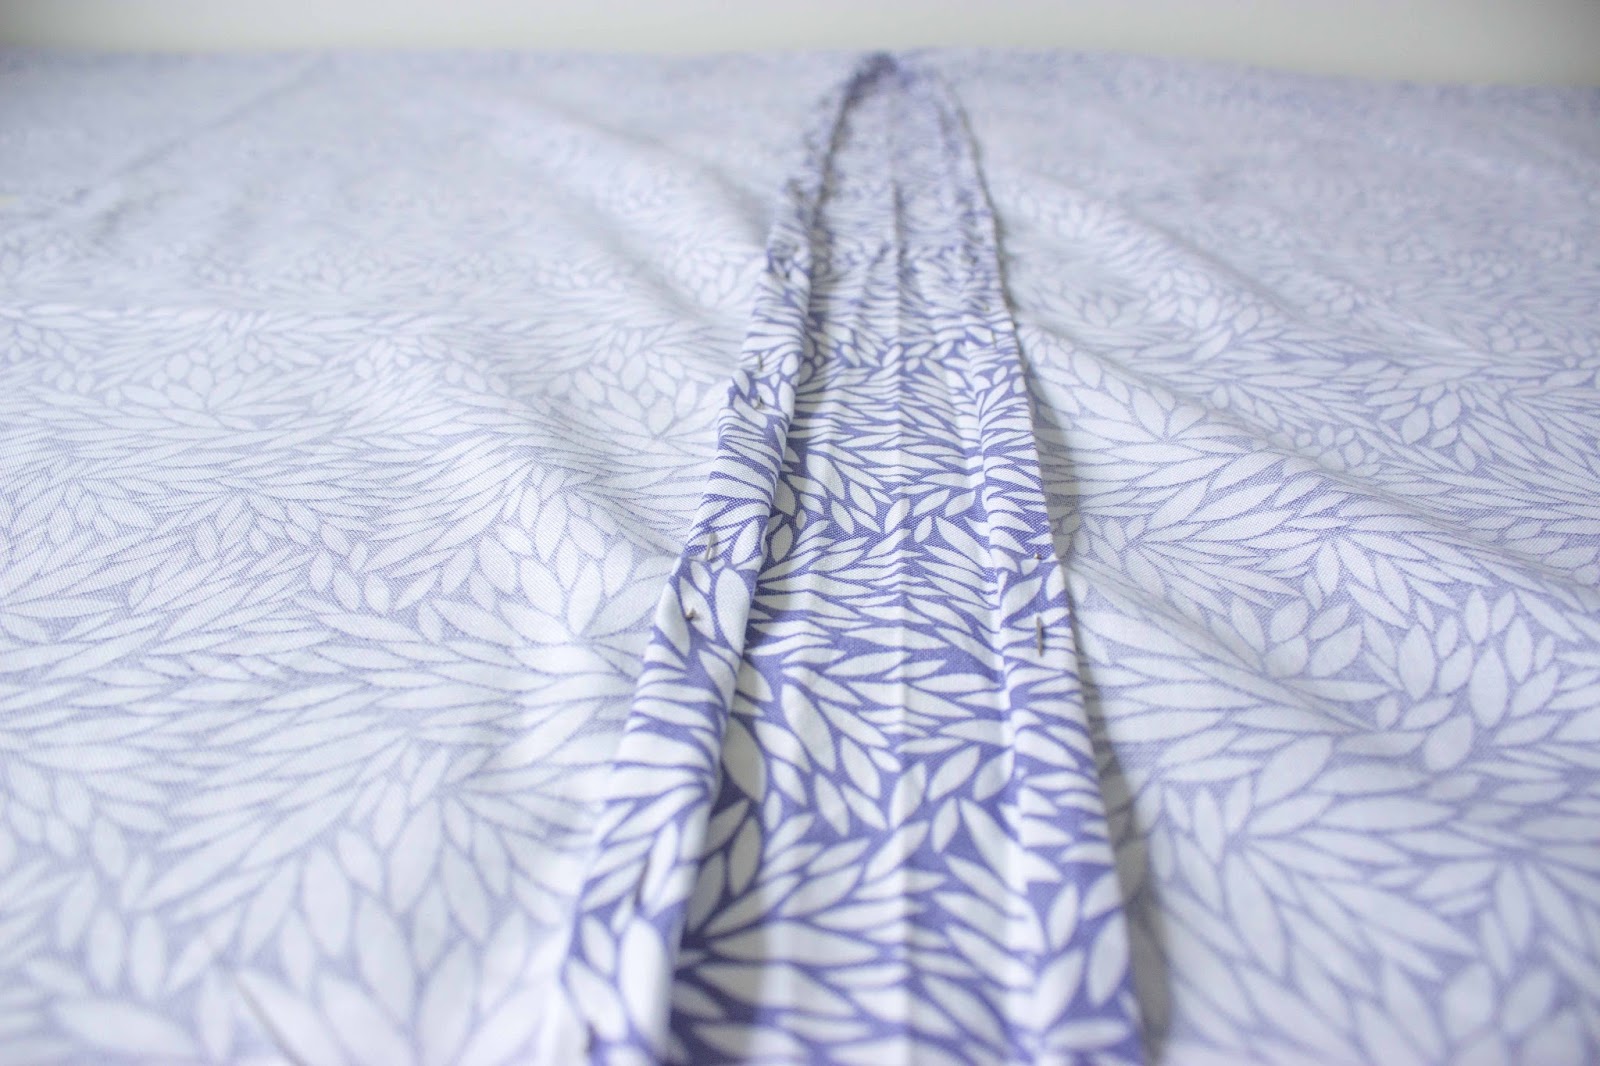
Step 2: Measuring and Cutting
Measuring and cutting the fabric correctly is essential to ensure a well-fitting and flattering kimono cardigan. Here’s how to do it:
- Measurements: Start by measuring your bust, waist, and hip circumference. Add a few inches to each measurement to allow for ease and comfort. Write down these measurements as they will guide you in determining the width and length of your kimono cardigan.
- Cutting the Fabric: Lay the fabric flat on a large cutting surface. Fold it in half lengthwise so that the selvage edges meet. Use your measurements to mark the width and length of the cardigan on the fabric using a fabric marker or chalk. Use a long ruler or straight edge to ensure straight lines. When cutting, leave extra fabric for seam allowance.
Remember that the length of the kimono cardigan is a personal preference. Some prefer a shorter length that falls at the waist, while others prefer a longer length that reaches the hips or even the knees. Consider your body proportions and style preferences when determining the length.
Once you have cut the fabric, shake off any loose threads, and prepare for the next step: sewing the shoulders.
Step 3: Sewing the Shoulders
Now that you have your fabric cut to the desired shape, it’s time to start sewing your kimono cardigan. We’ll begin by sewing the shoulder seams. Follow these steps:
- Prepare the Fabric: Place the fabric pieces right sides together, aligning the shoulder edges.
- Sew the Shoulders: Using a sewing machine or a needle and thread, sew a straight stitch along the shoulder edge, starting from the neckline and sewing towards the armhole. Make sure to backstitch at the beginning and end to secure the stitches. Repeat on the other shoulder.
- Press the Seams: Open up the seam and press it flat with an iron. This will create a clean and professional finish.
Remember to use a sewing machine-compatible stitch length or maintain consistent stitch size if sewing by hand. Reinforce the seams by backstitching or sewing a second line of stitches near the original seam for added strength.
Once you have sewn and pressed the shoulder seams, move on to the next step: sewing the sleeves.
Step 4: Sewing the Sleeves
Now that the shoulder seams are done, it’s time to attach the sleeves to your kimono cardigan. Follow these steps:
- Prepare the Sleeves: Take the sleeves and fold them in half lengthwise, right sides together.
- Align and Pin: Align the raw edges of the sleeves with the armholes of the kimono cardigan. Pin them in place, making sure to distribute any excess fabric evenly.
- Sew the Sleeves: Using a sewing machine or needle and thread, sew along the pinned edges, attaching the sleeves to the cardigan’s armholes. Start sewing from one end and continue to the other, ensuring that you sew a smooth, even stitch.
- Press the Seams: Open up the seam and press it flat with an iron. This will give your kimono cardigan a polished and finished look.
When sewing the sleeves, make sure to sew along the curved armhole edge, maintaining a consistent seam allowance. It may be helpful to use a few extra pins or clips to secure the fabric in place while you are sewing.
After sewing and pressing the sleeves, you can move on to the next step: hemming the edges of your kimono cardigan.
Step 5: Hemming the Edges
With the main body and sleeves of your kimono cardigan sewn together, it’s time to give your garment a finished look by hemming the edges. Here’s how:
- Prepare the Hem: Fold the raw edges of the kimono cardigan and sleeves towards the wrong side of the fabric. Use pins or clips to hold the fold in place.
- Sew the Hem: Using a sewing machine or needle and thread, sew a straight stitch along the folded edge to secure the hem. Alternatively, you can opt for a decorative stitch to add a touch of flair.
- Press the Hem: After sewing the hem, gently press it with an iron to ensure a crisp finish. This will also help the fabric to lay flat.
When hemming your kimono cardigan, be sure to maintain a consistent width along the entire hem. You can choose the width based on personal preference or follow a standard measurement of about ½ inch to 1 inch.
Take your time to sew the hem carefully, as it plays a crucial role in the overall appearance and durability of your kimono cardigan. Make sure to backstitch at the beginning and end of your stitches to secure them in place.
After hemming the edges, you can continue to the next step: adding trim (if desired) to further embellish your kimono cardigan.
Step 6: Adding Trim (Optional)
If you want to add some extra flair and personalization to your kimono cardigan, you can consider adding trim. Adding trim is an optional step, but it can elevate the overall look of your garment. Here’s how to do it:
- Select the Trim: Choose a trim that complements your fabric and desired style. Options include lace trim, pom-pom trim, fringes, or even decorative ribbons. Take the time to find a trim that adds the perfect finishing touch to your kimono cardigan.
- Measure and Cut the Trim: Measure the length of each edge where you want to add the trim. Cut the trim to match the measured length, adding a little extra for ease of attachment.
- Attach the Trim: Align the trim along the edges of the kimono cardigan and pin it in place. Use a needle and thread to hand sew the trim onto the fabric, making sure to sew it securely. Alternatively, you can use a sewing machine if it is suitable for the specific trim and fabric combination.
- Finish the Ends: When you reach the end of the trim, fold it under or create a neat overlapping finish to prevent fraying. Secure the end by sewing it in place.
Adding trim is a creative way to personalize your kimono cardigan and make it unique to your style. It can be added along the hem, sleeves, or even the front opening of the cardigan. Take your time and ensure that the trim is sewn evenly and securely to achieve a polished and professional look.
After adding the trim to your kimono cardigan, proceed to the next step: trying on the garment and making any necessary adjustments.
Step 7: Trying on and Adjusting
Now that you have completed the sewing and optional trim addition, it’s time to try on your newly made kimono cardigan. Trying it on will give you the opportunity to assess the fit and make any necessary adjustments. Here’s how:
- Put on the Cardigan: Carefully slip your kimono cardigan over your shoulders and arms.
- Assess the Fit: Take a moment to evaluate how the cardigan drapes on your body. Check the length, the fit around the shoulders, and the general comfort.
- Make Adjustments: If you find that the cardigan is too long or too short, you can hem it further. Additionally, if there are any areas that feel too tight or too loose, you may consider making adjustments to the seams or altering the garment to ensure a perfect fit.
Remember, each person’s body shape and preference may differ, so it’s essential to make the necessary alterations to achieve the desired fit and comfort. It’s a great opportunity to get creative and customize the kimono cardigan further to suit your unique style.
Make sure to take careful notes of any adjustments you made, as this will be helpful for future projects or if you plan to create more kimono cardigans in different fabrics or styles.
Once you have tried on the kimono cardigan and made any necessary adjustments, you are ready for the final step: adding the finishing touches.
Step 8: Final Touches
Congratulations on making your very own kimono cardigan! You’re almost done. Now, let’s add the final touches to complete your garment:
- Clean Up: Take a moment to clean up any loose threads or excess fabric around the seams. Trim them carefully with scissors to ensure a neat and polished appearance.
- Pressing: Use an iron to press your kimono cardigan one final time. This will remove any wrinkles and give it a polished and professional look.
- Stylistic Details: Consider adding any additional decorative elements if desired, such as buttons, fabric patches, or embroidery. These small details can further enhance the uniqueness of your kimono cardigan.
Take the time to enjoy your handcrafted kimono cardigan and admire your sewing skills. Dress it up or down, pairing it with different outfits to create stylish and versatile looks.
Lastly, don’t forget to care for your kimono cardigan according to the fabric’s specific washing and maintenance instructions. Proper care will help preserve the shape and longevity of your garment so you can enjoy wearing it for years to come.
Now that you have completed all the steps and added the finishing touches, you can proudly wear and showcase your one-of-a-kind kimono cardigan!
Conclusion
Congratulations on successfully crafting your very own kimono cardigan! You have embarked on a creative journey, using your sewing skills to create a stylish and versatile addition to your wardrobe. By following the step-by-step instructions and adding your personal touches, you have created a unique garment that reflects your style and personality.
Making a kimono cardigan allows you to unleash your creativity and customize the design to suit your preferences. From choosing the perfect fabric and trim to adjusting the fit, you have learned valuable sewing techniques that can be applied to future projects.
Remember, practice makes perfect, so don’t be discouraged if it takes a few attempts to achieve the desired results. Each kimono cardigan you make will not only enhance your sewing skills but also add a versatile piece to your wardrobe.
Now that you have discovered the joy of creating your own clothing, you can explore other sewing projects and continue to expand your skills. From dresses to tops and accessories, there are endless possibilities for expressing your creativity through sewing.
Enjoy wearing your handmade kimono cardigan with pride, knowing that you have crafted a garment that is unique to you. Share your creation with others and inspire them to embark on their own creative sewing projects.
Whether you’re a beginner or have experience in sewing, making a kimono cardigan can be a rewarding and enjoyable process. So, gather your materials, unleash your creativity, and have fun making your own fashionable kimono cardigan!