Home>How-to Guides>For Women>How To Crochet Bikini
For Women
How To Crochet Bikini
Modified: August 2, 2023
Learn how to crochet a stylish bikini for women with our easy-to-follow tutorial. Create your own beachwear and showcase your creativity.
(Many of the links in this article redirect to a specific reviewed product. Your purchase of these products through affiliate links helps to generate commission for Under-tec.com, at no extra cost. Learn more)
Table of Contents
- Introduction
- Materials Needed
- Choosing the Right Yarn
- Selecting a Crochet Hook
- Gauge and Measurements
- Understanding Crochet Terms and Abbreviations
- Basic Crochet Stitches
- How to Chain Stitch
- How to Single Crochet
- How to Double Crochet
- How to Half Double Crochet
- How to Triple Crochet
- Starting the Bikini Top
- Creating the Cups
- Working on the Straps
- Shaping the Bikini Bottom
- Finishing and Assembly
- Adding Adjustable Ties
- Styling and Customization Tips
- Conclusion
Introduction
Welcome to the world of crocheted bikinis! Creating your own bikini allows you to express your unique style while ensuring the perfect fit. Whether you’re a seasoned crocheter or just starting out, this article will guide you through the process of making your very own crochet bikini.
Crocheting a bikini is not only a fun and rewarding project, but it also allows for endless customization possibilities. You can choose from a wide array of yarn colors and textures, experiment with different stitch patterns, and add embellishments to make your bikini truly one-of-a-kind.
In this article, we’ll walk you through the materials you’ll need, the steps to take, and provide some helpful tips to ensure a successful crocheting experience. By the end, you’ll have a stunning bikini that not only flatters your figure but also showcases your creative skills.
Whether you plan to wear your crocheted bikini lounging by the pool or strutting your stuff on the beach, you can take pride in knowing that you crafted it with your own hands. So, let’s dive into the world of crochet and get started on your bikini-making journey!
Materials Needed
Before you begin crocheting your bikini, it’s important to gather all the necessary materials. Here’s a list of items you’ll need:
- Crochet yarn: Choose a yarn that is suitable for swimwear, such as cotton or nylon. Make sure to select yarn in colors that reflect your personal style.
- Crochet hooks: Invest in a set of crochet hooks in various sizes. The hook size will depend on the yarn weight you choose for your project.
- Tape measure: A tape measure is essential for taking accurate measurements of your body and tracking your progress as you crochet.
- Scissors: A pair of sharp scissors will come in handy for cutting yarn and finishing off your project.
- Darning needle: A darning needle, also known as a yarn needle, is used for weaving in loose ends and sewing any necessary seams.
- Stitch markers: These small, removable markers are helpful for keeping track of stitch counts and pattern repeats.
- Buttons, beads, or other embellishments (optional): If you want to add extra flair to your bikini, consider incorporating buttons, beads, or other decorative elements.
Having all these materials at hand will make the crocheting process smoother and more enjoyable. Remember to choose quality materials that are durable and appropriate for swimwear, ensuring that your bikini stands up to chlorine, saltwater, and prolonged sun exposure.
Now that you have your materials ready, it’s time to choose the perfect yarn for your crochet bikini.
Choosing the Right Yarn
When it comes to crocheting a bikini, selecting the right yarn is crucial. Since your bikini will be exposed to water and sun, it’s important to choose a yarn that is both durable and suitable for swimwear. Here are a few factors to consider when choosing the perfect yarn:
1. Fiber Content: Opt for yarns that are made from natural fibers like cotton or bamboo, as they are breathable and absorbent. Synthetic fibers like nylon or acrylic can also work well as they offer durability and resistance to fading.
2. Yarn Weight: The weight of the yarn determines the thickness and drape of the finished bikini. For a bikini, you’ll generally want to use a lightweight yarn such as a sport or DK weight yarn. These yarns create a fabric that is comfortable and doesn’t add bulk. Avoid using bulky or chunky yarns that may make your bikini feel heavy and look bulky.
3. Water Resistance: Look for yarns that are designed to be water-resistant or have moisture-wicking properties. This will help your bikini dry quickly and prevent it from becoming heavy when wet.
4. Color Fastness: Make sure to choose yarns with color-fast properties, especially if you plan to use vibrant or bold colors. You don’t want your bikini to fade or bleed when exposed to water or sunlight.
5. Price Point: Consider your budget when selecting the yarn. You don’t have to break the bank to create a beautiful bikini. There are plenty of affordable options available that still offer quality and durability.
Once you have a good understanding of the type of yarn you’re looking for, visit a local yarn shop or browse online to explore the various options available. Take the time to feel the yarn and assess its texture and drape. Swatch with different yarns to see how they behave when crocheted.
Remember, choosing the right yarn is essential in creating a comfortable and long-lasting bikini that you’ll love to wear. Now that you’ve selected the perfect yarn, let’s move on to picking the appropriate crochet hook.
Selecting a Crochet Hook
Once you have chosen the ideal yarn for your crochet bikini, the next step is to select the right crochet hook. The size of the crochet hook you use will affect the gauge, or the number of stitches per inch, as well as the overall look and feel of your bikini. Here are some key factors to consider when choosing a crochet hook:
1. Hook Size: The size of the crochet hook is denoted by a letter or number. The best hook size to use will depend on the recommended gauge for your chosen yarn. You can find the suggested hook size on the yarn label or in the pattern you’re following. Use a smaller hook for a tighter stitch, and a larger hook for a looser, more drapey fabric. It’s essential to match the hook size to achieve the correct gauge and ensure that your bikini fits properly.
2. Comfort: Since you’ll be spending a significant amount of time holding the crochet hook, it’s important that it feels comfortable in your hand. Look for hooks with ergonomic handles that provide a comfortable grip and reduce hand fatigue. Try different handle types, such as inline or tapered, to find what works best for you.
3. Material: Crochet hooks are available in various materials, including aluminum, plastic, acrylic, wood, and bamboo. Each material has its own unique feel and benefits. Aluminum hooks are durable and slide easily through stitches, while wooden or bamboo hooks provide a warm and smooth texture. Experiment with different materials to find the one that suits your personal preference.
4. Smoothness: Ensure that the crochet hook has a smooth surface to prevent snagging and splitting of the yarn. Hooks with smoother finishes allow for quick and effortless stitching.
5. Interchangeability: If you plan on working on multiple projects with different yarn weights, consider investing in an interchangeable crochet hook set. These sets usually include a variety of hook sizes and allow you to switch out hooks within a single handle, providing flexibility and convenience.
When selecting a crochet hook, it’s a good idea to have a few different sizes on hand to accommodate any adjustments needed to meet the gauge of your chosen yarn. Additionally, don’t forget to check your tension as you crochet, as it can affect the size of your stitches and the overall fit of your bikini.
Now that you have your yarn and hook selected, it’s time to consider gauge and measurements for your crochet bikini.
Gauge and Measurements
Ensuring the correct gauge and taking accurate measurements are crucial steps to achieve a well-fitting crochet bikini. Gauge refers to the number of stitches and rows per inch in the crocheted fabric. It is essential to match the gauge specified in your pattern or create a gauge swatch to ensure that your finished bikini will have the correct measurements. Here’s how to determine the gauge and take accurate measurements:
1. Gauge Swatch: Before starting your bikini, create a gauge swatch by crocheting a small square with your chosen yarn and hook. Follow the pattern instructions for the stitch pattern and work at least 4 inches by 4 inches of the fabric. Measure the number of stitches and rows in that 4-inch square to determine if it matches the gauge specified in the pattern. If your stitch counts are different, adjust your hook size accordingly until you achieve the correct gauge. This step is important to ensure that your final bikini will fit properly.
2. Body Measurements: To crochet a bikini that fits you well, take accurate measurements of your body. Measure your bust, underbust, waist, and hip circumference using a flexible tape measure. Additionally, measure the length of your torso, the width of your shoulders, and the distance between your breasts. These measurements will guide you in creating the right-sized cups, straps, and bikini bottom for your body.
3. Pattern Sizing: When selecting a pattern to follow, make sure to check the sizing options available. Some patterns offer specific sizes, such as small, medium, and large, while others provide detailed measurements to customize the fit. Choose a pattern that closely matches your measurements or can be easily adjusted to fit your body shape and size.
Remember, everyone’s body proportions are unique, so it may be necessary to make adjustments or modifications to the pattern to achieve the perfect fit. Be prepared to make alterations as needed during the crocheting process to ensure that your bikini flatters your individual figure.
By paying attention to gauge and taking accurate measurements, you’ll be able to create a crochet bikini that fits you beautifully. Now that we have the basics covered, it’s time to dive into understanding crochet terms and abbreviations.
Understanding Crochet Terms and Abbreviations
As you dive into the world of crochet, it’s important to familiarize yourself with the various crochet terms and abbreviations used in patterns. Understanding these terms will make it easier for you to follow instructions and create beautiful stitches. Here’s a guide to help you decipher common crochet terms and abbreviations:
1. Chain Stitch (ch): The chain stitch is the foundation of most crochet projects. It involves pulling yarn through a loop to create a chain. Chains are used as a base for other stitches or to create spaces within the pattern.
2. Single Crochet (sc): The single crochet stitch is a basic stitch that creates a tight, dense fabric. Insert the hook into a stitch, yarn over, and pull through both loops on the hook.
3. Double Crochet (dc): The double crochet stitch is taller than the single crochet stitch. Yarn over, insert the hook into a stitch, yarn over, pull through a loop, yarn over, and pull through two loops on the hook. Yarn over again and pull through the last two loops on the hook.
4. Half Double Crochet (hdc): The half double crochet stitch is taller than the single crochet but shorter than the double crochet. Yarn over, insert the hook into a stitch, yarn over, pull through a loop, yarn over, and pull through all three loops on the hook.
5. Treble Crochet (tr): The treble crochet stitch is even taller than the double crochet. Yarn over twice, insert the hook into a stitch, yarn over, pull through a loop, yarn over, pull through two loops on the hook, yarn over, and pull through the last two loops on the hook.
6. Repeat (rep): When you see “rep” in a pattern, it means to repeat a set of stitches or instructions. Pay attention to the number of repetitions specified.
7. Slip Stitch (sl st): The slip stitch is used to join stitches, create decorative edges, or move the hook to a different location. Insert the hook into a stitch, yarn over, and pull through both the stitch and the loop on the hook.
These are just a few of the basic crochet terms and abbreviations you may encounter in patterns. Familiarize yourself with these, and as you progress in your crochet journey, you’ll come across more advanced stitches and techniques.
Don’t be intimidated by the abbreviations. Many patterns include a stitch key or abbreviation guide at the beginning for easy reference. If you’re unsure about a specific abbreviation, consult online resources or refer to crochet stitch dictionaries for clarification.
Now that you understand the language of crochet, let’s delve into learning some essential crochet stitches.
Basic Crochet Stitches
As you embark on your crochet bikini-making journey, it’s essential to have a solid grasp of basic crochet stitches. These stitches will serve as the building blocks for creating the various components of your bikini. Here are five fundamental crochet stitches that you’ll frequently encounter in patterns:
1. Chain Stitch (ch): The chain stitch is the foundation of most crochet projects. It’s a series of loops formed by pulling the yarn through the previous loop. Chains are used as a base for other stitches or to create spaces within the pattern.
2. Single Crochet (sc): The single crochet stitch is a versatile stitch that creates a dense and sturdy fabric. Insert the hook into a stitch, yarn over, and pull through a loop. Yarn over again and pull through both loops on the hook. Single crochet stitches can be used for tight edging, solid fabric, or to add texture to your bikini.
3. Double Crochet (dc): The double crochet stitch is taller than the single crochet and creates a looser and more open fabric. Yarn over, insert the hook into a stitch, yarn over again, and pull through a loop. Yarn over once more and pull through the first two loops on the hook. Yarn over again and pull through the last two loops on the hook. Double crochet stitches are commonly used for creating lacy patterns or adding height to your bikini.
4. Half Double Crochet (hdc): The half double crochet stitch is a versatile stitch that falls between the single crochet and double crochet in height. Yarn over, insert the hook into a stitch, yarn over again, and pull through a loop. Yarn over once more and pull through all three loops on the hook. Half double crochet stitches provide a balance between density and drape and can be used for various components of your bikini.
5. Treble Crochet (tr): The treble crochet stitch is one of the tallest basic crochet stitches. Yarn over twice, insert the hook into a stitch, yarn over again, and pull through a loop. Yarn over once more and pull through the next two loops on the hook. Yarn over again and repeat the last step until you have only one loop left on the hook. Treble crochet stitches create a lacy and open fabric, making them ideal for stitch patterns and decorative elements within your bikini.
These basic crochet stitches are the foundation upon which you’ll build the cups, straps, and bottoms of your crochet bikini. By mastering these stitches, you’ll be able to follow patterns with ease and have the flexibility to create your own unique designs. Practice these stitches until you feel confident in their execution, and soon you’ll be ready to start crocheting your bikini top!
How to Chain Stitch
The chain stitch (ch) is the foundation of most crochet projects. It serves as a base for other stitches and creates spaces within the pattern. Follow these steps to learn how to chain stitch:
1. Start with a slip knot: To begin, create a slip knot by making a loop with the yarn, passing the end of the yarn through the loop, and pulling it tight. Insert your crochet hook through the loop of the slip knot and tighten the loop around the hook.
2. Yarn over and pull through: Hold the slip knot in your non-hook hand, and with your hook hand, yarn over by bringing the yarn over the hook from back to front. Hold the yarn between your thumb and index finger to maintain tension. With the yarn over the hook, pull the yarn through the slip knot loop to create your first chain stitch.
3. Continue chaining: Repeat the yarn over and pull through step to create additional chain stitches. Each time you pull the yarn through the loop on the hook, you’re creating a new chain stitch. Continue chaining until you have the desired number of stitches for your project.
4. Consistency is key: As you chain stitch, strive for consistency in the size and tension of your stitches. Avoid making your stitches too tight or too loose. Practice maintaining an even tension by holding the yarn with a gentle but firm grip as you pull it through each loop.
5. Count your stitches: Count the number of chain stitches you have made to ensure you have the correct number for your pattern. Miscounting can result in a project that is too big or too small. Use stitch markers if needed to help keep track of your stitch count.
Remember, the chain stitch is the starting point for most crochet projects. Once you have mastered this basic stitch, you can move on to more intricate stitches and patterns. Practice your chain stitch technique until you feel comfortable and confident in creating straight and evenly sized chains.
Now that you have learned how to chain stitch, let’s move on to another essential stitch – the single crochet.
How to Single Crochet
The single crochet (sc) stitch is one of the foundational stitches in crochet. It creates a tight and sturdy fabric, making it ideal for various projects, including your crochet bikini. Follow these steps to learn how to single crochet:
1. Insert the hook: Begin by inserting your crochet hook into the stitch or space where you want to create the single crochet. If you’re working on a foundation chain, insert the hook into the second chain from the hook.
2. Yarn over and pull through: Yarn over by bringing the yarn from back to front over the hook. With the yarn over the hook, pull it through the stitch or space, so you now have two loops on your hook.
3. Yarn over and pull through both loops: Yarn over once again and pull the yarn through both loops on the hook. This completes one single crochet stitch.
4. Repeat the process: Continue inserting your hook into the next stitch or space, yarn over and pull through, and yarn over and pull through both loops to create each subsequent single crochet stitch.
5. Maintain even tension: As you work, make sure to maintain an even tension on the yarn. Avoid making your stitches too tight or too loose. Consistent tension will result in an even and professional-looking fabric.
6. Count your stitches: Count the number of single crochet stitches you have made to ensure you have the correct number for your pattern. Counting helps you maintain the proper stitch count and size for your project.
With practice, you’ll become more comfortable and efficient in creating single crochet stitches. Remember to focus on maintaining an even tension and keeping your stitches consistent in size. This will ensure that your crochet bikini has a cohesive and polished appearance.
The single crochet stitch is incredibly versatile and can be used for various parts of your bikini, such as straps, edging, or creating a solid fabric. Experiment with different patterns and stitch placements to achieve the desired look for your crochet bikini.
Now that you’ve mastered the single crochet stitch, let’s move on to the double crochet stitch, another essential stitch in crochet.
How to Double Crochet
The double crochet (dc) stitch is a versatile stitch that creates a taller and more open fabric compared to the single crochet. It’s commonly used in crochet projects, including your crochet bikini. Follow these steps to learn how to double crochet:
1. Begin with a foundation chain: Start by creating a foundation chain with the desired number of stitches. If you’re working on a pattern, follow the instructions for the number of chains needed.
2. Yarn over and insert the hook: Yarn over by bringing the yarn from back to front over the hook. Then, insert your hook into the indicated stitch or space. For the first row, you will typically insert the hook into the fourth chain from the hook.
3. Yarn over and pull through: Yarn over once again and pull the yarn through the stitch (you should now have three loops on your hook).
4. Yarn over and pull through the first two loops: Yarn over once more and pull the yarn through the first two loops on the hook (two loops remaining on the hook).
5. Yarn over and pull through the last two loops: Yarn over one final time and pull the yarn through the last two loops on the hook. This completes one double crochet stitch.
6. Repeat the process: Continue the process by yarn over, insert the hook into the next stitch or space, yarn over and pull through, yarn over and pull through the first two loops, and yarn over and pull through the last two loops to create each subsequent double crochet stitch.
7. Count your stitches: Count the number of double crochet stitches you have made to ensure you have the correct number for your pattern. Keeping track of your stitch count is crucial for maintaining the size and shape of your crochet bikini.
With practice, you’ll become more confident in creating double crochet stitches. Remember to maintain an even tension on the yarn and to keep your stitches consistent in size. This will result in a uniform and professional-looking fabric.
The double crochet stitch can be used for various aspects of your crochet bikini, such as creating panels, adding texture, or working lace patterns. Explore different stitch placements and combinations to achieve the desired look and feel for your bikini.
Now that you’ve learned how to double crochet, let’s move on to the half double crochet stitch, another essential stitch in crochet.
How to Half Double Crochet
The half double crochet (hdc) stitch is a versatile stitch that falls between the height of a single crochet and a double crochet. It creates a fabric that is slightly taller than the single crochet and denser than the double crochet. Follow these steps to learn how to half double crochet:
1. Begin with a foundation chain: Start by creating a foundation chain with the desired number of stitches. If you’re following a pattern, follow the instructions for the number of chains needed.
2. Yarn over and insert the hook: Yarn over by bringing the yarn from back to front over the hook. Then, insert your hook into the indicated stitch or space. For the first row, you will typically insert the hook into the third chain from the hook.
3. Yarn over and pull through: Yarn over once again and pull the yarn through the stitch (you should now have three loops on your hook).
4. Yarn over and pull through all loops: Yarn over and pull through all three loops on the hook. This completes one half double crochet stitch.
5. Repeat the process: Continue the process by yarn over, insert the hook into the next stitch or space, yarn over and pull through, and yarn over and pull through all loops to create each subsequent half double crochet stitch.
6. Count your stitches: Count the number of half double crochet stitches you have made to ensure you have the correct number for your pattern. Keeping track of your stitch count is important for maintaining the size and shape of your crochet bikini.
With practice, you’ll become more comfortable and efficient in creating half double crochet stitches. Remember to maintain an even tension on the yarn and to keep your stitches consistent in size. This will result in a uniform and professional-looking fabric.
The half double crochet stitch can be used for various aspects of your crochet bikini, such as creating textured panels, adding height, or working on stitch patterns. It’s a versatile stitch that provides a good balance between thickness and drape.
Now that you’ve learned how to half double crochet, you have another essential stitch in your repertoire. You’re now ready to start crocheting your bikini top using these basic crochet stitches!
How to Triple Crochet
The triple crochet (tr) stitch is a tall and airy stitch that is often used to create lacy and open patterns. It’s the next step in height after the double crochet. Follow these steps to learn how to triple crochet:
1. Begin with a foundation chain: Start by creating a foundation chain with the desired number of stitches. If you’re following a pattern, follow the instructions for the number of chains needed.
2. Yarn over twice: Yarn over by bringing the yarn from back to front over the hook twice. You should have three loops on your hook.
3. Insert the hook: Insert your hook into the indicated stitch or space. For the first row, you will typically insert the hook into the fourth chain from the hook.
4. Yarn over and pull through: Yarn over once again and pull the yarn through the stitch. You should now have four loops on your hook.
5. Yarn over and pull through two loops: Yarn over and pull through the first two loops on the hook. You should now have three loops remaining on your hook.
6. Yarn over and pull through two loops: Yarn over once more and pull through the next two loops on the hook. You should now have two loops remaining on your hook.
7. Yarn over and pull through the final two loops: Yarn over one final time and pull through the remaining two loops on the hook. This completes one triple crochet stitch.
8. Repeat the process: Continue the process by yarn over twice, insert the hook into the next stitch or space, yarn over and pull through, yarn over and pull through two loops, yarn over and pull through two loops, and yarn over and pull through the final two loops to create each subsequent triple crochet stitch.
9. Count your stitches: Count the number of triple crochet stitches you have made to ensure you have the correct number for your pattern. Keeping track of your stitch count is important for maintaining the size and shape of your crochet bikini.
The triple crochet stitch is often used to create stitch patterns, add height to your projects, or create open and lacy designs. It’s a versatile stitch that can add a beautiful and delicate touch to your crochet bikini.
With practice, you’ll become more comfortable and efficient in creating triple crochet stitches. Focus on maintaining an even tension on the yarn and keeping your stitches consistent in size. This will result in a uniform and professional-looking fabric.
Now that you’ve learned how to triple crochet, you have another essential stitch in your repertoire. You’re now ready to explore more intricate stitch patterns and incorporate them into your crochet bikini.
Starting the Bikini Top
Now that you’ve mastered the basic crochet stitches, it’s time to start crocheting your bikini top. The process will vary depending on the pattern you’re following or the design you have in mind. However, there are a few general steps to get you started:
1. Choose your pattern: Select a crochet bikini pattern that suits your style and skill level. Look for patterns specifically designed for bikini tops or adapt a pattern to fit your desired design. Make sure to read through the instructions thoroughly before beginning.
2. Gather your materials: Check the pattern for the recommended yarn, hook, and any additional materials needed. Make sure you have everything at hand before you start. Also, consider any modifications or customizations you want to make, such as adding embellishments or adjusting the size.
3. Create a foundation chain: Begin by creating a foundation chain using the recommended number of chains specified in the pattern. This will serve as the base for your bikini top. Take care to maintain an even tension and keep the chain loose enough to prevent tightness or distortion in the fabric.
4. Work the first row: Follow the pattern instructions to work the first row of stitches into the foundation chain. This may involve working single crochet, double crochet, or other stitches, depending on the design. Pay close attention to stitch placement and spacing to ensure a well-shaped and even fabric.
5. Check your gauge: As you progress, periodically check your gauge against the pattern instructions. Adjust your tension or hook size if necessary to ensure that your stitches match the required gauge. This will help ensure that your bikini top fits correctly.
6. Shape the cups: Depending on the pattern, you may need to shape the cups of your bikini top. This typically involves increasing or decreasing stitches to achieve the desired cup size and curvature. Follow the pattern instructions carefully to achieve accurate shaping.
7. Customize and personalize: Once the basic structure of the top is established, you can get creative and add personal touches to make your bikini top unique. Explore different stitch patterns, color changes, or embellishments to showcase your style and personality.
8. Continue with the pattern: Follow the pattern instructions to complete the rest of the bikini top. This may include working additional rows, creating straps, adding decorative elements, or joining pieces together. Take your time and refer to the pattern frequently to ensure accuracy.
Remember to enjoy the process of crocheting your bikini top. Take breaks whenever needed and stay patient, as creating a beautiful piece can take time. Don’t be afraid to make adjustments or modifications to the pattern to suit your body shape and preferences.
Now that you’re ready to start your bikini top, grab your materials and dive into the next exciting phase of the crochet process!
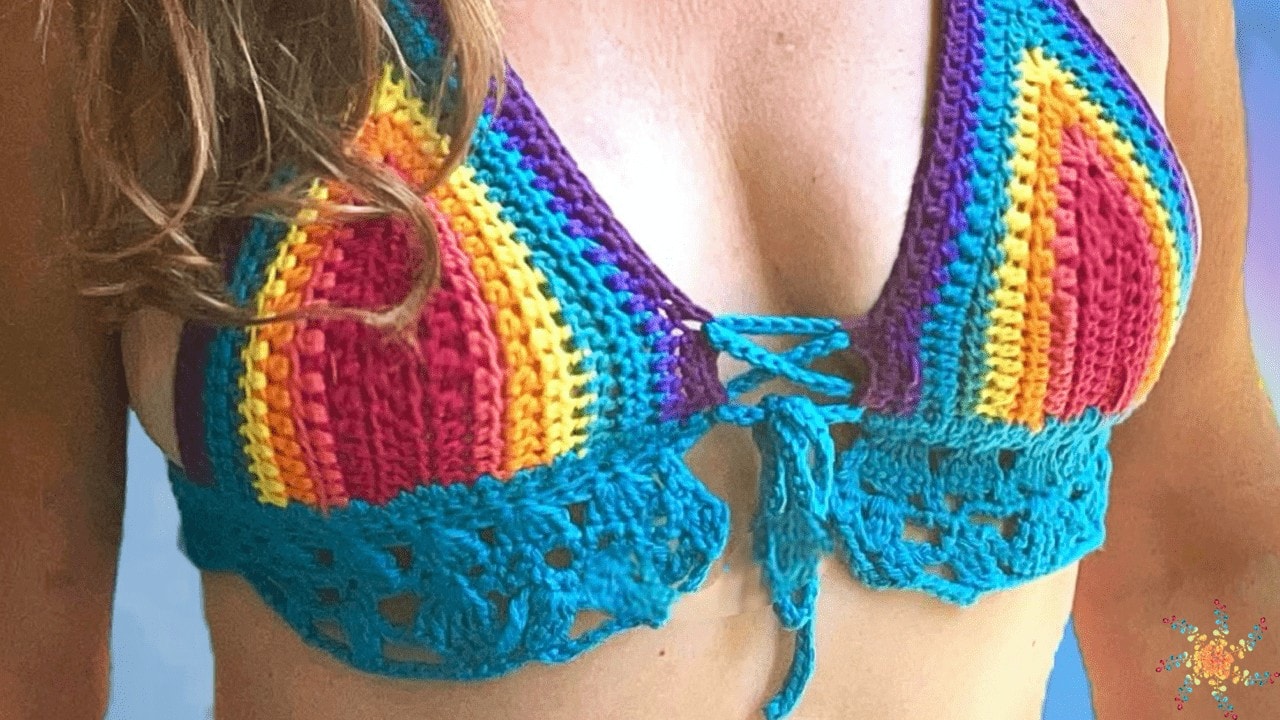
Creating the Cups
Creating the cups is a crucial step in crocheting your bikini top as it determines the shape and support of the garment. The cup design will vary depending on the pattern or style you’ve chosen, but here are some general guidelines to help you create the cups:
1. Follow the pattern instructions: If you’re using a crochet pattern for your bikini top, carefully follow the instructions provided. The pattern should specify how to shape the cups and the number of stitches required. Pay attention to any specific stitch placements or pattern repeats mentioned.
2. Increase or decrease stitches: To create the cup shape, you may need to increase or decrease stitches in certain rows. Increases typically involve adding stitches through the established stitches, while decreases involve crocheting stitches together. These steps will shape the cups and ensure a proper fit. Refer to the pattern for the specific stitch count changes and when to make them.
3. Size and fit considerations: Consider your body measurements and the desired fit of your bikini top when shaping the cups. If you need more or less coverage, you can make adjustments by adding or subtracting stitches accordingly. Remember to try on the bikini top as you progress to ensure that it’s fitting properly.
4. Maintain pattern consistency: As you shape the cups, be mindful of maintaining the pattern consistency. If you’re working with a stitch pattern, make sure to follow the instructions for maintaining the pattern’s integrity while increasing or decreasing stitches. This will ensure a cohesive and aesthetically pleasing design.
5. Test the cups for fit: As you work on the cup shaping, regularly check how the cups are fitting. You can hold the crochet piece up against your body or try it on to ensure that it provides the desired coverage and support. Make any necessary adjustments to ensure a comfortable and flattering fit.
6. Consider additional cup enhancements: Depending on your preference, you may want to incorporate additional features into the cups, such as padding, underwire, or lining. These elements can provide extra support, shape, and coverage. If you plan to add any enhancements, ensure they are securely attached and integrated into the cup structure.
Remember, every crochet pattern and style may have different cup construction techniques. Always read and follow the pattern instructions carefully, as they will provide the best guidance for shaping and creating the cups of your crochet bikini top. Take your time, enjoy the process, and make adjustments as needed to achieve the perfect fit and design.
Once the cups are complete, you can move on to working on the straps or other components of your bikini top.
Working on the Straps
The straps of your crochet bikini top play an essential role in providing comfort and support. They also contribute to the overall design and style of the garment. Follow these steps to work on the straps:
1. Determine the strap length: Start by deciding the desired length of your straps. You can refer to the pattern instructions or use a measuring tape to determine the appropriate length. Keep in mind that the length may vary depending on your personal preference and body measurements.
2. Chain stitch for the straps: Begin working the straps by creating a chain stitch of the desired length. The number of chains will depend on the pattern or design you’re following. Ensure that the chain is long enough to comfortably fit around your shoulders while also providing sufficient support.
3. Single crochet or other stitch pattern: Once you’ve created the chain for the straps, you can continue with a simple stitch pattern like single crochet or any other stitch that complements the rest of the bikini top. Follow the pattern instructions for the stitch pattern to use or create your own if desired.
4. Consistent stitch tension: As you work on the straps, maintain consistent stitch tension to achieve an even and uniform appearance. Be mindful of not making the stitches too tight or too loose. This will ensure that the straps have a comfortable fit and the same look throughout.
5. Try on and adjust as needed: As you progress with the straps, periodically try on the bikini top to check the fit and comfort of the straps. This allows you to make any necessary adjustments while still in the process of crocheting. You can add or remove stitches if the straps feel too loose or tight.
6. Strap attachment: Once the straps are the desired length, you will need to attach them to the top of the cups. This can be done by sewing, slip stitching, or crocheting the straps directly onto the cups. Follow the pattern instructions for the recommended attachment method.
7. Finishing touches: After attaching the straps, check for any loose ends or uneven stitches. Weave in any loose ends using a darning needle to ensure a clean and polished finish.
Remember to customize the strap width and style to your liking. You can make wider straps for additional support or create more delicate and intricate designs for a feminine touch. Explore different stitch patterns, colors, or even add embellishments to make your straps unique.
Working on the straps gives you the opportunity to add your personal touch to your crochet bikini top. Take your time, enjoy the process, and aim for a comfortable and stylish result.
Once the straps are complete, you can move on to shaping the bikini bottom or any other remaining components of your crochet bikini.
Shaping the Bikini Bottom
The bikini bottom is an essential component of your crochet bikini. Shaping it properly ensures a comfortable fit and a flattering silhouette. Follow these steps to shape the bikini bottom:
1. Determine the size and style: Choose the style and coverage level you want for your bikini bottom. It can be a classic bikini bottom, high-waisted, cheeky, or any other design that suits your preference. Consider your body measurements and personal comfort when deciding on the size.
2. Start with a foundation chain: Begin by creating a foundation chain with the number of chains specified in the pattern or based on your preferred width for the bikini bottom. Ensure that the chain is long enough to wrap around your hips comfortably.
3. Work the first row: Follow the pattern instructions to work the first row of stitches into the foundation chain. This can involve single crochet, double crochet, or any other stitch pattern depending on your chosen design. Pay attention to stitch placement and spacing to create a well-shaped and even fabric.
4. Shape the bikini bottom: To shape the bikini bottom, you may need to increase or decrease stitches on subsequent rows. For example, to create a tapered or curved shape, decrease stitches gradually on the sides. Follow the pattern instructions for the specific stitch count changes and when to make them.
5. Customize based on your body type: Consider your body type when shaping the bikini bottom. You can adjust the rise, leg openings, or waistband to flatter your curves and achieve a comfortable fit. If needed, try on the bikini bottom as you work to ensure it provides the desired coverage and silhouette.
6. Check for even tension: Maintain an even tension on the yarn as you crochet the bikini bottom. Consistent tension will help create a professional-looking fabric. Take care to avoid making your stitches too tight or too loose, as this can affect the overall structure and fit of the bottom.
7. Test for fit: Regularly test the fit of the bikini bottom by trying it on or holding it up against your body. This allows you to make any necessary adjustments while you’re still in the crocheting process. It’s better to make changes as you go rather than having to undo and redo work later.
8. Finishing touches: Once the bikini bottom is the desired size and shape, weave in any loose ends using a darning needle. Check for any uneven stitches or gaps and make corrections as needed for a polished final result.
Remember, the shaping and fit of the bikini bottom are crucial for comfort and confidence. Take your time, follow the pattern instructions, and make adjustments as necessary to ensure a flattering and well-fitting result.
With the bikini bottom shaped, you’re almost there. Continue with any remaining components, such as adding adjustable ties or finishing touches, to complete your crochet bikini.
Finishing and Assembly
Finishing and assembly are the final steps to complete your crochet bikini and bring all the components together. Follow these steps to finish and assemble your bikini:
1. Weave in loose ends: Begin by using a darning needle to weave in any loose ends from your crochet work. This ensures a neat and professional finish. Insert the needle through the stitches on the wrong side of the fabric, following the yarn path, and trim any excess yarn.
2. Block your pieces (optional): If desired, you can wet-block or steam-block your crocheted pieces. This process involves gently soaking or steaming the fabric, then shaping and drying it to achieve a more polished and even appearance.
3. Join the pieces: Depending on the construction of your bikini, you may need to join the cups, straps, and bottom pieces together. You can use slip stitches, single crochets, or any other joining method recommended in the pattern. Follow the instructions carefully to ensure proper alignment and a secure connection.
4. Add finishing touches: Consider any additional decorative elements or details you want to add to your crochet bikini. This can include buttons, beads, bows, or any other embellishments. Sew these embellishments securely onto the fabric using a darning needle and matching thread or yarn.
5. Adjustability and closures: If you want your bikini to be adjustable, you can add ties, clasps, or closures to the straps, back, or sides. This allows for a customizable fit and makes it easier to put on and take off the bikini. Follow the pattern instructions or get creative with your own closure solutions.
6. Test the fit: Once your bikini is assembled and any final touches are added, try it on to ensure the fit is accurate and comfortable. Make any necessary adjustments to the straps or closures to achieve the perfect fit for your body.
7. Give it a final look: Before wearing your crochet bikini, take a moment to inspect the final product. Check for any loose stitches, uneven edges, or areas that may need reinforcement or adjustments. Make any necessary repairs or modifications to ensure the durability and longevity of your creation.
8. Show off your finished bikini: With all the finishing touches complete, it’s time to proudly wear your newly crafted crochet bikini! Whether you’re lounging by the pool, strolling along the beach, or enjoying a day in the sun, enjoy the satisfaction of wearing something you made with your own hands.
By following these finishing and assembly steps, you’ll have a well-crafted and beautiful crochet bikini ready to make a stylish statement this season.
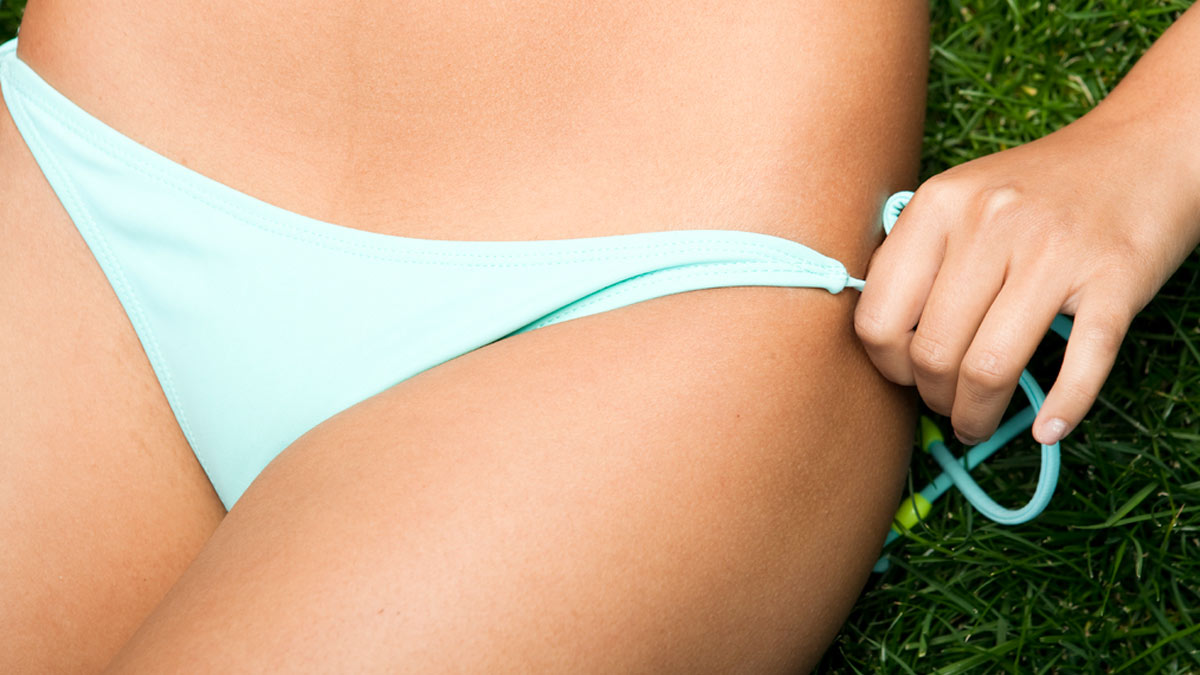
Adding Adjustable Ties
Adding adjustable ties to your crochet bikini is a great way to ensure a customizable and secure fit. Not only do adjustable ties provide convenience when putting on and removing your bikini, but they also allow you to adjust the tightness and positioning to your liking. Let’s explore how to add adjustable ties to your crochet bikini:
1. Choose your tie material: You can use crochet chains made from the same yarn as your bikini or opt for fabric or elastic ties. Consider the desired look and functionality when selecting your tie material.
2. Determine tie placement: Decide where you want to position the ties on your bikini. Common areas for adjustable ties include the back, neck, and sides of the bikini top, as well as the hip area of the bottom. Make sure to try on the bikini and experiment with different tie positions to find the most comfortable and flattering fit.
3. Create the ties: Start by creating long chains using your chosen tie material. The length of the chains will depend on your personal preference and the desired adjustability. It’s better to create longer chains and then trim them if necessary.
4. Attach the ties: For the top, you can attach one end of each tie to the sides or back of the cups. For the bottom, you can attach the ties at the sides or the front. Use a darning needle or crochet hook to weave the end of each tie through the fabric or crochet stitches and secure it with a knot or stitch.
5. Consider tie closures: Depending on your preference and style, you can leave the ties as simple, open-ended chains, or you can add closures or embellishments for a more polished look. Common options for closures include adding small buttons, hooks, or loops. Alternatively, you can tie the open ends into bows or knots.
6. Test and adjust the fit: With the ties attached, try on your crochet bikini and test the adjustability. Experiment with different tie lengths and tightness to find the most comfortable and secure fit. Make any necessary adjustments by repositioning or trimming the ties.
7. Final touches: To prevent fraying or unraveling, consider using a fray-check or applying a small amount of clear nail polish to the cut ends of the tie material. This will help to maintain the longevity and durability of the ties.
Adding adjustable ties to your crochet bikini not only provides practical functionality but also gives you the opportunity to customize the fit and style. Play around with different tie placements, materials, and closures to create a unique and personalized design.
Now that you’ve added adjustable ties to your bikini, you’re ready to showcase your creation and enjoy the flexibility and comfort it offers!
Styling and Customization Tips
With your crochet bikini complete, it’s time to make it truly your own by incorporating your personal style and customizing the design. Here are some styling and customization tips to help you enhance the look of your crochet bikini:
1. Play with color: Choose yarn colors that reflect your personality and flatter your skin tone. Experiment with bold, vibrant shades or opt for subtle, pastel hues. You can also create color-block or ombre effects by using different colors in different sections of your bikini.
2. Embellish with beads or charms: Add a touch of bohemian charm to your crochet bikini by incorporating beads, charms, or shells. Thread them onto the yarn during the crocheting process or sew them onto the finished piece to create eye-catching details.
3. Create texture with different stitch patterns: Explore various stitch patterns to add texture to your bikini. Consider using lace stitches, popcorn stitches, or decorative stitch combinations to create visual interest and dimension. Be sure to test stitch patterns on a swatch to see how they drape and fit before incorporating them into your design.
4. Mix and match stitches: Combine different crochet stitches within your design to create unique and intricate fabric. For example, you can use a row of double crochet followed by a row of single crochet for contrasting texture and visual appeal.
5. Incorporate lace or mesh details: Integrate lace or mesh panels into your bikini for an elegant and airy look. Use open stitch patterns or create lace inserts to add femininity and breathability to your design.
6. Add fringe or tassels: Incorporate fringe or tassels into the edges or ties of your crochet bikini for a playful and boho-inspired touch. You can use the same yarn as your bikini or experiment with contrasting colors for a vibrant pop.
7. Experiment with edgings: Enhance the edges of your crochet bikini with decorative edgings. Add picots, shell stitches, or scalloped borders to give your bikini a polished and finished look.
8. Mix yarn textures: Combine different types of yarn with varying textures to create dimension and visual interest. Mixing smooth yarns with more textured ones can add depth and richness to your crochet bikini.
9. Be creative with straps and closures: Customize the straps and closures of your bikini to suit your style. Play around with different tying methods, add decorative buttons or clasps, or create unique strap designs to make your bikini stand out.
Remember, styling and customization provide a fun opportunity to infuse your crochet bikini with your own unique flair. Get creative, trust your instincts, and have fun bringing your vision to life. Your crochet bikini will be an expression of your personal style and a true reflection of your creativity.
Conclusion
Congratulations on completing your crochet bikini! With your newfound skills in crochet and the knowledge of various stitches, you have created a one-of-a-kind piece that reflects your style and personality. The process of designing, selecting materials, and stitching together your bikini has been a labor of love, and the end result is a beautiful, handmade garment that you can be proud of.
Crocheting a bikini allows for endless customization possibilities. From choosing the perfect yarn colors and textures to adding unique embellishments, you have the freedom to make your bikini truly yours. The stitches you have mastered, such as the chain stitch, single crochet, double crochet, half double crochet, and triple crochet, served as the foundation for your creation, providing structure and beauty to every stitch.
Remember that creating a crochet bikini is not just about the final product, but also about the journey. You’ve honed your skills, experimented with different techniques, and allowed your creativity to flourish. Enjoy the process and embrace the imperfections, as they are what make your handmade bikini truly special.
As you wear your crochet bikini, whether lounging by the pool, basking in the sun at the beach, or enjoying a tropical getaway, take pride in the fact that you’ve crafted something with your own hands. Embrace the compliments and admiration that will surely come your way, knowing that you’ve showcased your talent and showcased your unique style through your wearable art.
Now that you have completed your crochet bikini, feel free to push your boundaries, explore new patterns, and continue to refine your skills. Crochet opens up a world of possibilities, allowing you to create not only bikinis but also a wide range of beautiful garments and accessories.
So, wear your crochet bikini with confidence and celebrate the artistry, skill, and self-expression that went into making it. Let it serve as a reminder of your creativity and the joy that comes from bringing ideas to life with a crochet hook and a skein of yarn.