Home>How-to Guides>For Women>How To Crochet A Swimsuit
For Women
How To Crochet A Swimsuit
Modified: August 5, 2023
Learn how to crochet a stylish swimsuit for women with our step-by-step guide. Perfect for lounging by the pool or hitting the beach, this DIY project is a must-try for any crochet enthusiast.
(Many of the links in this article redirect to a specific reviewed product. Your purchase of these products through affiliate links helps to generate commission for Under-tec.com, at no extra cost. Learn more)
Table of Contents
- Introduction
- Getting Started with Crochet
- Selecting the Right Yarn and Hook
- Choosing a Swimsuit Pattern
- Essential Crochet Stitches
- Crocheting the Swimsuit Top
- Crocheting the Swimsuit Bottom
- Adding Straps or Ties
- Finishing Touches and Embellishments
- Blocking and Sizing the Swimsuit
- Tips for Wearing and Caring for Crocheted Swimsuits
- Conclusion
Introduction
Welcome to the world of crochet! If you’re a crafty individual looking for a new and exciting project, why not try your hand at crocheting a swimsuit? Not only will it be a fun endeavor, but it will also allow you to create a unique and customized piece that reflects your personal style.
Crocheted swimsuits have become increasingly popular in recent years, offering a trendy and bohemian alternative to traditional swimwear. Whether you’re lounging by the poolside or frolicking at the beach, a crocheted swimsuit is sure to turn heads and make a statement.
While the idea of crocheting a swimsuit may seem daunting at first, don’t worry! This article will guide you through the process step by step, providing you with all the necessary information and tips to ensure your project is a success.
Before we dive into the details, it’s essential to note that crocheting a swimsuit requires some level of crochet proficiency. If you’re a beginner, it’s recommended to familiarize yourself with basic crochet stitches and techniques before attempting this project. However, if you’re up for a challenge and eager to learn, don’t let that discourage you!
In the following sections, we’ll explore everything you need to know to crochet a swimsuit, from selecting the right yarn and hook to adding finishing touches and embellishments. By the end of this article, you’ll have the knowledge and confidence to create your very own stylish and comfortable crocheted swimsuit.
Getting Started with Crochet
Crocheting a swimsuit requires a basic understanding of crochet stitches and techniques. If you’re new to crocheting, don’t worry! Here are some essential steps to get you started:
- Gather your materials: To begin, you’ll need some basic crochet tools, including a crochet hook and yarn. Choose a crochet hook size that matches the recommended gauge of your selected yarn. A smaller hook will create a tighter stitch, while a larger hook will result in a looser stitch. As for yarn, opt for a cotton or bamboo blend that is suitable for swimwear.
- Learn the basic stitches: Familiarize yourself with the fundamental crochet stitches, such as the chain stitch, single crochet, double crochet, and slip stitch. These stitches will form the foundation of your swimsuit. Practice them before you jump into the project to ensure your stitches are even and consistent.
- Practice gauge swatches: Since the fit of a swimsuit is crucial, it’s essential to create gauge swatches to determine the correct stitch and row counts. By achieving the recommended gauge, you can ensure that your swimsuit will fit properly. Take the time to crochet a swatch and measure it against the pattern’s instructions.
- Follow patterns: In the world of crochet, patterns act as a roadmap for your project. They provide instructions on stitch counts, shaping, and any special techniques required. Look for swimsuit patterns that match your skills and style preferences. You can find patterns in books, online resources, or even create your own once you gain more experience.
- Practice, practice, practice: As with any skill, practice makes perfect. Don’t be disheartened if your first attempt doesn’t turn out exactly as planned. Keep practicing and refining your techniques. With each project, you’ll gain more confidence and skill in crocheting swimwear.
Now that you’re familiar with the basic steps to get started with crochet, it’s time to explore further the important factors to consider when selecting the right yarn and hook for your swimsuit.
Selecting the Right Yarn and Hook
Choosing the right yarn and hook for your crocheted swimsuit is crucial to ensure a comfortable and durable finished product. Here are some factors to consider:
Type of Yarn: When selecting yarn for your swimsuit, it’s important to choose a material that is suitable for swimwear. Opt for yarn made from natural fibers such as cotton or bamboo, as they are lightweight, breathable, and dry quickly. Avoid using yarns that retain water, as this can lead to sagging and discomfort.
Yarn Weight: The weight or thickness of the yarn will also impact the final result of your swimsuit. Choose a yarn weight that matches the desired drape and stretchiness of the fabric. Thicker yarns will create a sturdier and more structured swimsuit, while lighter yarns will result in a more delicate and lightweight garment.
Hook Size: The size of your crochet hook determines the size of your stitches. It’s essential to use a hook size that matches the recommended gauge of your chosen yarn. If your stitches are too loose, try a smaller hook. Conversely, if they are too tight, switch to a larger hook. Remember, achieving the correct gauge is key to ensuring your swimsuit fits properly.
Consider Stretch: Since a swimsuit needs to stretch and move with your body, it’s important to choose a yarn with good stretch and recovery. Look for yarns that contain a small percentage of elastic or spandex. This will give your swimsuit the necessary flexibility while maintaining its shape and providing a comfortable fit.
Color and Design: The choice of yarn color and design is entirely up to you. Opt for bright and vibrant colors to showcase your personality or go for classic and timeless neutral tones. Additionally, you can experiment with different stitch patterns and combinations to add texture and visual interest to your swimsuit.
By carefully selecting the right yarn and hook for your crocheted swimsuit, you’ll be on your way to creating a stylish and perfectly fitting garment. Now that you have the basics covered, let’s move on to choosing a swimsuit pattern that suits your style and level of expertise.
Choosing a Swimsuit Pattern
When it comes to crocheting a swimsuit, finding the right pattern is key. The pattern you choose will determine the style and construction of your swimsuit. Here are some factors to consider when selecting a swimsuit pattern:
Skill Level: Assess your crochet skills and choose a pattern that aligns with your abilities. If you’re a beginner, look for patterns labeled as “beginner-friendly” or “easy.” These patterns typically use basic stitches and simple construction techniques. Intermediate and advanced crocheters can explore patterns with more intricate stitch patterns and shaping.
Style and Design: Consider the style and design of the swimsuit you want to create. Do you prefer a one-piece or a bikini? Are you looking for a classic, retro, or more modern design? Take your personal style and body shape into account when choosing a pattern. Look for patterns that showcase the elements you desire, such as a halter top, high-waisted bottoms, or unique stitch patterns.
Sizing: Check the pattern’s sizing chart to ensure it offers your desired size range. Some patterns provide instructions for multiple sizes, while others may require you to adjust the stitch counts to fit your measurements. Take accurate body measurements to ensure the swimsuit will fit you properly and flatter your shape.
Reviews and Feedback: Read reviews and feedback from other crocheters who have attempted the pattern. This can give you insights into any potential issues or modifications that may be needed. Pay attention to any common concerns or suggestions that could help you make informed decisions while crocheting.
Customization Options: Consider if the pattern offers customization options. Some patterns may include variations, such as different strap styles, optional details, or instructions for adding padding or lining. Customization options allow you to put your unique touch on the swimsuit and tailor it to suit your preferences.
Pattern Source: Patterns can be found in books, magazines, online platforms, or even through independent designers. Choose a pattern source that you trust and find reliable, ensuring that the instructions are clear, well-written, and supported with helpful visuals or diagrams.
By carefully considering these factors, you can select a swimsuit pattern that matches your skill level, style preferences, and body measurements. Once you have chosen the ideal pattern, it’s time to dive into the essential crochet stitches required to create your swimsuit.
Essential Crochet Stitches
Mastering the essential crochet stitches is crucial when it comes to crocheting a swimsuit. These stitches serve as the building blocks for creating various elements of the swimsuit, such as the cups, straps, and bottoms. Here are some key crochet stitches you’ll need to know:
Chain Stitch (ch): The chain stitch is the foundation of most crochet projects. To create a chain stitch, yarn over the hook and pull it through the loop on the hook. Repeat this process to create the desired number of chains. Chains are often used to start a row or create spaces within a pattern.
Single Crochet (sc): The single crochet stitch is a simple stitch that creates a tightly woven fabric. Insert your hook into the stitch or space, yarn over, and pull through. Yarn over again and pull through both loops on the hook. Single crochet stitches are commonly used for shaping and creating solid, dense fabric.
Double Crochet (dc): The double crochet stitch is taller than the single crochet and creates a more open and lacy fabric. Yarn over, insert your hook into the stitch or space, yarn over, and pull through. Yarn over again and pull through the first two loops on the hook. Yarn over once more and pull through the remaining two loops. Double crochet stitches are often used for adding height and creating an open, breathable texture.
Half Double Crochet (hdc): The half double crochet stitch is a versatile stitch that falls in between the height of a single crochet and a double crochet. Yarn over, insert your hook into the stitch or space, yarn over, and pull through. Yarn over again and pull through all three loops on the hook. Half double crochet stitches provide a nice balance between density and openness and are frequently used for creating texture.
Slip Stitch (sl st): The slip stitch is a short and quick stitch used for joining rounds, fastening off, or creating decorative edges. Insert your hook into the stitch or space, yarn over, and pull through both the loop on the hook and the loop immediately on the hook. Slip stitches are often used for seamless joining or creating a smooth finished edge.
These are just a few essential crochet stitches that you will encounter while crocheting a swimsuit. Depending on your chosen pattern, there may be additional stitches or variations required. It’s important to practice each stitch until you feel comfortable and confident before moving on to the construction of your swimsuit. By mastering these basic stitches, you’ll be ready to create the various elements of your swimsuit, from the top to the bottom.
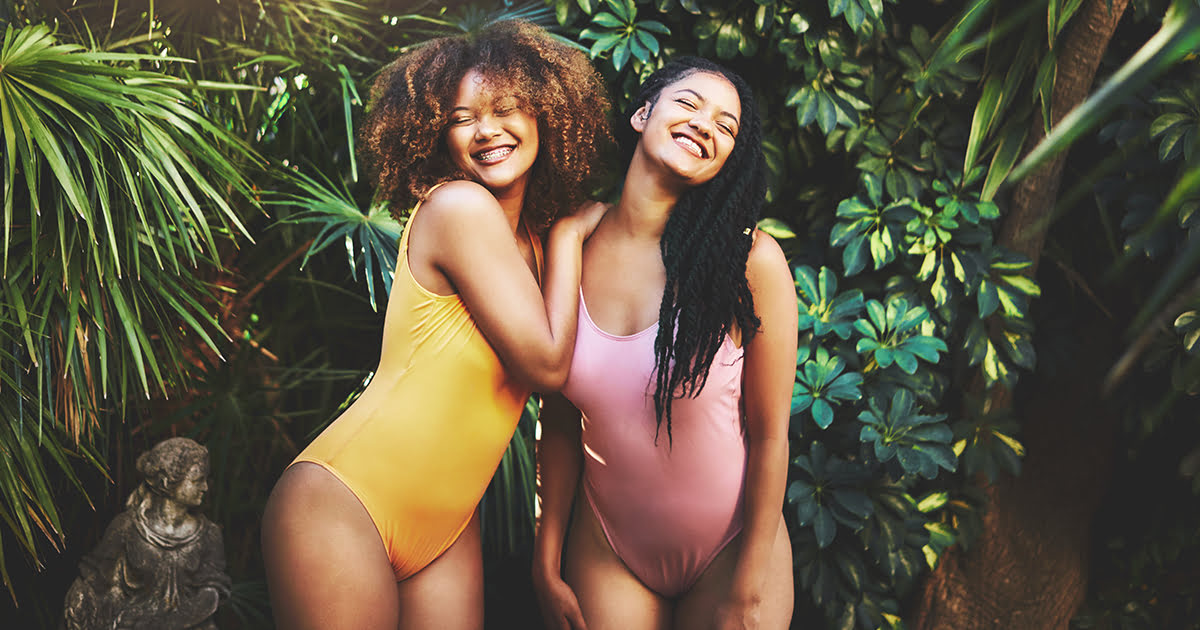
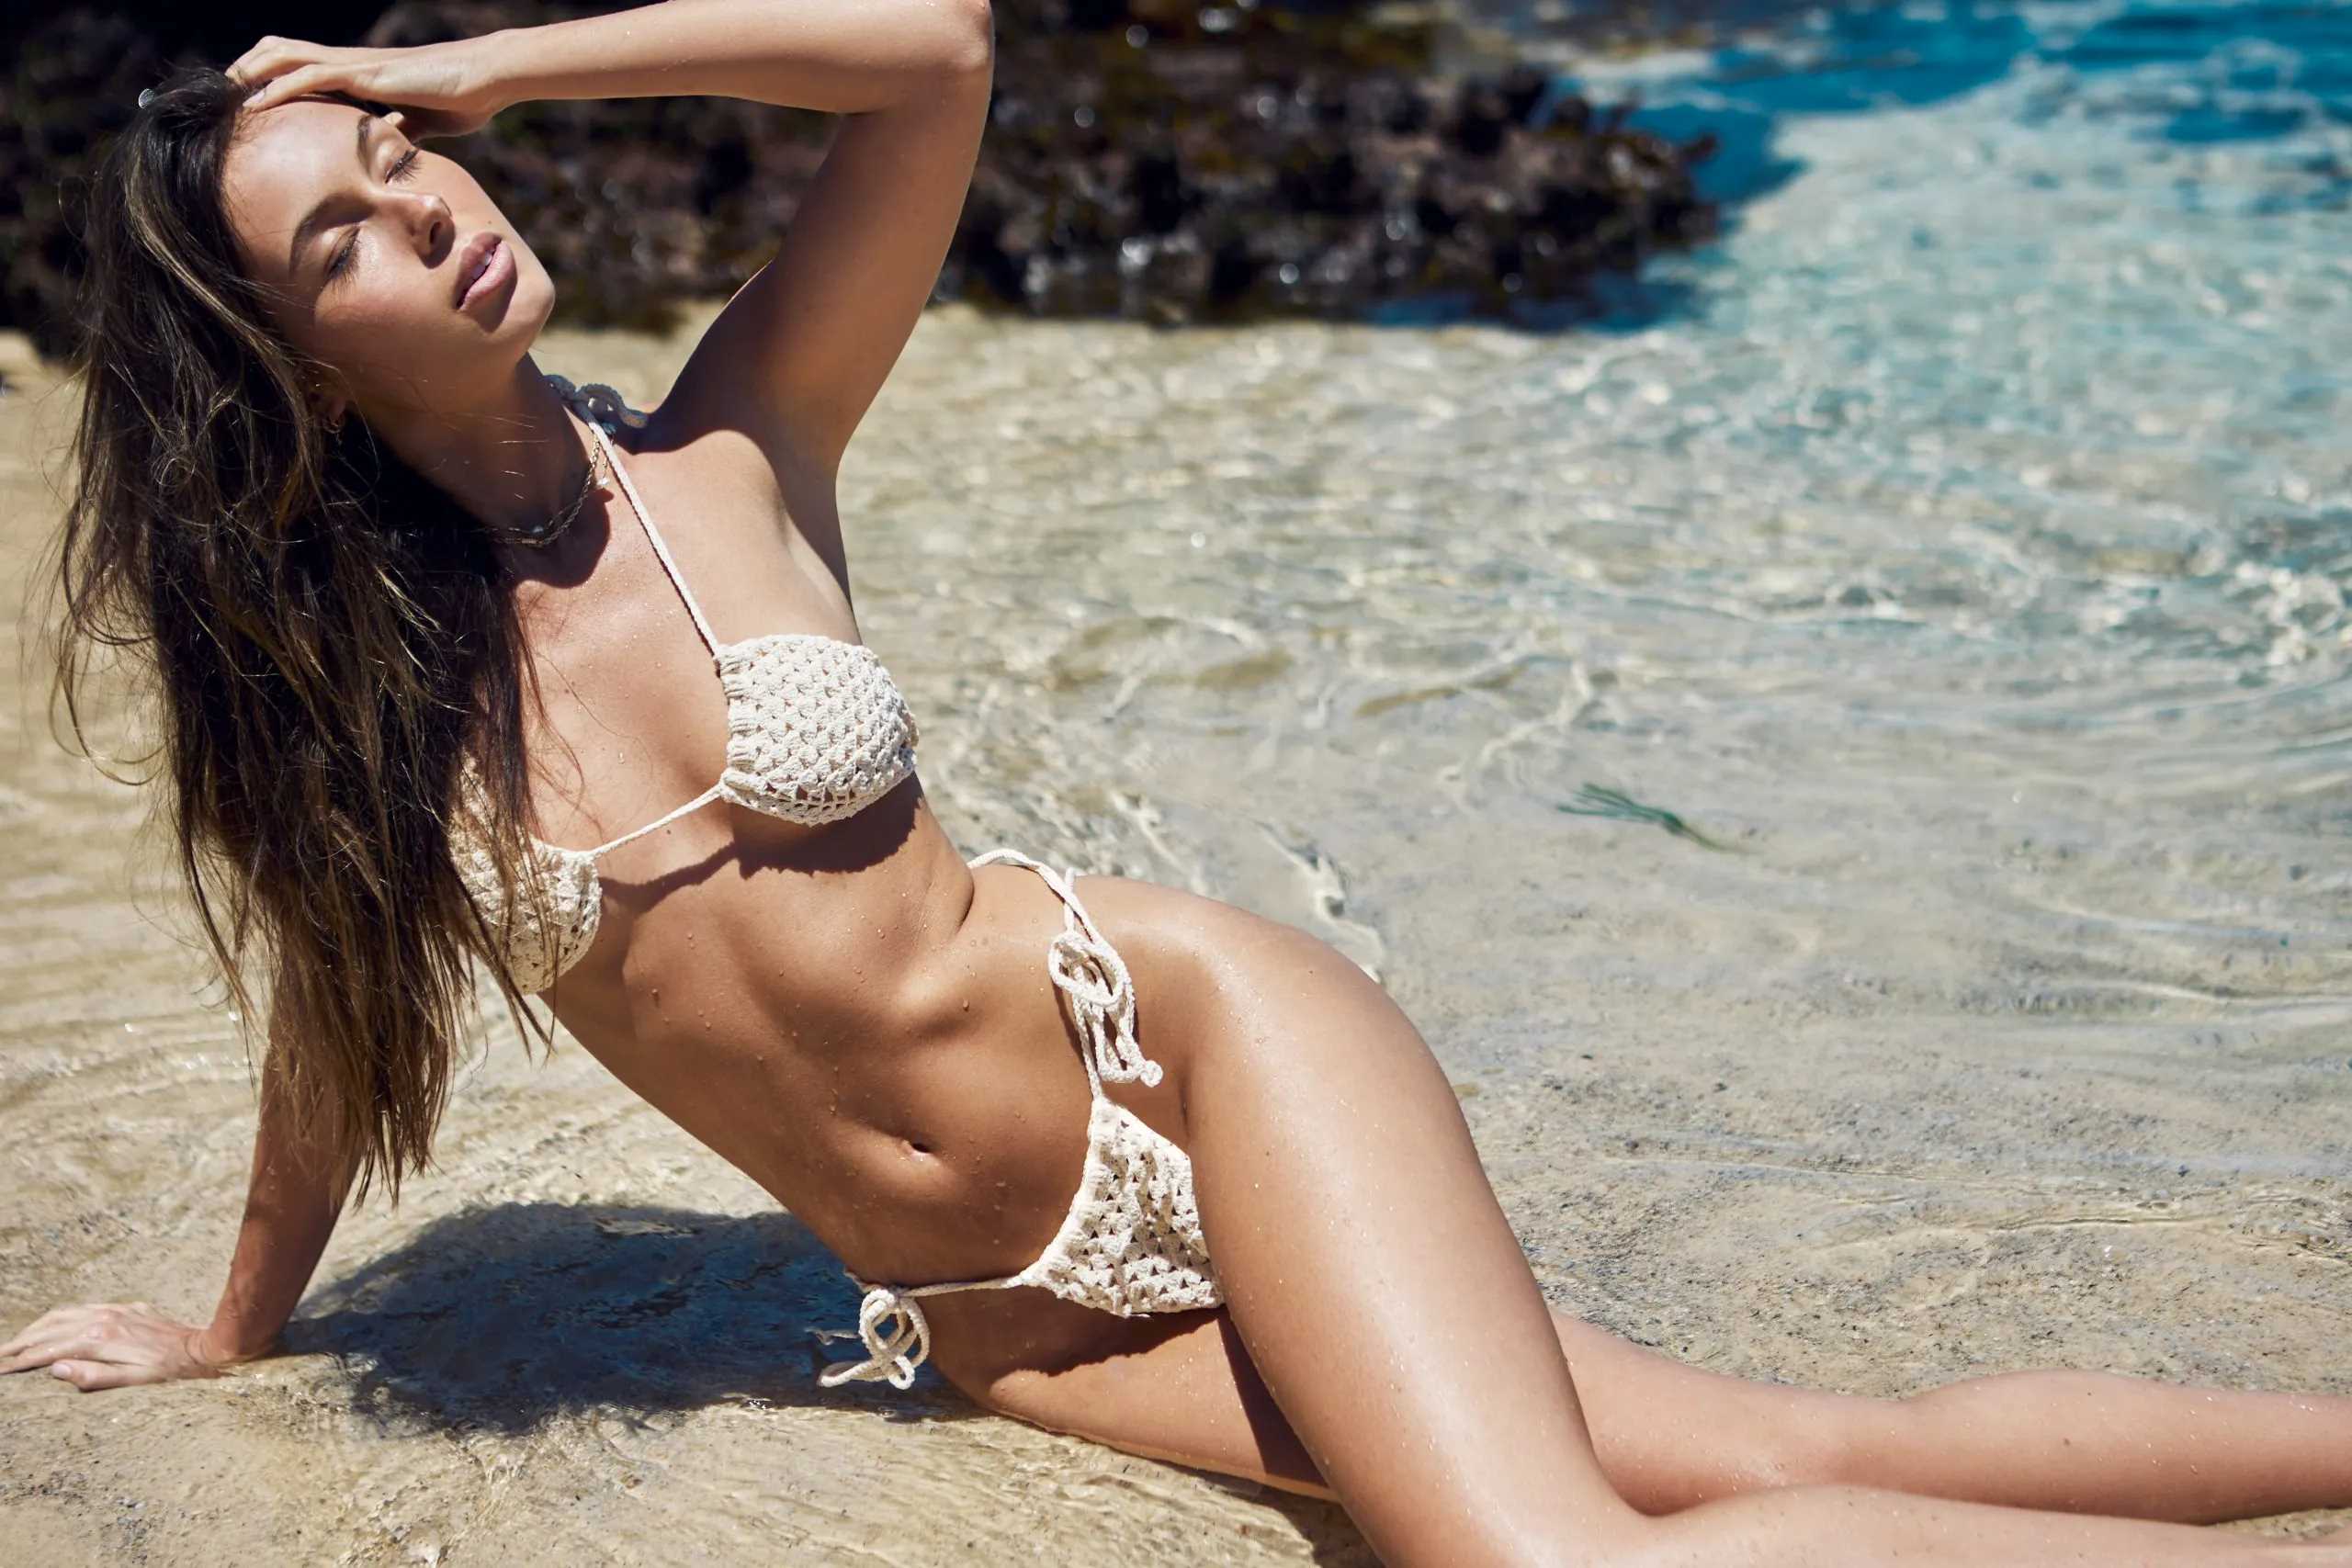
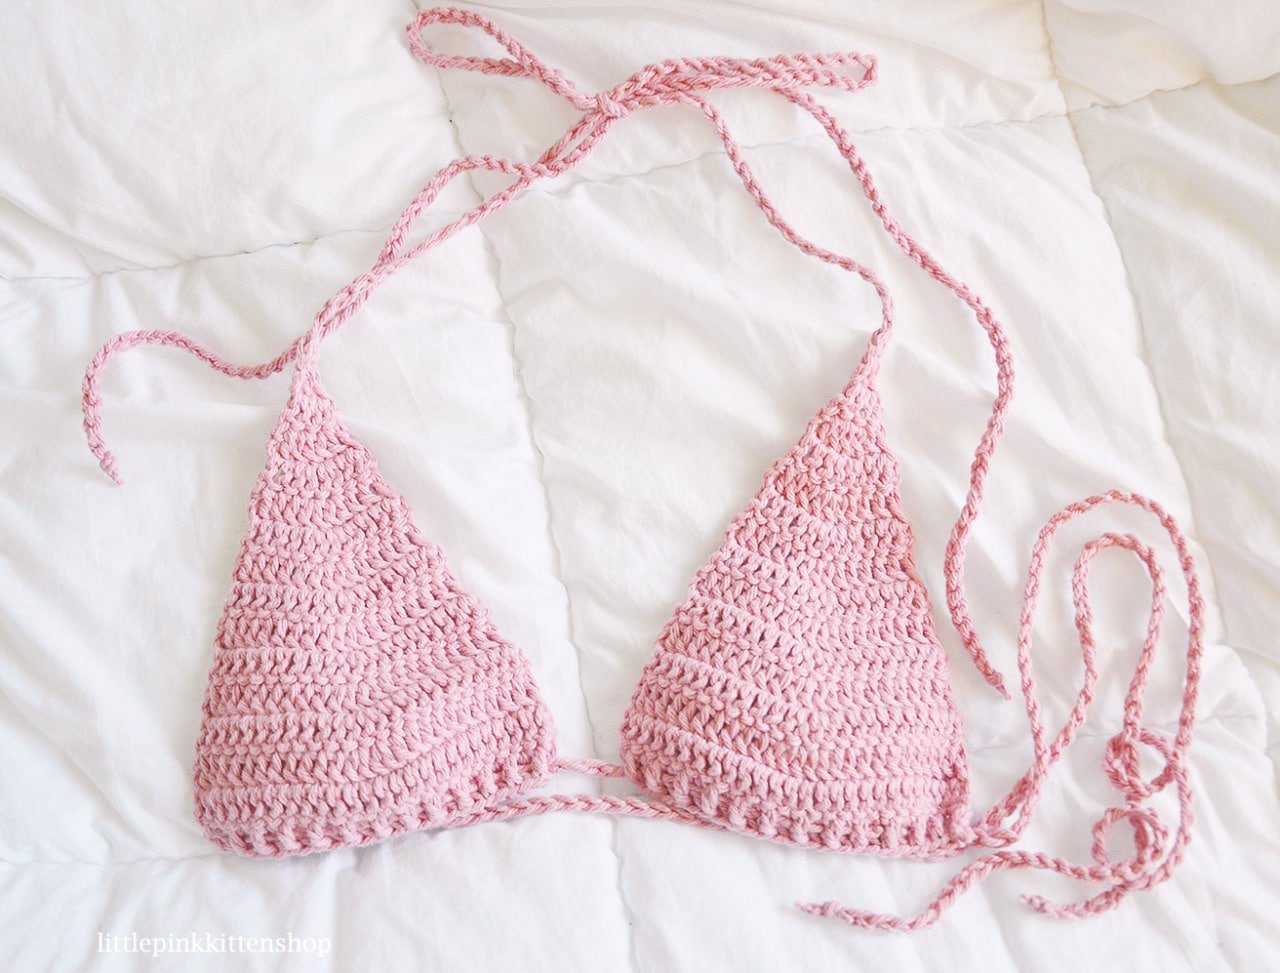
Crocheting the Swimsuit Top
The swimsuit top is the focal point of your crocheted swimsuit. Whether you prefer a bandeau, triangle, or halter style, crocheting the top requires attention to detail and a solid understanding of the pattern instructions. Here’s a general guide for crocheting the swimsuit top:
- Start with a gauge swatch: Crochet a gauge swatch using the recommended yarn and hook size to determine the correct stitch and row counts. Compare your swatch to the pattern’s gauge to ensure your stitches are the right size.
- Create the cups: The cups are the main component of the swimsuit top. Follow the pattern’s instructions to crochet each cup, paying attention to stitch counts, increases, and any shaping required. Adjust the cup size if needed to ensure a proper fit.
- Join the cups: Once the cups are complete, you’ll need to join them together. Follow the pattern’s joining method, whether it’s stitching the cups together or creating a central piece that connects the cups.
- Add straps or ties: Depending on the style of the swimsuit top, you may need to attach straps or ties to provide support and adjustability. Follow the pattern’s instructions to crochet and attach the straps, or get creative and customize the strap design to suit your preference.
- Add embellishments: If desired, you can embellish the swimsuit top with additional crochet stitches, such as lace or surface crochet details. These decorative elements can add a touch of elegance or personalization to your swimsuit top.
- Shape and fit: Once the main components are complete, try on the swimsuit top and make any necessary adjustments for a perfect fit. You may need to modify the strap length or make minor alterations to ensure comfort and support.
Remember to refer back to your chosen pattern for specific stitch instructions and construction details. Following the pattern closely will ensure that your crocheted swimsuit top turns out exactly as planned. Once you’ve completed the top, it’s time to move on to crocheting the swimsuit bottom.
Crocheting the Swimsuit Bottom
The swimsuit bottom is an essential component of a crocheted swimsuit, providing coverage and completing the overall look. Crocheting the bottom requires attention to detail, proper fit, and understanding of the pattern instructions. Here’s a general guide for crocheting the swimsuit bottom:
- Select the bottom style: Determine the style of the bottom you want to crochet, whether it’s a classic bikini, high-waisted, or a more unique design. Consider your comfort level and body shape when choosing the style.
- Start with a gauge swatch: Crochet a gauge swatch using the recommended yarn and hook size to determine the correct stitch and row counts. Compare your swatch to the pattern’s gauge to ensure your stitches are the right size.
- Create the foundation: The foundation sets the base for the swimsuit bottom. Follow the pattern instructions to crochet the initial chains or rows, ensuring that the foundation is wide enough and fits comfortably around your hips.
- Work the main stitch pattern: Follow the pattern instructions for the stitch pattern used in the bottom. Whether it’s a simple single crochet, a textured stitch, or a lace motif, ensure that you maintain an even tension and follow the stitch counts and repeats.
- Add shaping and details: Depending on the pattern, you may need to incorporate shaping elements, such as decreases or increases, to achieve the desired fit. Follow the pattern’s instructions for any shaping details, and pay attention to stitch placement and counts.
- Create the waistband: If crocheting a high-waisted swimsuit bottom, you’ll need to crochet a waistband. This could involve working additional rows or stitches to create a comfortable and secure fit around the waist.
- Try on and adjust: Once the main elements of the swimsuit bottom are complete, try it on to ensure a proper fit. Make any necessary adjustments, such as modifying the rise or leg openings, to ensure the right amount of coverage and comfort.
As with any crocheting project, closely follow your selected pattern for specific stitch instructions, shaping details, and construction guidance. Taking the time to understand the pattern and paying attention to stitch counts and shaping will result in a beautifully crocheted swimsuit bottom that fits and flatters. With the top and bottom complete, it’s time to add the finishing touches to your crocheted swimsuit.
Adding Straps or Ties
When it comes to crocheted swimsuits, adding straps or ties can provide both functionality and style. Depending on the design of your swimsuit, you may need to include adjustable straps or ties to ensure a secure and comfortable fit. Here’s a general guide for adding straps or ties to your crocheted swimsuit:
- Determine the strap style: Consider the style of your swimsuit and your personal preference when deciding on the strap or tie design. You can choose from halter straps, shoulder straps, or even criss-cross back designs. Think about the level of support and flexibility you desire.
- Measure for strap placement: If your pattern doesn’t specify strap placement, you’ll need to measure and mark the locations for the straps. Use a tape measure to determine the ideal placement based on your body’s proportions. Ensure that the straps will offer adequate support and security.
- Crochet the straps or ties: Follow the pattern instructions to crochet the straps or ties. This may involve working a specific stitch pattern, such as a chain or a stitch combination, to achieve the desired thickness or flexibility. You can experiment with different stitch patterns or embellishments to add uniqueness to your straps or ties
- Attach the straps or ties: Once the straps or ties are crocheted, it’s time to attach them to the swimsuit. Follow the pattern instructions for placement and attachment methods. This might involve sewing the straps directly onto the swimsuit or creating loops or buttonholes to thread the straps or ties through.
- Adjustability and customization: Consider incorporating adjustability in your straps or ties. For example, you can add adjustable sliders or buttons to provide customization options for a better fit. Remember to test the adjustability and make any necessary modifications before finalizing the attachment.
- Try on and make final adjustments: Once the straps or ties are attached, try on your crocheted swimsuit to assess the fit and comfort. Make any final adjustments to the strap length or positioning to ensure they are secure and provide the desired support.
Remember to consult your chosen pattern for specific instructions on strap or tie placement and attachment methods. By carefully adding straps or ties to your crocheted swimsuit, you’ll create a stylish and functional piece that fits your body comfortably while showcasing your unique style. With the finishing touches complete, it’s time to put the final polish on your crocheted swimsuit.
Finishing Touches and Embellishments
Adding finishing touches and embellishments to your crocheted swimsuit can elevate its overall look and make it truly unique. Whether you want to add decorative elements, additional detailing, or personalized touches, here are some ideas to consider:
- Edging: Give your swimsuit a polished finish by adding a decorative edging. This could be a simple border of single crochet, a picot trim, or even a scalloped edge. Choose a stitch pattern that complements the overall design of your swimsuit for a cohesive look.
- Lace and Appliques: Enhance the visual appeal of your swimsuit by incorporating lace or crochet appliques. These delicate details can be added to the cups, straps, or even the bottom portion of the swimsuit. Choose lace motifs or crochet appliques that align with your style and desired level of intricacy.
- Colorwork: If you want to add more visual interest to your swimsuit, consider incorporating colorwork. This can be done by changing yarn colors to create stripes, color blocks, or even intricate designs. Experiment with different color combinations to achieve the desired effect.
- Beads and Charms: Adding beads or charms can create a unique and eye-catching element to your swimsuit. You can thread them onto the straps or ties, attach them to the cups, or incorporate them into the edging. Ensure the beads and charms are secured properly to avoid any accidents while wearing the swimsuit.
- Crochet Motifs: Consider adding crochet motifs, such as flowers or stars, as embellishments on your swimsuit. These motifs can be strategically placed to enhance the design and provide a personalized touch. Experiment with different motif sizes and colors to create a visually striking effect.
- Embroidery: Add intricate embroidery designs to your swimsuit for a unique and artistic touch. Embroider floral motifs, geometric patterns, or even your initials onto the fabric. Use embroidery floss or yarn in complementary or contrasting colors to make the embroidered details stand out.
Remember to consider the practicality of any additional embellishments or finishing touches. Ensure they won’t interfere with the functionality or fit of the swimsuit, especially when it comes to comfort and ease of movement. By adding these finishing touches and embellishments, your crocheted swimsuit will truly reflect your personal style and make a statement when worn.
Once you are satisfied with the finishing touches, it’s time to move on to blocking and sizing your crocheted swimsuit to ensure it maintains its shape and fits you perfectly.
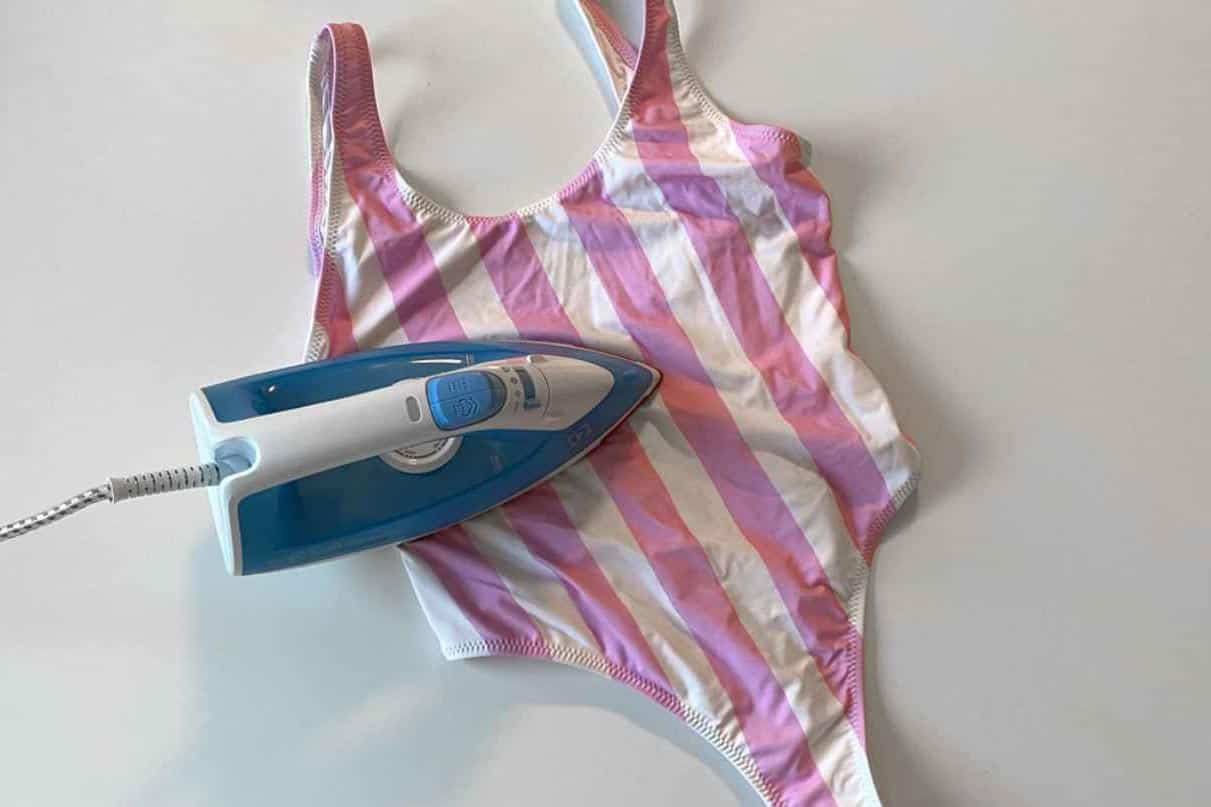
Blocking and Sizing the Swimsuit
Blocking and sizing are essential steps to ensure that your crocheted swimsuit maintains its shape and fits you perfectly. Blocking helps to even out and relax the stitches, while sizing ensures that the final product matches your intended measurements. Here’s a guide on how to block and size your crocheted swimsuit:
- Prepare for blocking: Fill a basin or sink with lukewarm water and add a gentle fabric wash or conditioner. Submerge your crocheted swimsuit in the water and gently squeeze it to ensure it is fully soaked.
- Blocking method: There are several ways to block your swimsuit. For a flat surface, lay a clean towel or blocking mat on a flat surface and pin your swimsuit into shape using rust-proof pins. Alternatively, you can use T-pins to secure the garment to a blocking board or foam mats.
- Shape the swimsuit: While blocking, gently stretch and shape the crocheted fabric to match your desired measurements and shape. Pay attention to areas that require more adjustment, such as the cups, waistband, or leg openings. Ensure that the stitches are stretched evenly and maintain their integrity.
- Dry the swimsuit: Leave your blocked swimsuit in a well-ventilated area to air dry completely. Avoid direct sunlight or sources of heat, as this can damage the yarn. Once dry, check that the garment is firm and maintains the intended shape.
- Size adjustments: If after blocking, the swimsuit still doesn’t fit as desired, you may need to make additional size adjustments. This can be done by adding or removing stitches in certain areas or adjusting the strap lengths. Consult your pattern for guidance on making size modifications.
- Try on and make final adjustments: Once your swimsuit is dry and the sizing is adjusted, try it on to ensure the fit is perfect. Take note of any areas that may need further tweaking or modifications. Make any necessary changes to ensure a comfortable and flattering fit.
Blocking and sizing are crucial steps to ensure that your crocheted swimsuit looks and fits as intended. By following these steps, you can achieve a professional and customized result that enhances your comfort and confidence when wearing the swimsuit.
With the blocking and sizing complete, you’re ready to dive into the final section—tips for wearing and caring for your crocheted swimsuit.
Tips for Wearing and Caring for Crocheted Swimsuits
Once you’ve completed your crocheted swimsuit, it’s important to know how to properly wear and care for it to ensure its longevity and continued beauty. Here are some tips to keep in mind:
- Rinse after each use: After wearing your crocheted swimsuit, rinse it well with cool water to remove any chlorine, saltwater, or sunscreen residue. Gently squeeze excess water out, but avoid wringing or twisting the fabric, as this can damage the stitches.
- Hand wash gently: Hand washing is the best method to maintain the quality and shape of your crocheted swimsuit. Use a mild detergent or gentle soap specifically formulated for delicate garments. Avoid using bleach or harsh chemicals that can damage the yarn fibers.
- Pat dry with a towel: After hand washing, gently pat your swimsuit with a clean towel to remove excess water. Avoid rubbing or wringing the fabric, as this can distort the stitches and shape of the swimsuit.
- Avoid excessive stretching: While wearing your crocheted swimsuit, be mindful of not stretching it excessively. Avoid excessive tugging or pulling on the fabric, as this can stretch out the stitches and cause the swimsuit to lose its shape and fit.
- Avoid rough surfaces: Be cautious of sitting or lounging on rough surfaces, as they can snag or damage the delicate stitches of your swimsuit. Always use a towel or beach mat to protect the fabric.
- Store carefully: When not in use, store your crocheted swimsuit in a clean and dry place. It’s best to fold it and place it in a drawer or storage box to avoid stretching or snagging from hangers or other garments.
- Handle with care: Treat your crocheted swimsuit with care, just like any other delicate garment. Avoid sharp objects, jewelry, or rough handling that can cause snags or tears in the fabric.
- Protection from chemicals: Be cautious when using sunscreen or tanning lotions, as some of these products may contain chemicals that can potentially discolor or damage the yarn. Allow sufficient time for the lotions to absorb before putting on your swimsuit.
- Regularly check for damage: Inspect your crocheted swimsuit regularly for any signs of damage, loose threads, or stretched stitches. Repair any issues promptly to prevent further damage and maintain the overall quality of the swimsuit.
- Rotate your swimsuits: If you’ve made multiple crocheted swimsuits, it’s a good idea to rotate them throughout the season. This allows each swimsuit to have some downtime and helps prolong their lifespan.
By following these tips, you’ll not only keep your crocheted swimsuit looking its best but also ensure that it fits well and lasts for many swim seasons to come. With proper care and attention, your crocheted swimsuit will be ready to make a stylish splash whenever you hit the beach or pool!
Conclusion
Crocheting a swimsuit can be a rewarding and creative project that allows you to showcase your style and craftsmanship. From selecting the right yarn and hook to adding finishing touches and embellishments, there are a multitude of decisions and techniques involved in creating a crocheted swimsuit. Throughout this article, we have explored the various aspects of crocheting a swimsuit, including getting started with crochet, selecting the appropriate yarn and hook, choosing a pattern, mastering essential crochet stitches, and crocheting the swimsuit top and bottom.
We have also discussed the importance of adding straps or ties and the impact of finishing touches and embellishments. Moreover, we have highlighted the significance of blocking and sizing to ensure a perfect fit and provided tips for wearing and caring for your crocheted swimsuit to maintain its beauty and longevity.
Remember, crocheting a swimsuit requires practice, patience, and a bit of creativity. Don’t be afraid to experiment with different stitch patterns, colors, and designs to make your swimsuit truly unique. Embrace the learning process, and don’t get discouraged if your first attempt isn’t flawless – with each project, you’ll improve your crochet skills and gain more confidence.
Now that you have a comprehensive understanding of crocheting a swimsuit, it’s time to grab your crochet hook, select your favorite pattern, and embark on this exciting journey. Enjoy the process of crafting your own stylish and personalized swimsuit that will make a statement and turn heads wherever you go. Stay inspired, keep crocheting, and have a fun-filled summer with your handmade creation!