Home>How-to Guides>For Women>How To Sew Your Own Swimsuit

For Women
How To Sew Your Own Swimsuit
Modified: August 6, 2023
Learn how to sew your own swimsuit for women with our step-by-step guide. Create a unique and personalized swimsuit that flatters your body shape and style.
(Many of the links in this article redirect to a specific reviewed product. Your purchase of these products through affiliate links helps to generate commission for Under-tec.com, at no extra cost. Learn more)
Table of Contents
Introduction
Swimsuits are a staple in every woman’s wardrobe, offering both style and functionality. While there are countless options available in stores, there is something special about sewing your own swimsuit. Not only does it give you the opportunity to create a custom-fit piece that flatters your body, but it also allows you to unleash your creativity and design a unique swimsuit that reflects your personal style.
Whether you’re a novice or an experienced sewist, creating your own swimsuit can be a rewarding and fun project. It can seem intimidating at first, but with the right knowledge and resources, you can achieve stunning results. This article will guide you through the step-by-step process of sewing your own swimsuit, from choosing the fabric to adding the finishing touches.
By sewing your own swimsuit, you have full control over the fabric selection. You can choose from a variety of options, such as nylon spandex, Lycra, or even eco-friendly fabrics made from recycled materials. Consider factors like stretch, durability, and colorfastness when selecting the fabric to ensure it meets your desired aesthetic and performance needs.
Accurate measurements are crucial for a well-fitting swimsuit. Taking your measurements correctly will ensure that your swimsuit hugs your curves in all the right places and provides the desired level of comfort. Use a flexible tape measure to measure your bust, waist, hips, and torso length, following a reliable measurement guide to ensure precision.
Once you have your measurements, the next step is to draft the pattern. The pattern serves as the blueprint for your swimsuit. You can either purchase a commercial pattern or create your own using basic pattern-making techniques. This allows you to customize the design, whether you prefer a classic one-piece or a trendy bikini.
Now it’s time to cut the fabric. Lay out your fabric on a clean, flat surface and pin your pattern pieces, making sure to follow the grainline direction as indicated on the pattern. Double-check your measurements before cutting to avoid any errors that could affect the fit of your swimsuit.
With your fabric pieces ready, it’s time to sew the seams. Depending on your pattern, you will encounter different types of seams, such as straight, zigzag, or French seams. Follow the instructions provided with your pattern or consult online tutorials for tips on sewing each type of seam correctly.
Elastic is an essential component of a swimsuit as it provides structure and support. Sewing elastic into the leg openings, waistband, and neckline will help your swimsuit retain its shape and stay in place. Make sure to use the appropriate elastic width and tension for each area to ensure a comfortable and secure fit.
Straps or ties add both functionality and style to your swimsuit. Whether you choose adjustable straps, halter ties, or a combination of both, attaching them securely is important. Take your time to carefully sew on the straps or ties, ensuring they are evenly placed and properly reinforced.
Finally, it’s time for the finishing touches. This includes trimming any excess fabric, securing loose threads, and giving your swimsuit a final press. Take pride in your creation and pack your newly sewn swimsuit for your next beach getaway.
Now that you understand the basics of sewing your own swimsuit, it’s time to dive into each step in more detail. Grab your sewing machine, stock up on supplies, and get ready to embark on a sewing adventure that will result in a swimsuit you can proudly call your own.
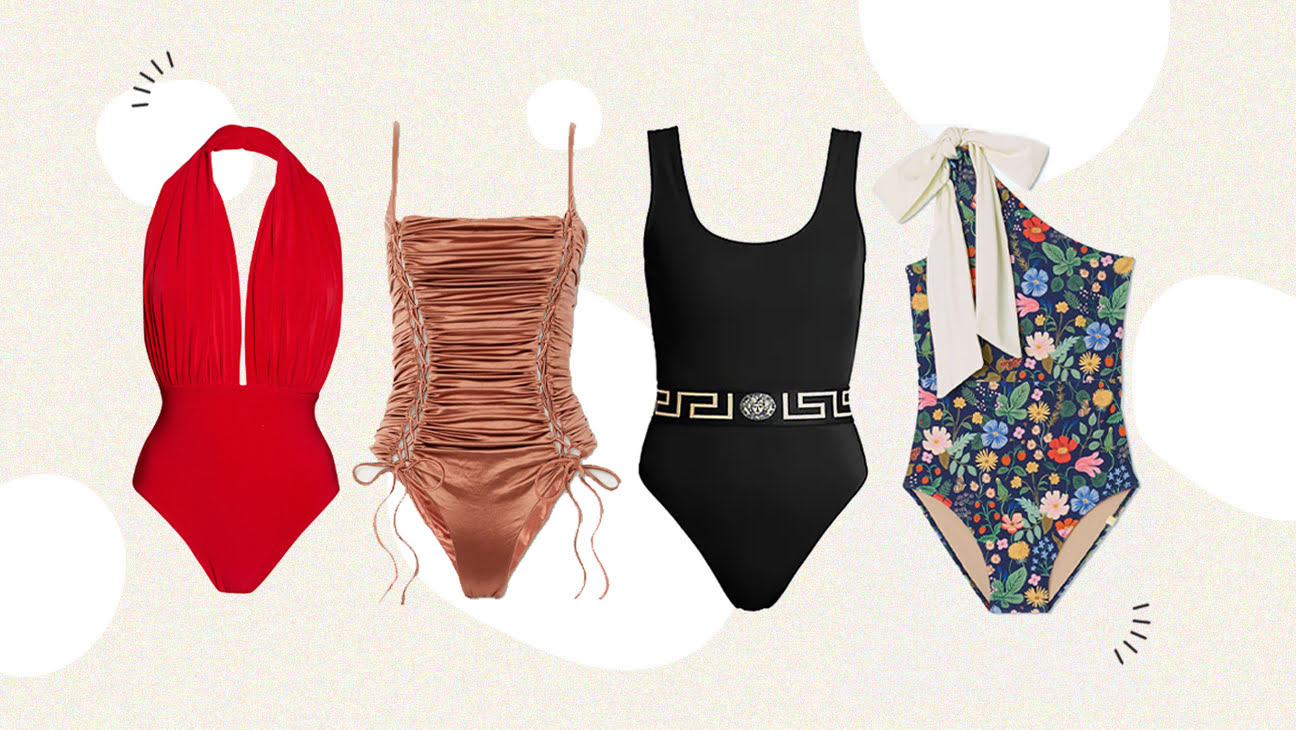
Choosing the Right Fabric
When it comes to sewing your own swimsuit, choosing the right fabric is crucial. The fabric you select will not only impact the overall look and feel of the swimsuit but also its durability and performance in the water. Here are some key factors to consider when choosing the fabric for your swimsuit:
1. Stretch: Swimsuit fabric needs to have a good amount of stretch to ensure a comfortable and snug fit. Look for fabrics that contain a high percentage of spandex or Lycra, as these materials provide excellent stretch and recovery.
2. Durability: Since swimsuits are exposed to water, chlorine, and sun, it’s important to choose a fabric that is resistant to fading, stretching, and pilling. Fabrics with a good quality nylon base are known to be durable and long-lasting.
3. Colorfastness: No one wants their vibrant swimsuit to lose its color after a few trips to the pool. Make sure to select a fabric that is colorfast and can withstand frequent exposure to chlorine and sunlight without fading.
4. Quick-drying: Swimsuits are meant to be worn in water, so it’s important to choose a fabric that dries quickly. Look for fabrics that have moisture-wicking properties or are specifically designed for swimwear.
5. UV protection: Protecting your skin from harmful UV rays is essential when spending time under the sun. Some swimsuit fabrics come with built-in UV protection, which is an added bonus to consider when selecting your fabric.
6. Style: Consider the style and design of the swimsuit you want to create. Certain fabrics lend themselves better to specific styles. For example, if you’re making a one-piece swimsuit, a thicker and more supportive fabric may be preferred, while a lighter, drapier fabric may work well for a flowy beach cover-up.
7. Personal preference: Lastly, trust your instincts and go with a fabric that you love. Whether you’re drawn to bold prints, vibrant solids, or subtle textures, choosing a fabric that reflects your personal style will make the sewing experience even more enjoyable.
To find the perfect fabric for your swimsuit, visit local fabric stores or explore online fabric shops that specialize in swimwear materials. Many online retailers offer fabric swatches that you can order to feel the fabric’s stretch, texture, and color in person before making your decision.
Now that you have a better understanding of what to look for in swimwear fabric, you can confidently choose a fabric that not only meets your aesthetic preferences but also ensures a comfortable and long-lasting swimsuit.
Taking Accurate Measurements
Before you dive into sewing your own swimsuit, it’s crucial to take accurate measurements. A well-fitting swimsuit will not only enhance your comfort but also flatter your body shape. Here are the steps to ensure accurate measurements:
- Use a flexible tape measure: To take precise measurements, use a flexible tape measure that can easily wrap around your body. Avoid using a rigid ruler or measuring tape, as it may distort the measurements.
- Bust: Measure around the fullest part of your bust, making sure the tape measure is level all the way around. Keep your arms relaxed at your sides and breathe normally.
- Waist: Find the narrowest part of your waist, usually a few inches above your belly button. Wrap the tape measure around your waist, ensuring it is snug but not too tight. Avoid sucking in your stomach or holding your breath, as this will result in an inaccurate measurement.
- Hips: Measure around the fullest part of your hips and buttocks. This will typically be around 7-9 inches below your waist. Make sure the tape measure is parallel to the ground and not sagging or digging into your skin.
- Torso length: This measurement is essential for one-piece swimsuits or tankinis. Start from the top of your shoulder, run the tape measure down the front of your body, following the contour of your bust, waist, and hips, and end at the desired length of the swimsuit. Ensure the tape measure is taut but not pulling or digging into your skin.
Keep in mind that getting accurate measurements may require the assistance of a friend or family member. They can help ensure that the tape measure is level and straight, resulting in precise measurements.
It’s also worth noting that not all measurements will be the same as the standard ready-to-wear sizes. Bodies come in different shapes and proportions, and customizing your swimsuit based on your measurements will provide the best fit.
Once you have your measurements, record them accurately and refer back to them when selecting a pattern size or making alterations. Comparing your measurements to the pattern’s size chart will help you choose the correct pattern size or make any necessary adjustments to achieve the desired fit.
Remember, taking accurate measurements is the foundation for sewing a well-fitted swimsuit. Taking the time to measure correctly will ensure that your final creation hugs your curves in all the right places and allows you to feel confident and comfortable when wearing your handmade swimwear.
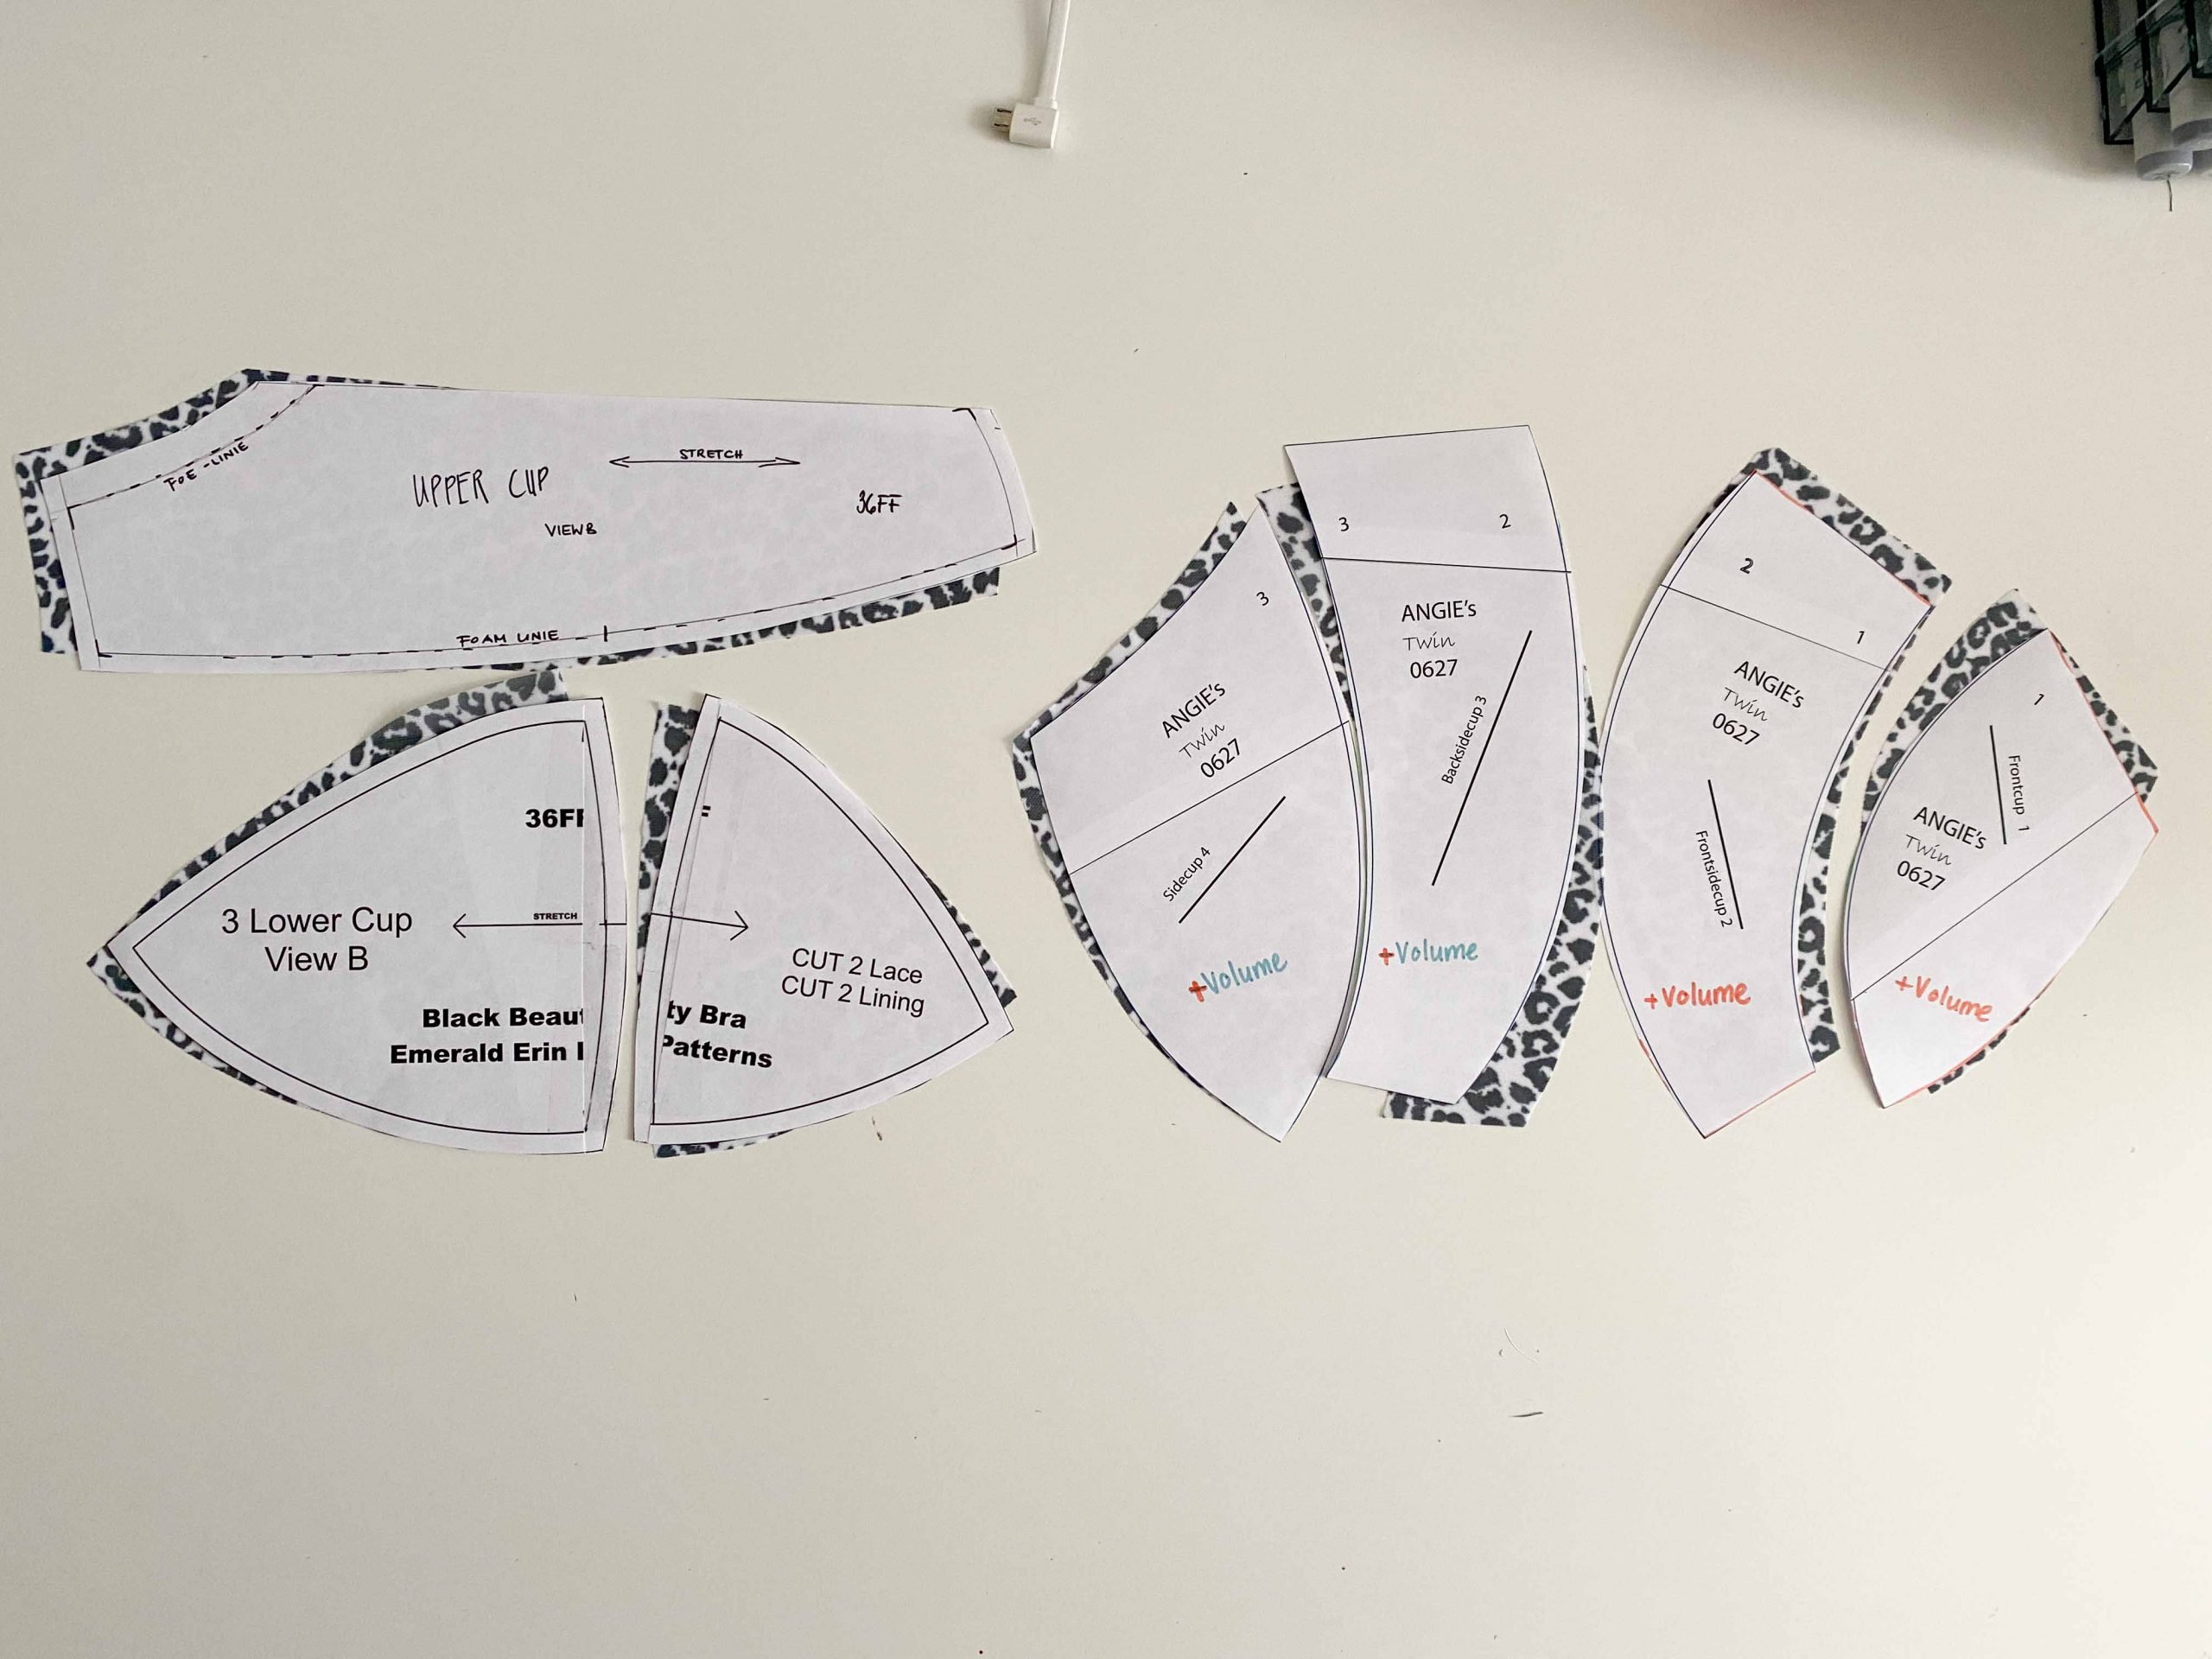
Drafting the Pattern
Once you have your measurements in hand, the next step in sewing your own swimsuit is to draft the pattern. This process involves creating a blueprint that will guide you in cutting the fabric and sewing the swimsuit. Here’s how to draft the pattern for your custom-fit swimsuit:
- Select a pattern style: Decide on the style of swimsuit you want to create. Whether it’s a classic one-piece, a trendy bikini, or a stylish tankini, choose a pattern that matches your desired design.
- Choose a pattern-making method: There are two primary options for pattern-making – using a commercial pattern or creating your own. Commercial patterns are widely available and come with pre-drafted pattern pieces and instructions. If you want more control and creativity, you can draft your own pattern using basic pattern-making techniques or by tracing an existing swimsuit that fits you well.
- Take accurate pattern measurements: Measure the pattern’s key points, such as the bust, waist, hips, and torso length. Compare these measurements to your own, and adjust the pattern if needed. Remember to account for seam allowances and any pattern-specific allowances or recommended alterations.
- Trace and modify the pattern: Using tracing paper or pattern drafting paper, trace the pattern pieces onto the paper, making sure to transfer all markings and notches. Take this opportunity to make any modifications or adjustments based on your personal measurements or design preferences. For example, you can add or reduce length, width, or gatherings according to your desired fit.
- Label and organize the pattern pieces: Once you have modified the pattern, label each piece with its corresponding name (e.g., front bodice, back bodice) and any specific information needed for construction (e.g., grainline, notches, seam allowances). Organize the pattern pieces neatly to avoid confusion during the sewing process.
When drafting your own pattern, it’s helpful to refer to online resources, pattern-making books, or tutorials for guidance. They can provide step-by-step instructions on customizing and altering pattern pieces, as well as tips on achieving the desired style and fit.
Keep in mind that drafting the pattern may require multiple iterations and adjustments before you achieve the perfect fit. Be patient and take your time to ensure the pattern aligns with your body measurements and design goals.
By drafting your own pattern, you have the freedom to create a swimsuit that truly reflects your style, personality, and body shape. It allows you to unleash your creativity and experiment with different design elements, such as necklines, cutouts, or embellishments.
Once you have your pattern finalized, it’s time to move on to the next step – cutting the fabric.
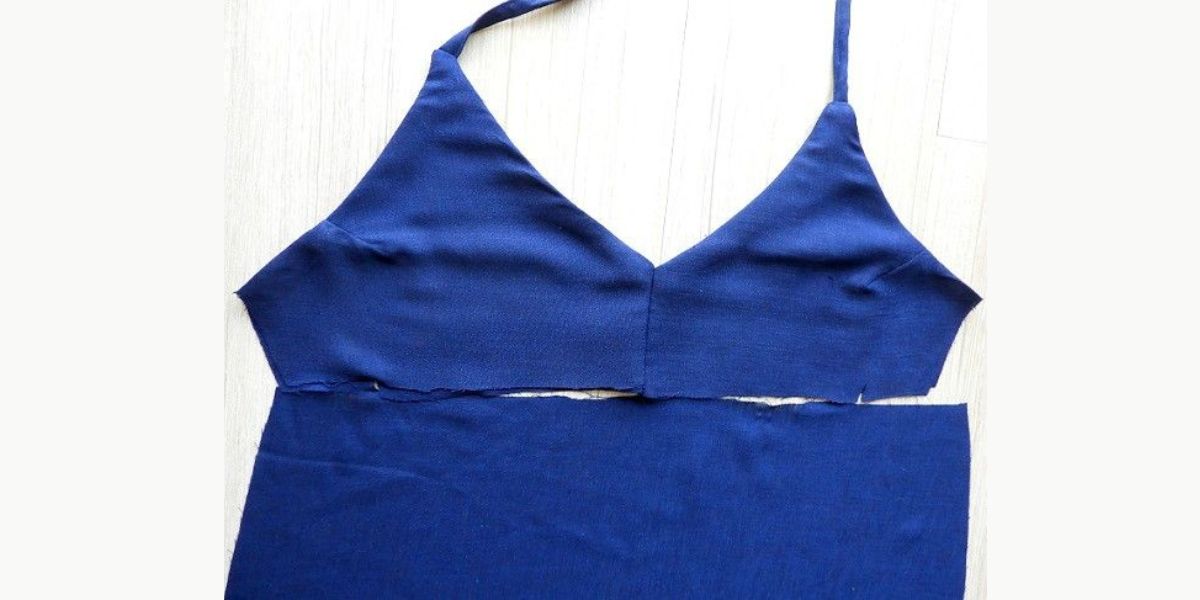
Cutting the Fabric
With your pattern ready, it’s time to move on to the next exciting step in sewing your own swimsuit – cutting the fabric. Precise cutting is essential to ensure accurate and clean edges, which will ultimately contribute to a well-constructed and professional-looking swimsuit. Here’s how to cut the fabric for your custom-made swimwear:
- Gather your supplies: Prepare all the necessary tools for cutting, including fabric shears or a rotary cutter, a self-healing mat or cutting table, pattern weights or pins, and marking tools (such as chalk or fabric markers).
- Prepare the fabric: Before cutting the fabric, make sure it is clean, unwrinkled, and properly folded. If necessary, give it a gentle press with a warm iron to remove any creases or wrinkles that may interfere with accurate cutting.
- Pin or weight the pattern: Lay your fabric flat on the cutting surface and pin or use pattern weights to secure the pattern pieces onto the fabric. Make sure the pattern is aligned with the grainline and any directional prints or motifs are in the desired position.
- Double-check the measurements: Before cutting, review the pattern instructions and double-check the measurements to ensure accuracy. Take your time to ensure that you are cutting the correct size for each pattern piece.
- Start cutting: Using sharp fabric shears or a rotary cutter, carefully cut along the marked lines of the pattern pieces. Take your time and follow the curves and angles of the pattern to achieve clean and accurate cuts. Remember to cut notches and markings as instructed by the pattern.
- Label and organize the fabric pieces: As you cut each fabric piece, label it with a fabric marker or attaching removable sticky notes. This will help you stay organized and easily identify each piece during the sewing process.
- Handle stretch fabrics with care: If you’re working with stretchy fabrics like spandex or Lycra, be mindful of their tendency to shift and stretch during cutting. Use pattern weights, pins, or even basting stitches to minimize distortion and ensure accurate cuts.
- Trim excess fabric: After cutting all the pieces, take the time to trim any excess fabric, especially from seam allowances. This will reduce bulk and make it easier to sew the seams correctly.
It’s important to note that each pattern may have specific cutting instructions, such as cutting certain pieces on the fold or cutting multiple layers of fabric simultaneously. Carefully read and follow the pattern instructions to ensure you are cutting the fabric correctly.
Remember, precision is key when cutting the fabric. Take your time, use the appropriate tools, and pay attention to details to achieve clean, accurate cuts that will result in a polished and professional-looking swimsuit.
Now that your fabric pieces are ready, it’s time to move on to the exciting part – sewing the seams and bringing your swimsuit to life!
Sewing the Seams
Now that you have all your fabric pieces cut and organized, it’s time to start sewing the seams of your swimsuit. Sewing the seams is where your swimsuit begins to take shape, and it’s essential to take your time and sew accurately for a high-quality finished product. Here’s a step-by-step guide to sewing the seams of your custom-made swimwear:
- Prepare your sewing machine: Set up your sewing machine with a stretch or zigzag stitch, as these stitches allow the fabric to stretch without breaking the threads. Use a ballpoint or stretch needle to prevent damaging the fabric while sewing.
- Pin or baste the pieces together: Pin or use basting stitches to temporarily secure the fabric pieces together at the seam allowance. This will ensure the fabric stays in place while you sew, preventing any shifting or misalignment.
- Align the edges and begin sewing: Align the edges of the fabric pieces with the right sides facing each other. Start sewing the seam, beginning with a backstitch to secure the thread. Sew slowly and follow the seam allowance indicated by the pattern, keeping the stitching line consistent and straight.
- Finish the seams: Once the seam is sewn, finish the raw edges to prevent fraying. You can use techniques like serging, zigzag stitching, or using an overlock stitch on your sewing machine. Alternatively, you can enclose the raw edges by sewing French seams or using binding tape.
- Press the seams: After finishing the seams, press them with an iron. Pressing helps set the stitches and gives the seams a professional finish. Use a low heat setting and press from the wrong side of the fabric or use a pressing cloth to protect delicate fabrics.
- Repeat for all seams: Continue sewing and finishing the remaining seams of your swimsuit, following the pattern instructions. Take your time and be mindful of any curves, corners, or detailed areas that require extra attention.
When sewing swimwear, it’s crucial to sew accurately and securely, as your swimsuit will be subjected to stretch and movement when worn. Always backstitch at the beginning and end of each seam to reinforce the stitches and prevent them from unraveling.
During the sewing process, don’t hesitate to consult online tutorials, sewing forums, or pattern instructions for additional guidance. These resources can provide helpful tips, techniques, and troubleshooting advice specific to sewing swimwear.
As you sew the seams, take the time to check the fit of your swimsuit and make any necessary adjustments. It’s easier to make alterations before attaching additional components like elastic or adding finishing touches.
Remember, sewing the seams is an important stage in creating your swimsuit. Take your time, sew with precision, and enjoy the process as you bring your custom-made swimwear to life.
Adding Elastic
One of the critical elements in sewing a well-fitting and comfortable swimsuit is adding elastic. Elastic helps to provide shape, support, and secure fit to your swimwear. Whether it’s the leg openings, waistband, or neckline, adding elastic correctly will ensure your swimsuit stays in place while offering the necessary flexibility and stretch. Here’s how to add elastic to your custom-made swimwear:
- Select the right type of elastic: Choose a high-quality, swimwear-specific elastic that is designed to withstand chlorine, saltwater, and exposure to UV rays. Look for elastic that has good recovery and retains its stretch even after repeated wear.
- Determine the length of elastic needed: Measure the areas where elastic is required, such as the leg openings, waistband, or neckline. Use a measuring tape and add a small amount for overlap and seam allowances.
- Prepare the elastic: If needed, pre-shrink the elastic by soaking it in lukewarm water and allowing it to air dry before sewing. This step prevents the elastic from shrinking further after it’s sewn into your swimsuit.
- Attach the elastic: Align the edge of the elastic with the edge of the fabric. Depending on the pattern and design, you may need to stretch the elastic slightly as you sew it onto the fabric. Use a stretch or zigzag stitch and sew the elastic in place, making sure to catch both the fabric and the elastic in your stitches.
- Secure the elastic ends: It’s important to secure the ends of the elastic to prevent it from unraveling over time. You can overlap the ends and sew them together in a secure seam, or create a loop and sew it securely to the fabric.
- Finish the elastic: To give your swimsuit a professional finish, cover the elastic edges with a fabric binding tape. This not only provides a clean look but also adds durability to the finished garment.
- Press and check the fit: After sewing the elastic, press the seams and check the fit of your swimsuit. The elastic should provide a secure yet comfortable fit. If needed, make any necessary adjustments at this stage before proceeding with the final steps.
It’s important to note that different areas of your swimsuit may require different widths and tensions of elastic. For example, the leg openings may require firmer elastic to prevent riding up, while the waistband and neckline may require softer elastic to ensure comfort and flexibility.
As you work with elastic, stretch it slightly as you sew to prevent it from buckling or causing gathering in the fabric. Take your time and sew with care, being mindful of any curves or corners where extra attention is needed.
If you’re new to sewing elastic, practice on scrap fabric or make a test sample before attaching it to your swimsuit. This will allow you to become familiar with the process and make any necessary adjustments without compromising your final garment.
By adding elastic correctly, you’ll achieve a swimsuit that fits securely, stays in place, and offers the freedom of movement necessary for a comfortable swim. Take your time and enjoy the process of giving your swimwear the finishing touch it deserves.
Attaching Straps or Ties
The addition of straps or ties to your swimsuit not only enhances its functionality but also adds a touch of style and customization. Whether you prefer adjustable straps, halter ties, or a combination of both, attaching them securely is crucial for a well-fitting and comfortable swimwear. Here’s a step-by-step guide on how to attach straps or ties to your custom-made swimsuit:
- Choose the style and length: Decide on the style of straps or ties that best suits your design and comfort preferences. Consider factors such as adjustability, support, and aesthetic appeal. Measure and cut the straps or ties to the desired length, allowing for seam allowances and any adjustments.
- Prepare the straps or ties: Fold the fabric for the straps or ties in half lengthwise with the right sides facing each other. Pin or clip along the long edge to secure them in place for sewing.
- Sew the long edge: Using a straight stitch or a narrow zigzag stitch, sew along the long edge of the fabric, leaving the ends open. If desired, you can reinforce the stitching by sewing over it a second time or using a wider zigzag for added durability.
- Turn the straps or ties right side out: Carefully turn the fabric right side out by gently pulling the fabric through the open ends. Use a turning tool or a blunt object, such as a chopstick, to push out the corners and create clean edges.
- Press the straps or ties: Use an iron on a low heat setting to press the straps or ties, ensuring they lie flat and have a professional finish. Take care not to use too much heat, as it may damage delicate fabrics.
- Attach the straps or ties: Follow the pattern instructions to determine the correct placement of the straps or ties on your swimsuit. Pin or use clips to temporarily secure them in place, ensuring they are evenly spaced and aligned. Use a stretch or zigzag stitch to attach them securely, making sure to catch both the straps or ties and the fabric.
- Reinforce the attachment: To ensure the straps or ties are securely attached, sew over the attachment points multiple times or create a box stitch for added reinforcement. This will provide the necessary strength to withstand the stress of wear and movement.
- Test the fit and adjust if necessary: Once the straps or ties are attached, try on your swimsuit and check the fit. Adjust the straps or ties if needed to achieve the desired level of comfort and support. Make any necessary modifications at this stage before proceeding further.
Attaching straps or ties can transform the look and functionality of your swimsuit, allowing you to customize it to your liking. The possibilities are endless – from crisscross back straps to decorative bow ties – choose a style that complements your design and personal style.
Take your time and sew with precision, ensuring the straps or ties are securely attached to withstand the movements and stresses of swimwear. This will result in a swimsuit that not only fits well but also exudes confidence and style.
Now that your swimsuit is taking shape with the addition of straps or ties, you’re ready to move on to the final steps – adding the finishing touches.
Finishing Touches
As you near the completion of your custom-made swimsuit, it’s time to add the finishing touches that will elevate the overall look and functionality. These final details will give your swimwear a polished and professional appearance. Here are some essential finishing touches to consider:
- Trimming and neatening: Take a moment to trim any excess fabric or thread ends from your swimsuit. This will create a clean and tidy finish, enhancing the overall appearance of your garment.
- Securing loose threads: Carefully check your swimsuit for any loose threads and secure them with a few small stitches or use a fabric adhesive, such as Fray Check. This step ensures that your swimsuit maintains its structural integrity, preventing any unraveled seams or hems.
- Adding lining: If desired, you can add a lining to your swimsuit for added comfort and support. A lining can help prevent transparency, add stability to the fabric, and promote a smoother fit. Follow the pattern instructions or online tutorials to properly attach the lining to your swimwear.
- Embellishments: Consider adding embellishments to your swimsuit to personalize and enhance its visual appeal. Options include decorative stitching, appliques, beads, or sequins. Be mindful of the water resistance and durability of the chosen embellishments, ensuring they can withstand the rigors of swimwear.
- Final fitting and adjustments: Before declaring your swimsuit complete, try it on and assess the fit and comfort. Make any necessary adjustments to straps, elastic, or any other element that may affect the fit. Taking the time to fine-tune the fit ensures you have a swimsuit that flatters and supports your body.
- Cleaning and care instructions: To ensure longevity, provide care instructions for your swimsuit. This may include advice on cleaning, drying, and storage. Providing proper care guidelines will help your swimsuit maintain its color, shape, and durability for many swimsuit seasons to come.
Remember, the finishing touches are the final steps in creating a swimsuit that showcases your craftsmanship and attention to detail. These small but significant details can transform your handmade swimwear into a stylish and functional piece that you’ll feel confident wearing.
Once you’ve added the finishing touches, take a moment to appreciate your hard work and dedication. You’ve successfully sewn your own swimsuit, tailored to your unique measurements and style preferences.
Now it’s time to pack your new swimsuit, head to the beach or pool, and enjoy the fruits of your labor. Embrace the pride and satisfaction that comes with wearing a swimsuit you’ve created with your own hands.
Conclusion
Congratulations on successfully sewing your own swimsuit! Through the process of choosing the right fabric, taking accurate measurements, drafting the pattern, cutting the fabric, sewing the seams, adding elastic, attaching the straps or ties, and adding the finishing touches, you have created a one-of-a-kind swimwear piece that fits your body perfectly and reflects your personal style.
Sewing your own swimsuit allows you to unleash your creativity, tailor the fit to your unique measurements, and customize the design to your liking. It’s a rewarding and fulfilling experience that not only results in a beautiful swimsuit but also offers a sense of accomplishment and empowerment.
Throughout this journey, you have learned valuable skills such as fabric selection, pattern drafting, and garment construction techniques specific to swimwear. These skills can be applied to future sewing projects, expanding your sewing repertoire and giving you the confidence to explore new ideas and designs.
Remember to embrace any challenges you encountered along the way as opportunities to learn and grow as a sewist. Mistakes and setbacks are a natural part of the creative process, and they often lead to unexpected discoveries and improvements in your sewing skills.
Now, as you head to the beach or pool in your handmade swimsuit, enjoy the attention and compliments that come with wearing a unique and perfectly-fitted garment. Be proud of your accomplishment and inspire others to embark on their own sewing adventures.
Lastly, don’t forget to take proper care of your swimsuit, following the cleaning and care instructions. By taking care of your handmade creation, you can continue to enjoy it for many swim seasons to come.
Thank you for joining us on this sewing journey, and we hope this guide has empowered you to continue exploring your creativity and sewing skills. Happy swimming and happy sewing!