Home>How-to Guides>For Women>How To Sew A Spaghetti Strap Tank Top
For Women
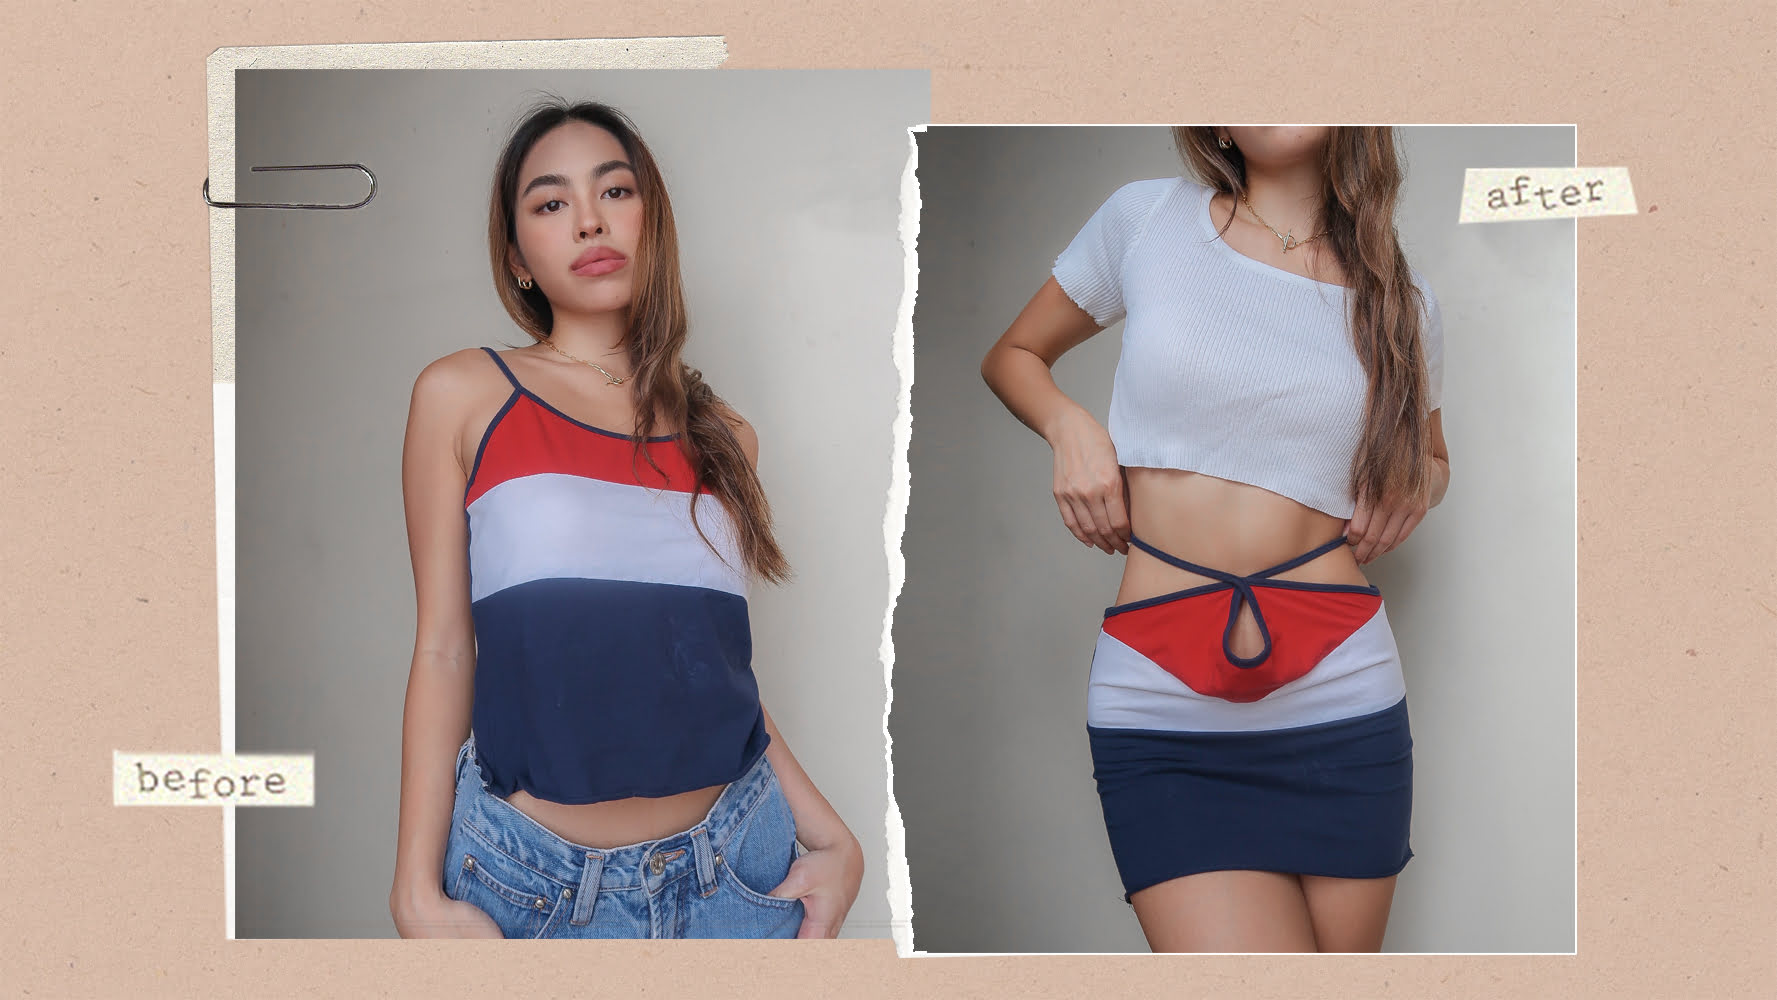
How To Sew A Spaghetti Strap Tank Top
Modified: September 23, 2023
Learn how to sew a stylish spaghetti strap tank top for women with our easy-to-follow tutorial. Create your own fashion statement with this versatile and trendy piece.
(Many of the links in this article redirect to a specific reviewed product. Your purchase of these products through affiliate links helps to generate commission for Under-tec.com, at no extra cost. Learn more)
Table of Contents
Introduction
Welcome to the wonderful world of sewing! If you’re looking for a fun and stylish project to try, look no further than sewing your own spaghetti strap tank top. Not only is it a great way to exercise your creativity, but it also allows you to have a custom-fit garment that perfectly suits your style.
Sewing your own clothes can be a rewarding experience, and the spaghetti strap tank top is a versatile piece that can be worn in all seasons. Whether you want to dress it up with a skirt and heels or dress it down with a pair of jeans and sneakers, this wardrobe staple is sure to become a favorite.
In this article, we will guide you through the process of sewing a spaghetti strap tank top. No matter your skill level, this project is achievable and enjoyable. We will cover everything from selecting materials, preparing the pattern, cutting the fabric, sewing the side seams, sewing the straps, hemming the bottom, and adding those finishing touches that will make your tank top truly special.
So roll up your sleeves, grab your sewing machine, and let’s get started on creating a fabulous spaghetti strap tank top that will have heads turning and compliments flowing.
Materials Needed
Before diving into the sewing process, let’s gather all the materials you will need to create your spaghetti strap tank top. Having everything prepared beforehand will make the sewing process smoother and more enjoyable. Here are the materials you will need:
- Fabric: Choose a lightweight and breathable fabric such as cotton or linen. The amount of fabric required will depend on your size and preferred length, so make sure to measure yourself and consult a pattern or size chart.
- Matching thread: Select a thread color that complements your fabric choice.
- Elastic: You will need a thin and flexible elastic band for the straps. Measure the circumference of your shoulders to determine the length required.
- Scissors: A good pair of fabric scissors is essential for cutting the fabric accurately.
- Sewing pins: These will help hold the fabric pieces together during the sewing process.
- Sewing machine: While it is possible to sew the tank top by hand, using a sewing machine will ensure a more professional finish and save you time.
- Iron: An iron will be used to press and flatten the fabric, ensuring clean seams and a polished look.
- Measuring tape: This will come in handy for taking your measurements and ensuring accurate cuts and constructions.
- Pattern or template: You can find a spaghetti strap tank top pattern online or create your own by tracing the outline of an existing tank top that fits you well.
- Fabric marking tool: This can be a fabric chalk or washable marker, which will help mark the fabric for cutting and sewing.
Ensure that you have all these materials ready before starting your project. Now that you have everything you need, let’s move on to preparing the pattern.
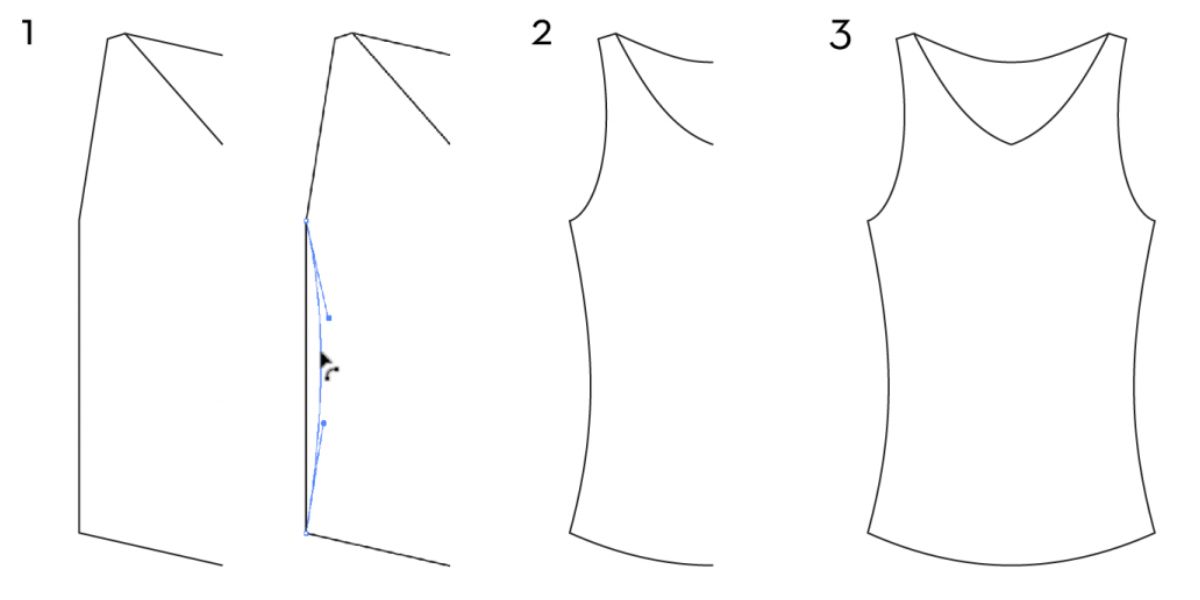
Preparing the Pattern
Now that you have gathered all the necessary materials, it’s time to prepare the pattern for your spaghetti strap tank top. If you already have a pattern, you can skip this step. However, if you don’t have a pattern, don’t worry! You can easily create one by tracing the outline of an existing tank top that fits you well. Here’s how:
- Lay your well-fitting tank top flat on a piece of pattern paper or any large paper that you can easily trace on.
- Carefully trace around the neckline, armholes, and side seams of the tank top. This will serve as the basic outline of your pattern.
- Add seam allowances to your traced outline. Typically, 1/2 inch to 5/8 inch is sufficient for seam allowances. Make sure to add seam allowances to all sides except for the neckline and armholes, as we will be adding elastic to these areas later.
- Label your pattern pieces to indicate the front and back pieces. This will prevent any confusion during the sewing process.
- Finally, cut out your pattern pieces along the outermost traced lines. Now you have your custom pattern for the spaghetti strap tank top!
Remember to double-check the accuracy of your pattern by comparing it to your original tank top or using your measurements as a guideline. Adjustments may be needed to ensure the perfect fit. It’s always better to be precise when it comes to pattern preparation to avoid any fitting issues later on.
With the pattern ready, let’s move on to the exciting part – cutting the fabric!
Cutting the Fabric
With your pattern in hand, it’s time to bring your spaghetti strap tank top to life by cutting the fabric. Follow these steps to ensure precise and accurate cuts:
- Prepare your fabric by laying it out on a clean, flat surface. Smooth out any wrinkles or folds to ensure an even cut.
- Place your pattern pieces on the fabric, making sure to align them according to the grainline. The grainline should run parallel to the selvage of the fabric to ensure optimal drape and fit.
- Secure the pattern pieces to the fabric using sewing pins. Make sure they are firmly in place, preventing any movement during cutting.
- Using sharp fabric scissors, carefully cut along the outer lines of your pattern pieces. Take your time and make clean cuts to ensure smooth edges.
- As you cut, be mindful of any markings or notches on the pattern pieces. These serve as guides for matching and aligning the fabric pieces during the sewing process.
- Repeat the cutting process for all the required fabric pieces, including the front and back pieces of the tank top.
It’s important to be precise and attentive when cutting the fabric. Accurate cuts will result in a well-fitted and professional-looking spaghetti strap tank top. Take your time, and if needed, seek assistance to ensure your cuts are flawless.
Once all the fabric pieces are cut, you are ready to move on to the next step – sewing the side seams.
Sewing the Side Seams
With your fabric pieces ready, it’s time to start sewing the side seams of your spaghetti strap tank top. This step will bring the front and back pieces together, creating the base structure of the top. Follow these simple steps to sew the side seams:
- Place the front and back pieces of the tank top with their right sides facing each other. Align the side seams and pin them together, ensuring that the edges match perfectly.
- Using a sewing machine and a straight stitch, sew a seam along the pinned edges of the side seams. Use the seam allowance specified in your pattern or a standard ⅜ inch (1 cm) seam allowance.
- Backstitch at the beginning and end of the seam to secure the stitches. This will prevent any unraveling later on.
- After sewing the side seams, press the seam allowances open with an iron. This will give a neater finish and make it easier to sew the straps and hem later.
Remember to take your time while sewing the side seams, ensuring that the stitches are straight and secure. If you’re using a lightweight fabric, consider finishing the raw edges with a zigzag stitch or overlocking to prevent fraying.
Once the side seams are sewn and pressed, you’ve completed the foundational structure of your spaghetti strap tank top. Now it’s time to move on to the next step – sewing the straps.
Sewing the Straps
Now that the side seams are sewn, it’s time to move on to sewing the straps of your spaghetti strap tank top. The straps not only provide support but also add a stylish element to the garment. Here’s how to sew the straps:
- Measure and cut two strips of fabric for your straps according to the desired length and width. Typically, a width of 1 inch (2.5 cm) works well for spaghetti straps.
- Fold each fabric strip in half lengthwise with the wrong sides facing each other. Press the folds with an iron to create a crease in the center.
- Open up the fabric strips and fold each long edge towards the center crease. Press them with an iron to create clean folds.
- Now, fold the fabric strips in half again along the original crease, enclosing the raw edges within. Press the folded strips with an iron once more.
- Secure the folded edges of each strap by topstitching close to the fold. This will prevent them from unraveling and give a professional finish.
- Position the straps on the front and back of the tank top, aligning them with the marked notches. Pin them in place, ensuring that they are evenly spaced and straight.
- Sew the straps to the tank top by stitching a straight line along the top edge of each strap. Make sure to backstitch at the beginning and end to secure the stitches.
When sewing the straps, it’s important to consider their length and adjust accordingly to ensure the best fit. You can always try on the tank top and make any necessary adjustments before sewing the straps in place.
With the straps sewn on, your spaghetti strap tank top is really starting to come together. The next step is to hem the bottom to give it a polished finish.
Hemming the Bottom
Now that the main structure of your spaghetti strap tank top is complete, it’s time to focus on hemming the bottom. Hemming will give your top a clean and professional look while preventing any fraying. Follow these steps to hem the bottom:
- Begin by trying on the tank top and determining your desired length. Mark the desired hemline with pins or fabric chalk.
- Measure and mark a seam allowance from the bottom edge of the tank top. A standard seam allowance of ½ inch (1.5 cm) works well for hemming.
- Fold the fabric along the marked seam allowance and press with an iron to create a crisp fold.
- Pin the folded hem in place, making sure it’s even and following the curve of the tank top.
- Using a sewing machine, stitch along the folded edge of the hem, removing the pins as you sew. Use a straight stitch or a narrow zigzag stitch for the best results.
- Backstitch at the beginning and end of the seam to secure the stitches.
It’s important to take your time while hemming to ensure even stitching and a smooth finish. If you prefer a more decorative hem, you can experiment with different stitch patterns or use a decorative edge foot on your sewing machine. Just make sure the hem is secure and well-finished.
With the bottom hemmed, your spaghetti strap tank top is almost complete. Just a few finishing touches, and you’ll be ready to show off your creation.
Finishing Touches
With the majority of the construction complete, it’s time to add those final finishing touches to your spaghetti strap tank top. These small details will elevate your garment, making it truly unique and ready to wear. Here are a few ideas to consider:
- Press the entire tank top once more with an iron. This will give it a polished and professional appearance.
- Trim any loose threads or excess fabric to ensure a clean and neat finish.
- Try on the tank top and make any necessary adjustments for a perfect fit. Take note of any areas that may require alterations, such as the straps or neckline.
- Consider adding embellishments like lace trim, decorative buttons, or embroidery to personalize your tank top and make it stand out.
- Experiment with different ways to style your tank top. Pair it with skirts, shorts, or jeans to create a variety of fashionable looks.
- Take the time to properly care for your new tank top by following the fabric’s washing and care instructions.
Remember, these finishing touches are an opportunity for you to unleash your creativity and add your personal touch to the garment. Have fun and experiment with different ideas to make your spaghetti strap tank top reflect your unique style!
Congratulations! You have now successfully sewn your very own spaghetti strap tank top. It’s time to put on your creation and flaunt your sewing skills with pride.
Conclusion
Creating your own spaghetti strap tank top can be a fulfilling and rewarding experience. Not only do you get to showcase your sewing skills, but you also have a unique garment that perfectly fits your style and preferences.
In this article, we have walked you through the process of sewing a spaghetti strap tank top, from gathering the necessary materials to adding those final finishing touches. We covered everything from preparing the pattern, cutting the fabric, sewing the side seams, attaching the straps, hemming the bottom, and adding personal embellishments.
Remember, the key to successful sewing is taking your time, being patient, and paying attention to detail. Don’t hesitate to make adjustments along the way to ensure the perfect fit and finish. And most importantly, have fun throughout the process!
Now that you have a beautifully crafted spaghetti strap tank top, you can enjoy the satisfaction of wearing your own creation. Mix and match it with different bottoms and accessories to create a variety of stylish looks for any occasion.
So, grab your sewing machine, unleash your creativity, and start sewing your own fabulous spaghetti strap tank top. Enjoy the process, embrace your unique style, and have fun making garments that reflect your personal flair. Happy sewing!