Home>How-to Guides>For Men>How To Cut A Shirt Into A Tank Top
For Men
How To Cut A Shirt Into A Tank Top
Modified: August 5, 2023
Learn how to transform a shirt into a stylish tank top for men. Step-by-step guide with easy instructions to create your own fashionable sleeveless top.
(Many of the links in this article redirect to a specific reviewed product. Your purchase of these products through affiliate links helps to generate commission for Under-tec.com, at no extra cost. Learn more)
Table of Contents
Introduction
Are you tired of your old t-shirts just sitting in your closet without ever being worn? Why not give them a new life by turning them into trendy tank tops? Not only is it a great way to upcycle your old clothing, but it can also save you money and give you a new addition to your summer wardrobe.
Cutting a shirt into a tank top is a simple and fun DIY project that anyone can do with a little bit of time and creativity. Whether you’re looking for a casual and relaxed look or something more stylish and edgy, transforming a shirt into a tank top allows you to customize your clothing to match your personal style.
In this article, we will guide you through the step-by-step process of cutting a shirt into a tank top. We’ll provide you with the materials you’ll need, as well as detailed instructions on how to properly cut and finish the edges of your shirt. Additionally, we’ll offer some optional suggestions for adding unique decorations to make your tank top truly one-of-a-kind.
So, grab your scissors and let’s get started on this exciting DIY project. Get ready to breathe new life into your old shirts and create your own fashionable and comfortable tank tops.
Materials Needed
Before you begin cutting your shirt, make sure you have the following materials on hand:
- A shirt (preferably one that is a bit oversized or that you no longer wear)
- A pair of fabric scissors
- Pins or fabric chalk
- Measuring tape
- Sewing machine or needle and thread (optional, for finishing the edges)
- Decorative items such as fabric paint, iron-on patches, or studs (optional, for adding unique touches to your tank top)
It’s important to use fabric scissors specifically designed for cutting fabric. Regular scissors may dull quickly or result in uneven cuts, making it more difficult to achieve a clean and professional look. If you don’t have fabric scissors, consider investing in a pair as they will come in handy for future DIY projects as well.
Pins or fabric chalk will help you mark the cutting lines on your shirt before you begin cutting. Choose whichever method you feel most comfortable with or have on hand.
Having a measuring tape is crucial for ensuring accurate and symmetrical cuts. It will help you determine the length and width of the tank top as well as the placement of the shoulder and neckline cuts.
The sewing machine or needle and thread are optional but can be used to finish the edges of your tank top for a more polished look. If you plan on using a sewing machine, make sure it is threaded and in good working condition before you begin.
If you want to take your tank top to the next level, consider using decorative items such as fabric paint, iron-on patches, or studs to add unique touches and personalize your creation.
Once you have gathered all the necessary materials, you’re ready to move on to the next steps of cutting your shirt into a tank top.
Step 1: Gather Your Supplies
Before you begin cutting your shirt into a tank top, it’s important to gather all the necessary supplies. Having everything you need at hand will make the process smoother and more efficient. Make sure you have the following items ready:
- A shirt of your choice
- Fabric scissors
- Pins or fabric chalk
- Measuring tape
- Sewing machine or needle and thread (optional for finishing the edges)
- Decorative items if desired
Choose a shirt that you want to transform into a tank top. Opt for one that is slightly oversized or that you no longer wear. This way, you can repurpose it into something new and stylish.
Ensure that your fabric scissors are sharp and clean. Using fabric scissors specifically designed for cutting fabric will ensure clean and precise cuts without fraying the fabric.
If you prefer using pins, have them ready to secure the fabric while cutting. Alternatively, you can also use fabric chalk to mark the cutting lines directly onto the shirt.
Having a measuring tape will help you determine the length and width of your tank top, as well as the placement of the shoulder and neckline cuts. This ensures that your tank top fits you well and gives you the desired look.
If you decide to finish the edges of your tank top, either with a sewing machine or by hand, make sure your sewing machine is threaded and in good working condition. Alternatively, have a needle and thread ready for hand-stitching.
Lastly, if you want to add unique touches to your tank top, gather any decorative items you may want to use, such as fabric paint, iron-on patches, or studs. These will allow you to personalize your tank top and make it truly your own.
Once you have gathered all your supplies, find a well-lit and comfortable space to start working on transforming your shirt into a trendy tank top.
Step 2: Prepare the Shirt
Now that you have your supplies ready, it’s time to prepare the shirt before you start cutting. Follow these steps to ensure a smooth and successful transformation:
- Start by laying the shirt flat on a clean surface. Smooth out any wrinkles or folds to ensure an accurate cutting process.
- If your shirt has sleeves, fold them towards the center of the shirt, creating a straight line from shoulder to shoulder. This will help you visualize the cutting lines better.
- If you’re using pins, use them to secure any folded areas or loose fabric layers in place. This will prevent any shifting or movement while you’re cutting.
- Alternatively, you can also use fabric chalk to mark the cutting lines directly on the shirt. Use a ruler or measuring tape to ensure the lines are straight and even.
- Before making any cuts, double-check that the shirt is positioned correctly, and the cutting lines are where you want them to be. It’s better to take a little extra time to ensure accuracy than to rush and end up with uneven cuts.
Preparing the shirt before cutting it is crucial as it sets the foundation for a successful transformation. Taking the time to properly fold the sleeves and secure any loose fabric will prevent any mishaps during the cutting process.
If you’re new to using fabric chalk, practice marking the lines on a scrap piece of fabric first to familiarize yourself with the process and ensure you achieve the desired markings.
Remember to take your time and be precise in marking the cutting lines. Accuracy is key to creating a clean and professional-looking tank top.
Once you’re satisfied with the preparation of the shirt, you’re ready to move on to the next step: marking and cutting the sleeves.
Step 3: Mark the Cutting Lines
Now that you have your shirt prepared, it’s time to mark the cutting lines. This step is crucial as it will guide you during the cutting process and ensure a precise and uniform result. Follow these steps to mark the cutting lines on your shirt:
- Start by deciding how wide you want the tank top straps to be. Use a measuring tape or ruler to measure the desired width, and mark this measurement on both sides of the sleeves. This will be the starting point for your cutting lines.
- From the marked width, measure down towards the armpit area of the sleeve. This will determine how deep you want the armholes to be. Mark this measurement on both sides of the sleeves.
- Next, use the measuring tape or ruler to measure the desired length of the tank top. Mark this measurement from the bottom hem of the shirt.
- Decide on the desired shape and depth of the neckline. Use the measuring tape or ruler to mark the center of the neckline. From the center point, measure the desired depth and mark that measurement on both sides of the neckline.
- Once you have marked all the cutting lines, step back and double-check that they are straight and symmetrical. Make any necessary adjustments before moving on to the next step.
Take your time during this step to ensure accuracy and precision. Using a ruler or measuring tape and double-checking the measurements will result in a well-proportioned tank top.
When marking the neckline, consider the type of tank top you want. You can opt for a V-neck, scoop neck, or even a crew neck. Choose a style that suits your preference and complements your body shape.
Remember to mark the cutting lines on both sides of the shirt to ensure symmetry. This will create a balanced and aesthetically pleasing tank top.
Once you are confident with the marked cutting lines, you’re ready to proceed to the next step: cutting the sleeves.
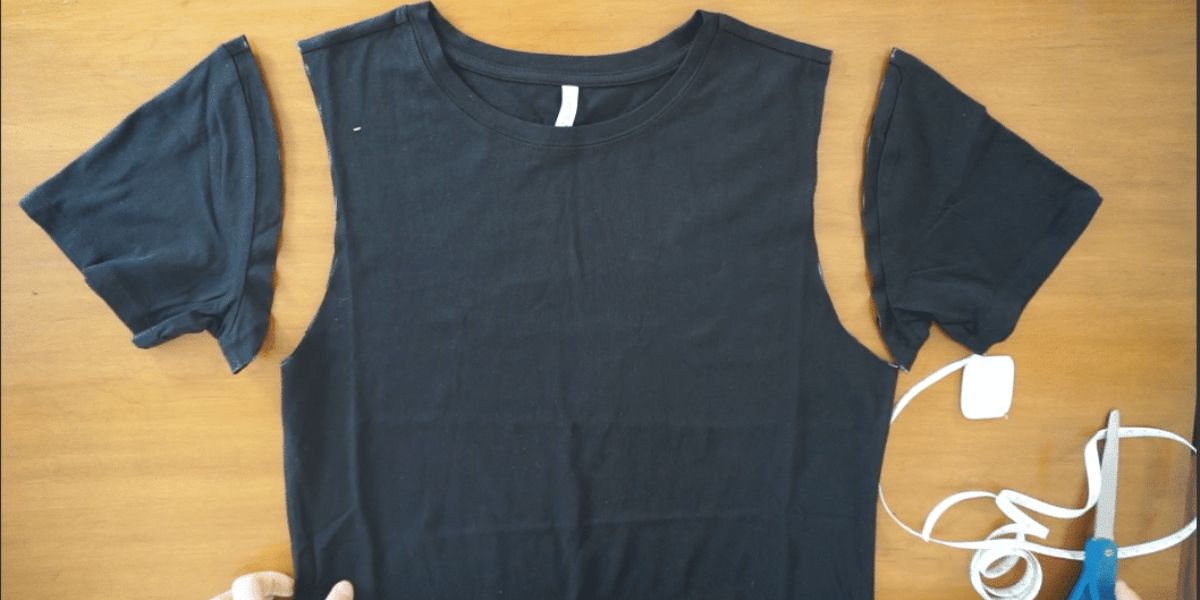
Step 4: Cut the Sleeves
Now that you have the cutting lines marked, it’s time to start transforming your shirt into a tank top by cutting the sleeves. Follow these steps to ensure clean and precise cuts:
- Take your fabric scissors and carefully align them with one of the marked lines on the sleeve. Start cutting along the line, applying even pressure to create a smooth and straight cut. Repeat this process for the other marked line on the same sleeve.
- Once you have cut along the marked lines, remove the excess fabric from the sleeves. Be mindful not to accidentally cut into the body of the shirt.
- Move on to the other sleeve and repeat the process, aligning the scissors with the marked cutting lines and cutting off the excess fabric.
- After cutting both sleeves, double-check that the resulting armholes are even and symmetrical. Make any necessary adjustments by trimming any uneven edges.
Take your time during this step to ensure accuracy and to create clean and even cuts. It’s important to follow the marked lines closely to achieve the desired result.
Be cautious not to cut too far into the body of the shirt when removing the excess fabric. It’s better to cut conservatively and make small adjustments if needed.
After cutting both sleeves and trimming any uneven edges, step back and examine the armholes for symmetry. If you notice any discrepancies, make minor corrections by carefully trimming the fabric until the armholes are uniform.
Once you’re satisfied with the sleeves, you’re ready to proceed to the next step: cutting the neckline.
Step 5: Cut the Neckline
Now that you have successfully cut the sleeves, it’s time to move on to cutting the neckline of your tank top. Follow these steps to create your desired neckline:
- Start by folding the shirt in half vertically, aligning the shoulder seams. This will ensure symmetry when cutting the neckline.
- Position the fabric scissors at the center of the folded edge where you marked the neckline. Gradually and carefully start cutting along the marked line.
- If you prefer a wider neckline, cut further towards the outer edges of the shoulder. For a narrower neckline, cut more towards the center of the folded edge.
- Unfold the shirt and examine the neckline you have created. Make any adjustments or refinements if necessary.
During this step, take your time and cut gradually to ensure a smooth and even neckline. It’s always better to cut conservatively, as you can always go back and make adjustments later if you want a wider neckline.
Ensure that the neckline is symmetrical and aligns with your desired style. You can experiment with different cuts and shapes, such as a scoop neck, V-neck, or a more unique design.
Unfolding the shirt will give you a clearer view of the neckline you have created. Examine it closely for any uneven edges or areas that may need touch-ups. If needed, make minor adjustments with the fabric scissors to achieve the desired shape and symmetry.
Once you’re satisfied with the cut of the neckline, you’re ready to move on to the next step: adjusting the length of the tank top.
Step 6: Adjust the Length
After cutting the sleeves and neckline, it’s time to adjust the length of your tank top to your desired preference. Follow these steps to achieve the perfect length:
- Put the shirt on and determine how long you want the tank top to be. Consider whether you prefer a cropped style or a longer length.
- Using fabric chalk or pins, mark the desired length on both sides of the shirt.
- Remove the shirt and lay it flat on a clean surface.
- Double-check the marked lines for symmetry and adjust if necessary.
- With a pair of fabric scissors, carefully cut along the marked lines, removing the excess fabric.
- If you’re looking for a neat finish, you can fold up the bottom hem of the tank top and secure it with pins before sewing it in place.
When deciding on the length of your tank top, consider your personal style and how you plan to wear it. Cropped tank tops are great for pairing with high-waisted bottoms, while longer tank tops can provide more coverage.
Using fabric chalk or pins to mark the desired length will make it easier to visualize and ensure even cuts on both sides of the shirt.
Laying the shirt flat on a clean surface allows for better control and precision when cutting.
Make sure to double-check the marked lines for symmetry before making any cuts. Adjust if needed to achieve an even and uniform length on both sides of the shirt.
If you prefer a finished look for the bottom hem of your tank top, fold it up and secure it with pins. You can then choose to either sew it in place using a sewing machine or hand-stitch it for a clean and polished finish.
With the length adjusted to your liking, you’re almost done! The next step will be to finish the edges of your tank top, which is optional but can provide a more polished look.
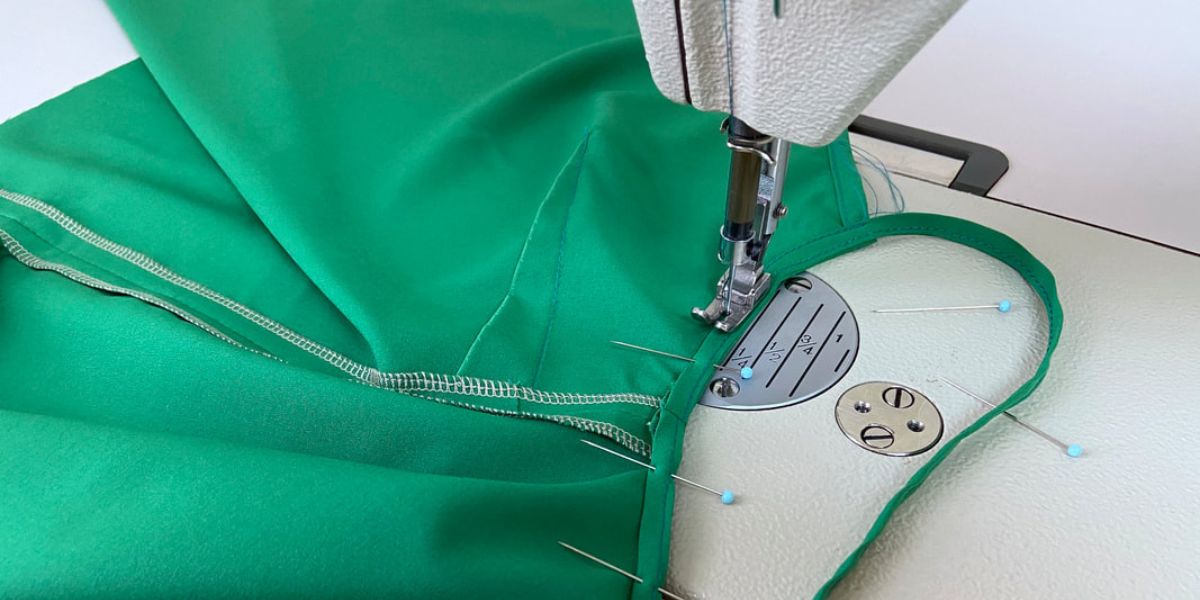
Step 7: Finish the Edges
Finishing the edges of your tank top is an optional step, but it can add a polished and professional touch to your DIY creation. Follow these steps to give your tank top a finished look:
- If you have a sewing machine, set it up with a matching thread color. If you prefer hand-sewing, thread a needle with a thread color that complements your tank top.
- Starting from one side of the tank top, fold the edge of the fabric towards the inside, about ¼ inch. Pin or hold it in place.
- If using a sewing machine, stitch along the folded edge, securing the fold in place. Ensure the stitches are even and straight. If hand-sewing, use a slip stitch or backstitch to secure the fold.
- Continue folding and stitching along the edges of the tank top until all sides are finished.
- Trim any excess fabric or loose threads that may be visible.
Finishing the edges gives your tank top a clean and tidy appearance, preventing the fabric from fraying over time.
Using a sewing machine provides a quicker and more precise finish, but hand-sewing can also achieve a neat result.
Ensure that the edge is folded evenly and consistently around the entire tank top to maintain a professional appearance.
When stitching with a sewing machine, maintain a steady pace and guide the fabric carefully to avoid any uneven or crooked stitches.
Inspect the finished edges of your tank top for any loose threads or stray fabric, and trim them away for a polished final result.
Now that the edges of your tank top are finished, your DIY project is almost complete. If desired, you can also add some optional decorations to make your tank top truly unique.
Step 8: Optional Decorations
At this stage, your tank top is almost ready to be worn. However, if you want to add some extra flair and personalization, consider these optional decoration ideas:
- Use fabric paint: Get creative by painting designs, patterns, or even quotes onto your tank top using fabric paint. Let your imagination run wild and make your tank top a true expression of your style.
- Try iron-on patches: Iron-on patches are an easy and fun way to add colorful and unique designs to your tank top. Choose patches that reflect your interests, hobbies, or simply add a pop of color and texture.
- Add studs or rhinestones: For an edgier look, consider adding studs or rhinestones to your tank top. Use a fabric glue specifically designed for adhering embellishments to fabric and carefully place the studs or rhinestones in a pattern of your choice.
- Sew on lace or trim: If you want to give your tank top a delicate and feminine touch, consider sewing on lace or decorative trim. This can be done along the neckline, armholes, or even along the bottom hem.
- Experiment with tie-dye: Create a unique and colorful tank top by experimenting with tie-dye techniques. There are many tutorials available online that can guide you through the process of creating vibrant and eye-catching designs.
Remember, these decoration ideas are optional and entirely up to your personal preference. Feel free to mix and match or come up with your own creative ways to adorn your tank top.
Make sure to follow the instructions provided with the chosen decoration methods, whether it’s fabric paint, iron-on patches, or sewing on embellishments.
Take the time to plan and carefully position your decorations before applying them to ensure a cohesive and aesthetically pleasing result.
With the optional decorations added, your tank top is now complete and ready to be showcased and worn with pride!
Conclusion
Cutting a shirt into a tank top is a satisfying DIY project that allows you to repurpose old clothing and create trendy and personalized pieces for your wardrobe. By following the steps outlined in this guide, you can transform an old shirt into a fashionable tank top that suits your style and preferences.
Starting with gathering the necessary materials, such as a shirt, fabric scissors, pins or fabric chalk, measuring tape, and optional sewing supplies, you’ll be well-prepared to begin the transformation process.
Preparing the shirt by folding the sleeves and marking the cutting lines ensures accuracy and symmetry. This step sets the foundation for achieving the desired cut and fit.
Next, you’ll carefully cut the sleeves and neckline, ensuring clean lines and even edges. Adjusting the length of the tank top to your liking allows you to customize the fit and style.
If you prefer a polished and professional finish, you can choose to finish the edges of your tank top by sewing or hand-stitching. This extra step adds a refined touch to the garment.
Finally, you have the option to further personalize your tank top by adding decorations such as fabric paint, iron-on patches, studs, lace, or tie-dye. Let your creativity shine and make your tank top truly unique.
With your stylish and DIY tank top complete, you’ll have a new addition to your wardrobe without spending extra money or letting unused shirts go to waste. Enjoy the satisfaction of wearing a custom-made piece that reflects your individuality and creativity.
Remember, practice makes perfect, so don’t be discouraged if your first attempt doesn’t turn out exactly as expected. Embrace the process, experiment, and have fun with it. Soon enough, you’ll be a pro at transforming shirts into fabulous tank tops.
So go ahead, grab those scissors and unleash your creativity. Happy cutting and creating!