Home>How-to Guides>For Men>How To Cut A Long Sleeve Shirt Into A Tank Top
For Men
How To Cut A Long Sleeve Shirt Into A Tank Top
Modified: August 5, 2023
Learn how to transform a long sleeve shirt into a stylish tank top for men. Perfect for warm weather and a trendy wardrobe update.
(Many of the links in this article redirect to a specific reviewed product. Your purchase of these products through affiliate links helps to generate commission for Under-tec.com, at no extra cost. Learn more)
Table of Contents
Introduction
Welcome to the world of fashion DIY! If you have an old long sleeve shirt sitting in your closet that you haven’t worn in ages, why not give it a trendy makeover? In this article, we will guide you through the process of transforming a long sleeve shirt into a fashionable tank top. No sewing skills required!
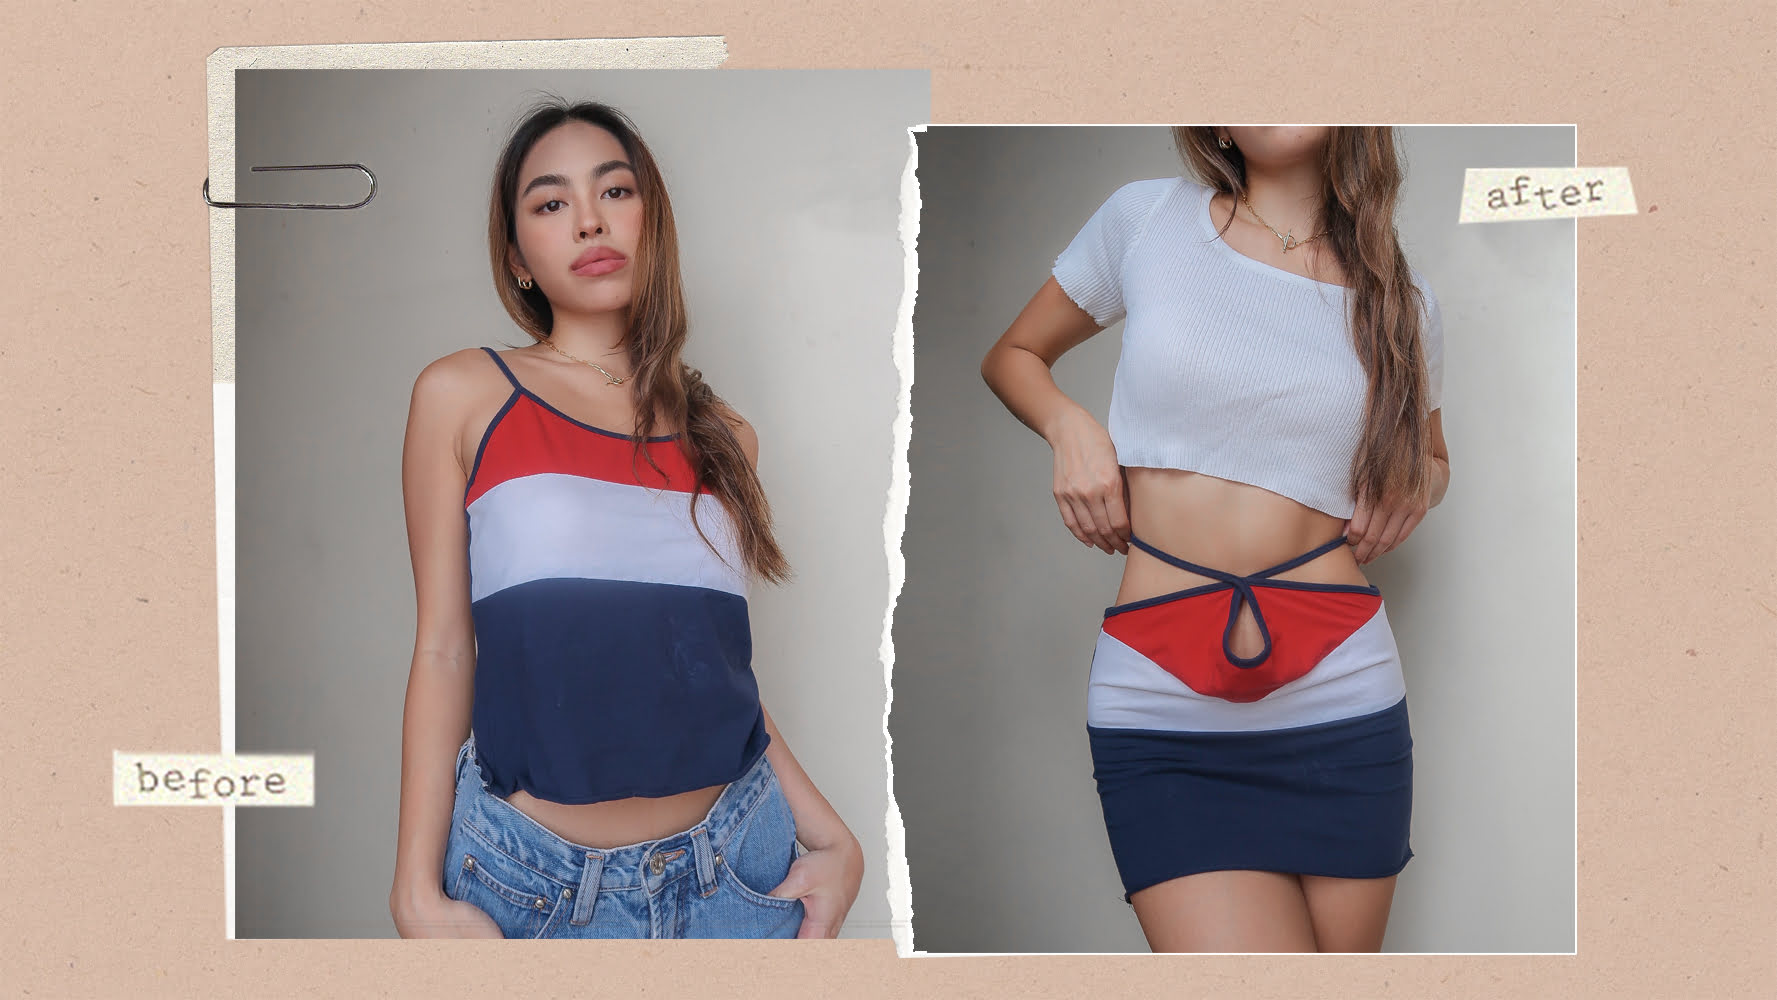
Converting a long sleeve shirt into a tank top not only extends the lifespan of your clothing but also allows you to create a unique and personalized piece that reflects your style. Whether you want to repurpose an old favorite or breathe new life into a thrifted find, this step-by-step guide will walk you through the process.
This DIY project is perfect for those who love to get creative and experiment with their wardrobe. By following these easy steps, you can give your long sleeve shirt a trendy twist and add a versatile staple to your summer wardrobe.
So, if you’re ready to unleash your inner fashion designer, let’s dive into the materials needed and get started on your journey to transforming a long sleeve shirt into a fashionable tank top!
Materials Needed
Before we begin, make sure you have the following materials handy:
- A long sleeve shirt: Choose a shirt that you no longer wear or one that you want to give a new life to. Make sure the fabric is in good condition and suitable for cutting.
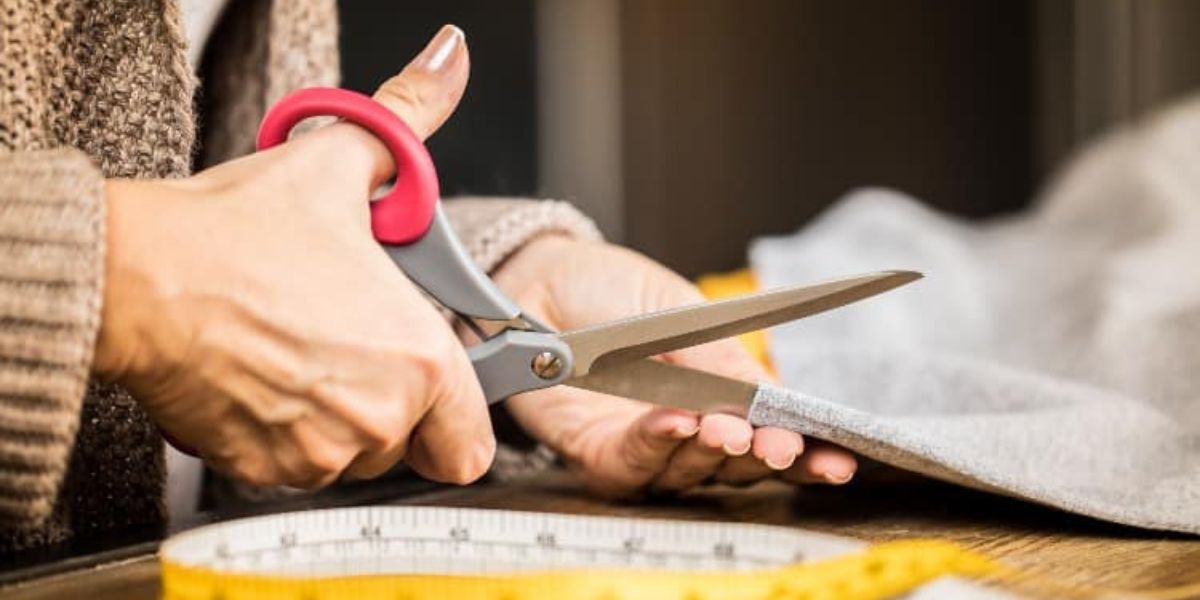
- A pair of fabric scissors: Use sharp fabric scissors to ensure clean and precise cuts. Regular scissors may result in frayed edges.
- A fabric marker or chalk: This will be used to mark the cutting lines on the shirt. Choose a marker or chalk that is easily visible on the fabric.
- A ruler or measuring tape: For accurate measurements and even cutting, a ruler or measuring tape is essential.
- A flat surface: Find a spacious and flat surface to work on. This will help you lay out the shirt and make the cutting process smoother.
- An iron and ironing board (optional): If you want to achieve a polished look, having an iron and ironing board will help smooth out any wrinkles or creases in the fabric.
Remember, these materials are just the basics to get you started. Feel free to add any additional embellishments or accessories that you may want to incorporate into your tank top, such as fabric patches, studs, or ribbons.
Now that you have all the necessary materials, let’s move on to the next step: gathering supplies and preparing the shirt for cutting.
Step 1: Gathering Supplies
The first step in transforming your long sleeve shirt into a tank top is to gather all the necessary supplies and prepare your workspace. Find a spacious and well-lit area where you can comfortably work.
Start by selecting a long sleeve shirt that you want to transform. This can be an old shirt that you no longer wear or a thrifted find. Ensure that the shirt is clean and free from any stains or damage.
Next, gather your fabric scissors, fabric marker or chalk, ruler or measuring tape, and any additional embellishments or accessories you want to incorporate into your tank top.
Before you begin cutting, it’s a good idea to iron the shirt if there are any wrinkles. This will make it easier to mark and cut accurately.
Once everything is assembled, lay the shirt on a flat surface, ensuring that it is smooth and wrinkle-free. Smooth out any wrinkles or creases with your hands or an iron if necessary.
Remember to take your time and ensure that you have everything you need before starting. Having all your supplies ready will make the process smoother and more efficient.
Now that you have gathered all the necessary supplies and prepared your workspace, it’s time to move on to the next step: marking the cut lines on the shirt.
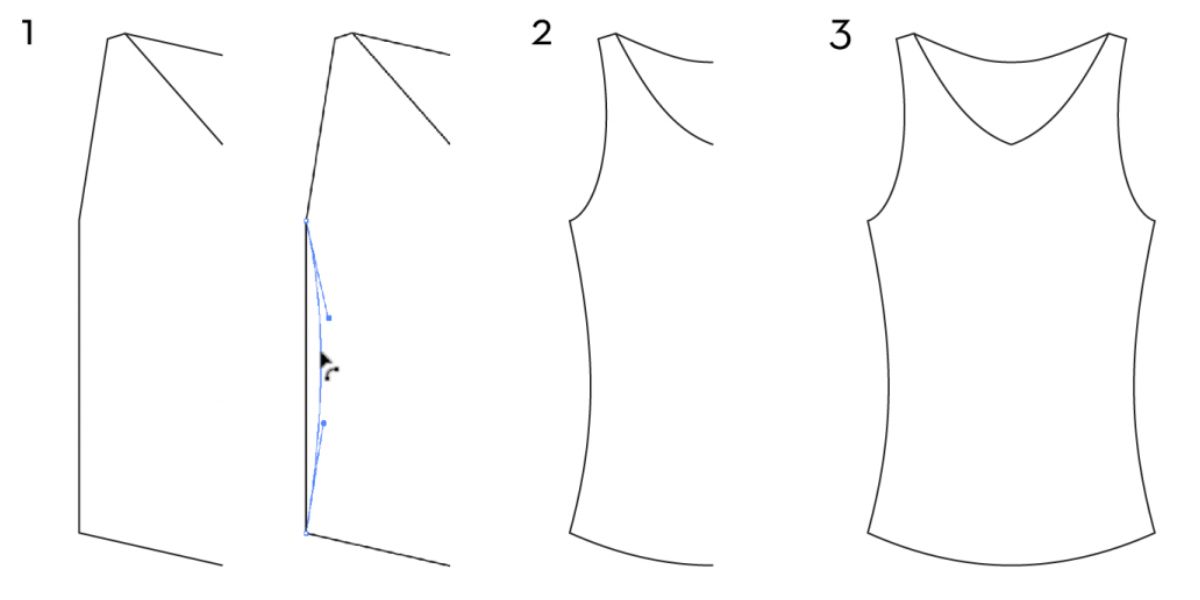
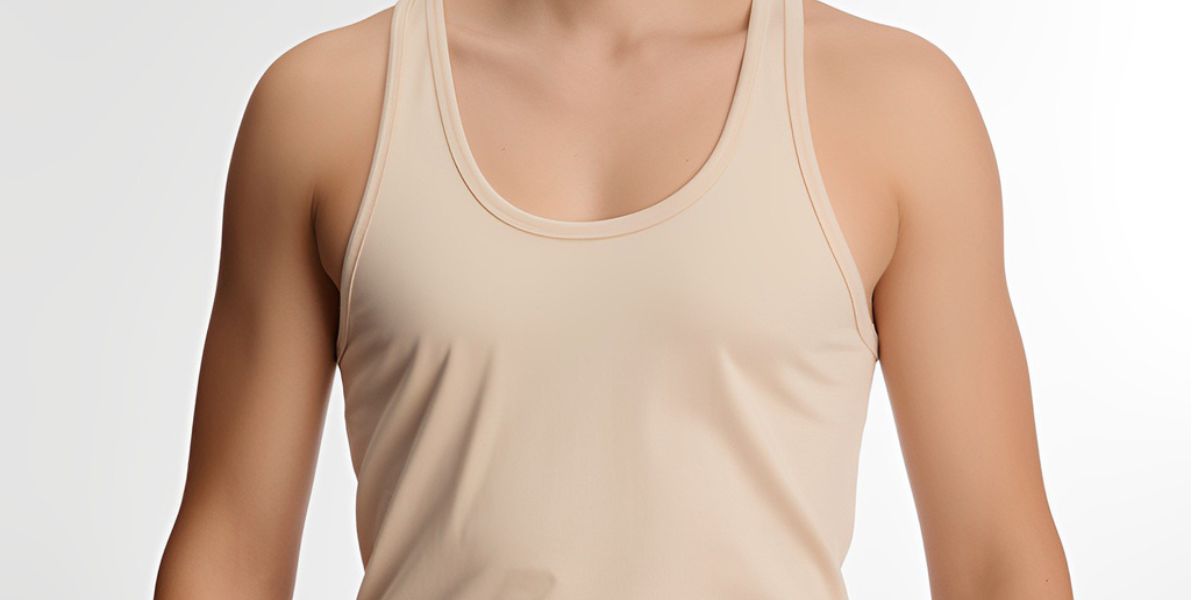
Step 2: Marking the Cut Lines
Now that you have all your supplies ready, it’s time to mark the cut lines on your long sleeve shirt. This step will determine the shape and style of your tank top, so take your time and be precise.
Start by deciding how wide you want the shoulder straps of your tank top to be. Use your ruler or measuring tape to measure the desired width from the shoulder seam towards the center of the neckline. Make a small mark or dot with your fabric marker or chalk to indicate the starting point of the cut.
Next, decide how deep you want the armholes of your tank top to be. Measure from the base of the shoulder seam down towards the side seam and make a mark at the desired length. Repeat this step on the other side of the shirt to ensure symmetrical armholes.
Depending on your preference, you can either create a racerback-style tank top by angling the armhole towards the center of the back or keep it straight for a classic look.
Once you have marked the shoulder and armhole lines, it’s time to mark the neckline. Determine how wide or narrow you want the neckline to be and make small marks or dots along the existing neckband or collar.
For a scoop neck tank top, you can mark a gentle curve from one shoulder strap to the other. If you prefer a v-neck or a deeper neckline, mark a V shape instead.
Take a step back and check if the lines are even and symmetrical on both sides. Make any necessary adjustments before moving on to the next step.
Once you are satisfied with the placement of the marks, double-check them to ensure accuracy. Clear and precise markings will help you cut the shirt accurately without any guesswork.
Now that you have marked the cut lines, it’s time to move on to the next step: cutting the sleeves of your long sleeve shirt to transform it into a tank top.
Step 3: Cutting the Sleeves
With the cut lines marked on your long sleeve shirt, it’s time to bring out your fabric scissors and start transforming it into a tank top. Remember to proceed with caution and take your time to ensure precise cuts.
Start by making a small snip at the shoulder mark you made earlier. This will act as a guide for the rest of the sleeve cut. Hold the fabric firmly and carefully cut along the marked line, following the shape of the armhole. Repeat this on the other side, ensuring symmetrical cuts.
When cutting the sleeves, it’s better to start with a slightly longer length and make adjustments later if needed. You can always trim off more fabric, but you can’t add it back once it’s cut.
Once you have cut both sleeves, try on the shirt to check if the armhole shape and length are to your liking. If you prefer a deeper or wider armhole, you can make additional cuts at this stage. Remember to make symmetrical adjustments on both sides.
If you want to create a racerback-style tank top, you can also consider cutting a small curve or angle towards the center back. This will give your tank top a sporty and trendy look. Again, make sure the cuts are symmetrical.
After making any necessary adjustments, step back and examine the shirt from different angles to ensure that the armholes are even and the overall shape looks balanced.
Once you’re satisfied with the armhole cuts, it’s time to move on to the next step: cutting the neckline to complete the transformation of your long sleeve shirt into a tank top.
Step 4: Cutting the Neckline
Now that you have successfully cut the sleeves of your long sleeve shirt to transform it into a tank top, it’s time to tackle the neckline. Cutting the neckline will add a touch of style and give your tank top a finished look.
Start by focusing on the marks you made for the neckline. Carefully cut along these marks, making sure to follow the desired shape. Use small, precise cuts to maintain control and avoid accidental overcutting.
If you marked a scoop neck, gently curve the scissors along the line, creating a smooth and rounded neckline. For a v-neck, cut diagonally from one mark to the center, then repeat the process on the other side. Take your time to ensure clean, symmetrical cuts.
After cutting the neckline, try on the tank top to see if the shape and depth of the neckline are to your liking. If you want to make any adjustments, carefully trim away small increments of fabric to achieve the desired look.
Remember that you can always cut more, but you cannot undo a cut. So, take it slow and make small adjustments as needed.
Once you are satisfied with the neckline, gently shake out the shirt to remove any loose fabric or threads. Inspect the edges of the cuts to ensure they are clean and evenly shaped.
At this stage, you can also consider adding any additional details or embellishments to your tank top, such as fabric patches, lace trim, or studs. Get creative and personalize your tank top to make it truly unique.
With the neckline now cut to your liking, it’s time to move on to the optional step of hemming the edges to give your tank top a polished finish.
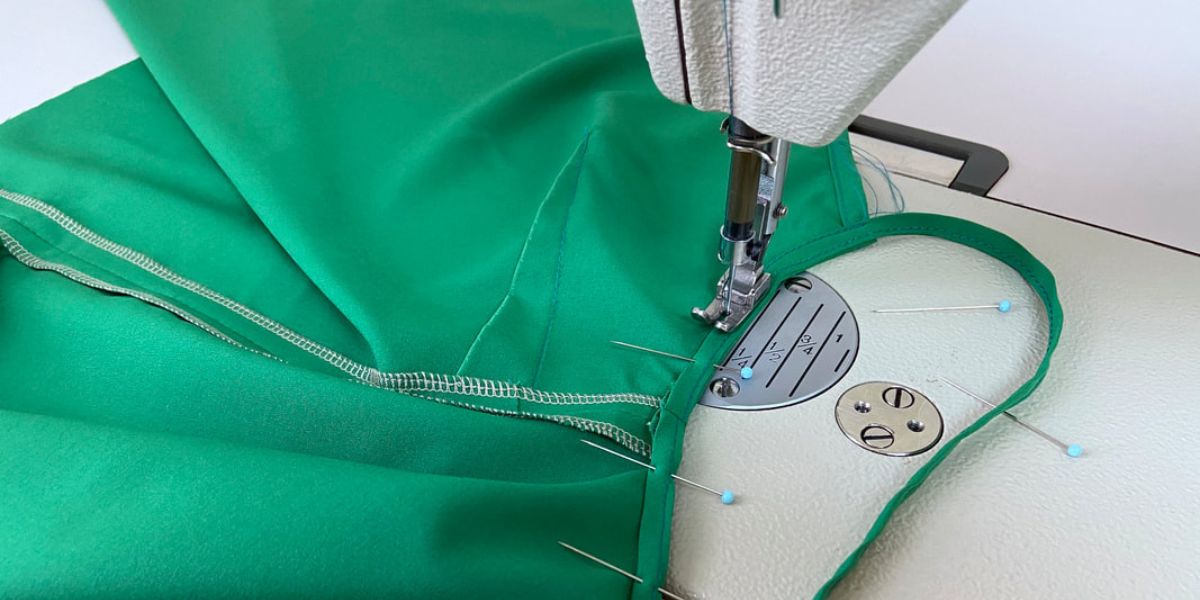
Step 5: Hemming the Edges (optional)
Now that you have transformed your long sleeve shirt into a tank top by cutting the sleeves and neckline, you have the option to hem the edges for a more polished and professional-looking finish. Hemming will also help prevent the fabric from fraying over time.
If you have basic sewing skills and access to a sewing machine, hemming the edges will be a breeze. Here’s how you can do it:
- Turn your tank top inside out. This will expose the raw edges that need to be hemmed.
- Fold the raw edge about 1/4 inch (0.6 cm) to the inside of the shirt and press it with an iron. This will create a clean folded edge.
- Next, fold the edge again, this time about 1/4 inch (0.6 cm) to 1/2 inch (1.3 cm) to create a double-fold hem. Press it with an iron to make the fold sharp and secure.
- Pinning the folded edge in place will help keep it secure while you sew. Use sewing pins to hold the fold in place along the entire hemline.
- Set up your sewing machine with a straight stitch or a zigzag stitch if you prefer a stretchy hem. Sew along the edge, removing the sewing pins as you go. Make sure to backstitch at the beginning and end to secure the stitches.
- If you don’t have a sewing machine, don’t worry! You can still hem the edges using a needle and thread. Choose a thread color that matches your fabric and use a simple hand stitch, such as a whip stitch or a slip stitch, to secure the folded edge in place.
Remember to take your time while sewing and ensure that your stitches are even. If you’re not confident in your sewing skills, you can always seek assistance from a friend or a local tailor.
Once you have hemmed all the edges, gently press your tank top with an iron to give it a crisp and finished look. Allow it to cool completely before turning it right-side out and trying it on.
Hemming the edges is an optional step but can add that final touch to your transformed tank top. However, if you prefer a more relaxed and raw look, you can skip the hemming and embrace the unfinished edges.
With the edges hemmed (or left raw), your tank top is nearly complete! The final step is to try it on, make any necessary adjustments, and enjoy your newly transformed piece.
Step 6: Trying on and Adjusting Fit
Now that your tank top is almost complete, it’s time to try it on and make any necessary adjustments to ensure the perfect fit. This step is crucial, as it allows you to customize the tank top according to your preferences and body shape.
Put on the tank top and stand in front of a mirror to assess the fit and overall look. Pay attention to the following aspects:
- Length: Check if the length of the tank top is to your liking. If you prefer it shorter, you can trim the bottom hem or even create a cropped tank top by cutting off more fabric.
- Fitting around the bust: Ensure that the tank top fits comfortably around your bust area. If it feels too tight or too loose, you can make adjustments by taking in or letting out the side seams.
- Armhole fit: Assess the fit of the armholes and make sure they are not too tight or too loose. If necessary, trim the armholes to achieve the desired fit or re-cut them slightly.
- Neckline: Check the neckline to ensure that it sits correctly and suits your style. If you need to make any adjustments, carefully trim or re-shape the neckline using your fabric scissors.
While trying on the tank top, you can experiment with different styling options, such as layering it with a cardigan or accessorizing it with a belt. This will help you envision different outfit possibilities and get creative with your new tank top.
If you find that any adjustments are needed, take off the tank top and make the necessary changes. This could involve trimming or re-sewing certain areas to achieve the desired fit and style.
Remember, the beauty of DIY fashion is that you have the freedom to customize your clothing to perfectly suit your taste and body shape. By taking the time to try on the tank top and make adjustments, you ensure that the final result is flattering and comfortable.
Once you are satisfied with the fit and style, your transformed long sleeve shirt is ready to be worn with confidence!
Congratulations on successfully turning your long sleeve shirt into a trendy tank top. Enjoy showing off your unique creation and embrace the satisfaction of breathing new life into old clothing.
Conclusion
Congratulations! You have successfully transformed your long sleeve shirt into a stylish tank top with just a few simple steps. By repurposing your old clothing, you not only extend its life but also create a unique and personalized piece that suits your style.
Throughout this DIY project, you have learned how to gather the necessary supplies, mark the cut lines, and confidently cut the sleeves and neckline of your shirt. You also had the option to hem the edges for a more polished finish, and you tried on the tank top to make any necessary adjustments to ensure a perfect fit.
Remember, the beauty of DIY fashion is that there are endless possibilities to explore. You can experiment with different styles, cuts, and embellishments to create a variety of tank tops that reflect your individuality.
As you gain more confidence in your DIY skills, you can even apply these techniques to other pieces of clothing, such as dresses, sweaters, or even jeans. The possibilities for creative transformations are endless.
So, the next time you come across an old long sleeve shirt that has been tucked away in your closet, don’t hesitate to give it a new life as a trendy tank top. With a little creativity, you can update your wardrobe without breaking the bank.
Enjoy the process of DIY fashion and feel proud of the unique pieces you create. Now go out there and show off your stylish new tank top to the world!