Home>How-to Guides>For Women>How to Shorten Tank Top Straps
For Women
How to Shorten Tank Top Straps
Published: July 29, 2023
Learn how to easily shorten the straps on your tank top with this step-by-step guide designed for women. Achieve a perfect fit for ultimate style and comfort.
(Many of the links in this article redirect to a specific reviewed product. Your purchase of these products through affiliate links helps to generate commission for Under-tec.com, at no extra cost. Learn more)
Table of Contents
Introduction
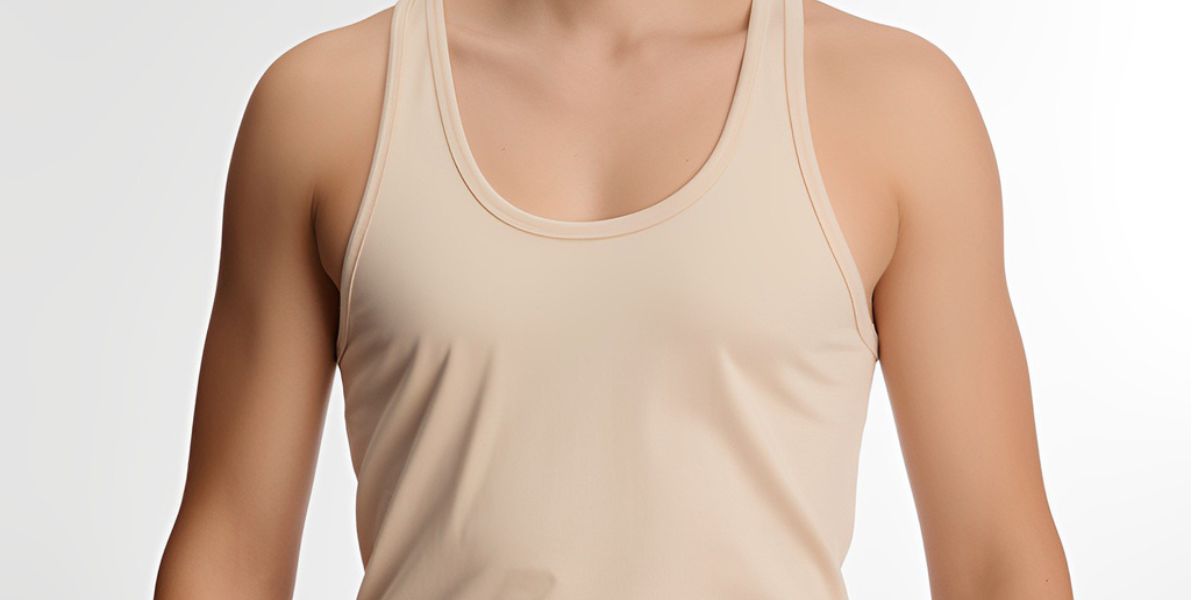
Tank tops are popular clothing items in the warmer months, offering comfort and style. However, sometimes the straps on tank tops may be too long for some individuals, causing them to fit improperly. Fortunately, with a few simple steps, you can easily shorten the straps on your tank top to achieve the perfect fit. In this guide, we will walk you through the process of shortening tank top straps, ensuring that you can confidently wear your tank top without any discomfort or inconvenience.
Whether you have recently purchased a tank top with straps that are too long or have an old favorite that needs adjusting, this step-by-step tutorial will provide you all the necessary information to get the job done right. You don’t need to be an expert in sewing or have any special tools to complete this task. With just a few basic materials and a little bit of patience, you can customize your tank top to have straps that are the ideal length for you.
In the following sections, we will outline the materials you will need, as well as provide detailed instructions on how to shorten your tank top straps effectively. So let’s get started and transform your tank top into a perfectly fitting and stylish garment that you will love to wear.
Materials Needed
Before we begin the process of shortening tank top straps, it’s essential to gather all the necessary materials. Fortunately, you won’t need any specialized equipment or expensive tools. Here’s what you’ll need:
- A tank top with straps that need shortening
- Scissors – Make sure they are sharp and suitable for cutting fabric
- Pins – These will help to hold the fabric in place during the adjustment process
- Thread and needle or sewing machine – Depending on your preference and skill level, you can choose to sew the straps by hand or machine
- Measuring tape or ruler – This will help you determine the desired length of the straps
- Iron – An iron will be useful for ironing out any wrinkles or creases in the fabric after shortening the straps
Once you have gathered all these materials, you’ll be ready to begin the process of shortening your tank top straps. It’s important to have everything prepared beforehand to ensure a smooth and efficient adjustment process. Now, let’s move on to the step-by-step instructions for shortening your tank top straps.
Step 1: Determine the Desired Length
The first step in shortening tank top straps is to determine the desired length. This will depend on your personal preference and the fit you are looking to achieve. Here’s how you can determine the ideal length for your tank top straps:
- Put on the tank top – Wear the tank top and assess the current length of the straps. Note whether they are too long or too short for your liking.
- Use a measuring tape or ruler – Measure the current strap length from the top of the tank top to where you would like the adjusted strap length to be.
- Consider the fit – Take into consideration how tight or loose you want the tank top to be on your shoulders. If you prefer a looser fit, you may want to leave the straps slightly longer. If you prefer a more fitted look, you can shorten the straps accordingly.
Once you have determined the desired length for your tank top straps, make a mental note or mark the measurement on the strap using a pin or fabric chalk. This will serve as a guide during the next steps of the adjustment process.
By taking the time to determine the desired length of your tank top straps, you can ensure that the final result will be comfortable and flattering. The goal is to create straps that are the perfect length to suit your style and body shape. With this information in mind, let’s move on to the next step of shortening the tank top straps.
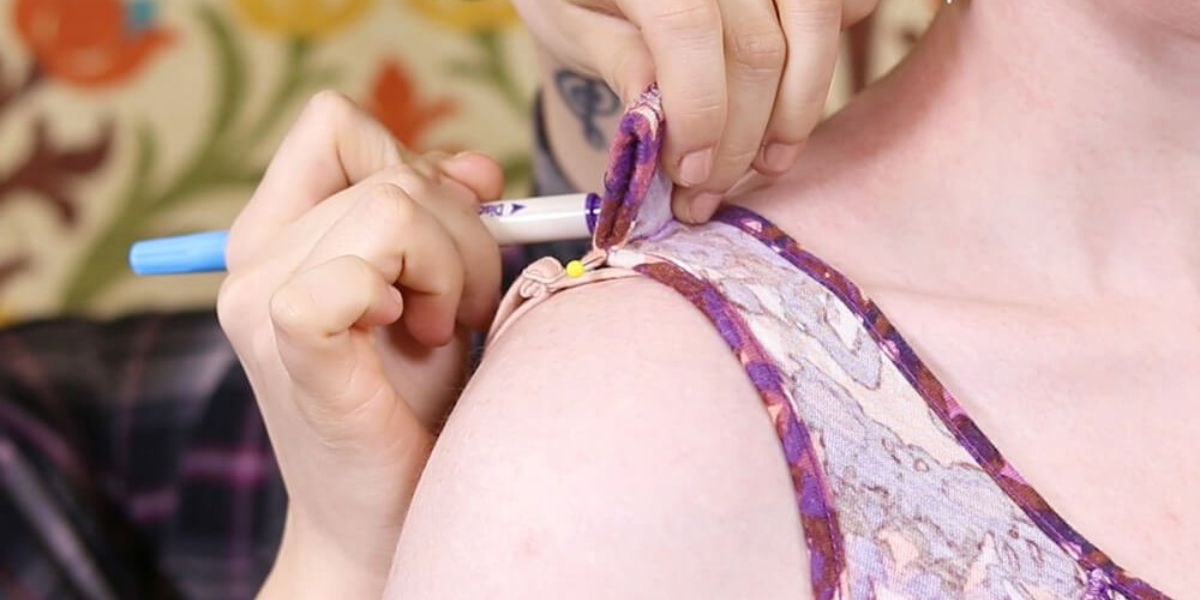
Step 2: Mark the Cutting Points
Now that you have determined the desired length for your tank top straps, it’s time to mark the cutting points. This step is crucial to ensure that both straps are adjusted evenly and symmetrically. Here’s how you can mark the cutting points on your tank top straps:
- Take off the tank top – Remove the tank top to have better access to the straps for marking.
- Lay the tank top flat – Place the tank top on a flat surface, such as a table or ironing board.
- Measure and mark – Using a measuring tape or ruler, measure the desired length from the top of the strap inward. Mark this measurement with a pin or fabric chalk.
- Repeat for the other side – Repeat the measurement and marking process for the other strap, ensuring that the measurements are symmetrical.
By marking the cutting points on the tank top straps, you create a visual guide for the next step of actually cutting the straps. Double-check the markings to ensure they are accurate and consistent on both sides of the tank top. Taking the time to do this step correctly will result in a more professional and polished final adjustment.
With the cutting points marked on your tank top straps, we are ready to move on to the next step, which involves cutting the straps to the desired length. Let’s dive into the details of this process in the next section.
Step 3: Cut the Straps
Now that you have marked the cutting points on your tank top straps, it’s time to actually cut them to the desired length. This step requires precision and careful handling of the fabric to ensure a clean and even cut. Here’s how you can proceed with cutting the straps:
- Put on the tank top (optional) – You can choose to put on the tank top again to get a better idea of how the adjusted straps will look and feel.
- Hold the fabric in place – To prevent the fabric from shifting or stretching while cutting, hold the strap taut between your fingers.
- Use sharp scissors – Make sure you have a pair of sharp fabric scissors that are specifically designed for cutting fabric. This will result in a cleaner cut.
- Start cutting – Carefully cut the strap at the marked cutting point. Use a smooth, continuous motion to ensure an even cut.
- Repeat for the other side – Repeat the cutting process for the other strap, ensuring that both straps are cut to the same length.
While cutting the straps, it’s important to exercise caution and attention to detail. Take your time and be mindful of the fabric to avoid any mishaps or uneven cuts. By following these steps, you can successfully shorten the straps of your tank top to the desired length.
With the straps now cut, we can move on to the next step of adjusting the straps to ensure a secure and comfortable fit. Keep reading to learn how to complete this step effectively.
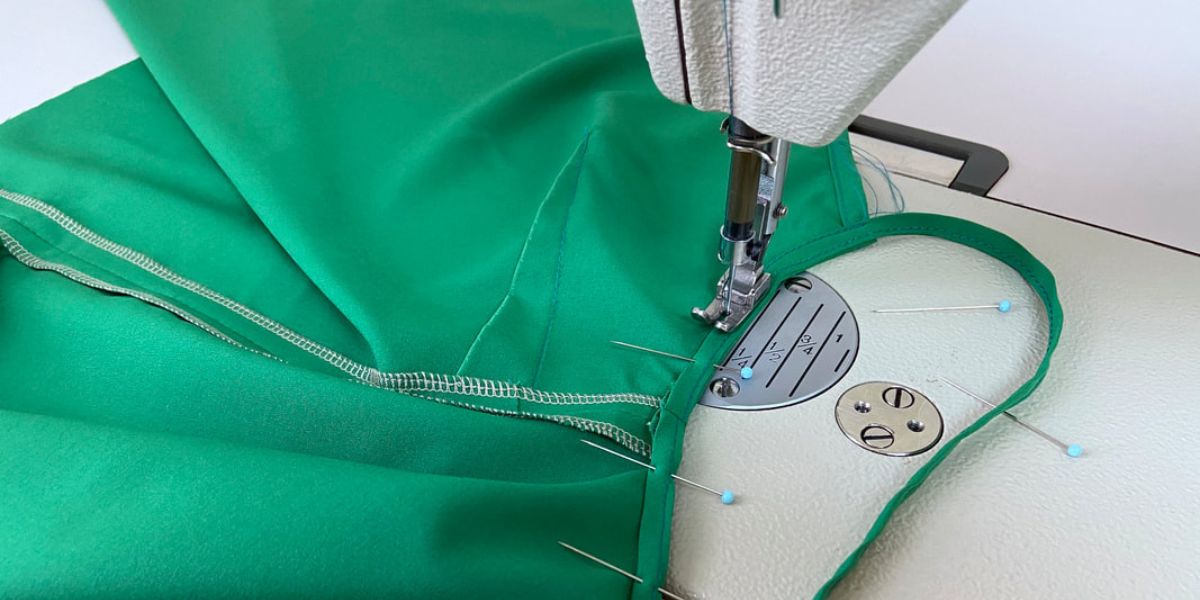
Step 4: Adjust the Straps
With the tank top straps cut to the desired length, the next step is to adjust them to ensure a proper fit and comfortable wear. This step involves securing the cut ends and making any necessary adjustments to the strap length. Here’s how you can proceed with adjusting the straps:
- Put on the tank top (optional) – To better assess the fit, you can choose to put on the tank top again.
- Hold the cut end – Take the cut end of the strap and fold it over towards the inside of the fabric. This will create a clean edge and prevent fraying.
- Pin or sew the folded end – Use pins or sewing to secure the folded end in place. If you choose to sew, make sure to use a small, neat stitch or a zigzag stitch to ensure a secure hold.
- Try on the tank top – Put on the tank top to check if further adjustments are needed. Assess the strap length and make any necessary changes to achieve the desired fit.
- Repeat for the other strap – Follow the same process for the other strap, ensuring that both straps are adjusted equally.
During the adjustment process, it’s important to try on the tank top and make any additional alterations if needed. Pay attention to the overall fit and comfort, and make any necessary modifications to ensure that the tank top fits your body perfectly. By taking the time to adjust the straps properly, you can improve the overall appearance and wearability of the tank top.
Now that the straps are adjusted, we can move on to the final step of securing them in place. Keep reading to learn how to complete this step effectively.
Step 5: Secure the Straps
After adjusting the tank top straps to the desired length, the final step is to secure them in place to ensure they stay in the correct position. This will prevent the straps from slipping or shifting while wearing the tank top. Here’s how you can effectively secure the straps:
- Put on the tank top (optional) – If you took it off during the previous step, you can put on the tank top again to have a better idea of how the final fit will look and feel.
- Hold the straps in place – Adjust the straps to the desired positioning on your shoulders. Hold them in place to ensure they are aligned and comfortable.
- Use thread and needle or sewing machine – To secure the straps, you can hand sew or machine sew a few stitches at the top of each strap where it meets the tank top. This will keep the straps in place and prevent them from shifting during wear.
- Choose a matching thread – Select a thread that matches the color of your tank top to create a seamless look.
- Make small, neat stitches – Take small, neat stitches to secure the straps, ensuring that the thread is securely fastened and won’t come loose.
By securing the tank top straps, you can have peace of mind knowing that they will stay in place while you go about your day. Taking this extra step will prevent any potential discomfort or inconvenience caused by loose or shifting straps. Once the straps are securely sewn, take a moment to examine your work and make any final adjustments if necessary.
Congratulations! You have successfully shortened the straps on your tank top. By following these steps, you have transformed your tank top into a garment that fits perfectly and enhances your style. Now, you can confidently wear your tank top and enjoy the comfort and flattering look it provides.
Conclusion
Shortening the straps on your tank top is a simple and effective way to improve its fit and comfort. By following the step-by-step instructions outlined in this guide, you can easily customize your tank top to suit your preferences and body shape. Whether you have a new tank top with straps that are too long or an old favorite that needs adjusting, these techniques will help you achieve the perfect fit.
Throughout the process, it’s important to take your time and pay attention to detail. From determining the desired strap length to marking the cutting points, cutting the straps, and adjusting and securing them, each step plays a crucial role in achieving a professional and polished result. By using basic materials such as scissors, pins, thread, and a measuring tape, you can complete this project without the need for any specialized tools.
Remember to try on the tank top throughout the process to ensure a proper fit and make any necessary adjustments. This will help you achieve a personalized and comfortable result. Whether you prefer a looser or more fitted look, these techniques can be tailored to your individual preferences and style.
Now that your tank top straps are shortened and securely in place, you can confidently wear your tank top knowing that it fits perfectly. Enjoy the comfort, style, and versatility that your adjusted tank top provides, and confidently flaunt your fashion sense.
Thank you for following this guide. We hope it has been helpful in assisting you with shortening the straps on your tank top. Get creative, experiment with different styles, and make your tank top uniquely yours. Happy styling!