Home>How-to Guides>For Women>How To Alter A Tank Top That’s Too Big

For Women
How To Alter A Tank Top That’s Too Big
Modified: August 5, 2023
"Learn how to easily alter a tank top that's too big for women with these simple steps. Get the perfect fit and rock your favorite tank tops confidently!"
(Many of the links in this article redirect to a specific reviewed product. Your purchase of these products through affiliate links helps to generate commission for Under-tec.com, at no extra cost. Learn more)
Table of Contents
Introduction
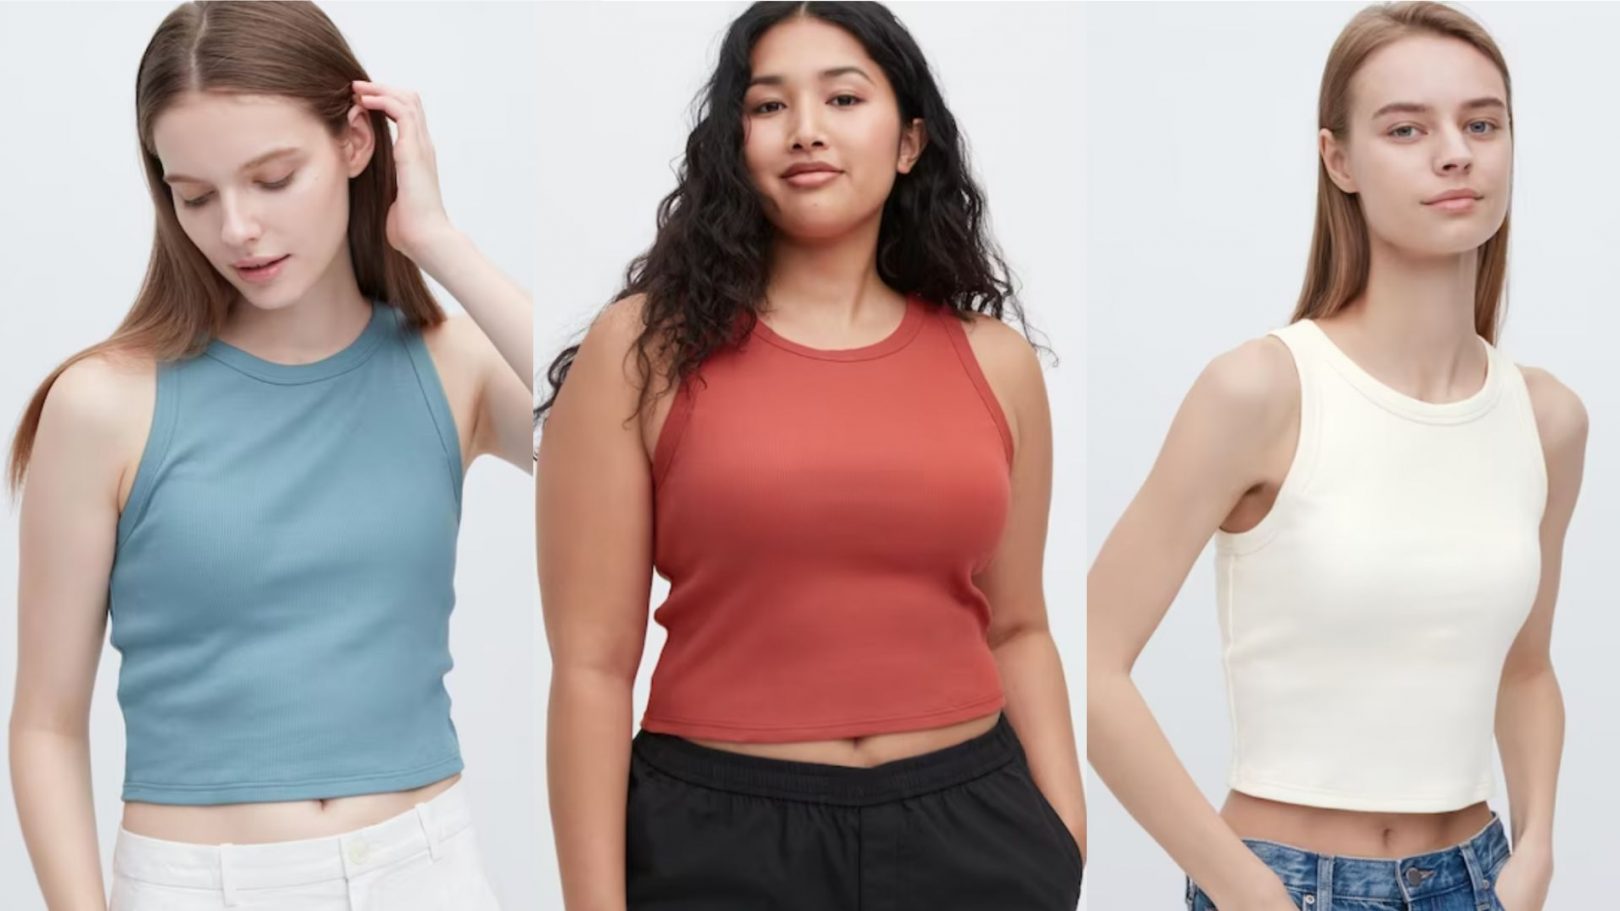
Welcome to our guide on how to alter a tank top that’s too big! Tank tops are versatile and fashionable pieces of clothing that can be styled in various ways. However, if your tank top is too loose or baggy, it may not have the desired fit and can make you feel uncomfortable. Don’t worry though, because with a few simple alterations, you can transform your oversized tank top into a flattering and well-fitted garment that you’ll love to wear.
Whether you’ve recently bought a tank top that’s a size too big, or you’ve lost weight and your favorite tank top is now too loose, we’ve got you covered. In this guide, we’ll take you through step by step instructions on how to alter your tank top to achieve the perfect fit for your body.
Before diving into the alteration process, it’s crucial to assess the fit of the tank top and determine where it needs adjustment. This will help you choose the appropriate alteration method and gather the necessary supplies. We’ll walk you through the different alteration options and explain how each one can be implemented.
From taking in the sides to creating darts, adding elastic to the waist, or even cutting and reconstructing the tank top, you’ll have several options to choose from based on your preferences and sewing skill level. We’ll provide detailed instructions and tips for each alteration method to ensure that you get the best results.
After completing the alterations, it’s essential to add the finishing touches and do a final fit check to ensure that the tank top fits you perfectly. You may also consider adding additional embellishments or personal touches to make your tank top even more unique and stylish.
So, if you’re ready to transform your oversized tank top into a well-fitted and flattering garment, let’s get started! Follow our step-by-step guide and become a pro at altering your clothing to suit your body shape and style.
Assess the Fit of the Tank Top
Before you begin the alteration process, it’s crucial to assess the fit of your tank top. This step will help you determine which areas need adjustment and guide you in choosing the most suitable alteration method.
Start by trying on the tank top and taking note of how it fits you. Pay attention to the overall length, the width of the straps, and the fit around the bust, waist, and hips. Look out for any areas that feel too loose, baggy, or unflattering.
Check the length of the tank top. Ideally, it should end at the desired point on your torso. If it’s too long, you may need to consider shortening it. Alternatively, if it’s too short, you’ll want to avoid altering the length too drastically as it may affect the style and aesthetics.
Next, assess the width of the straps. If they are too wide or narrow for your liking, you can adjust them during the alteration process to achieve a better fit.
Moving on to the fit around the bust, waist, and hips, determine whether the tank top is too loose or baggy in these areas. Pinch and gather excess fabric to see how much needs to be taken in. This will give you an idea of the alteration method you’ll need to use.
Take into consideration the style and fabric of the tank top. Certain materials, such as stretchy knits or woven fabrics, may require different alteration techniques. Additionally, consider any design elements, such as patterns or prints, that you’ll need to match or preserve during the alteration process.
Remember that alterations are personal and subjective. Consider your own preferences and the style you want to achieve. Some individuals prefer a loose and flowy fit, while others prefer a more tailored and form-fitting look. The goal is to create a tank top that flatters your body shape and makes you feel confident.
Once you have assessed the fit of your tank top and identified the areas that require alteration, you’re ready to move on to the next step: choosing the appropriate alteration method. In the following section, we’ll discuss different alteration options and guide you through the process of transforming your tank top into the perfect fit.
Choose the Correct Alteration Method
Now that you have assessed the fit of your tank top, it’s time to choose the appropriate alteration method. There are several options available, each serving a specific purpose and addressing different fitting issues. Selecting the correct alteration method will ensure that your tank top has the desired fit and maintains its overall style and aesthetics.
1. Taking in the Sides: If your tank top is too loose around the bust, waist, or hips, one option is to take in the sides. This involves sewing along the side seams to remove excess fabric and create a slimmer silhouette. This method is relatively straightforward and can be done with or without a sewing machine.
2. Creating Darts: Darts are triangular folds that can be added to the fabric to improve the fit and shape of the tank top. This alteration method is particularly useful if you have excess fabric around the bust area. Adding darts can create a more tailored and flattering fit by providing shaping and contouring.
3. Adding Elastic to the Waist: If your tank top is loose around the waist area, adding elastic can help create a defined waistline and prevent the fabric from appearing shapeless. This method works well with flowy or loose-fitting tank tops and can be done by sewing a casing and inserting elastic for a cinched waist look.
4. Cutting and Reconstructing the Tank Top: For more advanced alterations, you may consider cutting and reconstructing the tank top. This method is suitable if you want to change the overall style or fit of the tank top. It involves cutting the fabric and sewing it back together to achieve the desired look. Keep in mind that this method requires more sewing skills and precision.
When deciding on the alteration method, consider your sewing skill level and the equipment you have available. Some methods may require more complex sewing techniques or the use of a sewing machine. Choose an alteration method that you feel comfortable with and confident in executing.
Additionally, think about the fabric of your tank top. Some alteration methods may work better with certain fabric types, such as woven cotton or stretchy knits. Consider how the fabric will behave during the alteration process and how it will affect the final fit and appearance of the tank top.
Remember, the goal is to choose an alteration method that addresses the specific fitting issues of your tank top and achieves the desired fit and style. Once you have selected the alteration method, gather the necessary supplies and get ready to transform your tank top into a perfectly fitting garment.
Gather the Necessary Supplies
Before you begin altering your tank top, it’s important to gather all the necessary supplies. Having the right tools at hand will ensure a smoother and more efficient alteration process. Here’s a list of the essential supplies you’ll need:
- Measuring Tape: A measuring tape is essential for taking accurate measurements of your tank top and determining the amount of alteration needed.
- Pins or Clips: Use pins or clips to temporarily secure the fabric while you work on the alterations.
- Scissors: A good pair of fabric scissors will be needed for cutting fabric and trimming any excess.
- Seam Ripper: Sometimes, you may need to undo stitches or remove seams. A seam ripper is a handy tool for this purpose.
- Sewing Machine: If you have access to a sewing machine, it can speed up the alteration process and provide more precise sewing results. However, alterations can also be done by hand if you don’t have a machine.
- Needles and Thread: Stock up on sewing needles and matching thread colors for the specific fabric of your tank top.
- Elastic: If you plan on adding elastic to your tank top, make sure to have the appropriate width and length for your desired waistline measurement.
- Fabric Marking Tool: A fabric marking tool can be used to mark guidelines, darts, or any other information on the fabric. Choose a tool suitable for your fabric type, such as washable or disappearing ink markers.
- Iron and Ironing Board: A well-pressed fabric makes it easier to work with and results in more professional-looking alterations. Make sure you have an iron and ironing board handy.
- Additional Embellishments: If you want to add extra flair to your tank top, gather any additional embellishments like lace, sequins, or beads that you’d like to incorporate into your design.
Having all these supplies prepared and within reach before you start the alteration process will save time and make the process much more organized. Ensure that your sewing area is well-lit and comfortable, allowing you to work with ease and precision.
Remember, each alteration method may require specific additional supplies, depending on the technique and your preferences. Take the time to research and gather any additional materials needed based on the alteration method you’ve chosen.
Once you have all your supplies ready, you’re equipped to begin the alteration process and transform your oversized tank top into a garment that fits you perfectly!
Option 1: Take in the Sides
If your tank top is too loose around the bust, waist, or hips, one effective alteration method is to take in the sides. This simple adjustment can give your tank top a more fitted and flattering silhouette. Here’s how you can do it:
- Put on the tank top and assess how much fabric needs to be taken in on each side. Pinch the excess fabric and measure the amount using a measuring tape. Remember to distribute the adjustments evenly on both sides.
- Take off the tank top and turn it inside out. Lay it flat on a table or ironing board.
- Using pins or clips, secure the fabric along the sides, following the measurements you obtained in the previous step.
- Starting from the armhole, sew along the pinned or clipped line. Use a straight stitch or a zigzag stitch if your fabric is stretchy. Be sure to backstitch at the beginning and end of the seam to secure it.
- Try on the tank top to check the fit. If it’s still too loose, make any necessary adjustments by redoing the seam or taking in more fabric. Remember to try it on after each adjustment to ensure the desired fit.
- If you’re satisfied with the fit, trim any excess fabric along the seam, leaving a small allowance. This will give a neater finish.
- Finally, give the tank top a press with an iron to smooth out any wrinkles or creases. Your tank top is now ready to be worn with its improved fit!
Remember, taking in the sides is a customizable alteration method. You can adjust the amount of fabric you take in based on your preferences and desired fit. Additionally, consider the fabric of your tank top. If it’s a stretchy knit, you may need to use a stretch stitch or a serger to ensure the seam doesn’t snap or break when the fabric stretches.
By taking in the sides, you can transform your oversized tank top into a garment that accentuates your curves and provides a more tailored look. It’s a relatively simple alteration that can make a significant difference in how your tank top fits and flatters your body shape.
Keep in mind that while this method is effective for adjusting the width of the tank top, it may not solve fitting issues related to length, armholes, or neckline. For those specific alterations, you may need to explore other options such as creating darts or modifying the design of the tank top.
Now that you’ve learned how to take in the sides of your tank top, you’re one step closer to achieving the perfect fit. If you’re looking for other alteration methods, continue reading to explore more options for transforming your tank top into a garment that’s tailored to your body.
Option 2: Create Darts
If you have excess fabric around the bust area or want to add shaping to your tank top, creating darts is an excellent alteration method. Darts can give your tank top a more tailored and fitted look, enhancing your curves and improving the overall fit. Follow these steps to create darts in your tank top:
- Put on the tank top and assess where the fabric needs to be taken in around the bust area. Pinch and gather the excess fabric to determine the amount you want to remove.
- Take off the tank top and turn it inside out. Lay it flat on a table or ironing board.
- Using the measurements you obtained in the previous step, mark two points on each side of the tank top where the darts will start and end. The points should align vertically with the areas where you want to remove the excess fabric.
- Draw a straight line connecting each pair of points. These lines will serve as your guide for sewing the darts.
- Starting from the bottom point, fold the fabric along the drawn line, bringing the two points together. Pin or clip the fold to secure it in place.
- Repeat this process for the second line.
- Using a straight stitch, sew along each pinned or clipped line, tapering the stitch as you approach the top point of the dart. Backstitch at the beginning and end of each dart to secure them. Ensure that the stitches are evenly spaced and that they lie flat against the fabric.
- Try on the tank top to check the fit. If the darts are too tight or too loose, make any necessary adjustments by redoing the stitches or changing the tapering of the darts.
- Trim any excess fabric along the stitched lines, leaving a small allowance. This will give a neater finish.
- Press the darts with an iron to set them in place and flatten any wrinkles. Your tank top now has added shaping and a more tailored fit!
Creating darts is a versatile alteration method that can be customized based on your body shape and preferences. The size and shape of the darts can be adjusted to suit your desired fit. If you’re unsure about the placement or angle of the darts, you can baste them first or use fabric marking tools to help guide your sewing.
Remember to consider the fabric of your tank top when creating darts. If it’s a lightweight or delicate fabric, use caution when sewing to avoid puckering or distorting the fabric. It may also be helpful to reinforce the fabric with interfacing or stitching stabilizers before sewing the darts.
By adding darts to your tank top, you can create a more flattering and tailored silhouette that accentuates your curves. This alteration method is particularly effective for adjusting the fit around the bust area and creating a more defined waistline.
Now that you’ve learned how to create darts in your tank top, you have another option for achieving the perfect fit. If you’re interested, continue reading to explore more alteration methods to customize your tank top and make it uniquely yours.
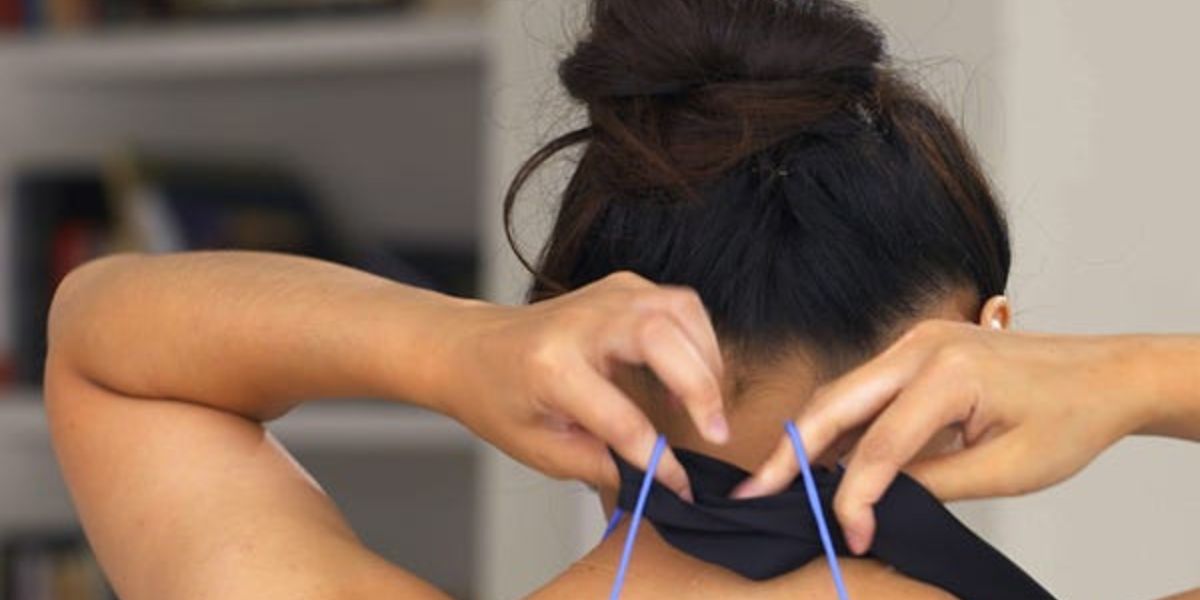
Option 3: Add Elastic to the Waist
If your tank top is loose around the waist area or lacks definition, adding elastic can help create a more fitted and flattering look. This alteration method is particularly useful for flowy or loose-fitting tank tops. Follow these steps to add elastic to the waist of your tank top:
- Measure your waist or desired waistline on the tank top and add an inch for the elastic casing.
- Take off the tank top and turn it inside out. Lay it flat on a table or ironing board.
- Using the measurement obtained in the previous step, mark a line along the waistline of the tank top.
- Measure and cut a piece of elastic that matches your waist measurement.
- With the tank top still inside out, fold the fabric along the marked line, creating a casing for the elastic. Pin or clip the folded fabric to secure it in place, leaving a small opening to insert the elastic.
- Attach a safety pin to one end of the elastic and thread it through the casing, being careful not to twist it. Pull the elastic through until it reaches the other end of the casing.
- Overlap the ends of the elastic by about half an inch and sew them together securely, either by hand or using a sewing machine.
- Close the opening in the casing by sewing it shut.
- Try on the tank top to check the fit. If the elastic feels too tight or too loose, adjust the length accordingly and sew it again.
- Give the tank top a press with an iron to flatten any wrinkles and distribute the gathers evenly.
Adding elastic to the waistline of your tank top can give it a more defined shape and prevent it from appearing shapeless or baggy. The elastic provides a cinched waist look and enhances the overall fit of the tank top.
Keep in mind that the width of the elastic and the tightness of the gathering can be adjusted based on your preferences and the fabric of your tank top. If your fabric is stretchy, you may need to use a slightly shorter length of elastic to ensure a snug fit around the waist.
This alteration method is a great way to add a touch of structure and definition to your tank top, transforming it into a more tailored and flattering garment. It’s a simple and effective alteration option, especially for loose-fitting or flowy tank tops.
Now that you’ve learned how to add elastic to the waist of your tank top, you have one more technique to customize the fit and style. If you’re interested, continue reading to explore additional alteration options and make your tank top uniquely yours.
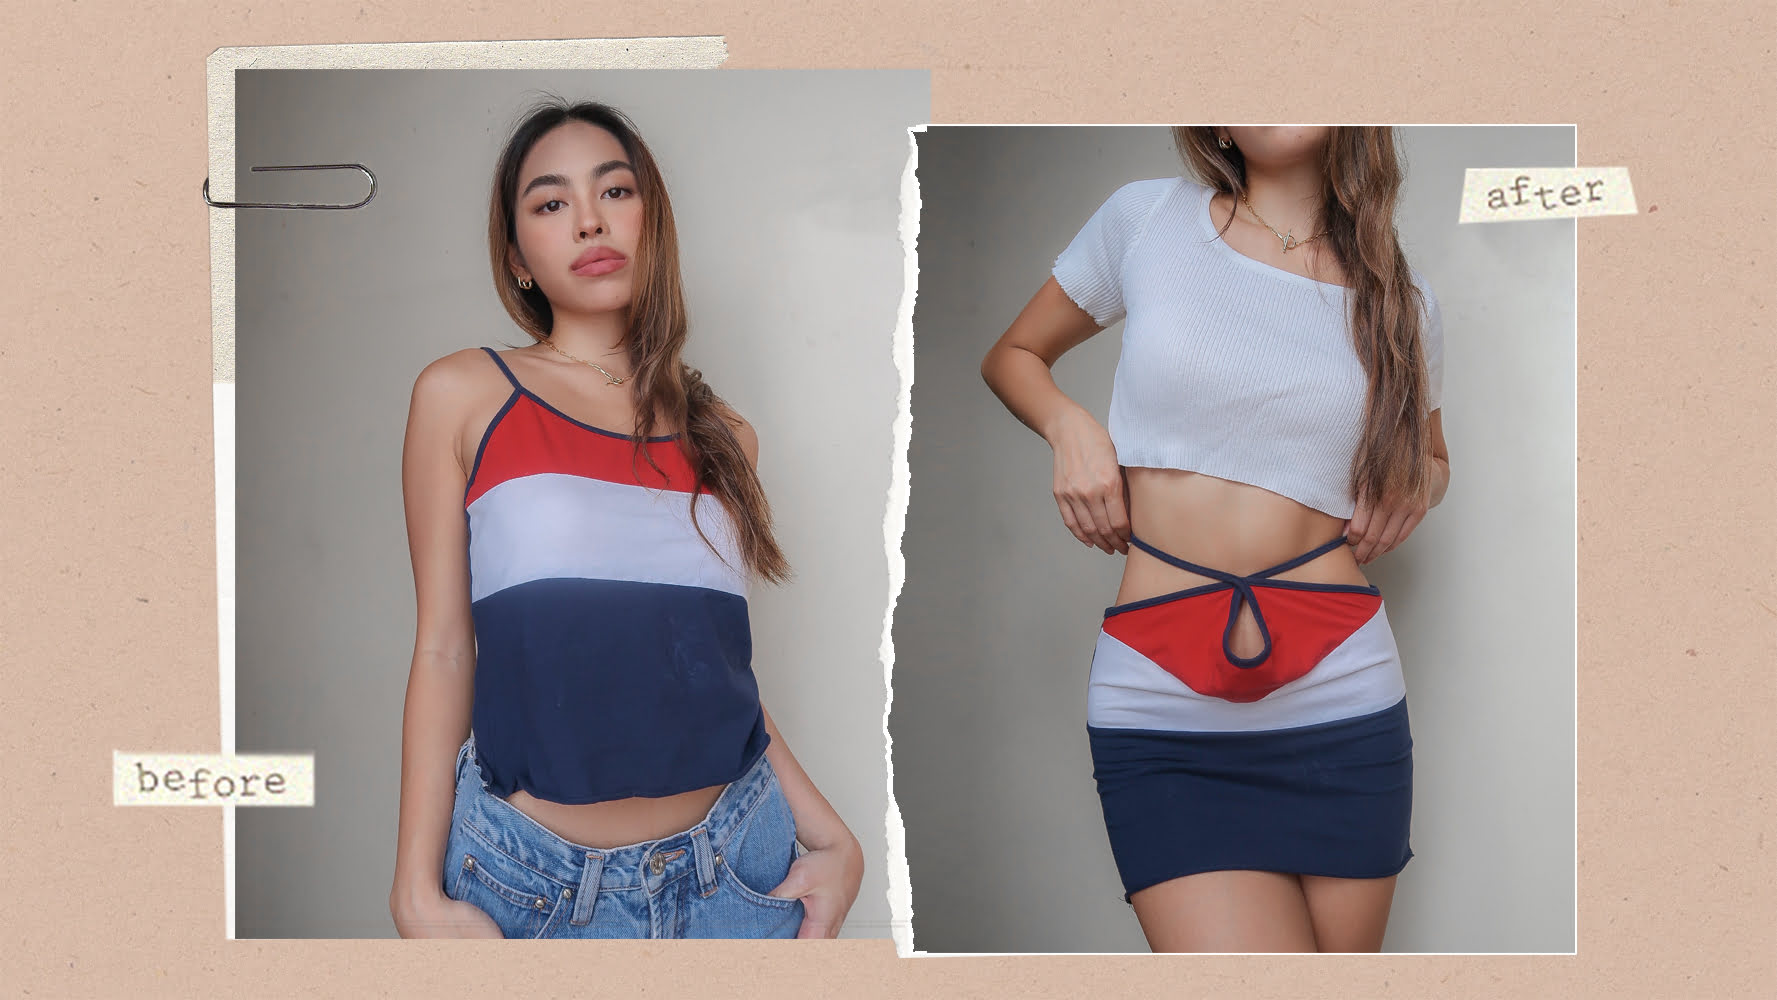
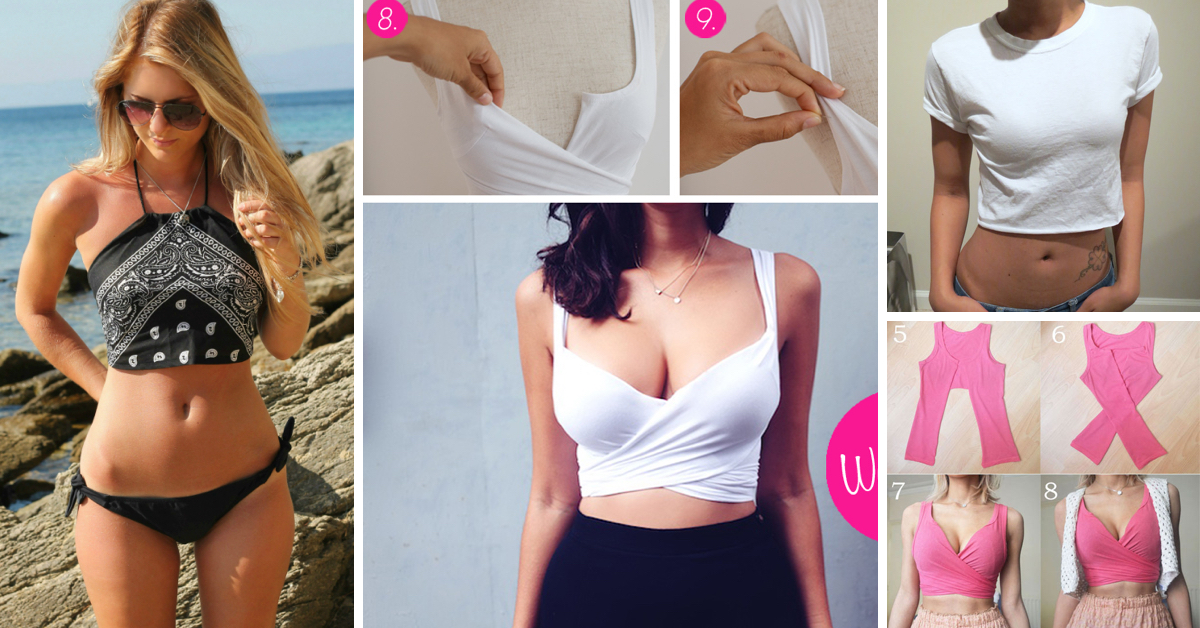
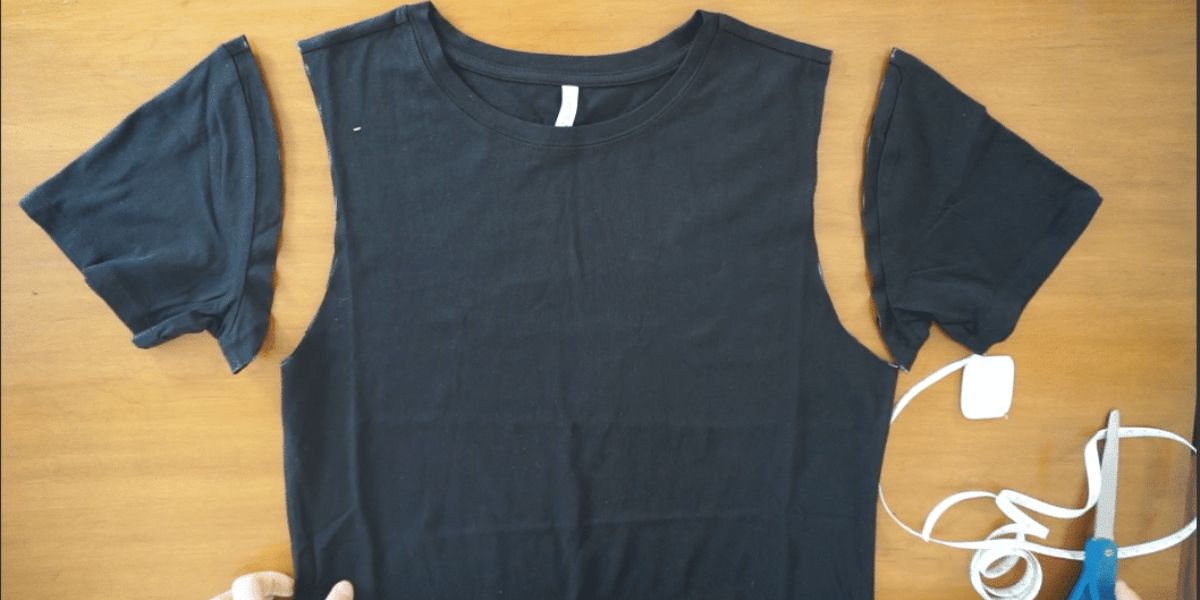
Option 4: Cut and Reconstruct the Tank Top
If you’re feeling adventurous and want to completely transform the style and fit of your tank top, cutting and reconstructing it can be a creative alteration option. This method allows you to customize the design, shape, and length of the tank top according to your preferences. Here’s how you can cut and reconstruct your tank top:
- Put on the tank top and visualize the style and design you want to achieve. Consider how you want to modify the length, neckline, or overall shape.
- Take off the tank top and lay it flat on a table or ironing board.
- Mark the areas where you want to make changes using fabric marking tools. Measure and mark the desired length, neckline, or any other modifications you have in mind.
- Using sharp fabric scissors, carefully cut along the marked lines to remove the excess fabric. Take your time and make clean, precise cuts to achieve the desired shape.
- If you’re adjusting the neckline, consider finishing the raw edges with bias tape or a rolled hem for a neater and more professional look.
- If you’re modifying the length, you can hem the bottom by folding the fabric twice and sewing along the edge to secure it.
- Try on the tank top to check the fit and design. Make any necessary adjustments by trimming or re-sewing certain areas.
- Press the reconstructed tank top with an iron to smooth out any wrinkles and give it a polished finish.
When cutting and reconstructing your tank top, don’t be afraid to get creative and experiment with different styles and designs. You can turn a basic tank top into a stylish crop top, add asymmetrical hems, or create unique cut-out patterns. Let your imagination lead the way!
Keep in mind that cutting and reconstructing a tank top requires more advanced sewing skills and precision. Ensure that you have the necessary tools and equipment, including sharp scissors and a sewing machine if needed. Take your time and approach the process with patience and creativity.
This alteration method allows you to completely transform your tank top, making it a one-of-a-kind piece that perfectly suits your style and body shape. It gives you the freedom to customize every aspect of the tank top, from the fit and length to the overall design.
Now that you’ve learned how to cut and reconstruct your tank top, the possibilities are endless. If you’re interested, continue reading to explore more alteration methods and further personalize your tank top.
Finishing Touches and Final Fit Check
Once you’ve completed the alterations on your tank top, it’s time to add the finishing touches and do a final fit check. These steps will ensure that your tank top not only fits well but also has a polished and professional finish. Here’s what you need to do:
- Inspect the seams and edges of the tank top to ensure that they are secure. If necessary, reinforce any weak or stretched seams by sewing over them again or adding an extra line of stitching.
- Trim any excess threads or fabric that may be sticking out or hanging loose.
- Try on the tank top and carefully evaluate the fit. Move around, raise your arms, and bend to ensure that the alterations hold up and the tank top feels comfortable.
- Stand in front of a mirror to assess the overall appearance and fit of the tank top. Take note of any areas that may still need adjustment or refinement.
- Make any final tweaks or adjustments based on your observations. This could involve further taking in the sides, adjusting the darts, or refining the shape.
- Gently press the tank top with an iron to smooth out any wrinkles and give it a polished look. Pay attention to the seams and hems to ensure they lay flat.
Remember, fitting preferences can vary from person to person. If you’re satisfied with the fit and appearance of your tank top, then it’s ready to be worn and enjoyed. However, if there are any areas that still bother you or need improvement, don’t hesitate to make further alterations until you achieve the desired result.
Additionally, consider adding any final embellishments or personal touches to make your tank top more unique and stylish. This could include sewing on lace trim, adding embroidery or patches, or enhancing the design with fabric paint or appliques. Let your creativity shine and make your tank top a true reflection of your personal style.
By giving attention to the finishing touches and doing a final fit check, you can ensure that your altered tank top fits and looks just the way you want it to. Enjoy your newly transformed garment and feel confident in your customized creation!
Conclusion
Congratulations! You have successfully learned how to alter a tank top that’s too big, allowing you to transform oversized and ill-fitting garments into stylish and well-fitted pieces that flatter your body shape. Whether you took in the sides, created darts, added elastic to the waist, or cut and reconstructed the tank top, these alteration methods have provided you with the flexibility to customize your tank tops to your preferences and achieve the perfect fit.
Throughout this guide, we emphasized the importance of assessing the fit, choosing the correct alteration method, and gathering the necessary supplies. By following these steps, you were able to confidently tackle the alteration process and achieve excellent results.
Remember, alterations are personal and subjective, and everyone’s preferences and body shapes vary. Take the time to experiment and find the alteration methods that work best for you. Don’t be afraid to get creative and add your own personal touches to make your tank top even more unique and stylish.
Now armed with the knowledge and skills to alter your tank tops, you have the ability to breathe new life into your wardrobe. Instead of begrudgingly wearing ill-fitting clothing, you can confidently strut your stuff in tank tops that fit you like a glove.
So, start rummaging through your closet, find those tank tops that have been collecting dust, and transform them into your new favorite garments. With a little time, effort, and creativity, you’ll be able to revamp your tank tops and enjoy a wardrobe that is personalized to your style and body shape.
Happy altering!