Home>How-to Guides>For Women>How To Make A Crochet Tank Top
For Women
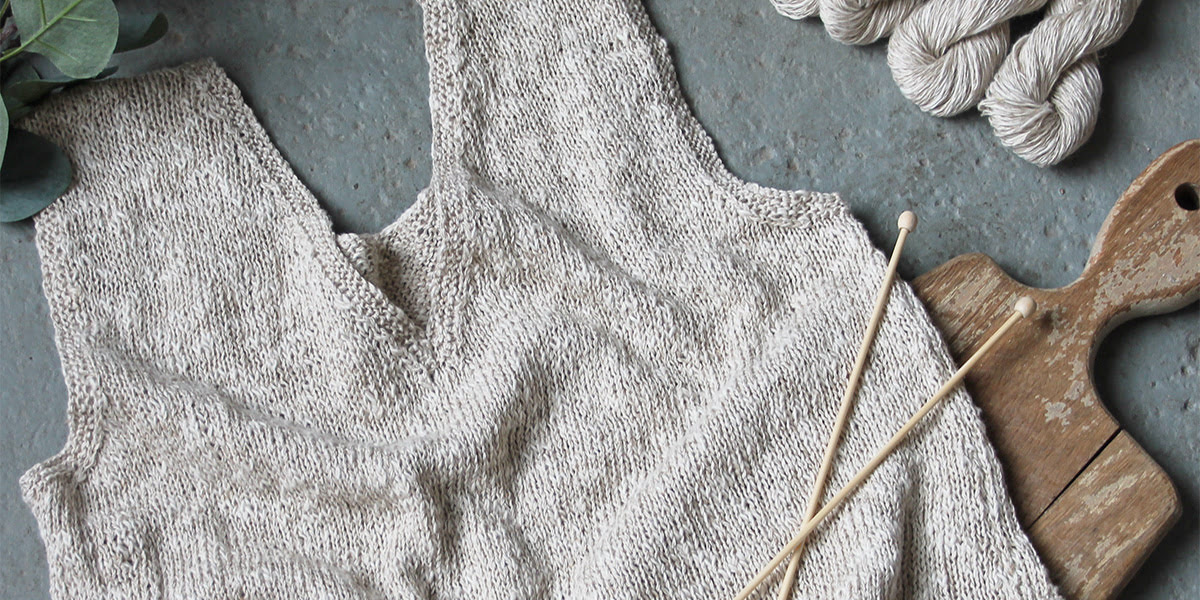
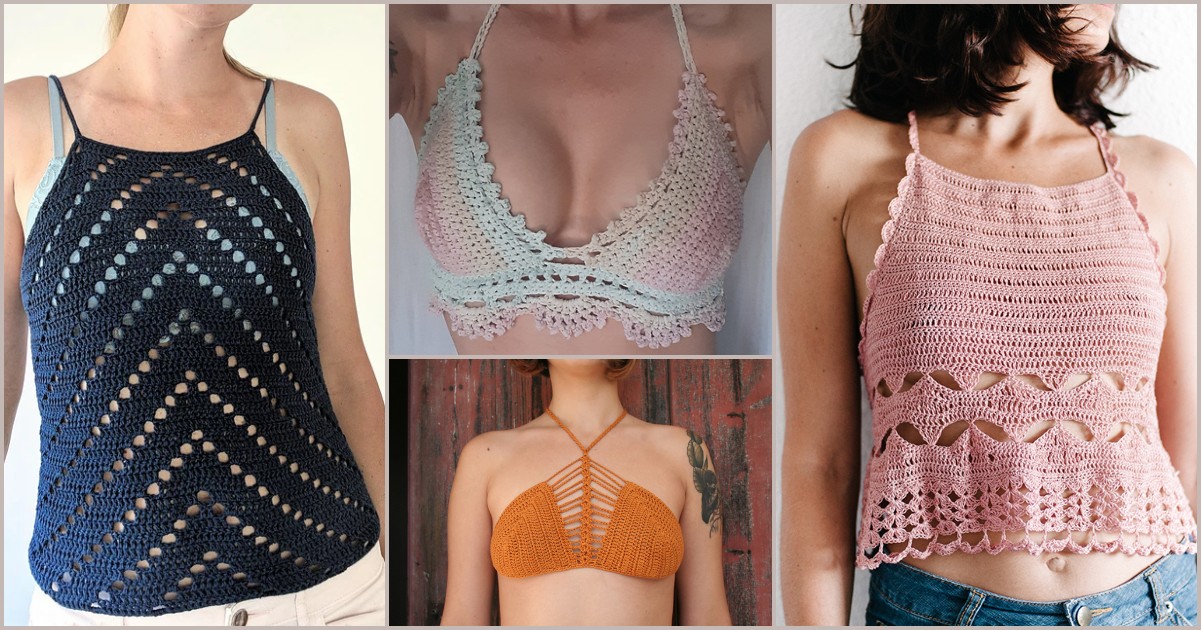
How To Make A Crochet Tank Top
Modified: July 30, 2023
Learn how to make a stylish crochet tank top for women with our easy-to-follow tutorial. Create your own fashionable summer wardrobe now!
(Many of the links in this article redirect to a specific reviewed product. Your purchase of these products through affiliate links helps to generate commission for Under-tec.com, at no extra cost. Learn more)
Table of Contents
- Introduction
- Materials Needed
- Step 1: Taking Measurements
- Step 2: Choosing the Crochet Pattern
- Step 3: Gathering Supplies
- Step 4: Starting with a Foundation Chain
- Step 5: Crocheting the Front Panel
- Step 6: Shaping the Armholes
- Step 7: Crocheting the Back Panel
- Step 8: Joining the Panels
- Step 9: Adding Straps or Sleeves
- Step 10: Finishing Touches
- Conclusion
Introduction
Are you ready to add a versatile and stylish piece to your wardrobe? Look no further than a crochet tank top. This trendy garment is not only fashionable but also customizable, allowing you to create a unique and personalized look.
Whether you’re an experienced crocheter or a beginner looking for a fun project, making a crochet tank top is a great way to showcase your skills and creativity. This article will guide you through the process of creating your own crochet tank top, from taking measurements to adding the finishing touches.
With the right materials, patterns, and techniques, you can create a tank top that fits your body perfectly and reflects your personal style. The possibilities are endless when it comes to choosing yarn colors, stitch patterns, and additional design elements.
In this step-by-step guide, we’ll walk you through the process of making a crochet tank top. You’ll learn how to take accurate measurements, select the perfect crochet pattern, gather supplies, and crochet the front and back panels. We’ll also cover how to shape the armholes, join the panels, and add straps or sleeves to complete your tank top.
By the end of this article, you’ll be equipped with the knowledge and skills to create a stunning crochet tank top that will turn heads wherever you go.
Materials Needed
Before we dive into the crochet process, let’s gather all the materials you’ll need to create your crochet tank top. Here’s a list of essential items to have on hand:
- Crochet hooks in various sizes (depending on the yarn weight you choose)
- Yarn: Select a soft, breathable, and durable yarn that suits your style and color preference. Consider using cotton or bamboo yarn for a comfortable summer tank top.
- Tape measure: This will help you take accurate measurements for a properly fitting tank top.
- Scissors: These will come in handy for cutting yarn and trimming loose ends.
- Yarn needle: Use a yarn needle with a large eye to weave in loose ends and sew any seams.
- Stitch markers: These will help you keep track of stitch counts or mark specific points in your pattern.
- Buttons, beads, or other embellishments (optional): Personalize your tank top by adding decorative elements to make it truly unique.
- Pattern: Find a crochet tank top pattern that suits your skill level and desired style.
It’s important to note that the size and type of materials may vary depending on your specific project and desired outcomes. So, feel free to customize your supplies according to your preferences.
Once you have gathered all the necessary materials, you’ll be ready to move on to the next steps: taking measurements and selecting a crochet pattern.
Step 1: Taking Measurements
Before you begin crocheting your tank top, it’s crucial to take accurate measurements to ensure a proper fit. Here are the key measurements you’ll need:
- Bust: Measure the fullest part of your bust, wrapping the tape measure around your body and keeping it parallel to the floor. Make sure the tape measure is snug but not too tight.
- Waist: Measure the narrowest part of your waist, usually located between your ribcage and belly button. Again, keep the tape measure parallel to the floor and make sure it’s comfortably snug.
- Hip: Measure the widest part of your hips, ensuring that the tape measure is level and parallel to the floor.
- Length: Decide how long you want your tank top to be and measure from the top of your shoulder to your desired length.
Once you have these measurements, you can use them as a guide for selecting the appropriate size in your chosen crochet pattern or for customizing your own design.
Remember, it’s always better to err on the side of caution and choose a slightly larger size, as crochet fabric tends to have less stretch compared to knit or woven fabrics. You can also make adjustments during the crocheting process to ensure a perfect fit.
Now that you have your measurements on hand, you’re ready to move on to the next step: choosing the crochet pattern.
Step 2: Choosing the Crochet Pattern
Now that you have taken your measurements, it’s time to select a crochet pattern for your tank top. There are a variety of patterns available, ranging from beginner-friendly to more advanced designs. Consider the following factors when making your choice:
- Skill Level: Assess your crochet skills honestly and choose a pattern that matches your expertise. If you’re a beginner, opt for a simple pattern with basic stitches. Intermediate and advanced crocheters can challenge themselves with more intricate designs.
- Style: Think about the style you want to achieve with your tank top. Do you prefer a classic, fitted silhouette or a loose, bohemian-inspired look? Look for patterns that align with your personal style and fashion preferences.
- Yarn Weight: Take note of the recommended yarn weight specified in the pattern. This will help you choose a suitable yarn that matches the desired drape and elasticity of your tank top.
- Gauge: Pay attention to the gauge mentioned in the pattern. Gauge refers to the number of stitches and rows per inch that the pattern designer recommends. Achieving the correct gauge is crucial for ensuring that your tank top will have the correct measurements and fit.
There are many resources available for finding crochet patterns, including books, online platforms, and social media. Take your time and browse through various sources to find a pattern that captures your interest and matches your skills and preferences.
Remember, you can also modify existing patterns to fit your specific measurements or combine different elements from multiple patterns to create a unique design. Get creative and make it your own!
Once you have selected a pattern, it’s time to gather your supplies and get ready to start crocheting your tank top.
Step 3: Gathering Supplies
Now that you have your chosen crochet pattern, it’s time to gather all the necessary supplies to start crocheting your tank top. Here’s what you’ll need:
- Crochet Hooks: Select the appropriate crochet hook size based on the yarn weight recommended in your pattern. Different patterns may require different hook sizes, so make sure to check the pattern instructions.
- Yarn: Choose a yarn that matches the requirements of your chosen pattern. Consider the fiber content, texture, and color that align with your preferences and the project’s purpose. It’s always a good idea to purchase extra yarn to account for any mistakes or adjustments you may need to make.
- Tape Measure: A reliable tape measure will come in handy for measuring your progress and ensuring accuracy throughout the project.
- Scissors: Keep a pair of sharp scissors nearby for cutting yarn and trimming any loose ends.
- Yarn Needle: A large-eyed yarn needle is essential for weaving in the loose ends of your project and sewing any seams.
- Stitch Markers: Use stitch markers to mark the beginning or end of rounds, specific stitch patterns, or any other important points in your pattern. They can be as simple as safety pins or specially designed markers.
- Buttons or other Embellishments (optional): If you plan to add buttons, beads, or other decorative elements to your tank top, gather them now to ensure they match your yarn and desired style.
- Notebook and Pen: Have a notebook or journal and a pen handy for taking notes, tracking your progress, and making any modifications or adjustments during the crocheting process.
Once you have gathered all the necessary supplies, find a comfortable and well-lit space to work in. Having everything within reach will make the crocheting process more seamless and enjoyable.
With your supplies ready, you’re now prepared to move on to the next step: starting with a foundation chain and beginning the crocheting process.
Step 4: Starting with a Foundation Chain
Now that you have all your supplies ready, it’s time to start crocheting your tank top. The first step is to create a foundation chain, which will serve as the starting point for your project. Follow these steps:
- Hold the crochet hook in your dominant hand and make a slip knot by creating a small loop with the yarn.
- Insert the crochet hook into the slip knot, catching the yarn with the hook, and pulling it through the slip knot loop.
- Tighten the slip knot by gently pulling the yarn tail.
- With the slip knot secured on your crochet hook, yarn over (wrap the yarn around the hook from back to front).
- Using the hook, pull the yarn through the slip knot, creating a new loop on the hook.
- Repeat steps 4 and 5 until you have the desired number of chains, as indicated in your pattern or based on your measurements.
Remember to keep your tension even throughout the foundation chain, neither too tight nor too loose. This will ensure that your tank top has a consistent and balanced appearance.
Once you have completed the foundation chain, take a moment to double-check the number of chains you have made. It’s important to have an accurate count as this will determine the width of your tank top.
With the foundation chain complete, you are now ready to move on to the next step: crocheting the front panel of your tank top.
Step 5: Crocheting the Front Panel
Now that you have your foundation chain, it’s time to start crocheting the front panel of your tank top. This part will determine the width and shape of the front of your garment. Follow these steps:
- Start by crocheting a row of foundation stitches according to your chosen pattern. This could be single crochet, double crochet, or any other stitch pattern specified.
- Work row by row, following the pattern instructions for stitch type and stitch count. Pay attention to any shaping instructions, such as increasing or decreasing stitches to achieve the desired fit.
- Keep count of the number of rows you have worked to ensure even shaping and symmetry in your piece.
- Continue crocheting until you reach the desired height for the front panel, which may be mentioned in your pattern or based on your measurements.
- Remember to maintain a consistent tension to ensure a neat and uniform appearance throughout your work.
- At the end of the front panel, finish off your work by securing the last stitch and cutting the yarn, leaving a tail for weaving in later.
Take occasional breaks to measure your progress against your measurements or hold the piece up against your body to check the fit. This will help ensure that your garment is coming together as intended.
Don’t hesitate to reach out for help or clarification if you encounter any difficulties or have questions while crocheting the front panel. There are numerous resources available online and within the crochet community that can provide guidance and support.
Once the front panel is complete, you can move on to the next step: shaping the armholes.
Step 6: Shaping the Armholes
Shaping the armholes is an important step in crocheting your tank top, as it determines the fit and comfort around your arms. Follow these steps to shape the armholes:
- Identify the stitches on each side of the front panel where the armholes will begin. This will typically be mentioned in your pattern or determined by your measurements.
- Count the number of stitches you will skip to create the armhole. This will vary depending on the size and style of your tank top.
- Work the specified number of stitches until you reach the first armhole marker.
- Place a stitch marker at the starting point of each armhole. This will help you keep track of the armhole placement as you continue crocheting.
- Continue crocheting, skipping the marked stitches for the armholes and working the remaining stitches as indicated in the pattern.
- Follow any shaping instructions provided in the pattern, such as decreasing stitches to achieve a narrower armhole or creating curves for a more tailored fit.
- Keep working rows until you reach the desired length for the armholes, making sure to maintain a consistent tension throughout.
- Finish off your work, secure the last stitch, and cut the yarn, leaving a tail for weaving in later.
Take the time to try on your tank top and assess the fit of the armholes. If adjustments need to be made, this is the stage where you can unravel a few rows and make the necessary modifications. Remember to measure and check the fit against your own body or a well-fitting garment to ensure a comfortable and flattering result.
Once you have shaped the armholes to your satisfaction, you can proceed to the next step: crocheting the back panel of your tank top.
Step 7: Crocheting the Back Panel
Now that you have completed the front panel and shaped the armholes, it’s time to crochet the back panel of your tank top. Follow these steps to create the back panel:
- Start with a new yarn strand or join the yarn at one of the shoulders.
- Refer to your pattern for the stitch pattern and stitch count for the back panel.
- Crochet each row, following the pattern instructions, until you reach the desired height for the back panel.
- Keep in mind any shaping instructions in the pattern, such as increases or decreases, to achieve the desired fit.
- Continue crocheting, ensuring that the stitch count and pattern match up with the front panel and armhole shaping.
- Pay attention to your tension to maintain consistency throughout your work.
- Once you reach the desired height, finish off your work by securing the last stitch and cutting the yarn, leaving a tail for weaving in later.
While crocheting the back panel, it’s a good idea to periodically check and compare it to the front panel to ensure that they are the same width and length. This will ensure a symmetrical and well-fitting tank top.
At this point, you can try on your tank top to assess the overall fit and make any necessary adjustments. If you need to make modifications, now is the time to unravel and rework rows as needed.
Once you are satisfied with the back panel, you are almost ready to complete your tank top. The next step is to join the front and back panels together.
Step 8: Joining the Panels
With both the front and back panels of your tank top completed, it’s time to join them together. Follow these steps to seamlessly connect the panels:
- Lay the front and back panels side by side, making sure they are aligned properly.
- Using a yarn needle and a length of yarn in the same color as your project, thread the yarn through the needle.
- Starting at the bottom corner of one side, align the edges of the front and back panels.
- Insert the needle through the corresponding stitches on both panels, creating a secure and invisible seam. You can use a mattress stitch or any other stitch recommended by your pattern.
- Continue joining the panels together, stitch by stitch, until you reach the top shoulder on the same side.
- Repeat Steps 3-5 for the other side of the tank top, ensuring that the edges are aligned evenly.
Take care to maintain consistent tension while joining the panels to ensure a smooth and professional-looking seam. It’s a good idea to periodically try on the tank top during the joining process to ensure a proper fit and adjust if necessary.
Once you have completed the joining process, take a moment to inspect your work and make any final adjustments. Weave in any loose ends using your yarn needle to ensure a clean and polished finish.
With the panels successfully joined, your tank top is nearly complete. The next step is to add straps or sleeves, depending on your design preference.
Step 9: Adding Straps or Sleeves
Adding straps or sleeves to your crochet tank top can further enhance its style and functionality. Whether you prefer thin straps, wide straps, or even sleeves, this step allows you to customize your tank top to your liking. Follow these steps to add straps or sleeves:
- Determine the desired width and length of the straps or sleeves. Consider the look you want to achieve and your personal comfort.
- Choose a stitch pattern for the straps or sleeves that complements the design of your tank top. You can use the same stitch pattern as the body or change it up for added visual interest.
- Start crochetting the first strap or sleeve by attaching the yarn at the desired starting point. Crochet the desired number of stitches or rows according to your design.
- Ensure that the strap or sleeve is even in length and width, using stitch markers or a tape measure to guide you if necessary.
- Repeat the same steps on the opposite side to create symmetry in your tank top.
- Try on the tank top and adjust the length or fit of the straps or sleeves as needed. This is your opportunity to make any modifications to achieve the desired look and feel.
- Once you are satisfied, finish off your work by securing the last stitch, cutting the yarn, and weaving in any loose ends.
Remember to maintain a consistent tension while crocheting the straps or sleeves to ensure a seamless and professional finish. You can also experiment with different stitch patterns, color changes, or embellishments to personalize your tank top even further.
Now, stand back and admire your tank top with its added straps or sleeves. The final step is to add any finishing touches to perfect your creation before you showcase it to the world.
Step 10: Finishing Touches
Congratulations on almost completing your crochet tank top! The final step is to add those little finishing touches that will elevate your garment to the next level. Here are some ideas to consider:
- Blocking: If your yarn and stitch pattern allow, consider blocking your tank top. Blocking helps even out stitches, relaxes fibers, and gives your garment a more polished appearance. Follow the blocking instructions specific to your yarn type to achieve the best results.
- Edging: Add a decorative edge to your tank top to give it a finished look. This could be a simple single crochet or slip stitch along the bottom hem, armholes, and neckline. You can also experiment with more intricate edging patterns to suit your personal style.
- Embellishments: Consider adding buttons, beads, or other decorative elements to enhance the design of your tank top. Sew them on strategically or incorporate them within your stitch pattern to create eye-catching details.
- Lining: If you prefer a more substantial or modest tank top, you can line the front panel or even the entire garment using a lightweight, breathable fabric. This will add comfort and coverage while still showcasing your crochet work on the outside.
- Finishing off: Take the time to weave in any remaining loose ends using a yarn needle. This ensures a clean and professional finish for your tank top and prevents any unraveled stitches.
Take a step back and admire your completed crochet tank top. Try it on again to see how it fits and feels. Make any final adjustments or tweaks to achieve your desired outcome. Remember, this is your creation, and you have the freedom to make it uniquely yours.
Now, it’s time to wear your newly finished crochet tank top with pride and confidence. Pair it with your favorite bottom clothing and accessories to create a stylish and personalized ensemble. Enjoy the satisfaction of wearing something you crafted with your own hands!
Conclusion
Congratulations on successfully completing your crochet tank top! Through this step-by-step guide, you have learned how to take accurate measurements, select a suitable crochet pattern, gather the necessary supplies, and crochet the front and back panels of your garment. You have also discovered how to shape the armholes, join the panels, add straps or sleeves, and apply the finishing touches to make your tank top unique.
By infusing your creativity and personal style into your crochet project, you have created a fashionable and versatile piece that reflects your individuality. The beauty of crochet is the ability to customize your garments to fit your body perfectly and showcase your skill and artistic flair.
Remember, don’t be afraid to make modifications or experiment with different stitch patterns, colors, or embellishments to truly make your tank top your own. Crochet is an ongoing journey of learning and exploring, and this project is just the beginning of your creative endeavors.
Now, it’s time to enjoy wearing your crochet tank top and flaunt it with pride. Whether you’re heading to the beach, a casual gathering, or simply enjoying a sunny day, your handmade creation will surely turn heads and spark conversations.
Don’t forget to share your finished project with fellow crocheters, friends, and family. Inspire others with your talent and inspire yourself to take on more crochet challenges in the future.
Thank you for joining us on this crochet journey. Happy crocheting!