Home>How-to Guides>For Women>How To Make A Tshirt Into A Racerback Tank Top
For Women
How To Make A Tshirt Into A Racerback Tank Top
Modified: August 5, 2023
Learn how to transform a regular t-shirt into a stylish racerback tank top for women. Step-by-step guide with easy instructions to reinvent your wardrobe!
(Many of the links in this article redirect to a specific reviewed product. Your purchase of these products through affiliate links helps to generate commission for Under-tec.com, at no extra cost. Learn more)
Table of Contents
Introduction
Welcome to our step-by-step guide on how to transform a regular t-shirt into a trendy racerback tank top! Racerback tank tops are a popular choice for summer outfits, as they provide a stylish and comfortable option for keeping cool in the heat. By repurposing your old t-shirts, you can create your own unique racerback tank tops without breaking the bank.
Whether you’re a fashion enthusiast looking to upcycle your wardrobe or a crafty individual searching for a fun DIY project, this tutorial is perfect for you. We will walk you through each stage of the process, from gathering the necessary materials to giving your tank top a personalized touch.
Not only is this project eco-friendly, but it also allows you to express your creativity and individuality. With just a few simple steps, you can transform a plain t-shirt into a fashionable racerback tank top that will be the envy of your friends.
So, grab your scissors and sewing kit, and let’s get started on this exciting DIY adventure!
Materials Needed
Before we begin, let’s make sure you have all the necessary materials to complete this project. Here’s a list of items you’ll need:
- A t-shirt: Select a t-shirt that you no longer wear or want to repurpose. Choose a t-shirt that is slightly oversized for a more relaxed fit.
- Scissors: Make sure you have a sharp pair of fabric scissors to cut through the fabric easily.
- Measuring tape: This will help you to measure and mark the fabric accurately.
- Pins: Use pins to hold the fabric in place while cutting and sewing.
- Sewing machine or needle and thread: You have the option to use a sewing machine or hand sew the edges. Choose the method you’re most comfortable with.
- Fabric marker or chalk: This will help you mark the fabric for cutting.
- Embellishments (optional): If you want to add some personal touches to your racerback tank top, gather any embellishments such as lace, ribbons, or appliques.
Make sure you have all these materials ready before you begin transforming your t-shirt into a racerback tank top. It’s always better to be prepared!
Step 1: Gather Your Supplies
Before we dive into the transformation process, let’s gather all the supplies you’ll need for this DIY project. Having everything ready will ensure a smoother and more efficient process.
First, locate the t-shirt you want to turn into a racerback tank top. Look for a t-shirt that you no longer wear or one that you’re willing to repurpose. It’s best to choose a t-shirt that is one or two sizes larger than your regular size for a more relaxed and comfortable fit.
Next, grab a pair of sharp fabric scissors. These will be essential for cutting through the fabric smoothly and accurately.
You’ll also need a measuring tape. This tool will help you measure and mark the fabric for cutting. Accurate measurements are crucial for achieving the desired shape and fit of your racerback tank top.
Pins are another important item to have on hand. They will be used to hold the fabric in place while cutting and sewing, ensuring that everything stays aligned and doesn’t shift during the process.
Decide whether you want to use a sewing machine or opt for hand sewing. If you have access to a sewing machine and are comfortable using one, it can speed up the process. However, if you prefer hand sewing or don’t have access to a machine, a needle and thread will suffice.
To mark the fabric accurately, you’ll need either a fabric marker or chalk. These tools will allow you to make clear and precise cutting guidelines on the fabric.
Lastly, consider any embellishments you want to add to your racerback tank top. Lace, ribbons, or appliques can add a unique touch to your creation. Depending on your personal style and creativity, gather any additional materials for customization.
With all your supplies in place, you’re now ready to proceed to the next step: marking and cutting the fabric.
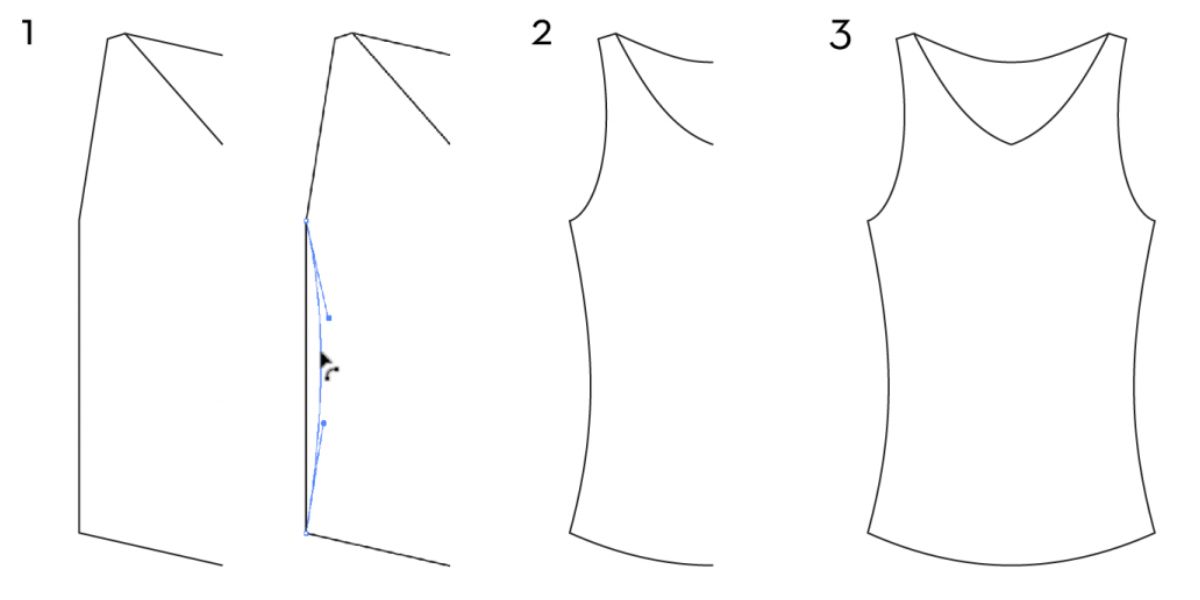
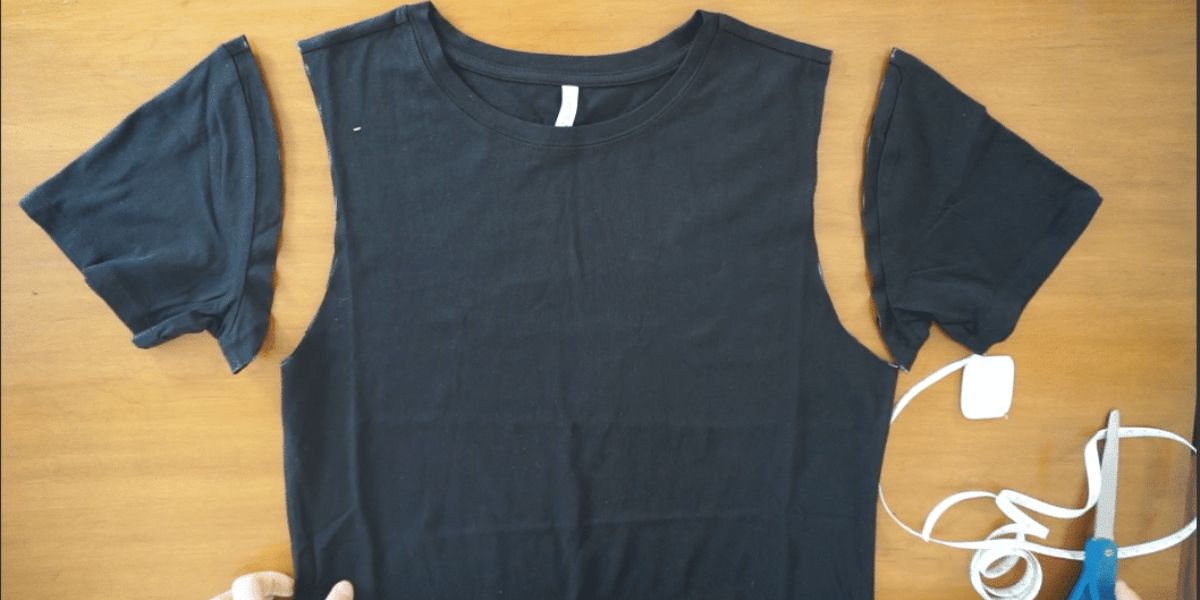
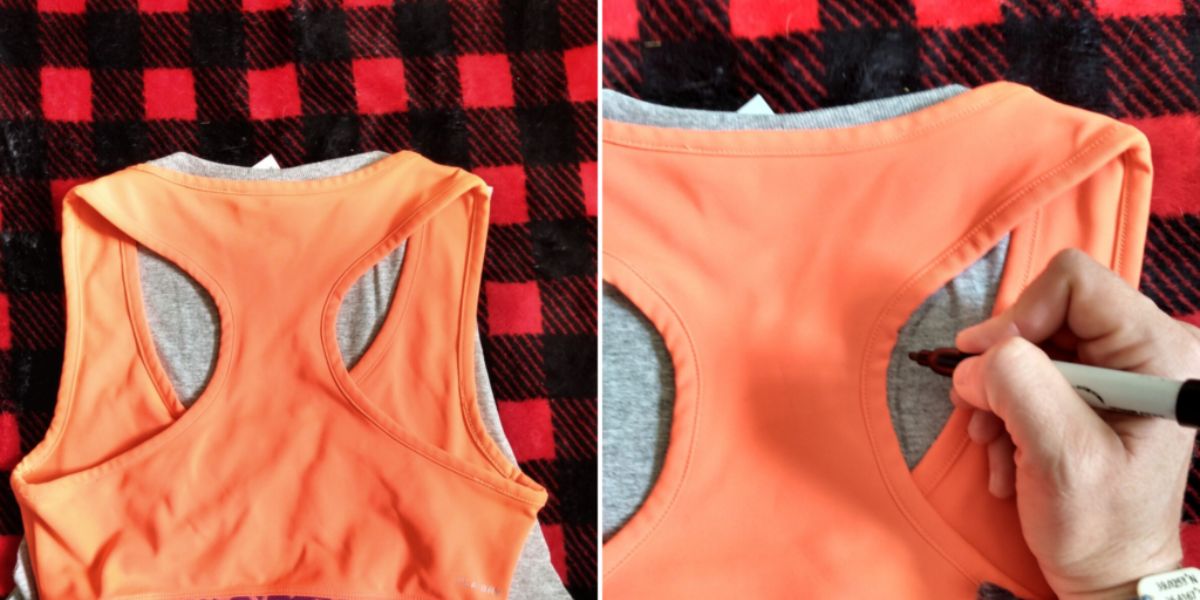
Step 2: Mark and Cut the Fabric
Now that you have all your supplies ready, it’s time to mark and cut the fabric of your t-shirt to create the desired racerback shape. Follow these steps:
- Lay your t-shirt on a flat surface. Smooth out any wrinkles or folds to ensure accurate markings.
- Start by marking the top center of the t-shirt. This will be the point where the racerback shape begins.
- Using your measuring tape, measure about 1.5 to 2 inches down from the top center mark on both sides of the t-shirt. Make small dots with your fabric marker or chalk to indicate these points.
- From each side dot, draw a diagonal line towards the middle of the t-shirt, creating a “V” shape. The angle of the lines depends on your preferred racerback width. Play around with it until you achieve the desired look.
- Use your fabric marker or chalk to connect the ends of the diagonal lines to the bottom hem of the t-shirt, creating a curved shape. This will be the outline for the racerback back of your tank top.
- For the front racerback shape, measure about 1.5 to 2 inches from the top center mark towards the shoulder on both sides of the t-shirt. Make small dots to indicate these points.
- Draw diagonal lines from the shoulder dots towards the middle of the t-shirt, just like you did for the back racerback shape. Connect the ends of these lines to the bottom hem, creating another curved shape.
- Once you’ve completed marking the racerback shape, carefully cut along the lines you’ve drawn. Remember to cut only the back layer of the fabric, leaving the front layer intact.
Take your time while marking and cutting the fabric to ensure accuracy. Pay attention to the curvature of the lines and adjust as needed to achieve the desired racerback shape. Double-check your work before proceeding to the next step. Once you’re satisfied with the cut, you’re ready to move on to creating the racerback shape.
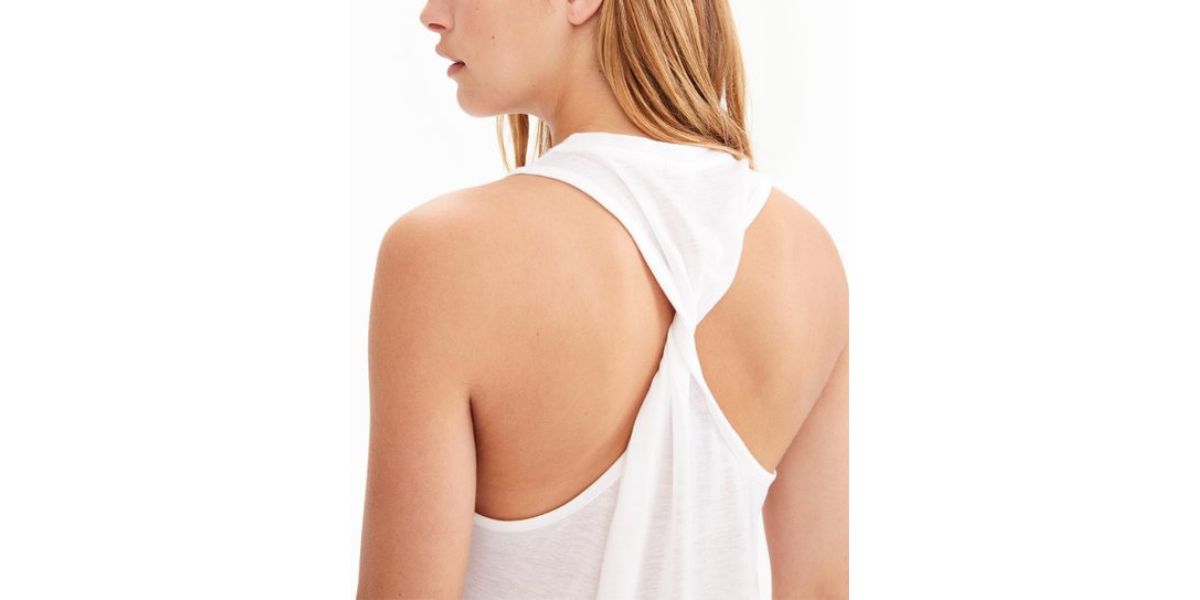
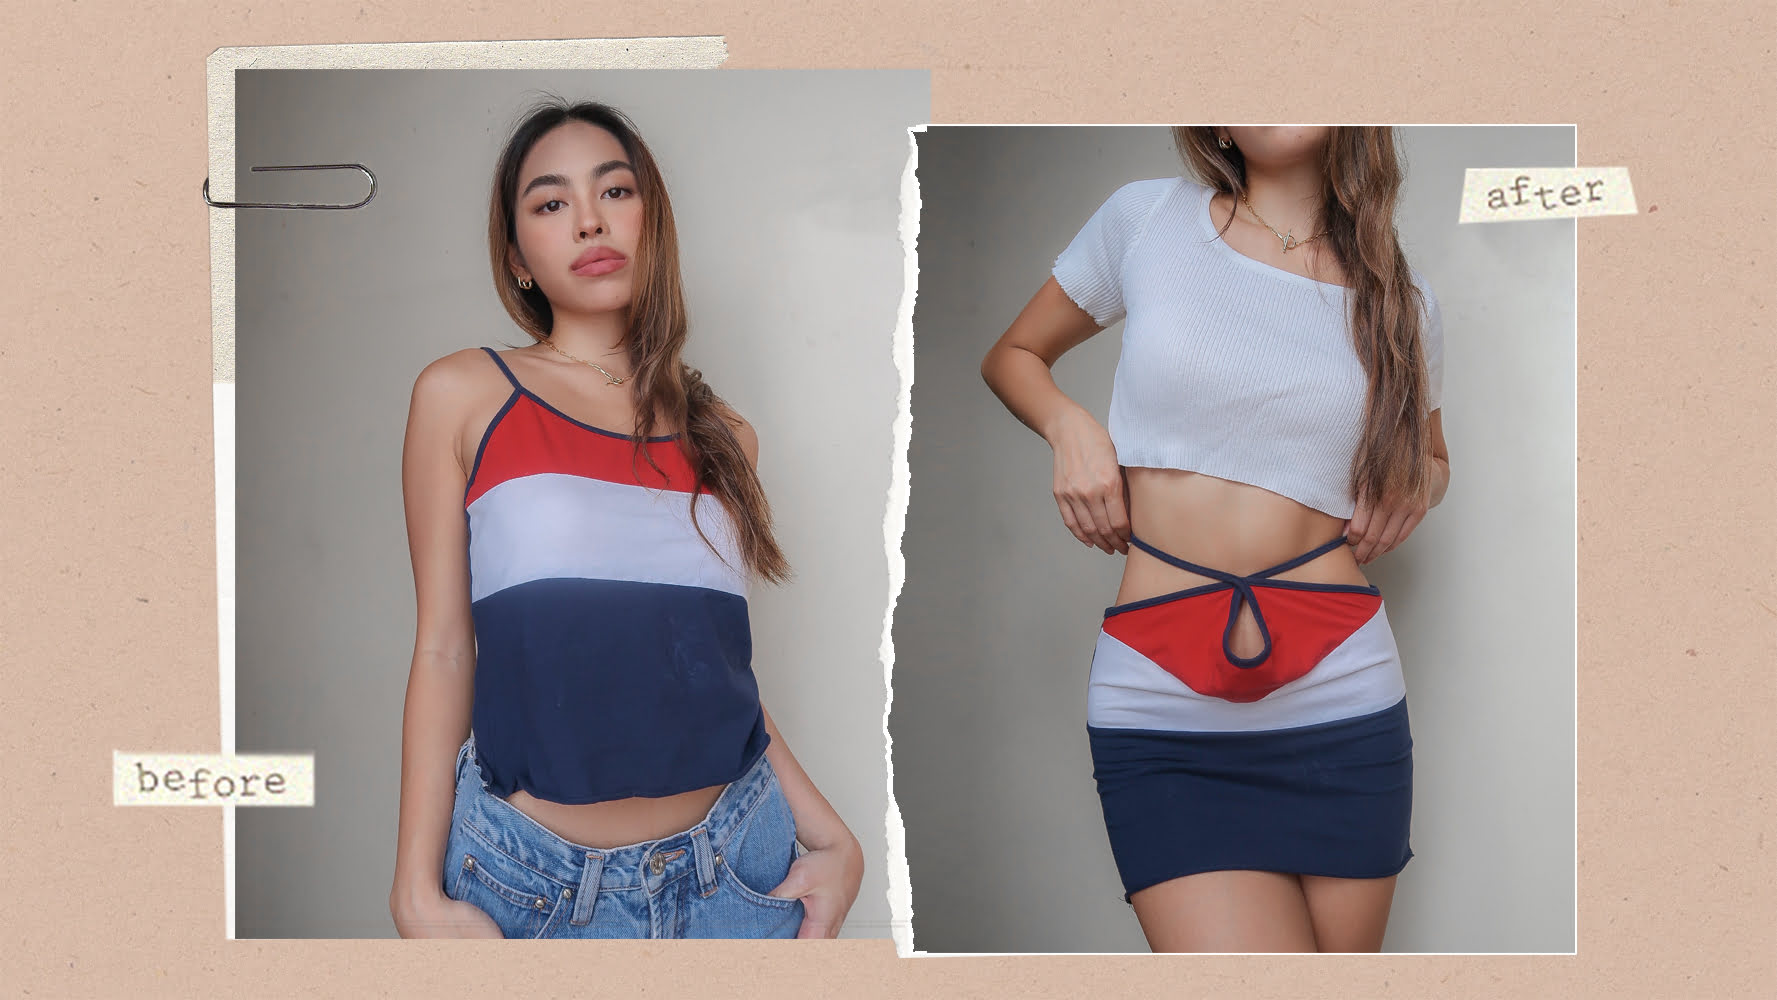
Step 3: Create the Racerback Shape
With the fabric of your t-shirt cut into the desired racerback shape, it’s time to create the racerback back and front of your tank top. Follow these steps to achieve the perfect racerback look:
- Flip your t-shirt over so that the back side is facing up.
- Take one side of the diagonal back lines and fold it towards the middle of the t-shirt. Use pins to secure it in place. Repeat this step for the other side, creating a symmetrical racerback shape.
- Next, flip the t-shirt back to the front side.
- Take one side of the diagonal front lines and fold it towards the middle of the t-shirt, aligning it with the back racerback shape. Use pins to hold it in place. Repeat this step for the other side, again creating a symmetrical look.
- Try on the t-shirt to ensure that the racerback shape fits comfortably and aligns properly. Make any adjustments as needed, such as tightening or loosening the folds.
Creating the racerback shape is crucial in achieving the desired style of your tank top. The folds should be secure but not too tight, allowing for comfort and ease of movement. Take your time to make sure everything is aligned and symmetrical. Once you’re satisfied with the racerback shape, move on to sewing the edges to secure the folds.
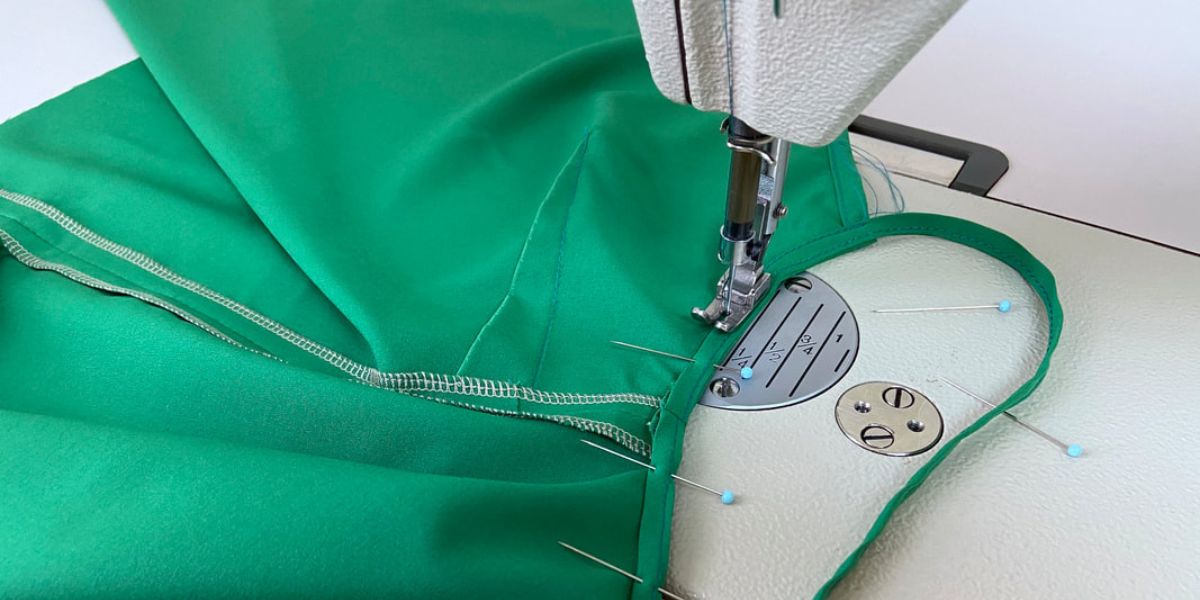
Step 4: Sew the Edges
Now that you have the racerback shape created, it’s time to secure the folds by sewing the edges. This step will ensure that your racerback tank top maintains its shape and durability. Follow these steps to sew the edges:
- Thread your sewing machine or needle with a thread color that matches your t-shirt or a contrasting color for a decorative touch.
- Starting at the top of one shoulder, sew a straight stitch along the folded edge of the racerback back. Continue sewing down the folded edge until you reach the bottom hem, securing the fold in place. Repeat this step for the other shoulder.
- Once the back edges are sewn, flip the tank top to the front side.
- Again, starting at the top of one shoulder, sew a straight stitch along the folded edge of the racerback front. Continue sewing down the folded edge until you reach the bottom hem, securing the fold in place. Repeat this step for the other shoulder.
- Make sure to backstitch at the beginning and end of each stitch to secure the thread and prevent unraveling.
Take your time while sewing the edges to ensure neat and even stitches. Sewing the edges will not only secure the folds but also add a polished and professional finish to your racerback tank top. Once you’ve completed sewing the edges, remove any remaining pins and check for any loose threads. Your tank top is now taking shape! Try it on for size and make any necessary adjustments before moving on to the next step.
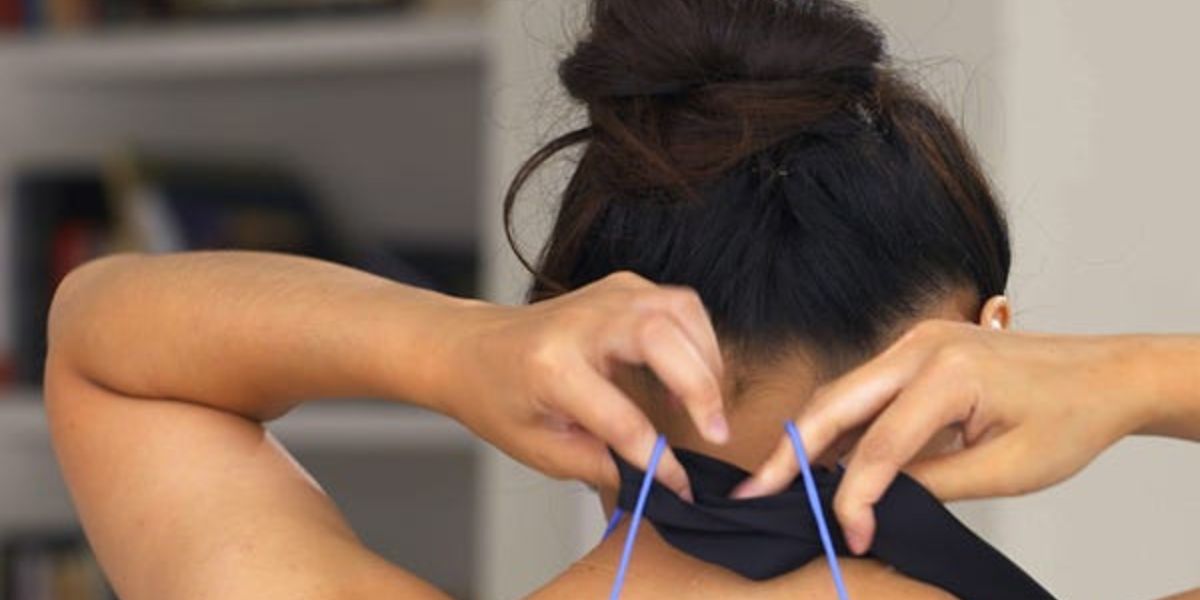
Step 5: Try on and Make Adjustments
Now that you’ve sewn the edges of your racerback tank top, it’s time to try it on and make any necessary adjustments. This step is crucial to ensure that the tank top fits comfortably and looks flattering. Follow these guidelines:
- Put on the tank top and assess the fit. Pay attention to the armholes, neckline, and overall length.
- Check if the racerback shape sits properly on your back. Ensure that the straps are not too loose or too tight.
- If the tank top feels too loose or baggy, you can make adjustments by taking it in on the sides. Pin the excess fabric and try it on again to see if the fit is improved.
- Similarly, if the tank top feels too tight or uncomfortable, you can release the seams slightly and try it on again for a more relaxed fit.
- Make any necessary adjustments to the length of the tank top. You can either cut it shorter if desired or add extra length by sewing a hem.
- Take note of any additional modifications or decorative touches you’d like to add, such as adding embellishments or trimming the neckline.
By trying on your racerback tank top, you’ll be able to assess the fit and make any necessary alterations. Keep in mind that everyone’s body shape and preferences are different, so it’s important to tailor the tank top to your own liking. Once you’re satisfied with the fit and style, you can move on to the final steps of finishing your DIY racerback tank top.
Step 6: Finish the Tank Top
The final step is to finish your racerback tank top by adding the necessary finishing touches. This will give your DIY creation a polished and professional look. Follow these steps:
- If you made any adjustments to the fit or length of the tank top in the previous step, now is the time to finalize those modifications. Make sure all the seams are secure and the tank top fits comfortably.
- Double-check the edges of the tank top to ensure there are no loose threads. Trim any excess thread to give it a clean finish.
- If you want to add extra reinforcement to the seams, you can use a zigzag stitch or a serger to finish the raw edges. This will prevent unraveling and give the tank top added durability.
- If you desire a more finished look, you can hem the bottom edge of the tank top and the armholes. Fold the fabric towards the inside and sew along the edge to create a neat and polished finish.
- Inspect the tank top once more to ensure that all the stitching is secure and the finishing touches are to your satisfaction.
By carefully finishing the tank top, you’ll add durability and a professional touch to your DIY creation. Taking the time to complete these final steps will make your racerback tank top look like it was bought from a store.
Once you’re satisfied with the finished tank top, give it a final press with an iron to smooth out any wrinkles or creases. Now, it’s time to rock your stylish and personalized racerback tank top with confidence!
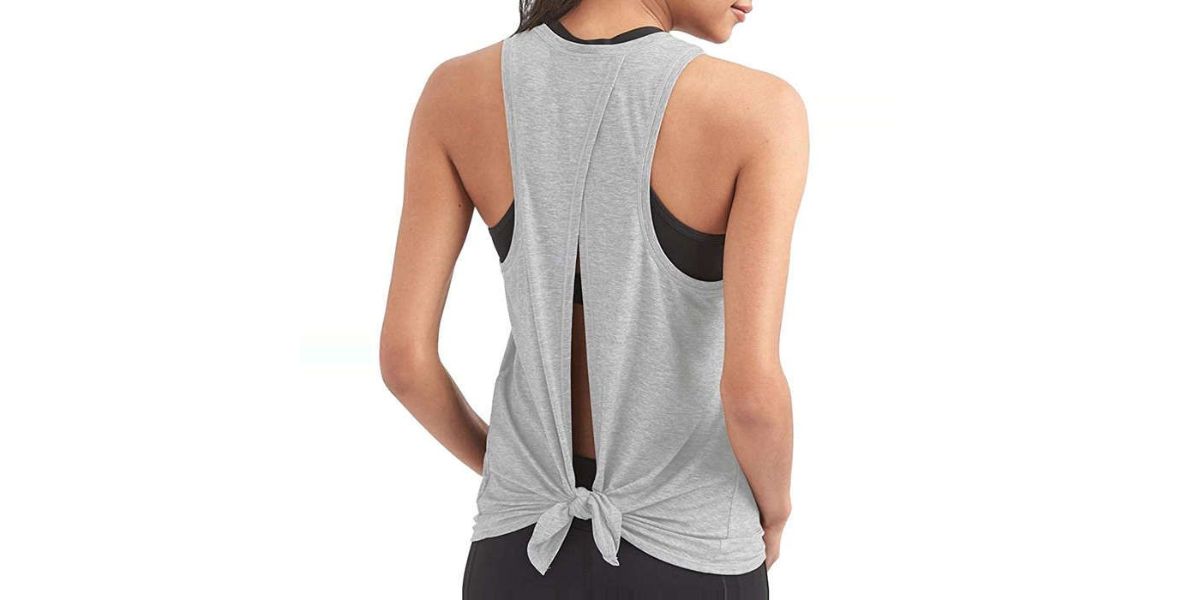
Step 7: Optional Decorative Touches
If you’re looking to further personalize your racerback tank top and add some creative flair, this step is for you. By incorporating optional decorative touches, you can make your tank top truly unique and reflect your personal style. Here are some ideas to get you started:
- Embellishments: Consider adding decorative elements such as lace, ribbons, or appliques to enhance the look of your tank top. You can sew these onto the front or back of the tank top, or even along the straps for an extra pop of style.
- Fabric Paint or Fabric Markers: Get creative by using fabric paint or fabric markers to add designs or patterns to your tank top. Whether it’s a floral motif, geometric shapes, or inspirational quotes, let your imagination run wild and turn your tank top into a unique work of art.
- Embroidery: If you enjoy handwork, you can try your hand at embroidery to embellish your tank top. Whether it’s a simple monogram, a delicate floral design, or intricate patterns, embroidery can add a touch of elegance and craftsmanship to your tank top.
- Cut-Outs: Another fun way to add a decorative touch is by cutting out shapes or patterns on the fabric. You can create a stencil design or freestyle cut-outs to achieve a more edgy and playful look.
- Dye or Tie-Dye: Transform your tank top with a vibrant burst of color by using fabric dye or tie-dye techniques. Experiment with different color combinations and techniques to create a one-of-a-kind design.
Remember, the options are endless when it comes to adding decorative touches to your tank top. Let your creativity shine and customize it to your heart’s desire. Just ensure that any embellishments or decorations you add are securely attached and won’t affect the comfort or fit of the tank top.
Once you’ve added the decorative elements, take a step back and admire your handiwork. Your racerback tank top is now complete and ready to be showcased with pride!
Conclusion
Congratulations on successfully transforming a regular t-shirt into a stylish racerback tank top! Through this step-by-step guide, we’ve shown you how to repurpose old t-shirts and unleash your creativity by customizing your own unique tank top. By following the outlined steps and incorporating optional decorative touches, you’ve breathed new life into your wardrobe and added a personalized touch to your fashion repertoire.
Remember, this DIY project not only allows you to unleash your creativity but also promotes sustainability by repurposing old clothing instead of throwing it away. By upcycling your t-shirts, you’re reducing waste and contributing to a more eco-friendly lifestyle.
Whether you’re wearing your newly transformed racerback tank top for casual outings, workouts, or as a trendy layering piece, be proud of the fact that you’ve created something with your own hands. Each step, from gathering the supplies to adding decorative touches, has contributed to the finished product that is uniquely yours.
Feel free to experiment with different t-shirt colors, patterns, and decorative ideas to create a collection of racerback tank tops that suit your style and mood. This project is a wonderful opportunity to explore your creativity and showcase your individuality through your clothing choices.
We hope this guide has inspired you to embark on other DIY projects and continue exploring your creativity. With a little imagination and some basic sewing skills, the possibilities are endless. So go ahead, express yourself, and enjoy the satisfaction of transforming an ordinary t-shirt into a fashionable and personalized racerback tank top.