Home>How-to Guides>For Women>How To Sew A Bra Into A Dress
For Women
How To Sew A Bra Into A Dress
Modified: August 2, 2023
Learn how to sew a bra into a dress effortlessly with our step-by-step guide. Perfect for women looking to enhance their comfort and style.
(Many of the links in this article redirect to a specific reviewed product. Your purchase of these products through affiliate links helps to generate commission for Under-tec.com, at no extra cost. Learn more)
Table of Contents
Introduction
Are you tired of wearing a separate bra and dress for special occasions? Well, there’s a solution – sewing a bra into your dress! This handy technique allows you to combine the support and shaping of a bra with the style and elegance of a beautiful dress. Whether you’re attending a wedding, a cocktail party, or any other formal event, sewing a bra into your dress can give you the confidence and comfort you need to enjoy the occasion to the fullest.
In this step-by-step guide, we’ll walk you through the process of sewing a bra into a dress. You’ll learn the materials you need, how to choose the right bra, and the steps to properly position and attach the bra to your dress. With a few simple sewing techniques, you can seamlessly integrate the bra into the dress, creating a stylish and functional garment.
By sewing a bra into your dress, you won’t have to worry about bra straps peeking out or adjusting your undergarments throughout the event. It provides a discreet solution that keeps everything in place, allowing you to move and dance with complete freedom. Plus, it can give your dress a more tailored and custom fit, enhancing your overall appearance.
So, let’s get started on this exciting journey of sewing a bra into a dress. By the end of this guide, you’ll have the knowledge and skills to confidently create a dress that combines both style and support. Let’s dive in!
Materials Needed
Before you start the process of sewing a bra into your dress, gather the following materials:
- A dress: Choose a dress that you would like to sew a bra into. It can be a formal gown, a cocktail dress, or any other style you prefer.
- A bra: Select a bra that provides the desired level of support and fits comfortably. Ideally, choose a bra that matches the color and style of your dress.
- Needle and thread: Use a needle and thread that matches the color of your dress. Make sure the thread is strong enough to hold the bra securely in place.
- Pins: Gather some sewing pins to temporarily hold the bra in position while you sew it onto the dress.
- Scissors: Have a pair of sharp scissors on hand to trim any excess fabric or thread during the sewing process.
- Measuring tape: A measuring tape will come in handy to ensure accurate placement of the bra on the dress.
- Marking tool: Use a marking tool, such as tailor’s chalk or washable fabric markers, to make temporary markings on the dress for proper bra positioning.
- Safety pins (optional): If you prefer a removable bra, you can use safety pins to attach the bra straps to the dress instead of sewing them in permanently.
Having these materials ready will ensure a smooth and efficient sewing process. Now that you have everything you need, let’s move on to the next step: choosing the right bra.
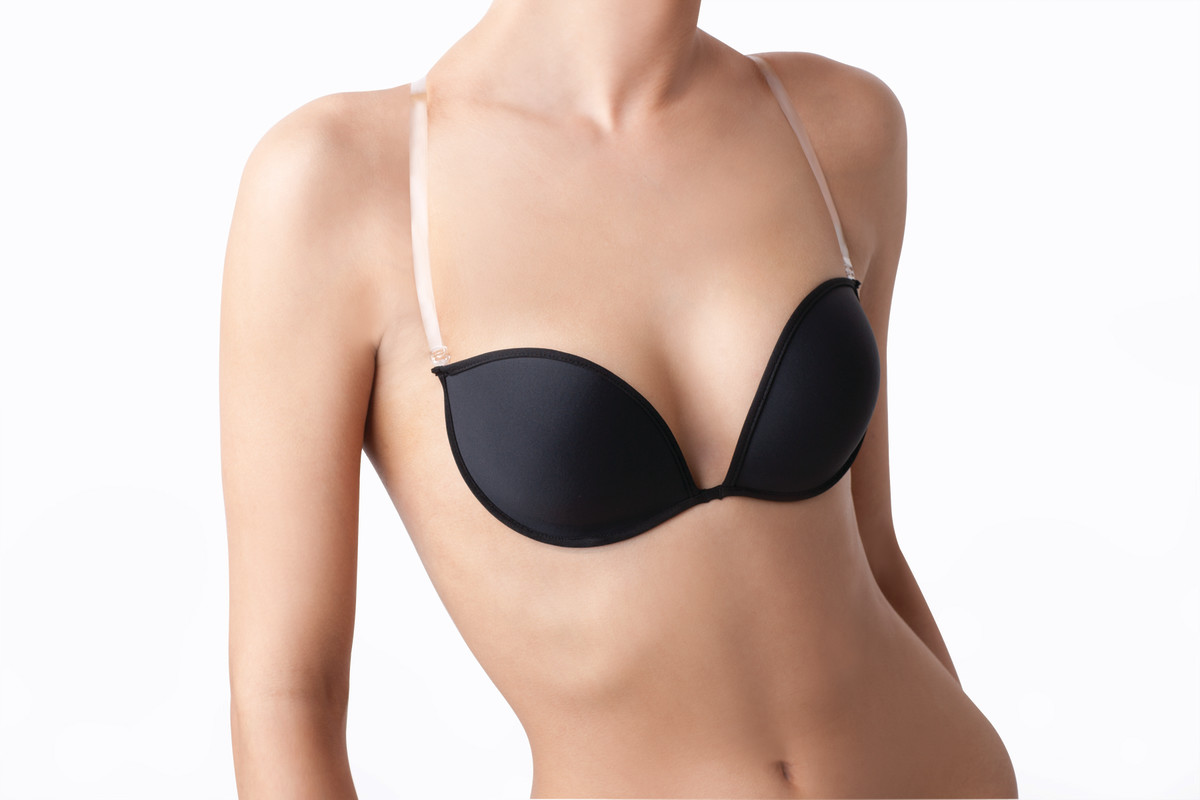
Step 1: Choosing the Right Bra
When sewing a bra into a dress, it’s crucial to choose a bra that meets your needs in terms of support, comfort, and style. Here are some factors to consider when selecting the right bra:
- Support level: Determine the level of support you need based on your bust size and the dress style. If you have a larger bust, opt for a bra with full coverage and strong support. For smaller busts, a bra with less padding and push-up may be more suitable.
- Cup size and shape: Ensure that the cups of the bra fit your bust properly and provide a natural shape. The cups should not create bulges or gaps when worn under the dress.
- Strap style: Consider the style of the dress and the visibility of the bra straps. If your dress has thin or delicate straps, choose a bra with convertible or removable straps that can be adjusted to match the dress style.
- Color and fabric: Select a bra that matches the color of your dress to avoid any visible lines or contrasts. Additionally, consider the fabric of the bra and ensure it is comfortable against your skin.
- Back closure: Determine whether a front-closure or back-closure bra works best with your dress style. A front-closure bra is ideal if your dress has a low back, while a back-closure bra may be more suitable for other dress styles.
Try on different bras with your dress to find the perfect match. It’s essential to feel comfortable and supported while wearing the bra, as it will be secured to your dress throughout the event.
Once you have chosen the right bra, proceed to the next step: preparing the dress for sewing.
Step 2: Preparing the Dress
Before sewing the bra into your dress, it’s important to prepare the dress to ensure a smooth and successful sewing process. Follow these steps to prepare your dress:
- Try on the dress: Put on the dress and make sure it fits properly. Adjust any straps or fastenings as necessary.
- Mark the bra placement: Use a measuring tape and a marking tool to make temporary markings on the dress where the bra cups will be positioned. Ensure the markings are centered and symmetrical.
- Secure the dress: If the dress has a zipper or buttons, fasten them to stabilize the fabric. This will make it easier to work with while sewing the bra.
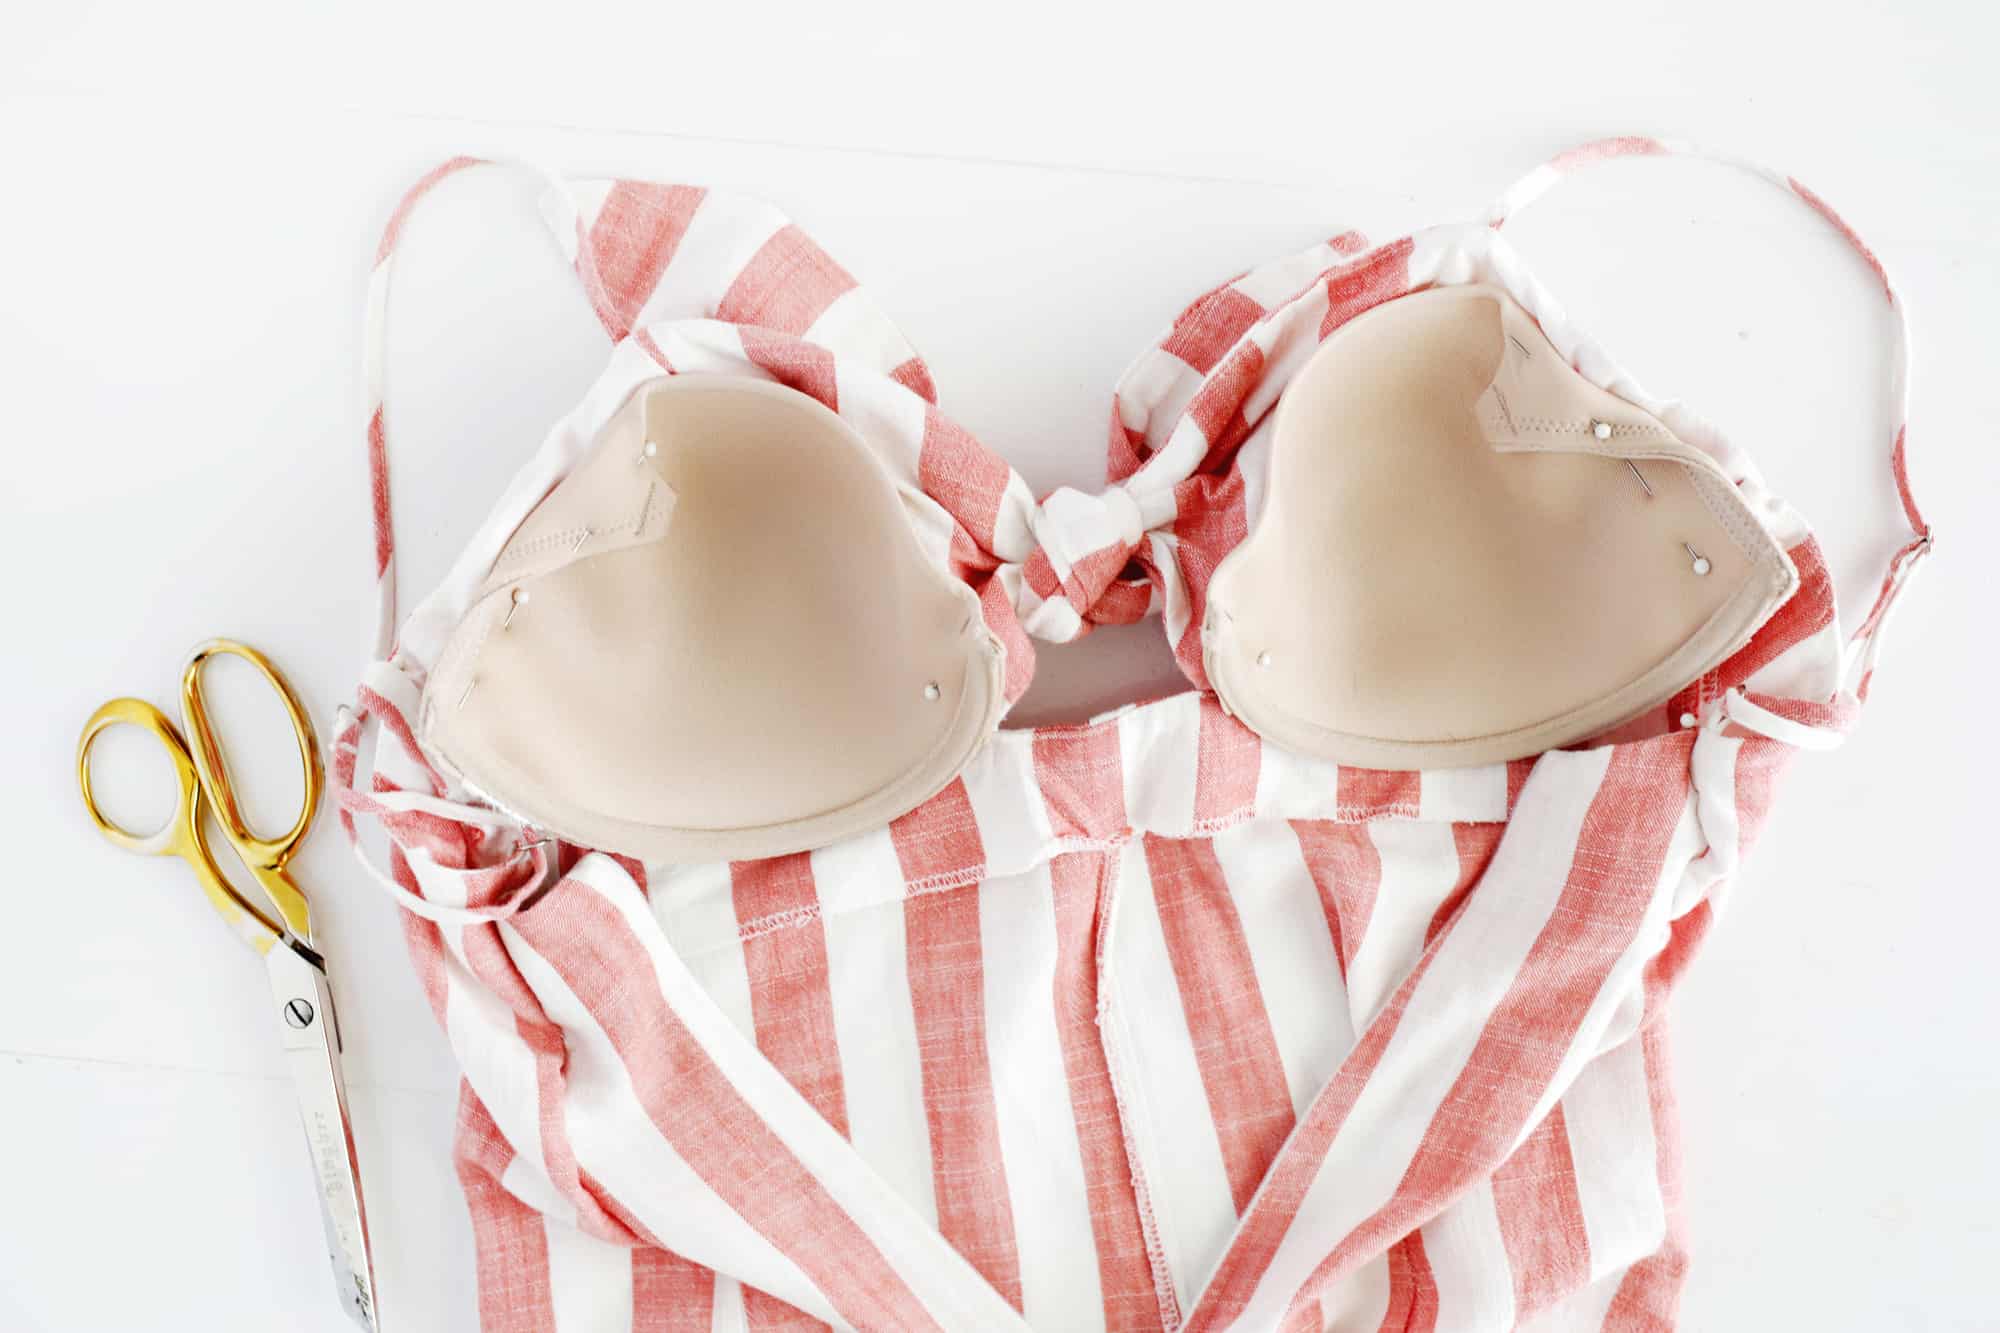
- Pin the bra in place: Take the bra and position it according to the markings on the dress. Use sewing pins to temporarily secure the bra cups in the desired position.
- Check the fit: Put the dress on again to confirm the bra placement. Make any necessary adjustments by repositioning the pins or markings.
By preparing the dress beforehand, you’ll have a clear idea of where the bra should be sewn, ensuring a seamless integration of the bra and dress. Once you’re satisfied with the positioning, you’re ready to move on to the next step: attaching the bra to the dress.
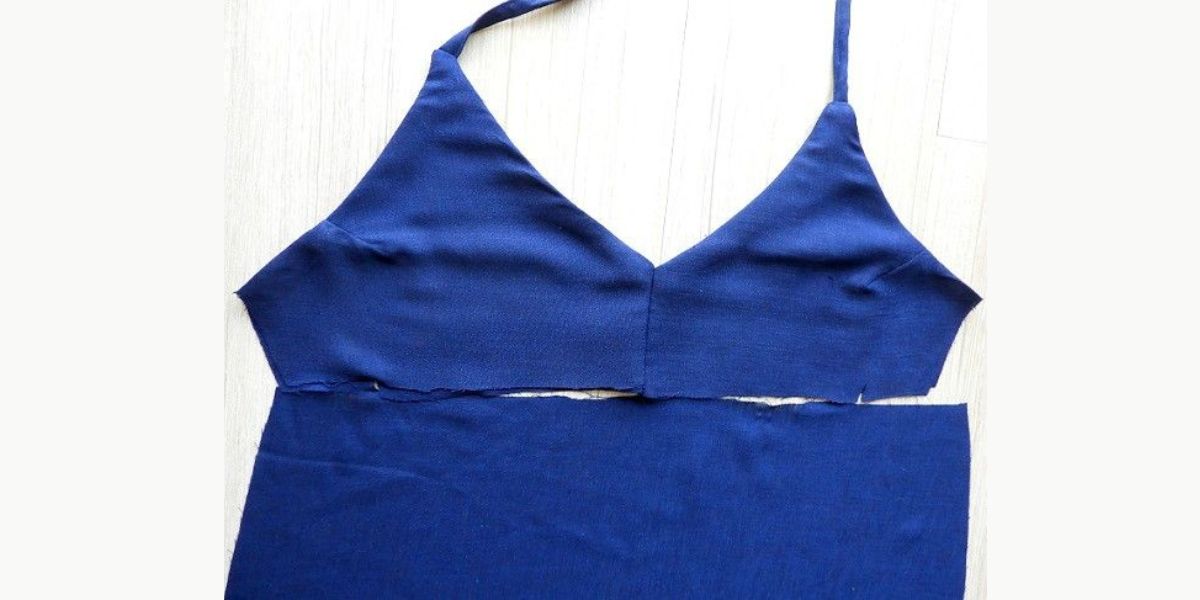
Step 3: Positioning the Bra
With the dress prepared, it’s time to position the bra on the dress. Follow these steps to ensure proper placement:
- Remove one side of the dress: Start by carefully removing one side of the dress to expose the area where the bra will be sewn. This will make it easier to work with and prevent any accidental sewing of the dress fabric.
- Align the bra cups: Place the bra cups on the temporary markings made earlier. Ensure that the cups are centered, level, and match the position of your bust. Make any necessary adjustments to achieve proper alignment.
- Pin the bra in place: Once you are satisfied with the positioning, use sewing pins to secure the bra cups to the dress fabric. Insert the pins through the outer edges of the bra cups, taking care not to poke through the underwire or padding.
- Reattach the dress: Carefully reattach the side of the dress that was temporarily removed and smooth out any wrinkles or folds. Ensure that the bra cups are still in their desired position and that the dress fabric lies flat against them.
Take the time to double-check the alignment and fit of the bra cups before moving on to the next step. It’s important to have the bra positioned correctly to ensure both comfort and aesthetics when wearing the dress.
Now that the bra is properly positioned, it’s time to securely attach it to the dress in the next step.
Step 4: Attaching the Bra to the Dress
Once the bra is positioned correctly, it’s time to attach it securely to the dress. Follow these steps to sew the bra onto the dress:
- Thread the needle: Take a length of thread that matches the color of your dress and thread it through the eye of the needle. Tie a knot at the end of the thread to secure it.
- Start sewing: Begin sewing from the inside of the dress, near the underwire or bottom edge of the bra cup. Take small, even stitches and secure the thread by gently pulling it through the fabric after each stitch.
- Sew along the edge: Sew along the edge of the bra cup, using the sewing pins as a guide. Take care to stitch through both the dress fabric and the bra fabric to create a secure attachment.
- Continue sewing: As you sew, remove the sewing pins one by one. Take small stitches and maintain a steady pace as you work your way around the entire circumference of the bra cup.
- Tie off the thread: Once you have sewn all the way around the bra cup, tie off the thread by making a knot close to the fabric. Trim any excess thread.
- Repeat for the other cup: Repeat the sewing process for the other bra cup, ensuring that it is aligned and positioned symmetrically with the first cup.
By sewing the bra onto the dress, you create a secure and permanent attachment that will withstand movement and keep the bra in place throughout the event. Take your time to sew carefully and neatly to achieve a professional-looking finish.
With the bra successfully attached to the dress, it’s time to move on to the next step: securing the bra straps.
Step 5: Securing the Bra Straps
After sewing the bra cups onto the dress, it’s important to secure the bra straps to ensure a comfortable and secure fit. Follow these steps to secure the bra straps:
- Put on the dress: Wear the dress and adjust the bra straps to your desired length. Make sure they provide sufficient support and remain hidden under the dress straps.
- Attach the straps: Depending on your preference, you can choose to either sew or use safety pins to attach the bra straps to the dress. Sewing will provide a permanent solution, while safety pins offer flexibility for removing the bra if desired.
- Sewing method: If you choose to sew, carefully stitch the bra straps to the dress straps or neckline. Use small, discreet stitches to secure the straps, ensuring they do not show through the fabric.
- Safety pin method: If you prefer removable straps, use small safety pins to attach the bra straps to the dress straps. Slide the safety pin through both the bra strap and dress strap, ensuring a secure connection.
- Test the fit: After securing the bra straps, put on the dress again to test the fit and comfort. Make any necessary adjustments to the strap length or attachment points.
Securing the bra straps will prevent them from slipping or showing, ensuring that your dress stays in place and provides optimal support throughout the event. Choose the method that suits your preference and sewing skills.
With the bra straps secured, it’s time to move on to the final step: testing the fit of your dress with the sewn-in bra.
Step 6: Testing the Fit
Now that you have sewn the bra into your dress and secured the bra straps, it’s essential to test the fit to ensure everything is comfortable and in place. Follow these steps to test the fit:
- Put on the dress: Wear the dress and adjust any dress straps, closures, or fastenings as necessary.
- Move around: Move, walk, or even dance around in the dress to get a sense of how well the bra is integrated. Pay attention to any discomfort, slipping, or support issues.
- Check for visibility: Look in the mirror or ask a trusted friend to check for any visible bra lines, bulges, or straps peeking out. If needed, make any adjustments to the strap placement or attachments.
- Assess comfort: Assess how comfortable the dress feels with the sewn-in bra. Ensure that the bra provides adequate support, without causing any discomfort or irritation.
- Invisible adjustments: Make any final adjustments, such as tightening the strap length or smoothing out any fabric bunching around the bra attachment points. These adjustments should ensure a seamless and comfortable fit.
By testing the fit of your dress with the sewn-in bra, you can make any necessary modifications to ensure both comfort and style. It’s important to feel confident and secure in your dress, knowing that the bra is properly integrated.
Congratulations! You have successfully sewn a bra into your dress, achieving a beautiful and functional garment. Now you can confidently wear your dress to events without the worry of visible bra straps or discomfort. Enjoy your stylish and well-supported outfit!
Conclusion
Sewing a bra into a dress is a fantastic way to combine style and support, allowing you to feel confident and comfortable at any special occasion. By following the step-by-step guide, you have learned how to choose the right bra, prepare the dress, position the bra, attach it securely, and secure the bra straps. Additionally, you have tested the fit and made any necessary adjustments to ensure a seamless and comfortable integration.
By sewing a bra into your dress, you eliminate the hassle of adjusting visible bra straps or worrying about unsupported bust. This technique provides a discreet and tailored solution that enhances the overall look and fit of your dress. Whether you are attending a wedding, a cocktail party, or any formal event, this skill empowers you to create a garment that meets both your aesthetic and functional needs.
Remember, take your time with each step and pay attention to detail to achieve the best results. Experiment with different bra styles and dress designs to find the perfect combination that suits your personal taste and body type. With practice, you will become more confident in your sewing skills and be able to modify dresses to your liking.
So go ahead, embrace your creativity, and enjoy the process of sewing a bra into your dress. Stand tall, feel comfortable, and radiate confidence as you step out in your beautifully crafted garment. Happy sewing!