Home>How-to Guides>For Women>How To Sew Your Own Bikini
For Women
How To Sew Your Own Bikini
Modified: August 2, 2023
Learn how to sew your own bikini for women with our step-by-step tutorial. Create a unique and stylish swimwear that fits perfectly.
(Many of the links in this article redirect to a specific reviewed product. Your purchase of these products through affiliate links helps to generate commission for Under-tec.com, at no extra cost. Learn more)
Table of Contents
Introduction
Welcome to the world of DIY bikini making! Sewing your own bikini can be a fun and rewarding project that allows you to customize your swimwear to your exact preferences. Whether you’re looking for a unique design, a better fit, or simply want to unleash your creativity, making your own bikini gives you the opportunity to create something truly special.
Gone are the days of settling for ill-fitting or mass-produced swimwear. By taking matters into your own hands, you can achieve the perfect fit and style that flatters your body shape and showcases your personal taste. Plus, by making your own bikini, you can choose from a wide range of colors, prints, and fabrics, ensuring your swimwear is as unique as you are.
In this guide, we will take you through the step-by-step process of sewing your own bikini, from gathering materials to adding the finishing touches. Whether you’re a beginner or an experienced seamstress, this article will provide you with all the information you need to create a stunning bikini that will turn heads at the beach or pool.
Before we dive into the details, it’s worth mentioning that sewing your own bikini requires some basic sewing skills and equipment, including a sewing machine, needles, thread, and scissors. If you’re new to sewing, don’t worry! With a little practice and patience, you’ll be able to create a beautiful bikini that fits you like a glove.
So, grab your sewing kit and let’s get started on this exciting journey to sew your own bikini!
Gathering Materials
Before you can begin sewing your own bikini, it’s important to gather all the necessary materials. Having everything you need at hand will make the process much smoother and more enjoyable. Here are the essential materials you’ll need:
- Fabric: Choose a fabric that is suitable for swimwear, such as nylon spandex or polyester spandex. These fabrics have the necessary stretch and durability to withstand chlorine and saltwater. Look for fabrics with a UPF (Ultraviolet Protection Factor) rating for added sun protection.
- Lining Fabric: Select a lining fabric that matches or complements your main fabric. The lining will provide additional support and opacity to your bikini. Look for swimwear lining fabric specifically designed for this purpose.
- Elastic: You’ll need elastic to create stretch and support in your bikini. Choose swimwear elastic that is comfortable against the skin and has good recovery. The width and type of elastic will depend on your design and personal preference.
- Thread: Use a high-quality polyester thread that is strong and resistant to chlorine and sun exposure. Consider choosing thread color that matches or coordinates with your fabric.
- Bikini Hardware: Depending on your design, you may need bikini hardware such as hooks, rings, sliders, or bra cups. These can add functionality and aesthetic details to your bikini.
- Notions: Don’t forget to gather other sewing notions, such as pins, needles, a measuring tape, fabric scissors, a fabric marker or chalk, and a seam ripper. These tools will come in handy throughout the sewing process.
Be sure to purchase enough fabric and lining to accommodate your desired bikini style and size. Consider the specific pattern and instructions you’ll be following, as they may require additional materials.
Now that you have all the necessary materials, you’re ready to move on to the next step: choosing the right fabric for your bikini.
Choosing the Right Fabric
Choosing the right fabric is crucial for creating a comfortable and durable bikini. Not all fabrics are suitable for swimwear, so it’s important to select a fabric that has the right properties to withstand the harsh conditions of the water. Here are some factors to consider when choosing your fabric:
- Stretch and Recovery: Look for fabrics that have good four-way stretch, meaning they stretch both horizontally and vertically. This will ensure that your bikini moves with your body and maintains its shape over time.
- Durability: Swimwear fabrics need to withstand the sun, chlorine, and saltwater without fading or deteriorating. Check the fabric’s composition and look for materials like nylon spandex or polyester spandex, which are known for their durability.
- Comfort: Opt for fabrics that feel comfortable against your skin. Consider the texture, weight, and breathability of the fabric to ensure a pleasant wearing experience.
- Prints and Colors: Choose a fabric with a print or color that reflects your personal style. Whether you prefer bold and vibrant patterns or classic solid colors, the choice is yours!
- UPF Rating: If sun protection is a concern for you, look for fabrics with a high UPF rating. These fabrics are designed to block a significant amount of harmful UV rays.
When shopping for fabric, consider visiting a local fabric store or exploring online fabric retailers. Many online stores offer swatch samples, allowing you to feel and evaluate the fabric before making a purchase.
Remember, the fabric you choose will play a significant role in the overall look and feel of your bikini. Take your time to find the perfect fabric that meets your requirements and matches your vision.
Now that you have your fabric sorted, it’s time to take accurate measurements to ensure a precise and flattering fit for your bikini.
Taking Measurements
Taking accurate measurements is a crucial step in sewing your own bikini. By measuring yourself correctly, you can ensure a precise and flattering fit. Here are the key measurements you’ll need to take:
- Bust: Measure around the fullest part of your bust, making sure the measuring tape is parallel to the ground.
- Underbust: Measure around the area just below your bust where your bra band would sit.
- Waist: Measure around the smallest point of your waist, typically around your natural waistline.
- Hips: Measure around the fullest part of your hips, ensuring the measuring tape is parallel to the ground.
- Torso Length: Measure from your shoulder to the desired position of the bikini bottom waistband. This measurement is especially important if you’re making a one-piece or high-waisted bikini.
- Rise: If you’re making bikini bottoms, measure from the front waistband to the back waistband through your crotch. This will help you determine the rise of your bikini bottoms.
When taking measurements, it’s essential to keep the measuring tape snug but not too tight. Avoid pulling or stretching the tape, as this can result in inaccurate measurements. A helpful tip is to measure over the undergarments or swimwear you plan to wear with your bikini to ensure a proper fit.
If you’re unsure about how to take your measurements or need more guidance, there are plenty of online resources and tutorials available that provide step-by-step instructions. Taking the time to measure yourself accurately will greatly contribute to the success of your bikini sewing project.
Now that you have your measurements ready, you can move on to creating a pattern for your bikini!
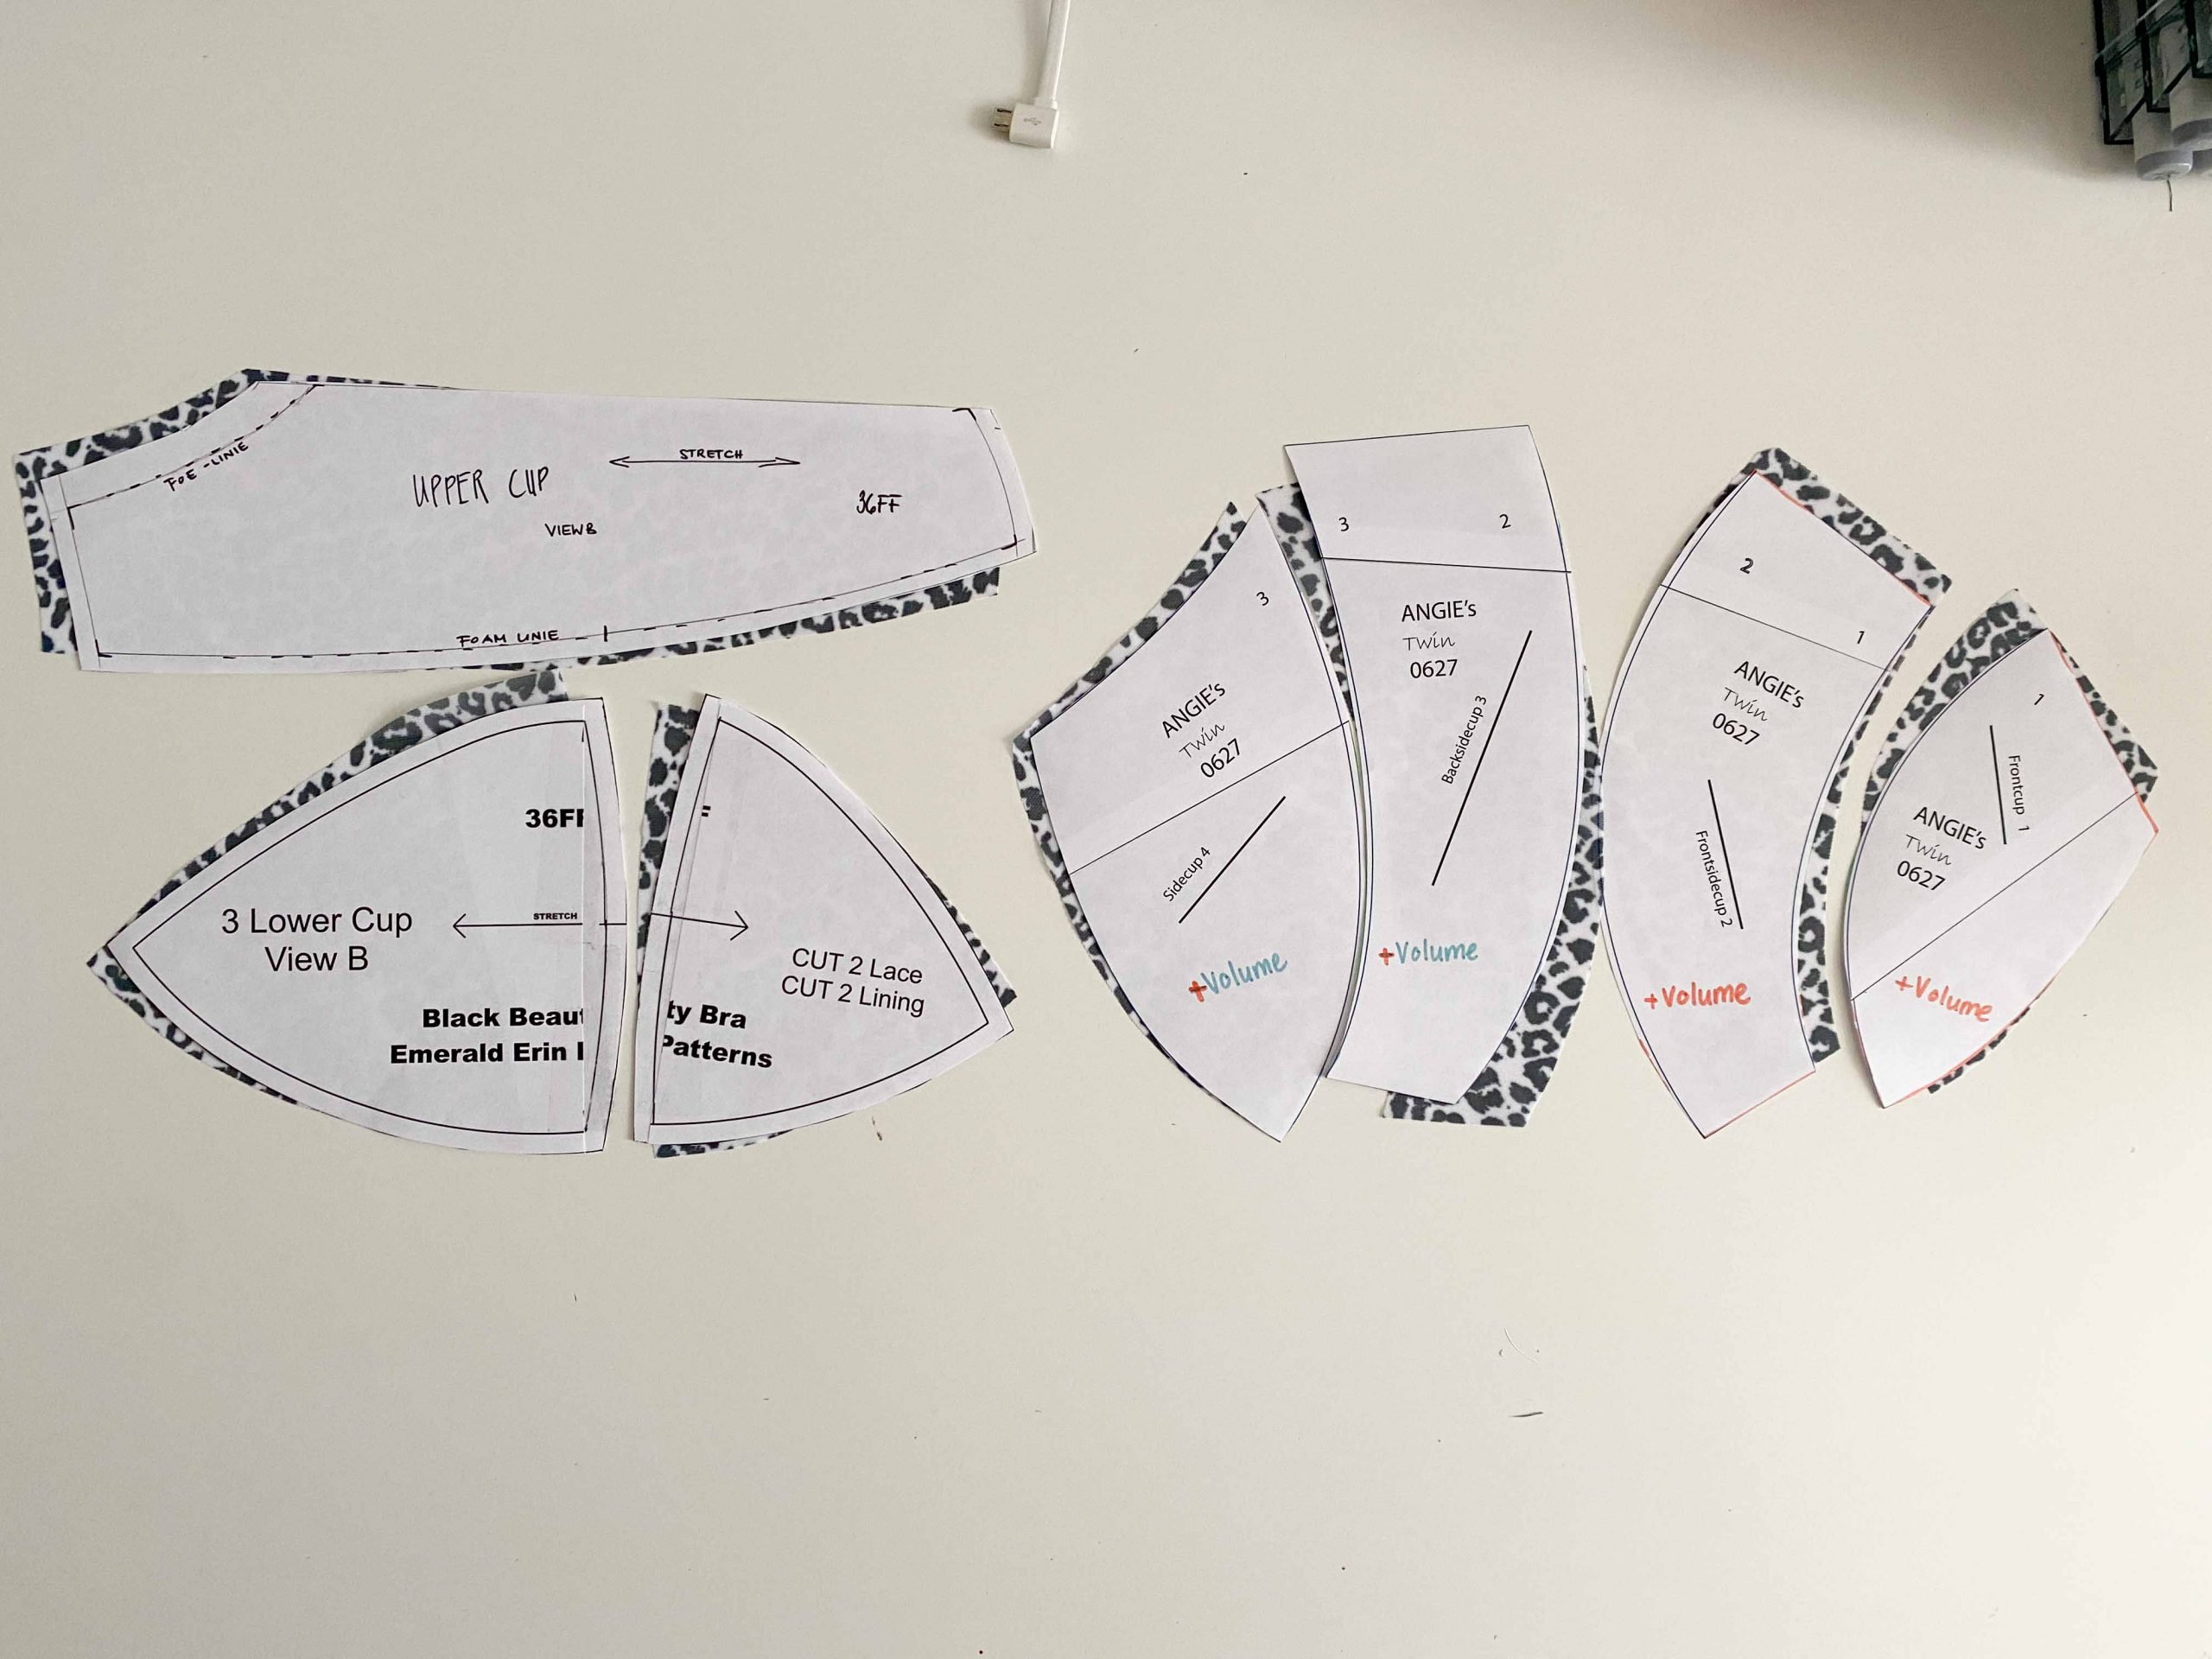
Creating a Pattern
Creating a pattern is an essential step in sewing your own bikini. While you can use commercial patterns, making a custom pattern will ensure a perfect fit and allow you to personalize the design. Here’s how you can create a pattern for your bikini:
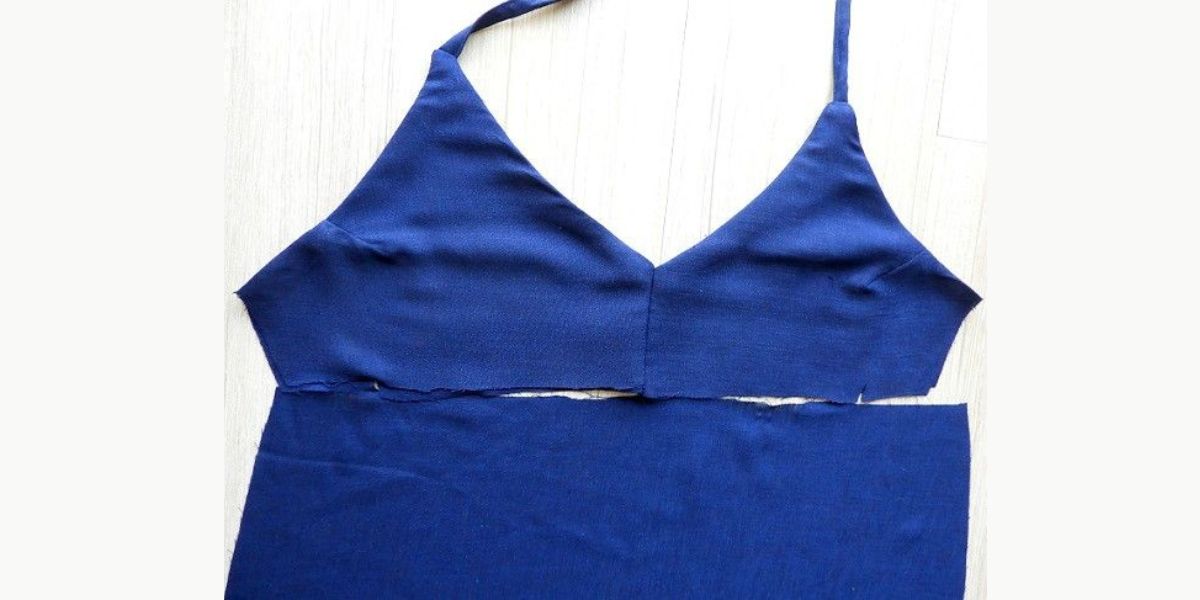
- Use an Existing Bikini: If you have a bikini that fits you well and has the style you’re looking for, you can use it as a reference. Carefully trace the outline of the bikini onto pattern paper or tracing paper. Make sure to mark the seam allowances as well.
- Draft from Scratch: If you don’t have an existing bikini to use as a reference, you can draft a pattern using your measurements. Start by drawing a rectangle for the bikini bottoms, using your hip measurement as the width and the desired rise as the height. Add additional curves and adjustments as needed for a flattering fit. For the bikini top, draw a rectangle or triangle for the cups, using your bust and underbust measurements as a guide. Consider adding darts or shaping to enhance the fit.
- Make Adjustments: Once you have a basic pattern, it’s important to make any necessary adjustments based on your individual measurements. Compare the pattern to your body measurements and make alterations as needed. This may include adding or subtracting length, adjusting the width, or reshaping the curves to match your body shape.
- Create a Mockup: To ensure that your pattern fits correctly, it’s recommended to create a mockup using inexpensive fabric or muslin. Sew the mockup together, trying it on to check the fit. Make any necessary adjustments to the pattern based on how it fits and feels.
- Finalize the Pattern: Once you’re satisfied with the fit of the mockup, transfer any adjustments back to the pattern. Make sure to label the pattern pieces and indicate the grainlines and seam allowances. Your pattern is now ready to be used to cut out your bikini fabric.
Creating your own pattern gives you the freedom to customize your bikini according to your preferences. Don’t be afraid to experiment and make adjustments along the way to achieve the perfect fit and style.
With your pattern in hand, it’s time to move on to the next step: cutting the fabric for your bikini!
Cutting the Fabric
Now that you have your pattern ready, it’s time to cut the fabric for your bikini. Proper cutting is crucial to ensure accurate pieces that will fit together seamlessly. Here’s how you can cut your fabric:
- Prepare the Fabric: Start by prewashing and drying your fabric according to the manufacturer’s instructions. This step will prevent any shrinkage or color bleeding later on.
- Place the Pattern on the Fabric: Lay out your fabric on a flat surface, ensuring that it is smooth and free from wrinkles. Position the pattern pieces on the fabric according to the grainlines and any directional prints or patterns you want to showcase. Pin the pattern pieces in place or use pattern weights to keep them steady.
- Trace or Cut: Depending on your preference, you can either trace around the pattern pieces directly onto the fabric using a fabric marker or chalk, or cut along the edges of the pattern pieces directly. If you are tracing, remember to transfer any markings such as notches or darts onto the fabric as well.
- Add Seam Allowance: If your pattern does not include seam allowances, you will need to add them before cutting. Use a ruler or a seam allowance guide to ensure consistent and accurate seam allowances throughout.
- Cut Carefully: Use fabric scissors to cut along the traced lines or the edges of the pattern pieces. Take your time and cut smoothly to ensure clean, precise edges. Double-check that you have cut all the necessary pieces for both the bikini top and the bottom.
It’s important to note that different fabrics may require different cutting techniques. For stretchy fabrics, like spandex, it’s best to use a rotary cutter to achieve clean and accurate cuts. However, for fabrics like lining or non-stretchy materials, fabric scissors work well.
Remember to cut all the necessary pieces in mirror images if your pattern requires it. This ensures that you have a left and right piece for a symmetrical bikini.
Once you have cut all the fabric pieces, it’s time to start sewing your bikini! The next sections will guide you through the process of sewing the bikini top and bottom.
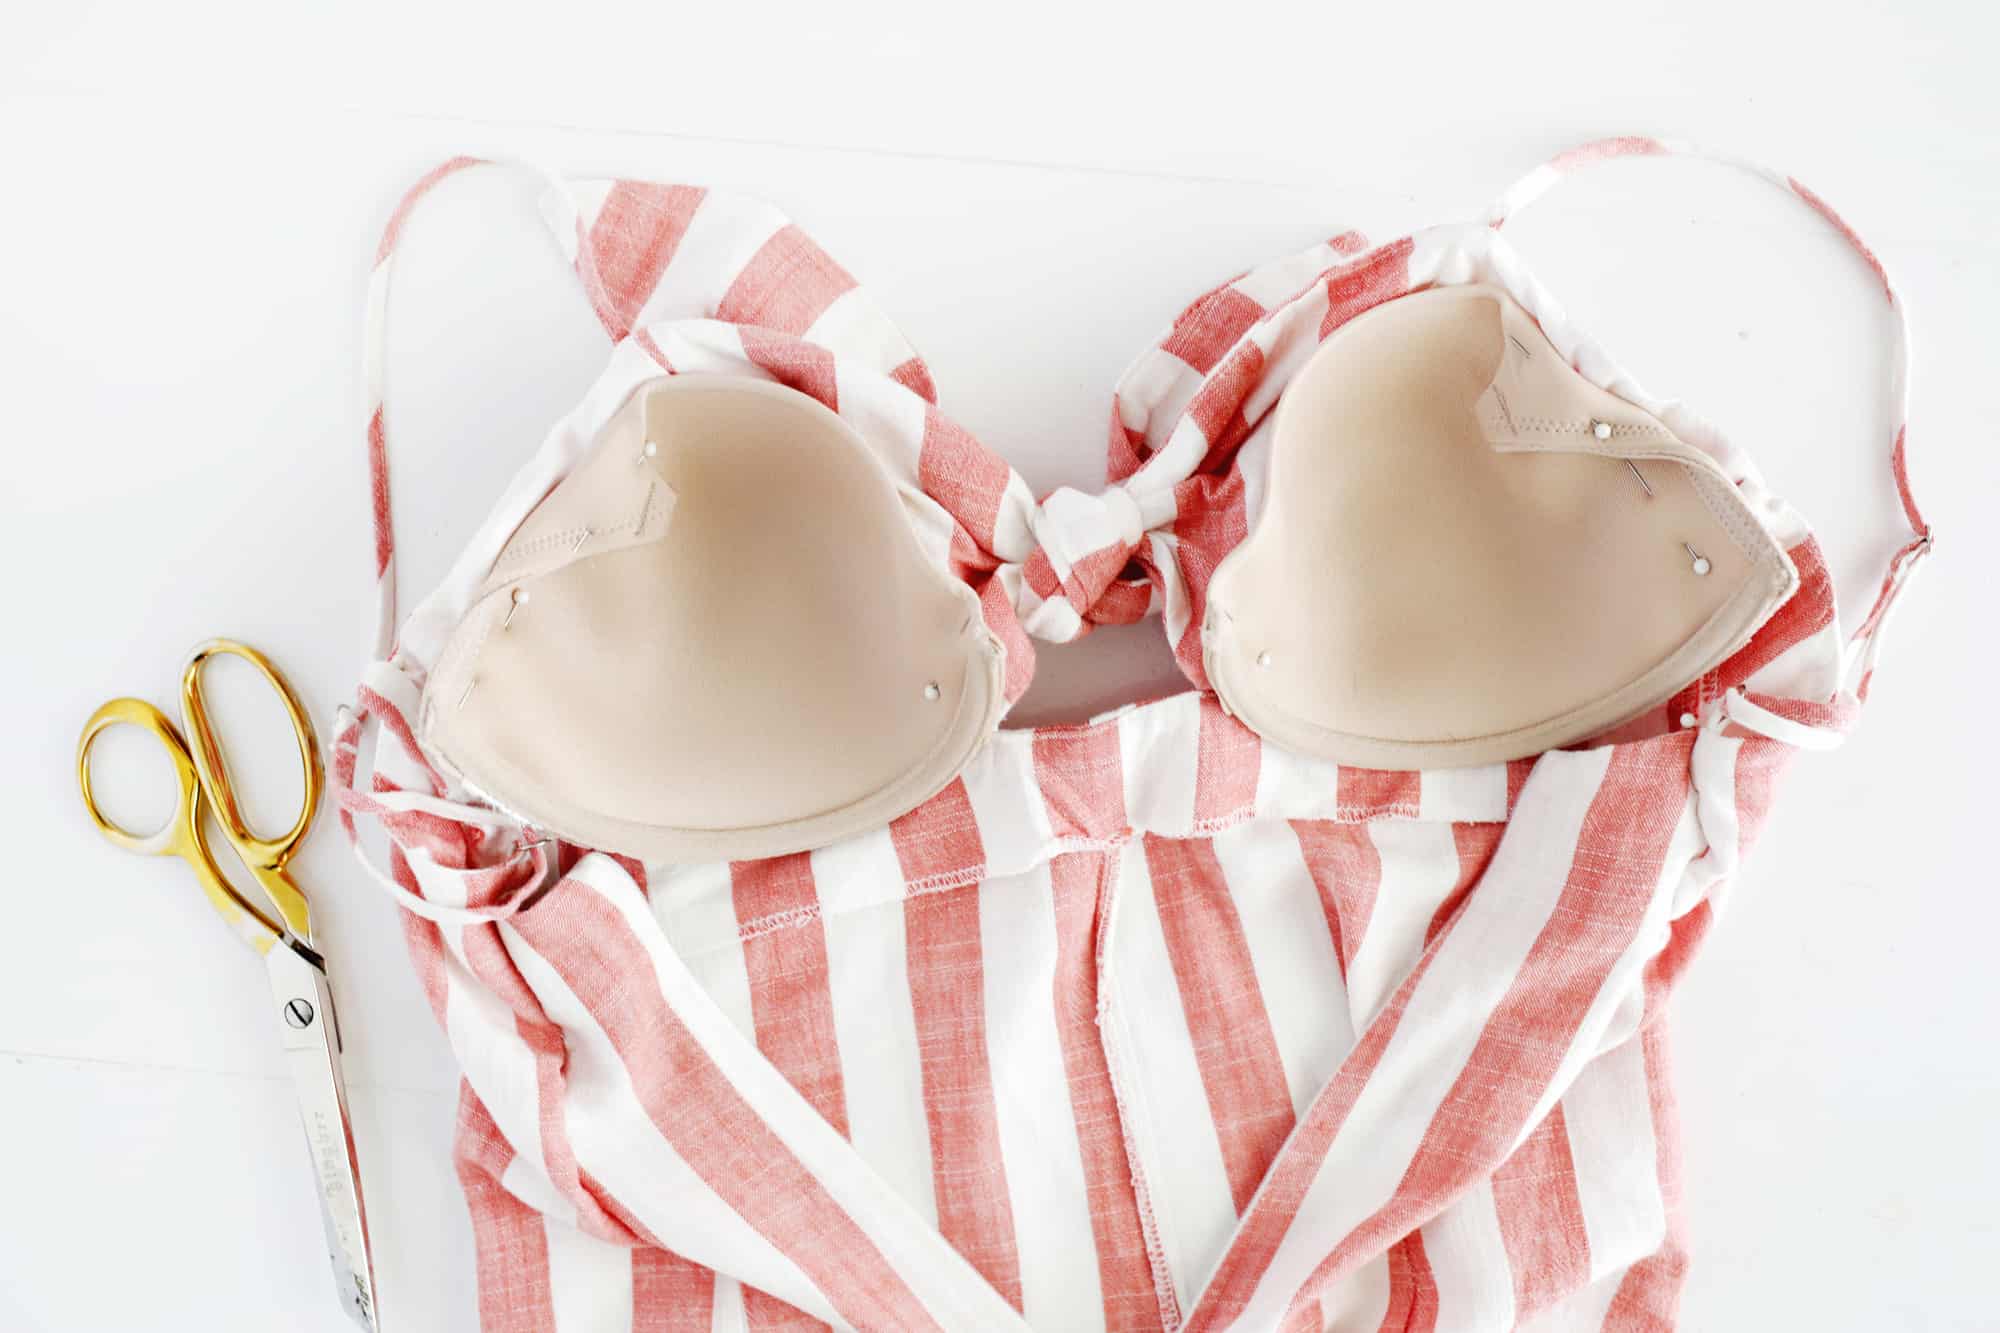
Sewing the Bikini Top
Now that you have all the fabric pieces cut for your bikini top, it’s time to start sewing! Follow these steps to sew your bikini top:
- Prepare the Pieces: Lay out your fabric pieces for the bikini top and organize them according to the sewing instructions or pattern guide. If you have lining fabric, make sure to cut and organize those pieces as well.
- Pin and Sew the Cups: If your bikini top has separate cups, start by pinning and sewing them together. Place the right sides of the fabric together and align the edges. Sew along the curved edges, leaving the bottom edge open. Trim any excess fabric and clip the curved seam allowance to help the cups lay flat when turned right side out.
- Attach the Lining: If your bikini top has lining, align the lining fabric with the main fabric of the cups. Sew around the edges, leaving the bottom open. Trim any excess fabric and clip the curved seam allowance if needed.
- Sew the Side Seams: With the cups and lining attached, fold the bikini top in half, right sides together, aligning the side edges. Pin and sew along the side seams, from the bottom edge of the cups to the bottom edge of the bikini top. Backstitch at the beginning and end of the seam to secure the stitches.
- Finish the Edges: To prevent fraying and add a professional touch, finish the raw edges of the bikini top. You can use a serger if available, or use a zigzag stitch or overcast stitch on your sewing machine. Alternatively, you can bind the edges with a fabric binding or bias tape.
- Insert Elastic: Measure and cut the appropriate length of elastic for the underbust area. The width of the elastic will depend on your personal preference and the design of your bikini top. Insert the elastic inside the bottom edge of the bikini top, stretching it slightly as you sew. Secure the ends of the elastic and trim any excess.
- Add Straps or Ties: Depending on your bikini top style, you may need to attach straps or ties. Measure and cut the appropriate length of fabric or elastic for the straps and attach them securely to the cups or back of the bikini top. Make sure the straps are even and well-positioned for a comfortable fit.
Throughout the sewing process, take the time to try on the bikini top and make any necessary adjustments for the perfect fit. This may include tightening or loosening the elastic, altering the strap length, or reshaping the cups.
Once you’ve completed the steps above, you’ll have a beautifully sewn bikini top ready to be paired with the matching bottoms. In the next section, we will go over sewing the bikini bottoms.
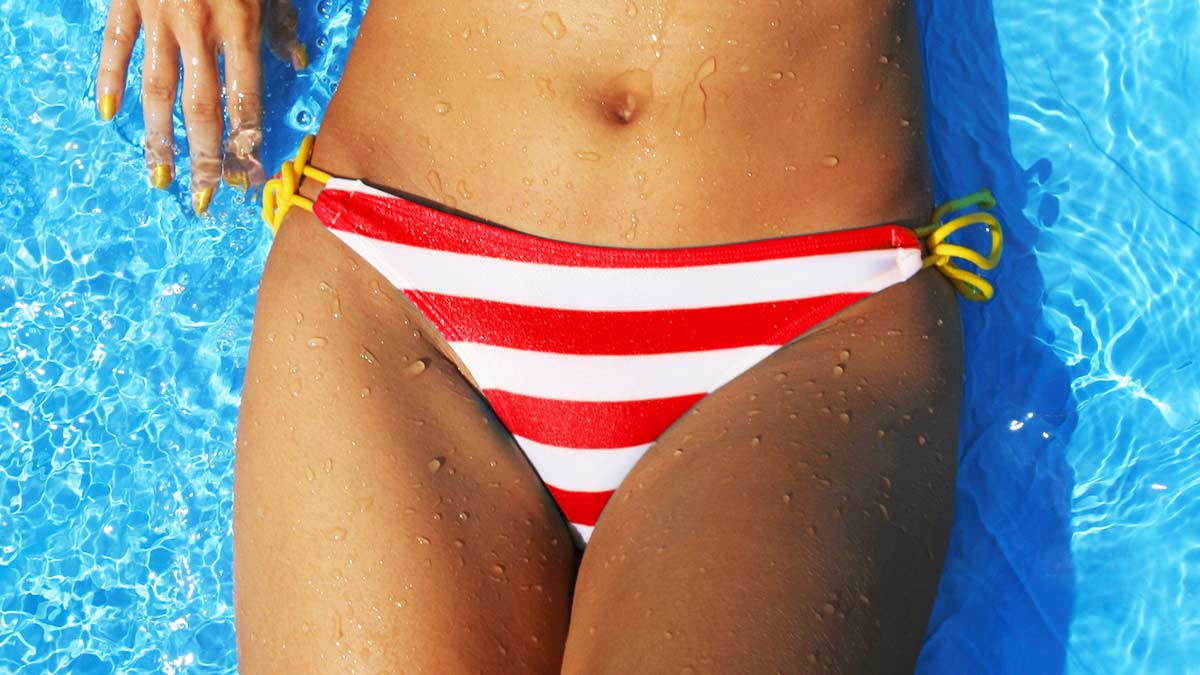
Sewing the Bikini Bottoms
Now that you have finished sewing the bikini top, it’s time to move on to sewing the bikini bottoms. Follow these steps to sew your own bikini bottoms:
- Prepare the Pieces: Lay out your fabric pieces for the bikini bottoms and organize them according to the sewing instructions or pattern guide. If you have lining fabric, make sure to cut and organize those pieces as well.
- Attach the Lining: If your bikini bottoms have lining, align the lining fabric with the main fabric of the bottoms. Sew around the edges, leaving a small opening for turning right side out. Trim any excess fabric and clip the curved seam allowance if needed.
- Construct the Bottoms: Fold the bikini bottoms in half, right sides together, aligning the front and back center seams. Pin and sew along the curved edges, from the top to the crotch area. Backstitch at the beginning and end of the seam to secure the stitches.
- Finish the Edges: To prevent fraying and add a polished look, finish the raw edges of the bikini bottoms. You can use a serger if available or use a zigzag stitch or overcast stitch on your sewing machine. Alternatively, you can bind the edges with a fabric binding or bias tape.
- Create the Waistband: Measure and cut a length of elastic that fits comfortably around your waist. Depending on your desired style, you can either sew the elastic directly to the top edge of the bikini bottoms or create a casing by folding over the edge and sewing a channel for the elastic. Insert the elastic, making sure it is evenly distributed, and secure the ends.
Throughout the sewing process, double-check the fit of the bikini bottoms by trying them on and making any necessary adjustments. This may include altering the rise, adjusting the leg openings, or reshaping the back seam for a flattering fit.
Once you have completed these steps, you will have your very own handmade bikini bottoms that perfectly complement the top. Now it’s time for the finishing touches!
Adding Straps or Ties
Adding straps or ties to your bikini can enhance the style and functionality of the design. Follow these steps to add straps or ties to your bikini:
- Choose the Strap Style: Determine the type of straps or ties you want for your bikini. This can include adjustable straps, halter neck ties, or even criss-cross back straps. Consider the style and support you desire for your bikini top.
- Measure and Cut: Measure and cut the appropriate length of fabric or elastic for the straps or ties. Ensure that you have enough length to provide the desired fit and style.
- Position and Attach: Place the straps or ties on the bikini top according to your chosen style and design. Pin them in place or use removable fabric markers to mark the positions. If you’re using fabric for the straps, fold and press the edges for a clean finish.
- Sew or Attach: Sew the straps or ties securely to the bikini top. You can use a straight stitch, a zigzag stitch, or a bartack stitch for added strength. Make sure to backstitch at the beginning and end of the seams to secure the stitches.
- Adjustability: If you want adjustable straps or ties, consider adding sliders, rings, or hooks to the straps. This allows the wearer to customize the tightness and fit of the bikini top.
When attaching straps or ties, it’s important to ensure that they are appropriately aligned and securely attached to the bikini top. Take the time to adjust the straps or ties to your desired length and positioning before sewing them in place.
Adding straps or ties not only adds a stylish detail to your bikini but also provides functionality and comfort. Customize the straps or ties to suit your personal preference and enjoy a customized fit.
With the straps or ties successfully added, your bikini is nearly complete! In the next section, we will go over the finishing touches that will elevate the overall look of your creation.
Finishing Touches
As you near the end of your bikini sewing project, it’s time to add those final finishing touches that will elevate the overall look of your creation. These finishing touches can include adding decorative details, ensuring clean and professional finishes, and paying attention to small yet important details. Here are some final steps to consider:
- Topstitching: To give your bikini a polished look and secure the seams, consider adding topstitching. This stitching can be done along the edges, around the cups, or along the waistband. Use a matching thread color and a straight stitch or a decorative stitch for added visual interest.
- Embellishments: Consider adding embellishments such as beads, sequins, or fabric flowers to your bikini for a touch of personal style. Sew them on securely, ensuring that they won’t come loose during wear and that they won’t interfere with comfort.
- Finishing Seams: Check the seams of your bikini to ensure that they are tidy and secure. If necessary, finish any raw edges with a serger, a zigzag stitch, or a French seam. This will prevent fraying and give your bikini a professional finish.
- Try On and Adjust: Before completing your bikini, try it on to make any final adjustments. Check the fit, the comfort, and the overall appearance. If any alterations are needed, make them before finishing the project.
- Care Instructions Label: Sew or attach a care instructions label to your bikini. This will provide guidance on how to properly care for and launder your swimwear to ensure its longevity.
Remember, the finishing touches are what can truly make your handmade bikini stand out. Pay attention to the small details to create a garment that you’re proud to wear.
Once you’re satisfied with the final touches, your bikini is ready to be enjoyed! Take a moment to celebrate your accomplishment and showcase your unique creation at the beach or by the pool.
Congratulations on sewing your own bikini and embracing your creativity in swimwear fashion!
Trying on and Making Adjustments
After completing your bikini, it’s important to try it on and make any necessary adjustments to ensure the perfect fit and comfort. Here are the steps to follow when trying on your bikini and making needed alterations:
- Put on the Bikini: Wear your newly sewn bikini and stand in front of a mirror to assess the fit and overall look.
- Check the Fit: Examine how the bikini top fits your bust and underbust. Look for any areas that may be too loose or too tight and make a note of those adjustments.
- Assess the Bottoms: Observe how the bikini bottoms fit your hips and waist. Pay attention to any areas that may need adjustment, such as the rise or leg openings.
- Move and Sit: Move around and sit down to see how the bikini feels in various positions. Evaluate the comfort and coverage to ensure that the bikini stays in place.
- Make Fabric Adjustments: Pin or mark any areas that require changes. These adjustments may involve taking in or letting out seams, reshaping curves, or modifying elastic lengths.
- Make Strap or Tie Adjustments: If the straps or ties feel too loose or tight, mark the desired adjustments. This may involve shortening or lengthening the straps, repositioning ties, or adding additional closures.
- Making the Alterations: With the marked adjustments in mind, carefully remove the bikini and make the necessary alterations. Use a sewing machine or hand-sew the changes, ensuring that the modifications are secure and well-executed.
- Try on Again: Put on the modified bikini and assess the fit once more. Make any additional adjustments if needed, repeating the process of marking and altering as necessary.
Remember, the goal is to achieve a bikini that fits comfortably and flatters your body shape. Take the time to make the necessary adjustments, as it will result in a bikini that you’ll feel confident and comfortable wearing.
Once you’ve made the final alterations and are satisfied with the fit and comfort, your bikini is ready to be enjoyed. You’ve created a one-of-a-kind swimwear piece that reflects your personal style and fits you perfectly!
Conclusion
Congratulations on successfully sewing your own bikini! By embarking on this DIY project, you’ve not only created a stylish and personalized swimwear piece but also honed your sewing skills and unleashed your creativity. The process of sewing your own bikini allowed you to have full control over the design, fit, and fabric choices, resulting in a garment that is uniquely yours.
Throughout the journey, you learned how to gather materials, choose the right fabric, take accurate measurements, create a pattern, cut the fabric, and sew both the bikini top and bottoms. You also learned how to add straps or ties and apply finishing touches to elevate the overall look of your bikini. The attention to detail and the adjustments made along the way ensured a perfect fit that flatters your body shape.
Sewing your own bikini is a fulfilling and rewarding experience. Not only did you create a truly customized swimwear piece, but you also gained valuable sewing skills and confidence. From selecting quality materials to mastering various sewing techniques, you have expanded your knowledge in the world of garment construction.
Remember, this is just the beginning of your journey in creating your own personalized swimwear. Now that you have the foundation, you can continue to explore new designs, fabrics, and techniques to expand your bikini-making repertoire.
So, don’t be afraid to dive into new sewing projects and express your unique style through your handmade swimwear. Whether you’re lounging by the pool, sunbathing on the beach, or enjoying water activities, your one-of-a-kind bikini will make you feel confident, comfortable, and fabulous.
Happy sewing and enjoy showing off your beautiful creations!