Home>How-to Guides>For Women>How To Make Your Own Panties
For Women
How To Make Your Own Panties
Modified: July 30, 2023
Learn how to make your own panties for women with our easy-to-follow tutorial. Save money and customize your lingerie to fit your style and size.
(Many of the links in this article redirect to a specific reviewed product. Your purchase of these products through affiliate links helps to generate commission for Under-tec.com, at no extra cost. Learn more)
Table of Contents
Introduction
There’s something incredibly empowering and satisfying about making your own panties. Not only do you get to customize them to suit your style and preferences, but you also get the satisfaction of knowing that you created something with your own two hands. Plus, making your own underwear can be a fun and rewarding project that allows you to showcase your creativity and sewing skills.
Whether you’re a beginner or an experienced seamstress, this step-by-step guide will walk you through the process of making your own panties. From choosing the perfect fabric to adding those finishing touches, we’ve got you covered. So, grab your sewing machine and let’s get started on this exciting DIY venture!
Before we dive into the nitty-gritty details, let’s talk about the materials you’ll need for this project. Don’t worry, you won’t need anything fancy or hard to find. In fact, you probably already have most of the items in your sewing kit. Here’s a quick rundown of what you’ll need:
- Fabric for the front and back pieces
- Cotton jersey fabric for the crotch piece
- Elastic for the waistband
- Pins and scissors
- A sewing machine or needle and thread
- A ruler or measuring tape
- A pencil or tailor’s chalk
Now that you have your materials ready, let’s move on to the first step: choosing the fabric. This is where you can let your imagination run wild and select a fabric that truly represents your style and personality. Whether you prefer delicate lace, bold prints, or soft cotton, the choice is entirely up to you. Just make sure the fabric is comfortable and breathable, as that’s what you’re looking for in a pair of panties. Once you have your fabric, it’s time to take some measurements!
Materials Needed
Before embarking on your panty-making journey, it’s important to gather all the necessary materials. Don’t worry, you won’t need anything out of the ordinary. In fact, you might already have most of these items in your sewing kit. Here’s a list of the materials you’ll need:
- Fabric for the front and back pieces: Choose a fabric that is comfortable, breathable, and suits your style. Cotton, satin, or jersey are popular options.
- Cotton jersey fabric for the crotch piece: This fabric provides extra comfort and is ideal for the crotch area.
- Elastic for the waistband: Look for soft and stretchy elastic that will stay in place without digging into your skin.
- Pins and scissors: These basic sewing tools are essential for cutting and pinning the fabric.
- A sewing machine or needle and thread: Choose whichever method you are most comfortable with. A sewing machine will make the process faster, but hand sewing can work just as well.
- A ruler or measuring tape: Accurate measurements are key to ensure a perfect fit.
- A pencil or tailor’s chalk: These will be used to mark your measurements on the fabric.
By gathering these materials before you start, you’ll have everything you need at your fingertips, making the process smoother and more enjoyable.
Now that you have your materials ready, it’s time to move on to the next step: choosing the perfect fabric for your panties. Let’s get started!
Step 1: Choosing the Fabric
When it comes to making your own panties, the first step is selecting the fabric. This is an exciting decision, as it allows you to showcase your personal style and creativity. Here are a few things to consider when choosing the perfect fabric for your handmade panties:
Comfort: Remember, you’ll be wearing these panties against your skin, so opt for fabrics that are soft, breathable, and comfortable. Natural fibers like cotton or bamboo rayon are excellent choices. They are not only gentle on your skin but also allow for proper air circulation, keeping you feeling fresh throughout the day.
Stretch: Panties need to be flexible and able to move with your body. Look for fabrics that have some stretch, such as elastane or spandex blends. These materials will provide the necessary give and ensure a snug fit without feeling constricting.
Style and Design: This is your chance to let your personality shine through. Consider your personal taste and the overall look you want to achieve. If you prefer a classic and elegant style, opt for fabrics like lace or satin. If you’re more into bold and playful designs, you can go for vibrant prints or colorful patterns. Don’t be afraid to think outside the box and experiment with unique fabrics to create one-of-a-kind panties.
Washability: Since panties are a garment that gets washed frequently, it’s essential to choose fabrics that can withstand regular washing. Check the care instructions for each fabric you are considering and make sure they can be easily maintained without losing their shape or color.
By keeping these points in mind, you can select a fabric that not only meets your practical needs but also complements your individual style. Take your time to explore different options and envision how they will come together to create your dream pair of handmade panties.
Now that you’ve chosen the perfect fabric, it’s time to move on to the next step: taking accurate measurements. Let’s get started!
Step 2: Taking Measurements
Now that you have your fabric ready, it’s time to take accurate measurements to ensure a perfect fit for your handmade panties. Proper measurements are crucial for creating comfortable and well-fitting underwear. Here’s a step-by-step guide to help you take your measurements:
1. Waist: Use a measuring tape to measure around your natural waistline, where your waist is the narrowest. Make sure the tape is snug but not too tight, and take note of the measurement in inches or centimeters.
2. Hips: Measure around the fullest part of your hips, typically around the widest point of your buttocks. Again, ensure the tape is snug but not overly tight, and record the measurement.
3. Rise: The rise is the distance from the front waistband down between your legs to the back waistband. This measurement is important for determining where the panties will sit on your body. To measure the rise, start at your front waistband, then bring the tape down between your legs and up to the back waistband. Make sure the tape is in a straight line and record the measurement.
4. Leg Opening: Measure around the circumference of the leg opening where the elastic will sit. This will determine the width of the leg openings for optimum comfort. Ensure the tape is snug but not too tight, and take note of the measurement.
5. Crotch Depth: This measurement determines the depth of the crotch area. From the center front waistband, bring the tape down to the center back waistband. Ensure the tape is straight and measure the distance. This measurement is essential for creating the right amount of coverage in the crotch area.
Remember to take these measurements while wearing snug-fitting underwear or in the nude for the most accurate results. Also, keep in mind that different panty styles may require additional or slightly different measurements, so refer to the specific pattern or tutorial you are using.
With your measurements in hand, you can now move on to the next step: cutting the fabric. Get ready to bring your handmade panties to life!
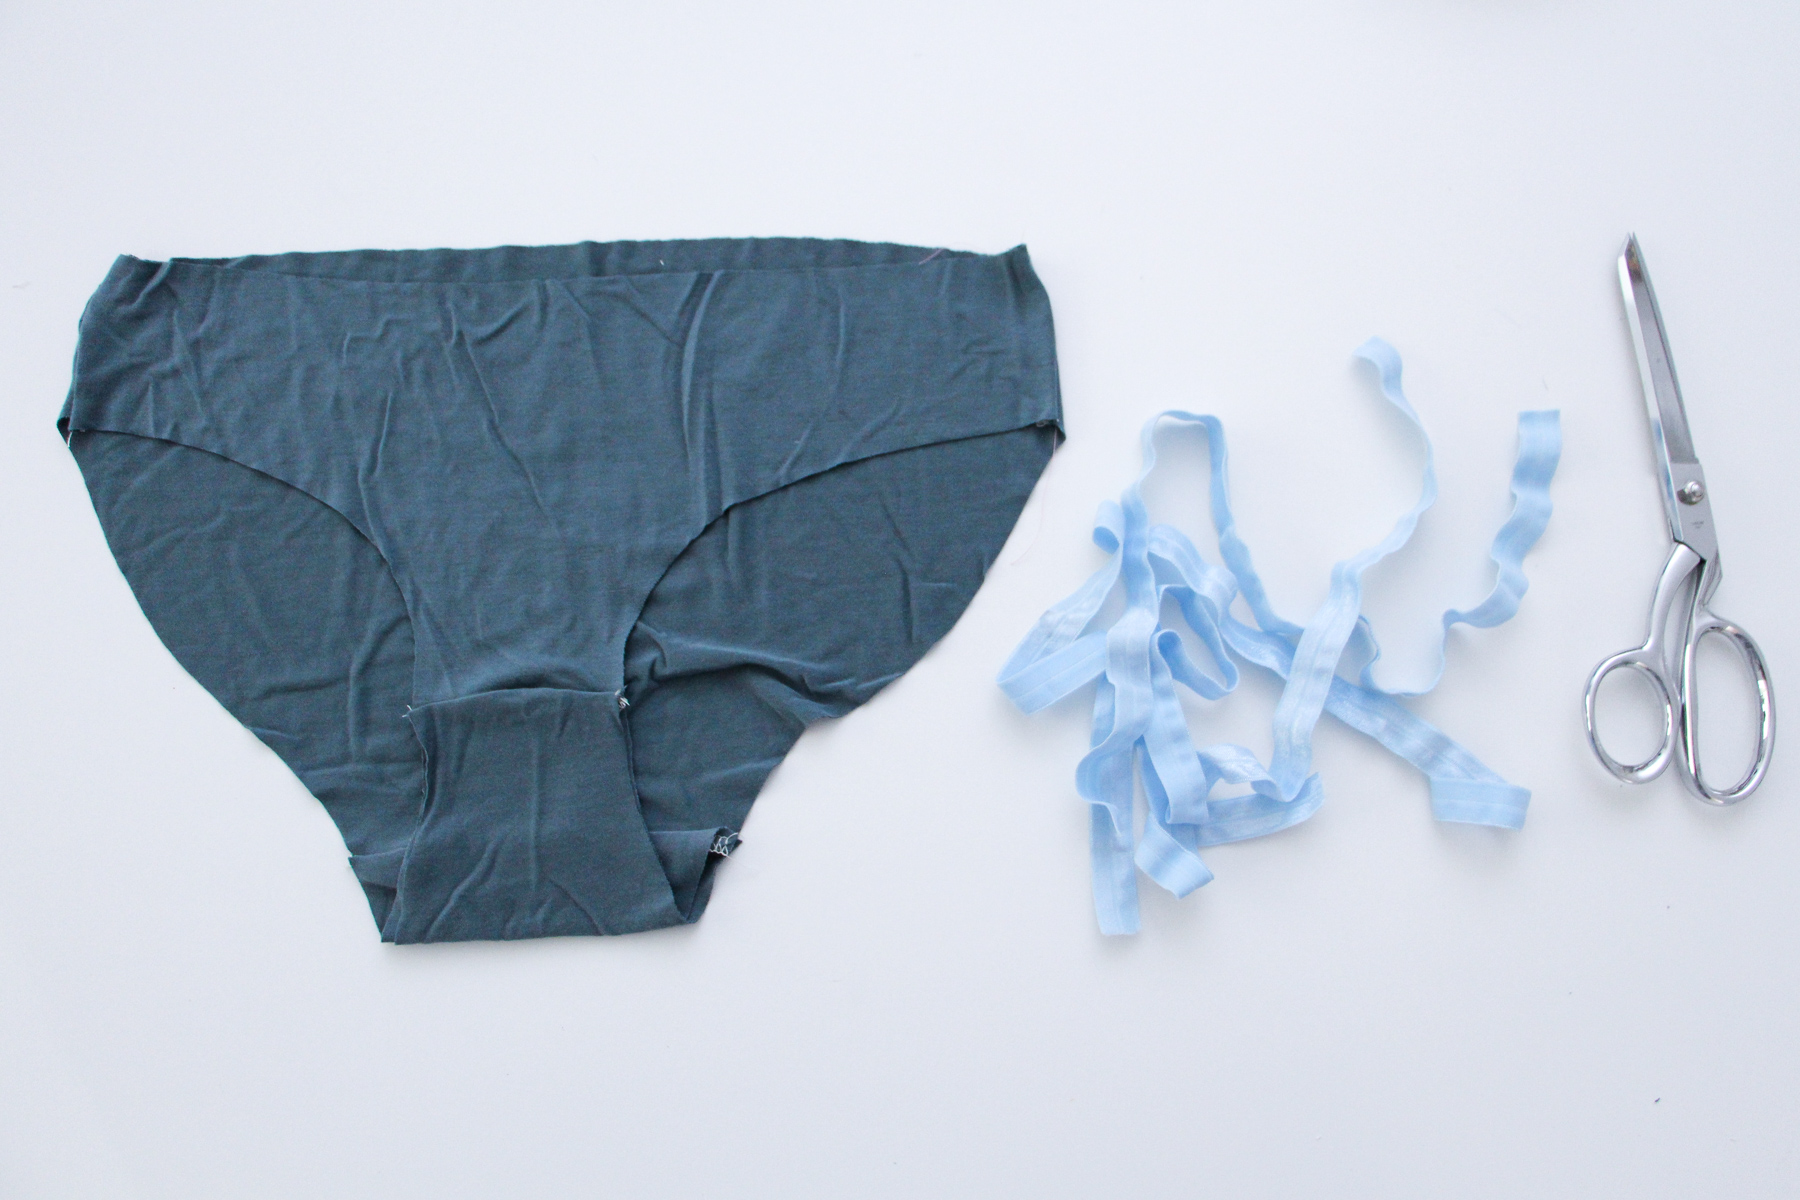
Step 3: Cutting the Fabric
With your measurements in hand, it’s time to bring your handmade panties to life by cutting the fabric. This step is crucial for ensuring precise and accurate pieces that will fit together seamlessly. Here’s a step-by-step guide to help you cut the fabric:
1. Prepare the fabric: Lay your chosen fabric flat on a clean, smooth surface. Smooth out any wrinkles or folds to ensure accuracy during the cutting process. If necessary, iron the fabric beforehand to remove any creases.
2. Position the pattern: If you are using a pattern or template, carefully position it on the fabric according to the measurements you have taken. Make sure the pattern aligns with the grainline of the fabric for optimal fit and drape.
3. Secure the pattern: Use pins or pattern weights to secure the pattern in place. This will prevent any shifting or movement of the fabric while you are cutting.
4. Trace and mark: Using a pencil or tailor’s chalk, trace around the edges of the pattern onto the fabric. Be as accurate as possible, especially when tracing the curves and edges. Mark any designated points such as notches or dart locations to ensure proper alignment during the sewing process.
5. Cut the fabric: With the pattern traced and marked, carefully cut along the lines you have made. Use sharp fabric scissors to ensure clean and precise cuts. Take your time and cut slowly, especially around curved areas, to maintain the accuracy of the pieces.
6. Double-check: Once you have cut out all the required fabric pieces, double-check that you have accurately cut all the necessary components. Compare them to the pattern or tutorial instructions to ensure you have everything you need before moving on to the next step.
Remember to keep any scrap fabric remnants for future projects or as a backup for repairs or adjustments. Cutting the fabric accurately lays the foundation for creating well-fitting and comfortable handmade panties. Now, you’re ready to start sewing the front piece. Let’s proceed to the next step!
Step 4: Sewing the Front Piece
Now that you have your fabric pieces cut out, it’s time to start sewing your handmade panties! We will begin with sewing the front piece, which is the foundation of your underwear. Follow these steps to sew the front piece together:
1. Prepare your sewing machine: Ensure your sewing machine is set up with a suitable needle and matching thread. Refer to your machine’s manual for the appropriate settings for the type of fabric you are using.
2. Pin and align the edges: Take the front piece of the fabric and pin the curved edges together, aligning them precisely. Ensure the right sides of the fabric are facing each other.
3. Sew the curved edges: Using a straight stitch, begin sewing along the curved edges of the fabric. Start at one end and sew towards the other end, removing the pins as you go. Sew with a ⅜ inch seam allowance for secure and neat stitching.
4. Backstitch at the end: Once you reach the end of the curved edge, backstitch a few stitches to secure the seam. Trim any excess thread.
5. Press the seam: Open up the fabric and press the seam allowance to one side using an iron on a low heat setting. This will create a flat and professional finish.
6. Topstitch the seam: To reinforce the seam and add a decorative touch, topstitch along the curved edge. Use a contrasting or matching thread and sew about ¼ inch from the edge, keeping the fabric flat and aligned.
Remember to adjust the tension and stitch length settings as needed for the specific fabric you are using. Take your time and sew with precision and care to ensure strong and durable seams.
With the front piece sewn, you have completed an important part of your handmade panties. Now it’s time to move on to sewing the back piece. In the next step, we will bring the two pieces together to create the foundation of your underwear. Stay tuned!
Step 5: Sewing the Back Piece
Now that the front piece of your handmade panties is complete, it’s time to move on to sewing the back piece. This step will bring together the front and back of your underwear, creating the foundation of the garment. Follow these steps to sew the back piece:
1. Pin and align the edges: Take the back piece of fabric and pin the curved edges together, aligning them precisely. Make sure the right sides of the fabric are facing each other.
2. Sew the curved edges: Using a straight stitch, sew along the curved edges of the fabric. Start at one end and sew towards the other end, making sure to remove the pins as you go. Maintain a ⅜ inch seam allowance for secure stitching.
3. Backstitch at the end: When you reach the end of the curved edge, backstitch a few stitches to secure the seam. Trim any excess thread.
4. Press the seam: Open up the fabric and press the seam allowance to one side using a low heat setting on your iron. This will help create a flat and professional finish.
5. Topstitch the seam: To reinforce the seam and add a decorative touch, topstitch along the curved edge of the back piece. Use a matching or contrasting thread and sew about ¼ inch from the edge, keeping the fabric flat and aligned.
Pay attention to the tension and stitch length settings to ensure smooth and even stitching. Taking your time while sewing the back piece will result in a sturdy and visually appealing finish.
Now that you have sewn both the front and back pieces, your handmade panties are beginning to take shape! In the next step, we will sew the crotch piece and attach it to the front and back to create the complete underwear. Exciting, isn’t it? Let’s continue to the next step!
Step 6: Sewing the Crotch Piece
As we approach the final stages of creating your handmade panties, it’s time to sew the crotch piece. This important step will complete the construction of your underwear and provide the necessary coverage and comfort. Follow these steps to sew the crotch piece:
1. Pin and align the edges: Take the crotch piece of fabric and pin it to the front and back pieces, aligning the curved edges. Make sure the right sides of the fabric are facing each other.
2. Sew the curved edges: Using a straight stitch, sew along the curved edges, joining the crotch piece to the front and back pieces. Start at one end and sew towards the other, making sure to remove pins as you go. Use a ⅜ inch seam allowance to secure the pieces together.
3. Backstitch at the end: When you reach the end of the curved edge, backstitch a few stitches to secure the seam. Trim any excess thread.
4. Press the seam: Open up the fabric and press the seam allowance towards either the front or back pieces. Pressing the seam flat will ensure a tidy and professional finish.
By sewing the crotch piece, you have successfully connected the front and back pieces of your handmade panties, creating the complete foundation of the underwear. This step adds structure, comfort, and coverage to the garment.
In the next step, we will attach the elastic waistband, which will provide the necessary support and fit. So let’s dive into the next step and complete your handmade panties!
Step 7: Attaching the Elastic Waistband
With the main body of your handmade panties complete, it’s time to add the finishing touch by attaching the elastic waistband. The waistband not only ensures a secure and comfortable fit but also adds a professional and polished look to your underwear. Follow these steps to attach the elastic waistband:
1. Measure and cut the elastic: Measure the elastic by wrapping it around your waist, ensuring a snug but not overly tight fit. Cut the elastic to this measurement, adding an extra inch for overlap.
2. Overlap the elastic ends: Overlap the ends of the elastic by half an inch to create a loop. Use pins to hold the ends together temporarily.
3. Sew the elastic ends: Using a zigzag stitch, sew the overlapped ends together securely. Backstitch at the beginning and end to ensure a strong bond. Remove any pins used to hold the elastic.
4. Divide the elastic and fabric into quarters: Divide both the elastic waistband and the waist area of the panties into quarters, marking the center front, center back, and side points with pins or small fabric marks.
5. Attach the waistband: With the panties inside out, match the quarter marks on the elastic waistband to the quarter marks on the waist area of the panties. Pin the elastic waistband to the fabric, stretching it slightly to fit evenly.
6. Sew the elastic to the fabric: Using a zigzag stitch, sew the elastic to the fabric, stretching the elastic as you sew. Keep the fabric flat and ensure that you catch both the elastic and the fabric in your stitches. Remove any remaining pins as you sew.
7. Trim any excess: Once the elastic is securely attached, trim any excess elastic or fabric to create a clean and tidy finish.
Attaching the elastic waistband completes the construction of your handmade panties, giving them the perfect fit and comfort. Now, all that’s left to do is add some finishing touches to elevate the overall look of your creation!
In the final step, we will explore how to add those finishing touches and make your handmade panties truly special. Let’s continue to the next step and put the final flourishes on your project!
Step 8: Adding Finishing Touches
You’re almost there! In the final step of making your handmade panties, it’s time to add those special finishing touches that will elevate the overall look and feel of your creation. These details can range from decorative elements to functional additions that enhance the durability and comfort of your underwear. Here are some ideas for adding those finishing touches:
1. Decorative trims: Consider adding lace, ribbons, or bows to the edges of your panties for a touch of femininity and elegance. These decorative trims can be sewn along the leg openings or waistband, adding a charming detail to your handmade creation.
2. Embellishments: Get creative by adding decorative elements such as pearls, beads, or sequins for a personalized and unique touch. These embellishments can be strategically placed on the front or back of the panties, adhered with fabric glue or hand-sewn for extra durability.
3. Reinforced seams: To ensure longevity, reinforce the seams by backstitching or zigzag stitching over them. This extra step will add strength and durability to your handmade panties, ensuring that they stand the test of time.
4. Seamless finishes: For a seamless look, consider using a serger or a zigzag stitch to finish the edges of the fabric. This technique helps prevent fraying and creates a clean and professional appearance.
5. Gusset lining: To add an extra layer of comfort and hygiene, consider adding a cotton or bamboo jersey lining to the crotch area of your panties. This lining can be sewn in during the crotch piece attachment step for an additional touch of luxury.
6. Care instructions: Once your handmade panties are complete, don’t forget to include care instructions. This can be as simple as a tag or label with washing and drying recommendations to ensure your panties maintain their shape and longevity.
By adding these finishing touches, you can truly customize and elevate your handmade panties, creating a garment that is not only functional but also a reflection of your personal style and creativity.
With the finishing touches complete, step back and admire your exceptional work! You have successfully created your own one-of-a-kind panties, tailored to your exact preferences. Enjoy wearing your handmade creation and take pride in your sewing skills and creativity. Happy sewing!
Conclusion
Congratulations on completing your journey to making your own panties! Through careful fabric selection, precise measurements, and meticulous sewing techniques, you have successfully created a pair of handmade underwear that is tailored to your unique style and fit.
By making your own panties, you have not only tapped into your creativity but also experienced the satisfaction of crafting a garment with your own hands. The process of choosing the fabric, taking the measurements, cutting, sewing, and adding those special finishing touches has allowed you to create a truly personalized piece of lingerie.
Remember, the beauty of making your own panties lies in the ability to customize and experiment with different fabrics, trims, and details to suit your preferences. Whether you prefer delicate lace, bold prints, or a classic plain style, the possibilities are endless when it comes to creating your perfect pair.
As you become more experienced in panty-making, don’t hesitate to explore more intricate techniques, such as adding additional details like appliques, color-blocking, or even experimenting with different panty styles like thongs or boy shorts. The more you practice, the more confident you will become in your sewing skills, allowing you to expand your creativity even further.
Remember to take proper care of your handmade panties by following the care instructions you included during the finishing touches step. This will help prolong the lifespan of your underwear so that you can continue to enjoy wearing them for a long time to come.
Making your own panties is not only a practical and enjoyable endeavor, but it also allows you to express your individuality and embrace your personal style. Whether you’re creating a functional everyday pair or a special occasion garment, the process of making your own panties is a rewarding and empowering experience.
So, what are you waiting for? Start exploring new fabrics, patterns, and designs, and let your imagination run wild. Create stunning handmade panties that reflect your unique personality and make you feel confident and beautiful from the inside out. Happy panty making!