Home>Women's Underwear>Bras>How To Sew Your Own Bra
Bras
How To Sew Your Own Bra
Modified: August 2, 2023
Learn how to sew your own bras with our step-by-step guide. Create custom-fit and comfortable bras that suit your style. Get started today!
(Many of the links in this article redirect to a specific reviewed product. Your purchase of these products through affiliate links helps to generate commission for Under-tec.com, at no extra cost. Learn more)
Table of Contents
Introduction
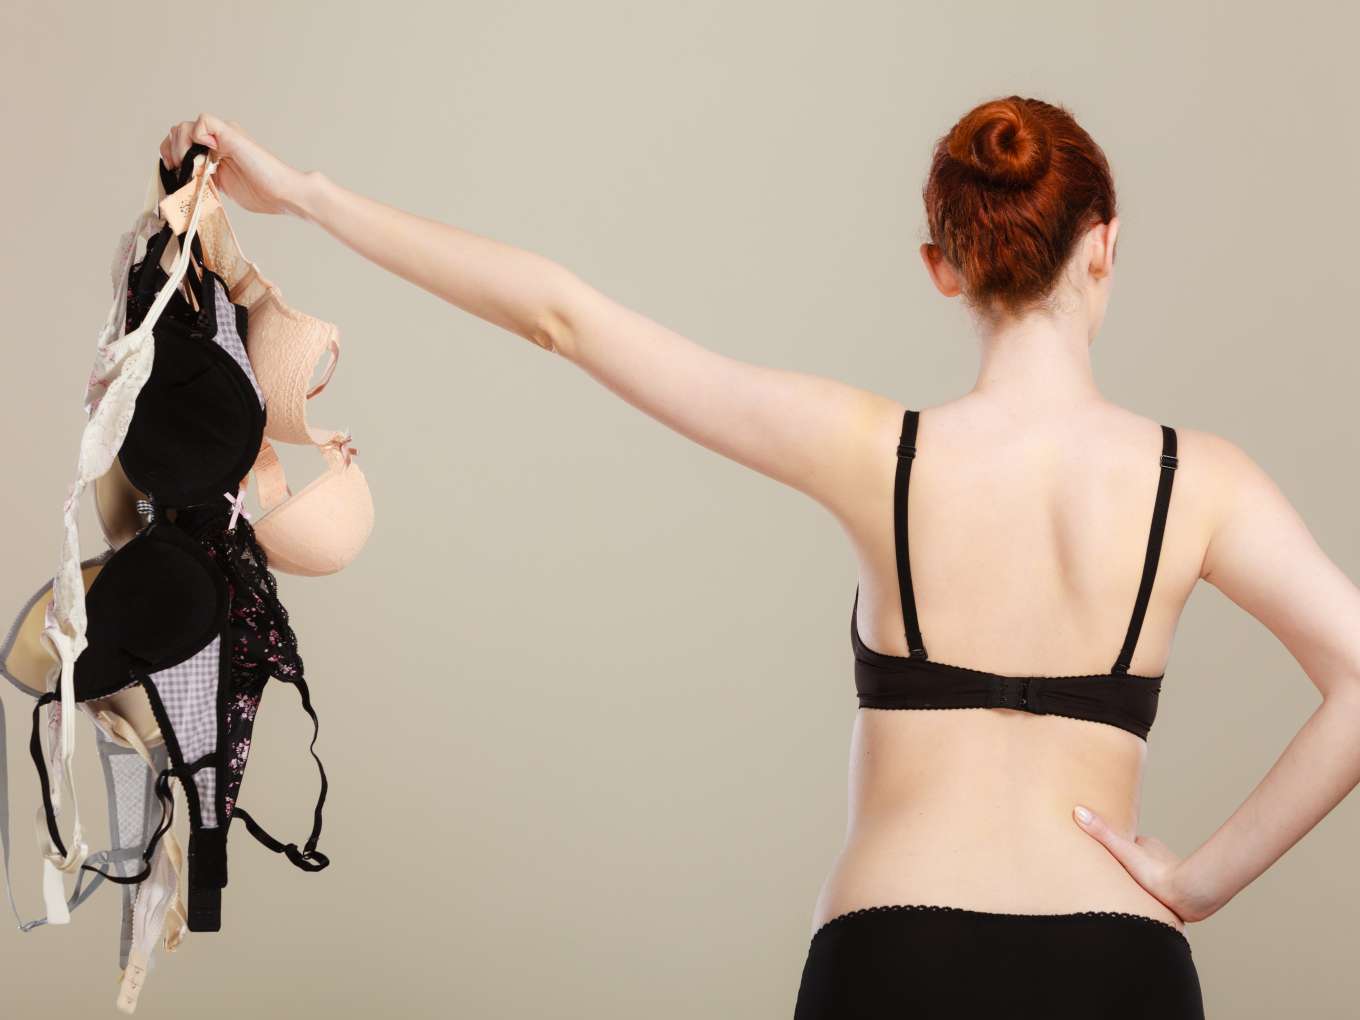
Welcome to the exciting world of bra-making! Sewing your own bra not only gives you the freedom to customize the fit, style, and materials, but it also allows you to unleash your creativity and express your personal taste. Whether you’re tired of ill-fitting store-bought bras or simply looking for a new sewing challenge, making your own bra can be a rewarding and empowering experience.
Sewing a bra may seem like a daunting task, but with the right guidance and a bit of practice, you’ll soon be on your way to creating beautiful and comfortable lingerie that fits you perfectly. In this article, we will guide you through the process of sewing your own bra, from gathering the materials to adding the finishing touches.
Before we dive into the technical aspects of bra-making, it’s important to highlight the benefits of sewing your own bras. Firstly, you have control over the fit. Many individuals struggle to find bras that provide the right amount of support and comfort for their unique body shape. By sewing your own bra, you can easily adjust the pattern to fit your measurements and preferences.
Secondly, you can choose from a wide range of fabrics, colors, and prints. Why settle for the limited options available in stores when you can create a bra that reflects your personal style? From delicate lace to bold prints, the choice is yours.
Lastly, crafting your own bra allows for customization. Perhaps you have a favorite bra style or a specific design feature that you love. With homemade bras, you have the freedom to incorporate those elements into your creation, making it truly one-of-a-kind.
In the following sections, we will walk you through the step-by-step process of sewing your own bra. We’ll cover everything from taking accurate measurements to selecting the right pattern and style, and then, guiding you through the construction process. So, let’s get started on your journey to creating the perfect bra!
Gathering the Materials
Before you begin sewing your own bra, it’s important to gather all the necessary materials. Having everything you need at hand will make the process much smoother and more enjoyable. Here are the essential items you’ll need:
- Bra Pattern: Start by selecting a bra pattern that suits your style and skill level. There are several beginner-friendly patterns available online or at your local sewing supply store. Make sure to choose a pattern that provides clear instructions and includes your size range.
- Fabric: Look for fabrics specifically designed for bras, such as bra tulle, power net, or stretch lace. These fabrics provide the necessary support and structure for your bra. You’ll also need lining fabric, which is often a lightweight polyester or nylon material.
- Notions: Gather a variety of notions, including underwires, bra sliders, rings, and hooks. These are essential for creating the functional elements of your bra. Make sure to choose notions that match your fabric in terms of color and size.
- Elastic: You’ll need several types of elastic, such as picot edge elastic, fold-over elastic, and plush waistband elastic. These elastics help to provide a comfortable and secure fit for your bra.
- Thread: Choose a high-quality polyester or nylon thread that matches your fabric color. Using a thread specifically designed for lingerie will ensure durability and flexibility.
- Sewing Machine and Tools: Have a sewing machine with a zigzag stitch or a specialized lingerie stitch. Additionally, gather essential sewing tools such as scissors, pins, measuring tape, and a seam ripper.
Once you’ve gathered all the materials, it’s a good idea to wash your fabrics before starting the sewing process. This helps to prevent any shrinkage that may occur after completing the bra. Follow the manufacturer’s instructions for washing and drying the fabrics accordingly.
Before moving on to the next steps, it’s important to note that bra-making requires precision and attention to detail. Taking accurate measurements and following the pattern instructions carefully will ensure a well-fitting and comfortable bra. So, let’s move on to the next section and learn how to take accurate measurements.
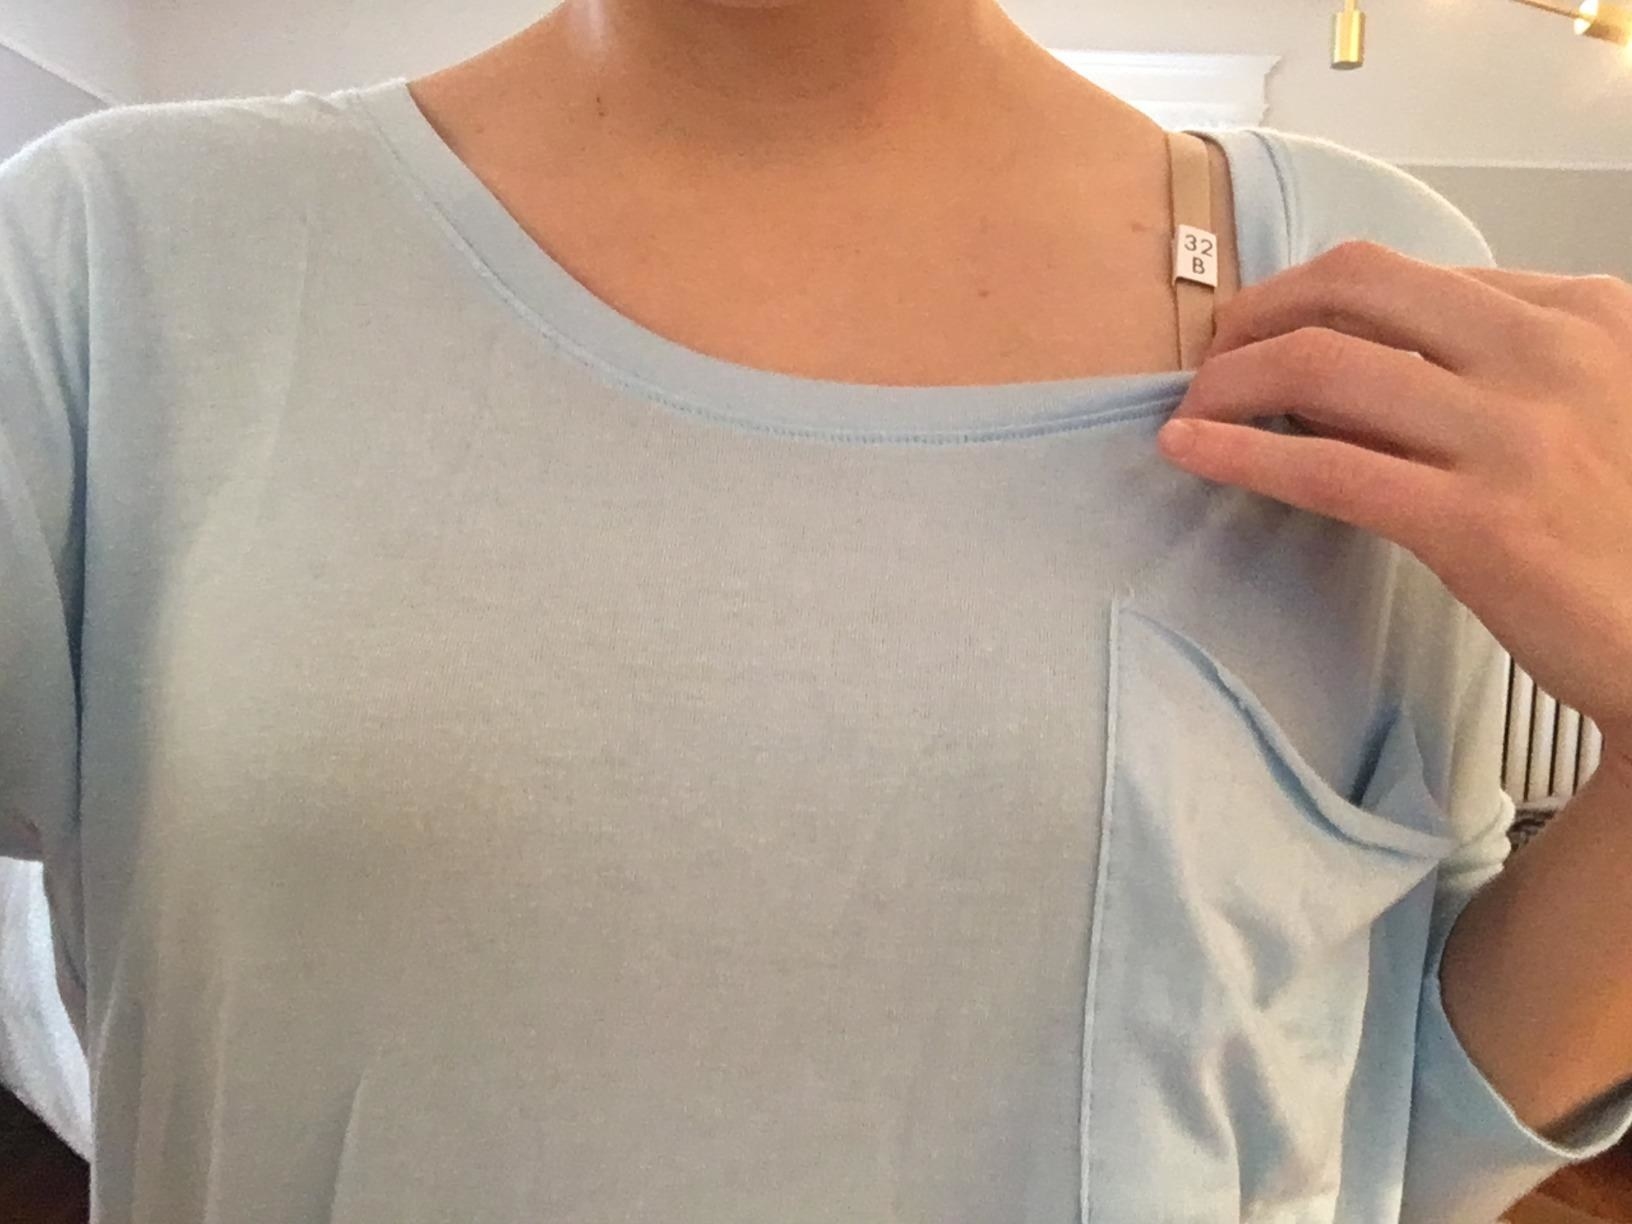
Taking Accurate Measurements
One of the most crucial steps in sewing your own bra is taking accurate measurements. This ensures that your bra fits perfectly and provides the necessary support. Here’s a step-by-step guide on how to take accurate measurements for your bra:
- Band Size: Begin by measuring your underbust, just below your breasts. Use a soft measuring tape and pull it snugly around your torso. Round the measurement to the nearest whole inch. This measurement will determine your band size, such as 32, 34, or 36.
- Cup Size: Next, measure the fullest part of your bust. Make sure the tape measure is parallel to the floor and not too tight. Round this measurement to the nearest whole inch. Subtract your band size from this measurement to determine your cup size. For example, if your bust measurement is 38 inches and your band size is 34 inches, the difference is 4 inches, which corresponds to a D cup.
- Underwire Length: If your chosen bra pattern includes underwires, you’ll need to measure the length of the underwire. Place the end of the measuring tape at the center front of your bra band and measure along the curve of your breast to the center back. This will give you the correct underwire length.
- Strap Length: Measure the distance from the top of your shoulder to the center back, where the bra straps will attach. This measurement will help you determine the strap length for your bra.
It’s important to note that bra measurements can vary between brands and even between patterns. Always refer to the specific instructions and size chart provided with your chosen pattern. If you’re unsure about any measurements or sizing, it’s a good idea to consult the pattern instructions or seek guidance from experienced bra-makers.
Once you have your accurate measurements, you’ll be able to select the appropriate size on your bra pattern and make any necessary adjustments to ensure a perfect fit. Taking the time to measure accurately will greatly enhance the success of your bra-making project and ensure a comfortable and supportive end result.
Now that you have your measurements, it’s time to move on to the next section and learn how to choose the right pattern and style for your bra.
Choosing the Right Pattern and Style
When it comes to sewing your own bra, choosing the right pattern and style is key to creating a bra that matches your preferences and fits your body comfortably. Here are some considerations to keep in mind when selecting your bra pattern:
- Size Range: Ensure that the pattern includes your specific size range. Many bra patterns offer a wide range of sizes to accommodate different body shapes. Check the pattern instructions or size chart to find your size.
- Support Level: Decide on the level of support you desire from your bra. Some patterns are designed for everyday wear and provide moderate support, while others cater to more specialized needs, such as sports bras or full-figured bras.
- Style and Design: Consider the style and design elements that appeal to you. Do you prefer a balconette, plunge, or full-cup style? Look for patterns that match your desired aesthetic and provide the features you desire, such as adjustable straps or a lace overlay.
- Skill Level: Assess your sewing skills and choose a pattern that matches your expertise level. Some patterns may be more complex and require advanced sewing techniques, while others are beginner-friendly and suitable for those new to bra-making.
- Reviews and Recommendations: Research online reviews or seek recommendations from fellow bra-makers. Their experiences and insights can provide valuable guidance in selecting a reliable and well-drafted pattern.
Remember, bra patterns are just a starting point. Feel free to modify and customize the pattern to suit your needs. You can adjust the strap length, add or remove underwires, or experiment with different fabrics and trims to create a unique bra that reflects your personal style.
Additionally, don’t be afraid to mix and match pattern pieces from different styles or sources. The beauty of sewing your own bra is the ability to customize and adapt the design to best suit your body and preferences.
Once you have selected your pattern, take the time to read through the instructions and familiarize yourself with the construction process. Understanding the steps involved will help ensure a smoother sewing experience.
Now that you have chosen the perfect pattern and style, it’s time to move on to the next section and learn how to cut out the fabric pieces for your bra.
Cutting Out the Fabric Pieces
Once you have selected your bra pattern and gathered all the necessary materials, it’s time to start cutting out the fabric pieces. Properly cutting the fabric is essential for ensuring accurate and clean sewing. Here’s a step-by-step guide on how to cut out the fabric pieces for your bra:
- Pre-wash and Press: Before cutting your fabric, it’s important to pre-wash and press it according to the manufacturer’s instructions. This helps to prevent any shrinkage or distortion that may occur after sewing.
- Layout the Pattern: Lay out your pattern pieces on the fabric according to the layout guide provided in the pattern instructions. Pay attention to the grain line and fabric direction, especially if you are using patterned or directional fabric.
- Pin and Cut: Once the pattern pieces are properly positioned, use sharp fabric scissors or a rotary cutter to cut around the edge of each piece. Take care to cut accurately along the lines of the pattern, ensuring smooth and clean edges.
- Mark Notches and Darts: As you cut, mark any notches or darts onto the fabric using tailors’ chalk or fabric markers. These markings will help with the alignment and construction of the bra pieces later on.
- Label the Pieces: It’s a good idea to label each fabric piece with the corresponding pattern piece number or name. This will help you keep track of the pieces during the sewing process.
It’s important to note that some bra patterns may require multiple fabric layers or special notation for different fabric types. Follow the pattern instructions carefully to ensure you cut out the correct fabric pieces in the appropriate fabric and color.
Additionally, if you’re using delicate or stretchy fabrics, it may be beneficial to use pattern weights or fabric clips instead of pins to hold the pattern pieces in place. This helps to prevent any distortion or damage to the fabric.
Once all the fabric pieces are cut, take a moment to double-check that you have cut out all the required pieces according to your pattern. Having all the pieces prepared and organized will make the sewing process much smoother and more enjoyable.
Now that your fabric pieces are ready, it’s time to move on to the next section and learn how to sew the cups and lining of your bra.
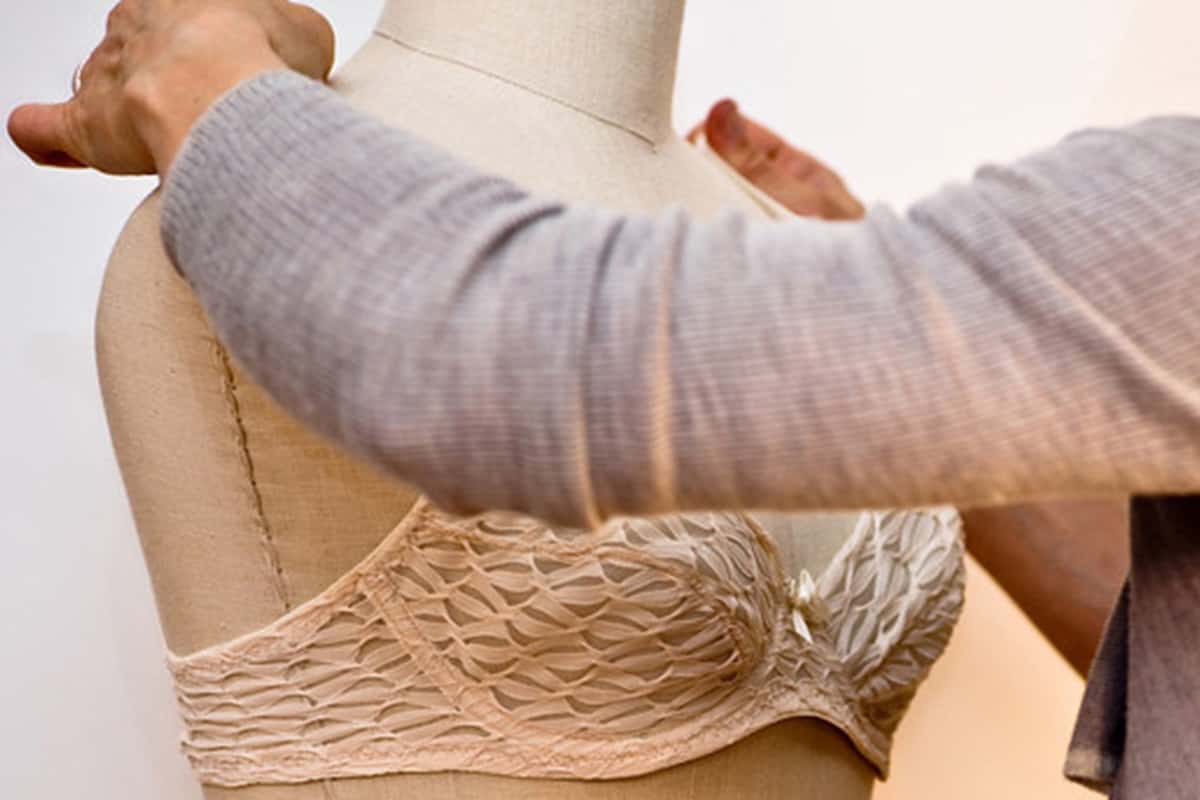
Sewing the Cups and Lining
Sewing the cups and lining is a critical step in constructing your own bra. This is where the foundation of the bra is created, providing support and shaping. Here’s a step-by-step guide on how to sew the cups and lining of your bra:
- Prepare the Pieces: Start by organizing your fabric cup pieces and lining pieces. Lay them out and make sure you have the correct pieces for each cup and lining.
- Pin and Sew the Cups: Place the right sides of the fabric cup pieces together, aligning the edges. Pin the pieces together along the curved edges of the cup. Use a stretch stitch or a narrow zigzag stitch to sew the pieces together, following the seam allowance specified in your pattern instructions.
- Trim and Press Seam Allowances: After sewing, trim the seam allowances to reduce bulk and clip the curved edges if necessary. Press the seam allowances open or towards one side, depending on your pattern instructions.
- Repeat for Lining: Repeat the same process for the lining fabric cup pieces, sewing and pressing the seams. The lining provides additional support and structure to the bra.
- Attach Cups and Lining: With the right side of the cup facing up, place the lining on top, aligning the edges. Pin the layers together and sew along the top edge of the cup using a stretch stitch or a zigzag stitch. Press the seam allowances towards the cup fabric.
- Understitch the Lining: To prevent the lining from rolling out, understitch the lining fabric close to the seam line. This helps to keep the lining in place and maintain the intended shape of the cups.
- Clip and Grade Curved Edges: Clip any curved edges of the cups and the lining to allow for smooth shaping. Grade the seam allowances, trimming the lining seam allowance slightly shorter than the fabric cup seam allowance.
It’s important to note that different bra patterns may have variations in cup construction methods. Always refer to the specific instructions provided with your pattern for the most accurate guidance.
As you sew the cups and lining, take your time to ensure precise stitching and accurate alignment of the fabric pieces. Pay attention to small details, such as clipping curves and pressing seams, as they contribute to the overall fit and comfort of your bra.
Now that the cups and lining are sewn, it’s time to move on to the next section and learn how to construct the side bands and back band of your bra.
Constructing the Side Bands and Back Band
Constructing the side bands and back band is a crucial step in creating a well-fitting and supportive bra. These components provide stability and ensure proper fit around the ribcage. Here’s a step-by-step guide on how to construct the side bands and back band of your bra:
- Prepare the Pieces: Gather the fabric side band pieces and back band pieces according to your pattern. Make sure you have the correct pieces for each side and the back.
- Align and Pin the Side Bands: With right sides together, align the side band pieces along the sides of the cup and lining. Pin the pieces in place, ensuring that they line up accurately.
- Sew the Side Bands: Use a stretch stitch or a zigzag stitch to sew the side bands to the cup and lining. Follow the seam allowance specified in your pattern instructions. Repeat this process for both side bands.
- Press and Finish Seam Allowances: Press the seam allowances towards the side bands, away from the cup and lining. To prevent fraying and provide a clean finish, you can sew a row of zigzag or overlock stitches along the raw edges of the seam allowances.
- Attach the Back Band: With the right side of the side bands facing up, align the back band along the bottom edges of the side bands. Pin the back band in place and sew it to the side bands using a stretch stitch or a zigzag stitch.
- Trim and Press Seam Allowances: Trim the seam allowances if necessary, and press them towards the back band. To maintain a clean finish, you can sew a row of zigzag or overlock stitches along the raw edges of the seam allowances.
It’s important to note that different bra patterns may have variations in side band and back band construction methods. Always refer to the specific instructions provided with your pattern for accurate guidance.
As you construct the side bands and back band, pay attention to the alignment of the pieces and ensure that the stitching is secure and neat. Pressing the seam allowances and finishing the raw edges contribute to a professional-looking finish.
Now that you have constructed the side bands and back band, it’s time to move on to the next section and learn how to add straps and make any necessary adjustments to your bra.
Adding Straps and Adjustments
Adding straps and making necessary adjustments are the final steps to complete your handmade bra. These elements provide comfort, support, and customization. Here’s a step-by-step guide on how to add straps and make adjustments to your bra:
- Prepare the Straps: Depending on your pattern, you may have adjustable or fixed-length straps. If your pattern calls for adjustable straps, gather the necessary hardware like sliders and rings.
- Measure and Cut the Straps: Measure your desired strap length and cut two fabric straps accordingly. If using hardware, add additional length for attaching the sliders and rings.
- Attach the Straps: For adjustable straps, thread one end of the strap through the slider, then fold it over and sew it in place. Thread the opposite end through the ring, fold it over, and sew it in place. Repeat this process for the second strap. For fixed-length straps, fold the ends over and sew them securely.
- Position and Attach the Straps: Place the straps on the front of the bra cups, positioning them according to your desired style and comfort. Pin the strap ends in place, ensuring they are aligned symmetrically. Sew them securely to the cups, reinforcing with additional stitches if needed.
- Make Adjustments: Once the straps are attached, it’s time to try on the bra and make any necessary adjustments. Check the fit and comfort of the bra. If needed, you can make alterations such as taking in the side seams, adjusting the band length, or tweaking the strap placement.
- Finishing Touches: After making any adjustments, reinforce the stitching and secure any loose ends. You can also add decorative touches like bows or embellishments to personalize your bra.
It’s important to note that making adjustments to your bra may require some trial and error. Take your time and make any alterations gradually, ensuring you achieve the desired fit and comfort.
Once you have added the straps and made any necessary adjustments, try on the bra again to ensure the fit is perfect. Make any final tweaks or adjustments if needed, and then your handmade bra is ready to be worn and enjoyed!
Now that you have successfully added straps and made adjustments, it’s time to move on to the final section and conclude your journey in sewing your own bra.
Finishing Touches and Final Fitting
You’re almost there! The final step in creating your handmade bra is adding the finishing touches and ensuring the perfect fit. These last details will elevate the look and comfort of your bra. Here’s what you need to do:
- Secure Loose Threads and Trims: Take a close look at your bra and trim any loose threads as needed. Ensure that all seams are secure and any trims or embellishments are securely attached.
- Try on the Bra: Put on your handmade bra and carefully assess the fit. Pay attention to the band, cups, and straps. Check for any discomfort, sagging, or gapping. If necessary, make minor adjustments to achieve your desired fit.
- Personalize and Embellish: This is your opportunity to add personal flair to your bra. You can sew on decorative bows, lace appliques, or any other embellishments that reflect your unique style. Be creative and make your bra truly one-of-a-kind.
- Make Final Adjustments: If you have identified any fit issues during the final fitting, make small, precise alterations such as tweaking the strap length, adjusting the band elasticity, or reinforcing any seams that may need it.
- Evaluate the Final Result: After making the necessary adjustments, step back and evaluate the final result. Take pride in your handcrafted bra and appreciate the time and effort you have invested in creating something truly special.
Once you are satisfied with the fit and appearance of your handmade bra, it’s time to wear it with confidence! Enjoy the comfort and support that a perfectly fitted bra provides, and admire your craftsmanship every time you put it on.
Remember, as with any new sewing project, practice makes perfect. The more you sew bras and experiment with different styles and techniques, the better you will become at creating custom lingerie that flatters your body and suits your preferences.
Now that you have completed all the necessary steps, it’s time to bask in the satisfaction of sewing your own bra and start planning your next bra-making adventure!
Conclusion
Congratulations on completing the journey of sewing your own bra! You have taken the plunge into the world of bra-making and have successfully created a unique and personalized piece of lingerie that fits you perfectly.
Throughout this article, we have covered the essential steps involved in sewing your own bra. From gathering the materials to taking accurate measurements, choosing the right pattern, cutting out the fabric pieces, sewing the cups and lining, constructing the side bands and back band, adding the straps and making necessary adjustments, and finally, adding the finishing touches and achieving the perfect fit.
By sewing your own bra, you have gained control over the fit, style, and materials, allowing you to create lingerie that aligns with your personal preferences and reflects your unique personality. You have also discovered the joy of crafting something by hand, taking your sewing skills to new heights, and exploring the art of lingerie making.
Remember, bra-making is an ongoing learning process. Each bra you create presents an opportunity to refine your techniques, experiment with different styles, and continue to improve your skills. Don’t be afraid to take risks and try new ideas – this is your chance to push the boundaries of creativity!
Whether you’re sewing bras for yourself, as gifts for loved ones, or even as a small business venture, the satisfaction and empowerment that comes with creating your own lingerie are immeasurable. So, embrace your newfound skill, wear your handmade bras with pride, and continue to explore the beautiful world of bra-making.
Happy sewing!