Home>How-to Guides>For Women>How To Sew A Simple Slip Dress

For Women
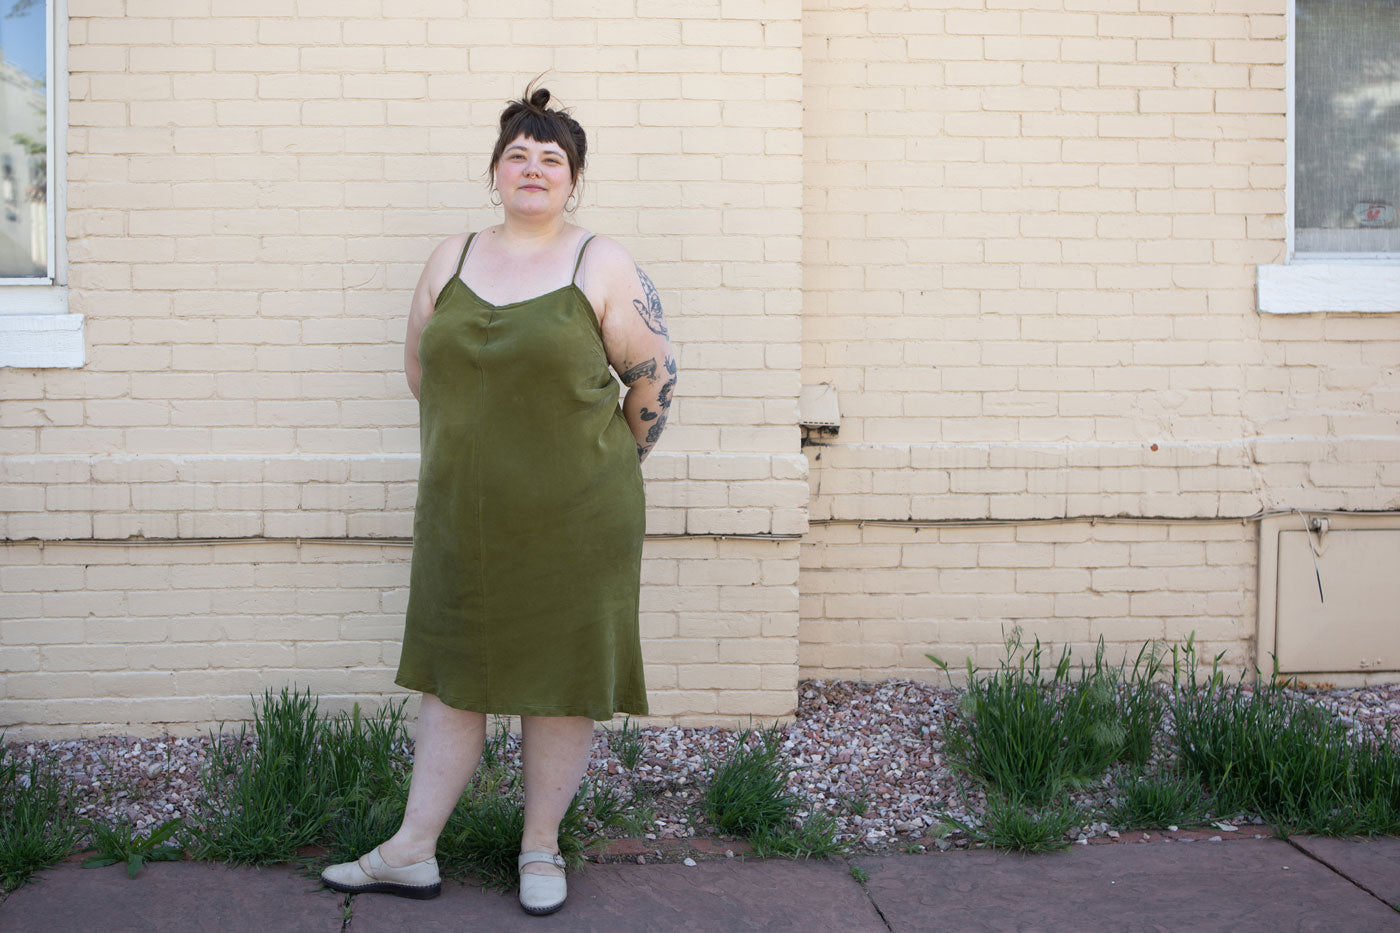
How To Sew A Simple Slip Dress
Modified: August 24, 2023
Learn how to sew a simple slip dress for women with this easy step-by-step tutorial. Create a flattering and versatile wardrobe staple!
(Many of the links in this article redirect to a specific reviewed product. Your purchase of these products through affiliate links helps to generate commission for Under-tec.com, at no extra cost. Learn more)
Table of Contents
Introduction
Welcome to this beginner’s guide on how to sew a simple slip dress! If you’ve always wanted to try your hand at sewing your own wardrobe, a slip dress is a great place to start. This versatile and timeless piece can be dressed up or down, making it a must-have in any woman’s closet.
Whether you’re a seasoned seamstress or a complete novice, this step-by-step tutorial will guide you through the process of creating a beautiful slip dress from start to finish. By the end of this article, you’ll have a stylish and customized dress that fits you perfectly.
Creating your own slip dress allows you to choose the fabric, color, and design that suit your personal style. You can experiment with different fabrics such as silk, satin, or cotton to achieve different looks and feels. Additionally, sewing your own dress gives you the opportunity to customize the length, neckline, and straps to ensure a flattering and comfortable fit.
Not only is sewing a slip dress a fun and creative project, but it also allows you to save money compared to buying a ready-made dress. Plus, you’ll have the satisfaction of wearing a garment that you crafted with your own hands, creating a sense of pride and accomplishment.
Throughout this tutorial, we’ll provide detailed instructions accompanied by helpful tips and tricks to make the process as seamless as possible. So, grab your sewing machine, gather your materials, and let’s get started on creating your very own slip dress!
Materials Needed
Before we dive into the sewing process, let’s gather all the materials you’ll need to create your slip dress:
- Fabric: Choose a fabric that suits your style and desired level of comfort. Silk, satin, or cotton are popular choices for slip dresses.
- Lining Fabric: If your main fabric is lightweight or sheer, it’s a good idea to use lining fabric to provide opacity and structure.
- Sewing Machine: A basic sewing machine will suffice for this project. Make sure it is in good working condition and threaded with the appropriate thread.
- Thread: Select a thread color that matches or complements your fabric.
- Scissors or Rotary Cutter: Use fabric scissors or a rotary cutter to cut your fabric accurately.
- Pins or Clips: These will be used to hold your fabric pieces together during sewing.
- Measuring Tape: You’ll need a measuring tape to take your body measurements and determine the dimensions for your dress.
- Iron and Ironing Board: Pressing your fabric and seams is crucial for achieving a professional finish.
- Interfacing (optional): If your fabric requires extra stabilization, you may need to use interfacing for certain areas like the bodice or straps.
- Pattern or Template: You can either purchase a slip dress pattern or use an existing dress in your wardrobe as a template.
- Notions: Depending on your design, you may need items such as buttons, snaps, or hooks for closures.
Ensure that you have all these materials on hand before starting your project to avoid any interruptions during the sewing process.
Step 1: Taking Measurements
Before you begin cutting your fabric, it’s essential to take accurate measurements to ensure a well-fitting slip dress. Here are the measurements you’ll need:
- Bust: Measure around the fullest part of your bust, ensuring that the measuring tape is level.
- Waist: Measure around the smallest part of your waist, typically above your belly button.
- Hips: Measure around the fullest part of your hips, keeping the tape parallel to the floor.
- Length: Decide how long you want your slip dress to be. Measure from your desired neckline to your desired hemline.
Record these measurements on a piece of paper, as you’ll refer to them throughout the cutting and sewing process to ensure accuracy. Remember to measure with your undergarments or the specific foundation garments you plan to wear with the slip dress to achieve the most accurate fit.
If you’re using a commercial pattern or template, refer to the size chart provided to determine the closest size based on your measurements. If you’re using an existing dress as a template, lay it flat on your fabric and use it as a guide to trace the shape onto the fabric.
It’s always a good idea to add a little extra fabric for seam allowances and adjustments, especially if you’re new to sewing. This will give you some wiggle room for alterations if needed.
Once you have your measurements ready and your fabric laid out, you can move on to the next step: cutting the fabric for your slip dress.
Step 2: Cutting the Fabric
Now that you have your measurements and pattern/template ready, it’s time to cut the fabric for your slip dress. Follow these steps:
- Prepare your fabric: Start by washing and ironing your fabric to remove any wrinkles. This step is important, especially if your fabric has a tendency to shrink.
- Layout your fabric: Place your fabric on a clean, flat surface. Ensure that it is smooth and free from any folds or wrinkles.
- Position your pattern/template: If you’re using a commercial pattern, carefully lay it on the fabric according to the instructions provided. If you’re using a dress as a template, place it on top of the fabric and align the edges.
- Secure the pattern/template: Use pins or pattern weights to secure the pattern/template in place. Make sure it is flat and does not shift while cutting.
- Cut the fabric: Using fabric scissors or a rotary cutter, carefully cut along the outline of the pattern/template. Follow the markings for darts, notches, and other design details if applicable.
- Repeat for lining fabric (optional): If you’re using lining fabric, follow the same steps to cut the lining pieces, ensuring they match the corresponding main fabric pieces.
Take your time during this step to ensure accurate cutting. Pay attention to the grainline of your fabric and the direction of any prints or patterns you want to incorporate into your slip dress.
Once you have all the fabric pieces cut, remove any pins or weights, and set them aside. You’re now ready to move on to the next step: sewing the bodice of your slip dress.
Step 3: Sewing the Bodice
With the fabric pieces cut and ready, it’s time to focus on sewing the bodice of your slip dress. The bodice is the upper part of the dress that covers the bust and waist. Here’s how to proceed:
- Prepare your sewing machine: Ensure that your sewing machine is threaded with the appropriate thread color and that you have the correct needle for your fabric.
- Pin or clip the bodice pieces together: Take the front and back bodice pieces and align the edges together, right sides facing each other. Pin or clip them in place, ensuring that any notches or markings are matched.
- Stitch the bodice: Using a straight stitch, sew along the pinned or clipped edges, leaving the armhole and neckline unfinished for now. Backstitch at the beginning and end of the seam to secure it.
- Press the seams: Open up the stitched seams and press them flat with an iron. This will create a clean and professional finish.
- Finish the armholes and neckline: Depending on your desired finish, you can either bind the edges with bias tape, sew a facing, or add a lining to the bodice. Follow the instructions provided with your pattern or choose a technique that suits your style.
- Add any desired embellishments: If you want to add lace, trim, or any other decorative elements to your bodice, now is the time to do so. Carefully sew or attach them according to your design.
Take your time while sewing the bodice to ensure accuracy and neatness. It’s important to check and adjust the fit as you go along, making any necessary alterations before moving on to the next step.
Once you’re satisfied with the bodice, set it aside and get ready for the next step: sewing the skirt of your slip dress.
Step 4: Sewing the Skirt
Now that the bodice is complete, it’s time to focus on sewing the skirt of your slip dress. The skirt is the lower part of the dress that falls from the waist to the desired hemline. Follow these steps:
- Prepare your sewing machine: Ensure that your sewing machine is still threaded with the appropriate thread color and that you have the correct needle for your fabric.
- Pin or clip the skirt pieces together: Take the front and back skirt pieces and align the side seams together, right sides facing each other. Pin or clip them in place.
- Stitch the side seams: Using a straight stitch, sew along the pinned or clipped side seams. Backstitch at the beginning and end of the seam to secure it.
- Finish the seam allowances: To prevent fraying, finish the raw edges of the side seams with a serger, zigzag stitch, or by using binding tape.
- Gather the waistline (optional): If you prefer a gathered skirt, sew two rows of basting stitches along the top edge of the skirt, leaving long thread tails. Gently pull the thread tails to gather the fabric evenly to match the width of the bodice.
- Attach the bodice and skirt: With the right sides together, align the raw edge of the bodice with the gathered or ungathered waistline of the skirt. Pin or clip them together, distributing any gathers evenly.
- Stitch the bodice and skirt together: Using a straight stitch, sew along the pinned or clipped waistline, ensuring that the gathers are secured and distributed evenly. Backstitch at the beginning and end of the seam.
Once you’ve sewn the bodice and skirt together, try on your slip dress to ensure it fits comfortably. Make any necessary adjustments, such as taking in the side seams or adjusting the gathers, to achieve the desired fit.
With the bodice and skirt now successfully joined, it’s time to move on to the next step: adding straps to your slip dress.
Step 5: Attaching the Bodice and Skirt
Now that the bodice and skirt are complete, it’s time to attach them together to create a cohesive slip dress. Follow these steps:
- Prepare your sewing machine: Ensure that your sewing machine is still threaded with the appropriate thread color and that you have the correct needle for your fabric.
- Pin or clip the bodice and skirt together: With the right sides facing each other, align the raw edges of the bodice and skirt at the waistline. Pin or clip them together, ensuring that the side seams match.
- Stitch the waistline: Using a straight stitch, sew along the pinned or clipped waistline, joining the bodice and skirt together. Backstitch at the beginning and end of the seam to secure it.
- Finish the seam allowances: To prevent fraying, finish the raw edges of the waistline seam with a serger, zigzag stitch, or using binding tape.
Once you’ve attached the bodice and skirt at the waistline, try on your slip dress again to ensure a comfortable and flattering fit. If any additional adjustments are needed, such as taking in the sides or altering the length, make those modifications before proceeding.
With the bodice and skirt successfully attached, it’s time to move on to the next step: adding straps to your slip dress.
Step 6: Adding Straps
The next step in creating your slip dress is to add the straps. The straps not only provide support but also contribute to the overall style of the dress. Follow these steps to add straps to your slip dress:
- Decide on strap placement: Determine where you want your straps to sit on your shoulders. Mark these points on the front and back of the bodice.
- Measure and cut the straps: Measure and cut two fabric strips to your desired length and width for the straps. Ensure that the width is wide enough to provide comfort and support.
- Fold and press the straps: Fold each strap in half lengthwise, right sides facing each other, and press them flat with an iron. This will create a neat and finished look.
- Sew the straps: With the right sides still facing each other, sew along the long edge of each strap, leaving the ends open. Backstitch at the beginning and end of the seam to secure it.
- Trim and turn the straps: Trim any excess fabric and carefully turn the straps right side out. Use a turning tool or a safety pin to help you achieve a clean and smooth result.
- Attach the straps: Position the straps on the marked points on the front and back of the dress. Pin or clip them in place. Try on the dress to ensure that the straps are positioned correctly and provide the desired fit.
- Sew the straps in place: With the dress still inside out, stitch the straps securely to the bodice, making sure to reinforce the stitching for added strength.
Take the time to adjust the strap length and positioning as needed to achieve the desired fit and comfort. Once you’re satisfied with the straps, trim any excess thread and turn the dress right side out.
Congratulations! Your slip dress is now taking shape, and it’s time to move on to the next step: hemming the dress.
Step 7: Hemming the Dress
As we near the final stages of creating your slip dress, it’s time to hem the dress to give it a polished and professional finish. Here’s how to hem your dress:
- Try on the dress: Put on the slip dress to determine your desired hemline. Stand in front of a mirror or have someone help you for accurate measurement.
- Mark the hemline: Use pins or fabric chalk to mark the desired length of the dress all around. Ensure that the dress falls at the desired length when you’re standing, sitting, or moving.
- Trim the excess fabric: Following the marked hemline, trim away the excess fabric, leaving a seam allowance of about 1 to 2 inches.
- Press the hem: Fold the seam allowance towards the wrong side of the dress and press it flat with an iron. This will create a crisp and clean edge.
- Sew the hem: Using a straight stitch, sew along the folded edge of the hem, securing it in place. Backstitch at the beginning and end of the seam to ensure durability.
Take your time while hemming the dress to ensure that the hemline is even and smooth all around. Use a ruler or measuring tape to double-check the length as you sew.
Once you’ve finished hemming your slip dress, try it on again to ensure that the length and fit are to your liking. Make any necessary adjustments or modifications before moving on to the final step: adding any final touches to your dress.
Step 8: Final Touches
Congratulations! You’re in the final step of creating your very own slip dress. Now, it’s time to add those final touches to make your dress truly unique and tailored to your style. Here are a few ideas:
- Finishing Details: Examine your slip dress for any loose threads, uneven stitching, or imperfections. Use a pair of small scissors or a seam ripper to trim any stray threads and fix any sewing errors to ensure a polished finish.
- Embellishments: If you desire a more embellished look, consider adding some decorative elements to your slip dress. This could include lace trim, embroidery, sequins, or beads. Sew them on carefully by hand or with a sewing machine to add that extra touch of glamour.
- Accessories: Complete your slip dress ensemble by styling it with accessories such as a belt, statement jewelry, a shrug, or a cardigan. Experiment with different accessories to create various looks and enhance the versatility of your slip dress.
- Pressing: Give your slip dress a final press with an iron to ensure that all seams, darts, and hems are crisp and well-defined. This will elevate the overall appearance of the dress and give it a professional finish.
- Storage: Find a suitable hanger or garment bag to store your slip dress, making sure it is protected from dust and other elements. Hang it in your closet or wardrobe to keep it in pristine condition until you’re ready to wear it.
Remember, these final touches are optional and depend on your personal preferences. Take the time to assess your slip dress and decide which elements will enhance its overall look and appeal.
With the final touches complete, step back and admire your beautiful slip dress. You have successfully created a unique and customized garment that fits your style and personality.
Now, it’s time to confidently wear your slip dress and embrace the satisfaction that comes with creating something with your own hands. Enjoy the compliments and the feeling of empowerment that comes from sewing your own wardrobe staple!
Conclusion
Congratulations on completing your journey to sew a simple slip dress! By following these step-by-step instructions, you have successfully created a beautiful garment that fits your style and body. Sewing your own slip dress not only allows you to express your creativity but also offers the satisfaction of wearing something you crafted with your own hands.
Throughout this tutorial, you’ve learned essential skills like taking accurate measurements, cutting fabric, sewing the bodice and skirt, attaching the pieces, adding straps, hemming, and applying final touches. These skills are not only valuable for creating slip dresses but can be applied to various sewing projects in the future.
Remember, practice makes perfect, and don’t be discouraged if your first slip dress doesn’t turn out exactly as planned. Each attempt is an opportunity to learn and improve your sewing skills.
Now that you have the foundation, feel free to experiment with different fabrics, colors, and designs to create a collection of slip dresses that reflect your personal style. You can modify the pattern to alter the length, neckline, or even add additional embellishments to make each dress unique.
Share your newfound skills with friends and family who may be inspired by your creation. Encourage them to join you in the wonderful world of sewing and help them unleash their creativity.
Never forget that sewing is a journey and a form of self-expression. Enjoy the process, embrace your creativity, and have fun bringing your fashion ideas to life. Now go out and rock your slip dress with confidence!