Home>How-to Guides>For Women>How To Do A Bikini Wax On A Client
For Women
How To Do A Bikini Wax On A Client
Modified: September 23, 2023
Discover the step-by-step guide on how to professionally perform a bikini wax on female clients. Get expert tips and tricks for a flawless and comfortable experience.
(Many of the links in this article redirect to a specific reviewed product. Your purchase of these products through affiliate links helps to generate commission for Under-tec.com, at no extra cost. Learn more)
Table of Contents
Introduction
Welcome to the world of bikini waxing! As every woman knows, achieving smooth and hair-free skin in the bikini area is essential for feeling confident and ready to hit the beach or enjoy intimate moments. And if you have a passion for beauty and helping others, becoming skilled in performing bikini waxes can be a rewarding and in-demand career choice.
But before you dive into the world of bikini waxing, it’s important to familiarize yourself with the process and techniques involved. This comprehensive guide will walk you through the steps of performing a bikini wax on a client, ensuring a smooth and comfortable experience for both you and your clients.
From the initial consultation to post-wax care, each step plays a crucial role in providing a successful and satisfying bikini wax. By following these steps and refining your technique, you’ll be well on your way to becoming a sought-after waxing professional.
Before we delve into the specific steps, it’s worth mentioning that performing bikini waxes requires not only technical skill but also the ability to build trust and make your clients feel comfortable. It’s important to create a welcoming and relaxing environment and approach each client with sensitivity and professionalism.
Now, let’s get started on the journey to becoming a master of bikini waxing. We’ll begin by preparing for the treatment, including consultation and gathering the necessary supplies. These initial steps are crucial in ensuring a smooth and successful waxing session.
Preparing for the Bikini Wax
Before you get hands-on with the bikini waxing process, it’s important to properly prepare yourself and your client. This involves conducting a thorough consultation, gathering the necessary supplies, and creating a comfortable and hygienic workspace.
Step 1: Consultation and Consent
First and foremost, have an open and honest consultation with your client to understand their needs, concerns, and any potential allergies or medical conditions that could affect the waxing process. It’s essential to obtain informed consent and ensure that your client is comfortable proceeding with the treatment.
Step 2: Gather Supplies
Next, gather all the supplies you will need for the bikini waxing session. This includes:
- Waxing materials (hot wax or strip wax)
- Disposable gloves
- Antiseptic solution
- Clean and disposable towels or sheets
- Pre-wax oil or lotion
- Waxing strips (if using strip wax)
- Wooden spatulas or applicator sticks
- Tweezers
- After-wax oil or lotion
- Clean and sanitized waxing bed or table
Step 3: Preparing the Wax
If you’re using hot wax, follow the instructions to heat the wax to the appropriate temperature. Make sure the wax is melted but not too hot to avoid the risk of burns. If you’re using strip wax, ensure that the wax is at a suitable consistency for easy application.
Step 4: Prepping the Client
Before the waxing process begins, it’s crucial to prepare the client’s skin properly. Cleanse the bikini area with an antiseptic solution to remove any dirt, oil, or bacteria. If needed, trim the hair to an appropriate length, usually around a quarter of an inch, to ensure effective hair removal. Provide disposable underwear or a clean towel for the client to cover themselves during the treatment.
By following these preparation steps, you’ll create a professional and efficient workspace that promotes the safety and satisfaction of your clients. With the necessary supplies in hand and the client prepared, you’re now ready to perform the bikini waxing process.
Step 1: Consultation and Consent
The first step in providing a successful bikini wax is conducting a comprehensive consultation with your client. This step is crucial in understanding their preferences, addressing any concerns or questions they may have, and ensuring their comfort throughout the process.
During the consultation, create a welcoming and relaxed environment where your client feels comfortable discussing their desired outcome. Take the time to listen actively and attentively, allowing them to express their expectations and any specific areas they want to focus on.
It’s important to ask your client about any allergies, skin sensitivities, or medical conditions that may impact the bikini waxing process. This information helps you choose the appropriate products and techniques and determine any necessary precautions to ensure their safety and well-being.
Once you have gathered all the necessary information and addressed any concerns, it’s crucial to obtain informed consent from your client before proceeding with the treatment. Explain the process, including any potential discomfort or redness that may occur, and ensure they understand what to expect.
Obtaining written consent is best practice to ensure clarity and transparency between you and your client. They should be aware of the risks associated with bikini waxing and have the opportunity to ask any remaining questions.
Remember, building trust and establishing open communication with your client is key to a successful bikini waxing experience. Show empathy, answer their questions honestly, and provide reassurance throughout the consultation process.
By conducting a thorough consultation and obtaining informed consent, you are setting the foundation for a positive and professional relationship with your client. This initial step helps establish trust, ensures their satisfaction, and lays the groundwork for a successful bikini waxing session.
Step 2: Gather Supplies
In order to perform a successful bikini wax, it’s crucial to gather all the necessary supplies beforehand. Having your supplies organized and readily available will help streamline the process and ensure a smooth and efficient waxing session.
Here’s a checklist of the essential supplies you’ll need:
- Waxing materials: Decide whether you’ll be using hot wax or strip wax for the bikini wax. Hot wax is often preferred for sensitive areas as it adheres to the hair more effectively, while strip wax is a quicker option for larger areas.
- Disposable gloves: Protect your hands by wearing disposable gloves throughout the waxing process. This ensures hygiene and prevents the spread of bacteria.
- Antiseptic solution: Use an antiseptic solution to cleanse the client’s skin before waxing. This helps to remove bacteria and prepare the area for hair removal.
- Clean and disposable towels or sheets: Place clean and disposable towels or sheets on your waxing bed or table to maintain hygiene and comfort for your client.
- Pre-wax oil or lotion: Apply a pre-wax oil or lotion to the bikini area to create a barrier between the wax and the skin. This can help minimize discomfort and irritation during the waxing process.
- Waxing strips (if using strip wax): If you’re using strip wax, make sure you have an adequate supply of waxing strips. These strips are used to remove the wax and hair from the skin.
- Wooden spatulas or applicator sticks: Use wooden spatulas or applicator sticks to apply the wax to the client’s skin. Make sure you have a sufficient number of clean and disposable sticks for hygiene purposes.
- Tweezers: Keep a pair of tweezers handy for precision hair removal. You may need them to remove any stray hairs or to shape the bikini line.
- After-wax oil or lotion: Apply an after-wax oil or lotion to soothe and nourish the client’s skin after the waxing process is complete. This helps reduce redness and post-wax discomfort.
- Clean and sanitized waxing bed or table: Ensure that your waxing bed or table is clean and sanitized before each client. This promotes a professional and hygienic environment.
By having all these supplies readily available, you can proceed with the waxing process smoothly and efficiently. Take the time to check your inventory regularly and restock as needed, ensuring that you have everything you need for a successful bikini waxing session.
Step 3: Preparing the Wax
Once you have gathered all the necessary supplies for your bikini waxing session, it’s time to prepare the wax. The preparation process will vary depending on whether you’re using hot wax or strip wax.
If you’re using hot wax:
Follow the instructions provided by the manufacturer to heat the wax to the appropriate temperature. Generally, the wax should be melted to a smooth and creamy consistency, but not too hot to avoid the risk of burns.
Use a wax warmer or wax heater to heat the wax, ensuring that it maintains a constant temperature throughout the session. It’s important to periodically check the wax’s temperature to ensure it remains within the safe range.
Before applying the wax to the client’s skin, stir the wax gently to ensure an even distribution of heat and to maintain consistency. This will ensure that the wax is ready for smooth and effective hair removal.
If you’re using strip wax:
If you’re using strip wax for the bikini wax, ensure that the wax is at a suitable consistency for easy application. It should be spreadable but not too runny. If the wax seems too thick or solid, you can warm it slightly to achieve the desired consistency.
You may also need to cut the waxing strips to the appropriate size, depending on the area you’re working on. These strips will be used to remove the wax and hair from the skin, so ensure that you have a sufficient supply of clean and ready-to-use strips.
Throughout the waxing process, it’s important to monitor the temperature of the wax and adjust accordingly to maintain a comfortable and safe environment for your client.
Remember to always follow the instructions provided by the wax manufacturer and adhere to recommended safety practices. Properly preparing the wax will ensure a smooth and effective hair removal process, leading to a satisfying and comfortable bikini waxing experience for your client.
Step 4: Prepping the Client
Before you begin the bikini waxing process, it’s essential to properly prep your client’s skin to ensure a comfortable and effective hair removal experience. Prepping the client involves cleansing the area, trimming the hair (if necessary), and providing necessary coverage.
1. Cleansing the area:
Start by cleaning the client’s bikini area with an antiseptic solution. This step is important to remove any dirt, oil, or bacteria that may be present on the skin. It helps create a clean and hygienic environment for the waxing process.
Use a clean, disposable towel or wipe to gently cleanse the area. Ensure that you cover the entire bikini area, including the bikini line and pubic area. This step not only removes impurities but also helps open up the hair follicles for easier hair removal.
2. Trimming the hair:
If the client’s hair is too long, it may be necessary to trim it before applying the wax. Trim the hair to an appropriate length, usually around a quarter of an inch. This length allows the wax to adhere to the hair properly and promotes more effective hair removal.
Use clean scissors or a trimmer specifically designed for hair removal. Be cautious and trim the hair evenly and carefully to avoid any potential injury to the client’s skin. Remember, it’s always better to err on the side of caution and leave the hair longer rather than trimming it too short.
3. Provide coverage:
During the bikini waxing process, it’s important to prioritize your client’s comfort and modesty. Provide them with disposable underwear or a clean towel to cover themselves during the treatment. This helps maintain their privacy and ensures that they feel at ease throughout the process.
Encourage your client to communicate any discomfort or concerns they may have during the prepping process. Building a comfortable and trusting rapport with your client will help create a positive and relaxed environment for the waxing session.
By properly prepping the client’s skin, you set the stage for a successful bikini wax. The cleansing process removes impurities and ensures hygiene, while trimming the hair and providing coverage prioritize your client’s comfort and satisfaction. Taking these steps prepares both you and your client for a smooth and effective hair removal experience.
Performing the Bikini Wax
Now that you have completed the necessary preparations, it’s time to move on to the main event: performing the bikini wax. This step-by-step process involves applying the wax to the bikini area, removing the hair, and ensuring your client’s comfort throughout the procedure.
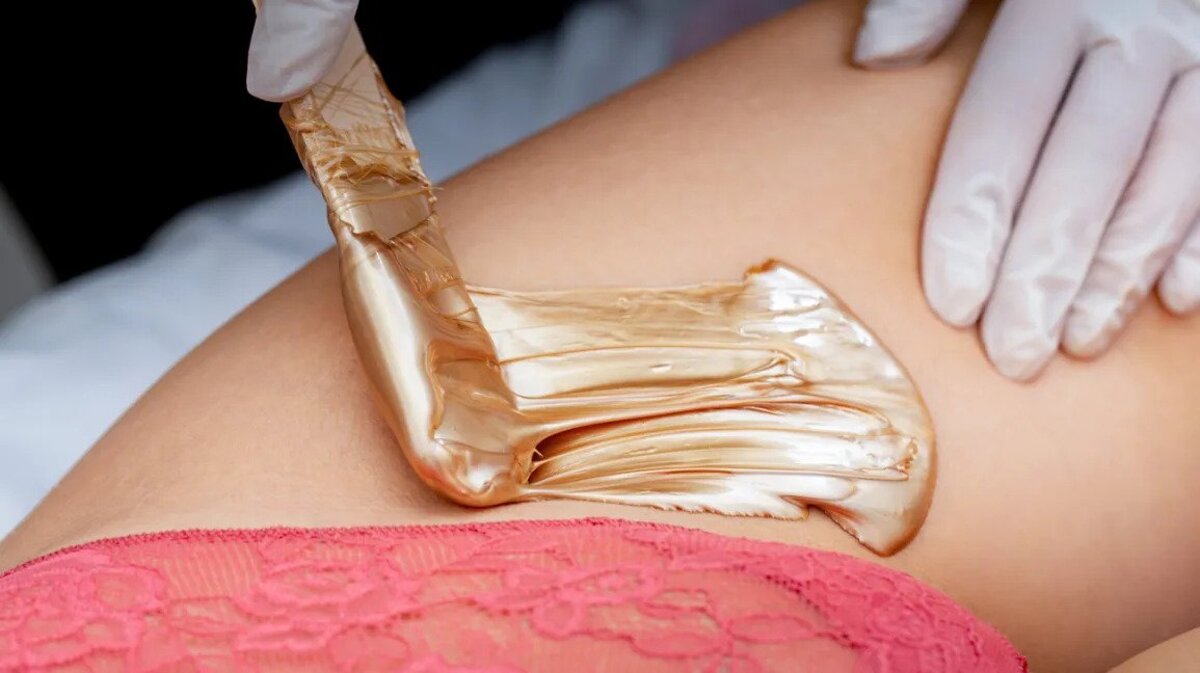
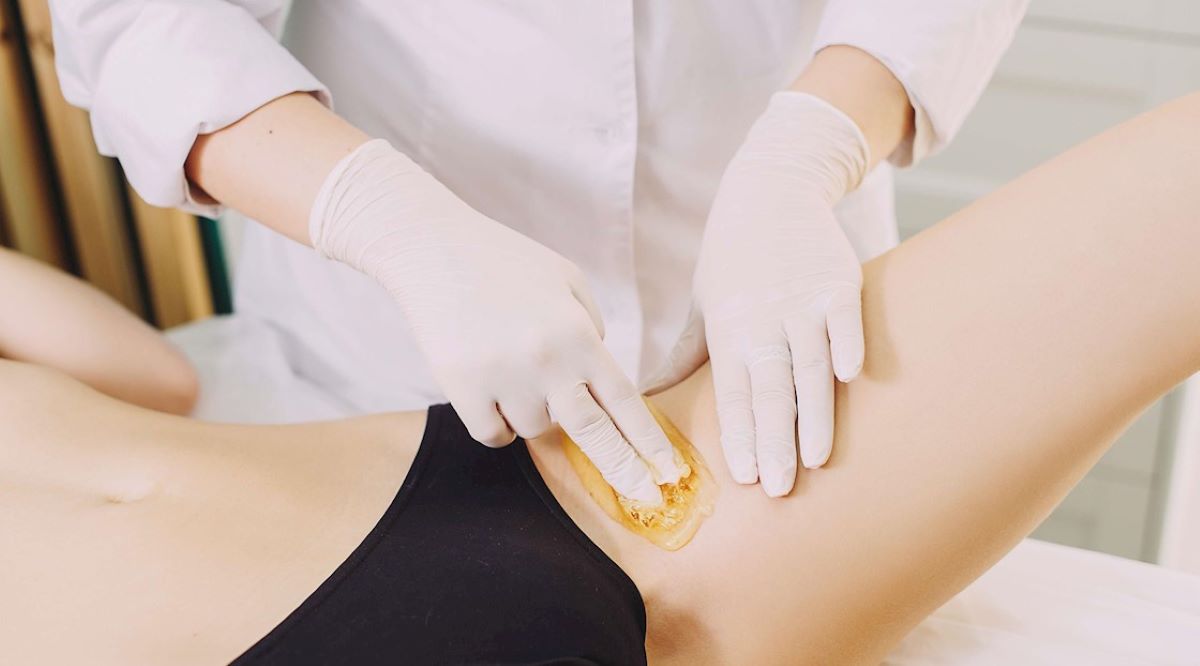
Step 5: Applying Wax on the Bikini Area
Start by testing the temperature of the wax on a small patch of your client’s skin to ensure it’s not too hot or too cold. Once you’ve confirmed that the temperature is comfortable, apply a thin layer of wax to the desired area using a wooden spatula or applicator stick. Make sure to apply the wax in the direction of hair growth for effective hair removal.
Cover small sections of the bikini area at a time, aiming for proper coverage without applying too much wax. This will help minimize discomfort and ensure better control during hair removal.
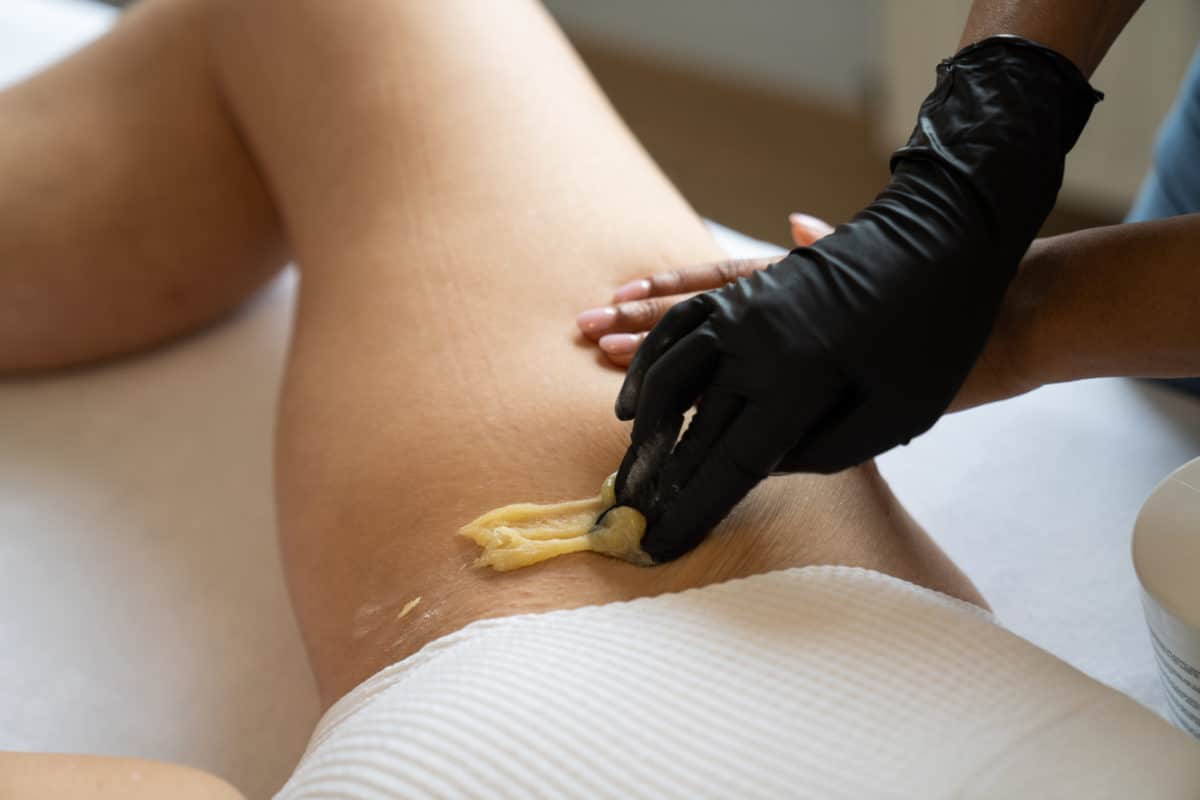
Step 6: Removing the Hair
If you’re using hot wax, wait for a few seconds until the wax cools and becomes slightly tacky. Gently lift one end of the wax strip and pull it off in one quick motion, against the direction of hair growth. This ensures that the hair is removed from the root, resulting in smoother and longer-lasting results.
For strip wax, press a wax strip firmly onto the wax-applied area and smooth it down in the direction of hair growth. Hold the skin taut and quickly rip off the strip in the opposite direction, keeping the strip parallel to the skin for maximum effectiveness.
Work your way through small sections of the bikini area, removing the hair methodically and efficiently. For any missed hairs, use tweezers to pluck them individually and ensure a clean and precise result.
Step 7: Post-Wax Care
After completing the hair removal process, soothe the client’s skin by applying an after-wax oil or lotion. This will help calm any redness or irritation and provide hydration to the skin.
Remind your client to avoid sun exposure, swimming in chlorinated water, or using harsh soaps or exfoliants on their treated skin for 24-48 hours after the waxing session. It’s also important to advise them to wear loose-fitting clothing to prevent friction and irritation in the treated area.
Throughout the bikini waxing process, maintain open communication with your client. Check in regularly to ensure their comfort and make any necessary adjustments. Remember, a gentle touch and a caring approach will help create a positive and satisfying experience for your client.
With these steps, you’ll be able to perform a bikini wax confidently and proficiently. Practice, refine your technique, and adapt your approach based on individual client needs to provide exceptional results every time.
Step 5: Applying Wax on the Bikini Area
Now that you have prepped the client and gathered all the necessary supplies, it’s time to move on to the actual process of applying the wax. This step is crucial in ensuring effective hair removal and ensuring a comfortable experience for your client.
When applying the wax to the bikini area, it’s important to work in small sections and apply a thin, even layer of wax. This helps to ensure that the hair is adequately coated and allows for better control during the removal process.
Here’s how to apply the wax on the bikini area:
- Test the temperature: Before applying the wax to your client’s skin, it’s essential to test the temperature to ensure it’s comfortable. Apply a small amount of wax on a sensitive area, such as the inside of your wrist, and wait a few seconds to see if it feels too hot or too cold. It should be warm and spreadable, but not too hot to avoid the risk of burns.
- Prep the skin: Cleanse the bikini area with an antiseptic solution to remove any dirt, oil, or bacteria. This step helps ensure hygiene and prepares the skin for effective hair removal.
- Apply the wax: Using a wooden spatula or applicator stick, scoop up a small amount of wax and apply it in the direction of hair growth on a small section of the bikini area. Smooth the wax down gently, ensuring good coverage while avoiding excess thickness.
- Work in small sections: Focus on one small area at a time to ensure that you can remove the hair efficiently and effectively. Applying the wax too thickly or over a large area can make it difficult to remove and may cause more discomfort for your client.
- Leave the edge for gripping: When applying the wax, leave a small edge free of the wax strip. This will provide a grip for easy removal and minimize any discomfort for your client.
Remember to communicate with your client throughout the process and ensure they are comfortable. If they experience any pain or discomfort, pause and adjust as needed.
By following these steps, you can ensure that the wax is applied evenly and effectively to the bikini area. This lays the foundation for a successful hair removal process in the next step.
Step 6: Removing the Hair
After applying the wax onto the bikini area, it’s time to move on to the hair removal process. This step involves removing the wax along with the unwanted hair to achieve smooth and hair-free skin. Proper technique and caution are essential to ensure a comfortable and effective experience for your client.
Follow these steps to remove the hair effectively:
- Allow the wax to set: Depending on the type of wax used (hot wax or strip wax), give the wax a few moments to set and adhere to the hair and skin. This will ensure proper grip and minimize discomfort during removal.
- Prepare for removal: If you’re using hot wax, gently lift one end of the wax strip that doesn’t have hair and hold the skin taut with your other hand. Ensure that the strip is parallel to the skin for maximum effectiveness.
- Quickly remove the wax strip: In one swift motion, pull the wax strip off in the opposite direction of hair growth. This ensures that the hair is removed from the root, resulting in longer-lasting and smoother results.
- Apply pressure: After removing the wax strip, apply gentle pressure to the area with your hand to soothe any immediate discomfort. This helps to reduce any post-waxing sensation.
- Repeat the process: Work your way through the bikini area in small sections, repeating the process of applying and removing the wax until all desired areas are treated. Be sure to change the wax strips as needed to ensure effective hair removal.
As you remove the hair, keep in mind the sensitivity of the bikini area and your client’s comfort. If your client expresses any excessive discomfort or pain during the process, pause and evaluate the situation before proceeding.
In case of any stubborn or missed hairs, use tweezers to individually pluck them, ensuring a clean and precise result. This step helps to ensure a smooth and flawless finish.
Throughout the process, maintain open communication with your client, asking about their comfort level and adjusting your approach accordingly. Remember to work with confidence and a gentle touch, prioritizing your client’s needs and comfort at all times.
By following these steps, you can effectively remove unwanted hair from the bikini area, leaving your client with smooth and satisfying results.
Step 7: Post-Wax Care
Once the hair removal process is complete, it’s important to provide proper post-wax care to ensure your client’s comfort and promote healthy skin. Taking the necessary steps to soothe and protect the treated area will minimize any potential redness, irritation, or ingrown hairs.
Here are some essential post-wax care tips:
- Apply after-wax oil or lotion: After removing the wax and hair, gently massage an after-wax oil or lotion onto the treated area. This will help soothe the skin, reduce redness, and provide hydration. Opt for a product that is specifically formulated for post-wax care.
- Avoid heat and friction: Advise your client to avoid activities that generate heat or friction in the treated area for at least 24 hours. This includes activities such as sunbathing, hot showers, saunas, vigorous exercises, and tight clothing. Heat and friction can cause additional irritation and sensitivity.
- Exfoliate after 48 hours: After 48 hours, encourage your client to gently exfoliate the bikini area using a mild exfoliating scrub or a soft brush. Exfoliation helps prevent ingrown hairs by removing dead skin cells and allowing new hair to grow properly.
- Keep the area clean and dry: Instruct your client to keep the treated area clean and dry to avoid any infections. They should gently cleanse the area daily with a mild, fragrance-free cleanser and pat it dry with a clean towel.
- Avoid harsh products and tight clothing: Advise your client to avoid using products with harsh ingredients, such as fragrances or alcohol, on the treated area. Additionally, recommend wearing loose-fitting clothing to prevent friction and further irritation.
- Recommend a follow-up appointment: Suggest a follow-up appointment with your client within 4-6 weeks to maintain the desired results. Consistent waxing helps weaken the hair growth and achieve longer-lasting smoothness over time.
Throughout the post-wax care process, continue to communicate with your client, addressing any concerns or questions they may have. Offer guidance and support to ensure that they have a positive and comfortable experience even after the waxing session is complete.
By following a proper post-wax care regimen, you can help your client’s skin recover quickly, minimize any potential side effects, and ensure long-lasting results.
Conclusion
Congratulations! You’ve now learned the step-by-step process for performing a bikini wax on a client. By following the consultation, preparation, application, and post-wax care steps outlined in this guide, you can ensure a smooth and satisfying experience for both you and your clients.
Remember, building trust and creating a comfortable and welcoming environment is paramount in your role as a bikini waxing professional. Be attentive to your client’s needs, communicate openly, and prioritize their comfort and satisfaction throughout the entire process.
Consistency and practice are key to becoming an expert in bikini waxing. Refine your technique, experiment with different wax types, and adjust your approach according to each client’s individual needs and preferences.
Additionally, staying up-to-date with the latest industry trends and advancements, such as new waxing techniques and aftercare products, will help you provide the best possible service to your clients. Continuously educate yourself, attend workshops, and maintain a commitment to ongoing professional development.
Lastly, remember the importance of professionalism and maintaining a high level of hygiene. Keep your workspace clean, sterilize your tools, and adhere to sanitary practices to ensure the safety and wellbeing of your clients.
By following these guidelines, you are well on your way to becoming a skilled and sought-after bikini waxing specialist. Embrace the art of hair removal and enjoy the rewarding experience of helping your clients feel confident and beautiful.
So, embrace your passion, perfect your technique, and get ready to provide exceptional bikini waxing services that leave your clients feeling pampered, satisfied, and ready to conquer the world!