Home>How-to Guides>For Women>How To Make Hair Removal Wax
For Women
How To Make Hair Removal Wax
Modified: August 2, 2023
Learn how to make hair removal wax at home for women. Get smooth, hair-free skin with this simple and cost-effective DIY waxing solution.
(Many of the links in this article redirect to a specific reviewed product. Your purchase of these products through affiliate links helps to generate commission for Under-tec.com, at no extra cost. Learn more)
Table of Contents
Introduction
For many women, hair removal is an essential part of their beauty routine. While there are various methods available, like shaving and using depilatory creams, waxing remains one of the most popular choices. Not only does it provide longer-lasting results, but it also ensures smoother and softer skin.
However, frequent salon visits can be expensive and time-consuming. So, why not learn how to make hair removal wax at home? It’s cost-effective, convenient, and allows you to have full control over the ingredients. In this article, we’ll guide you through the process of making hair removal wax in the comfort of your own home.
Before we dive into the recipe and instructions, let’s discuss the materials you’ll need. It’s important to gather everything beforehand to ensure a seamless wax-making experience. Here’s a list of the materials needed:
- Carnauba wax
- Beeswax
- Colophony resin
- Glycerin
- Essential oils (optional)
- Double boiler or microwave-safe bowl
- Wooden spatula or Popsicle stick
- Wax strips or muslin cloth
- Pair of gloves
- A clean, dry surface for waxing
- Moisturizer or aloe vera gel for aftercare
Make sure you have all these materials ready so that you don’t have to worry about gathering them during the process. Now, let’s move on to the hair removal wax recipe.
Materials Needed
Before you embark on making your own hair removal wax, it’s important to gather all the necessary materials. Having everything prepared in advance will ensure a smooth and hassle-free wax-making process. Here’s a list of the materials you’ll need:
- Carnauba wax: This natural plant wax will provide the base for your hair removal wax. It has a high melting point and helps the wax adhere to the hair.
- Beeswax: Beeswax adds a smooth and creamy texture to the wax mixture. It also aids in providing a protective barrier for your skin.
- Colophony resin: Also known as pine resin, colophony resin is responsible for the stickiness of the wax. It helps the wax adhere to the hair and makes the removal process easier.
- Glycerin: Glycerin is a humectant that helps to moisturize and hydrate the skin. It prevents the wax from becoming too brittle and aids in the smooth application.
- Essential oils (optional): Adding a few drops of essential oils not only provides a pleasant scent but can also offer additional benefits. For example, lavender oil has calming properties, while tea tree oil has antibacterial properties.
- Double boiler or microwave-safe bowl: You’ll need a heat-safe container for melting the wax. A double boiler is preferred, but if you don’t have one, a microwave-safe bowl can be used.
- Wooden spatula or Popsicle stick: To stir and mix the ingredients, a wooden spatula or a clean Popsicle stick is ideal. They don’t conduct heat and won’t melt in the hot wax.
- Wax strips or muslin cloth: These are necessary for removing the wax from your skin. Wax strips are typically pre-cut, while muslin cloth can be cut into desired sizes.
- Pair of gloves: Wearing gloves during the waxing process will protect your hands and maintain hygiene.
- A clean, dry surface for waxing: Ensure that the area where you’ll be applying the wax is clean and dry. This will help with proper adhesion and effective hair removal.
- Moisturizer or aloe vera gel for aftercare: After waxing, it’s essential to moisturize and soothe your skin. Aloe vera gel or a fragrance-free moisturizer can help calm any potential redness or irritation.
By gathering these materials, you’ll have everything you need to create your homemade hair removal wax. Now that you’re prepared, let’s move on to the process of making the wax.
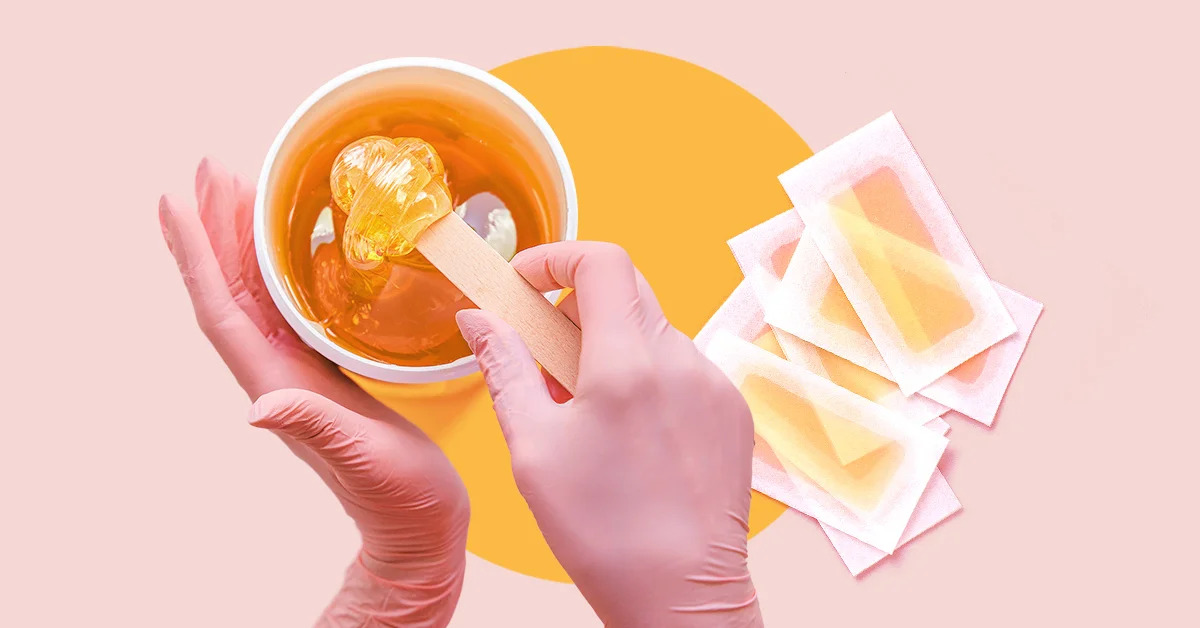
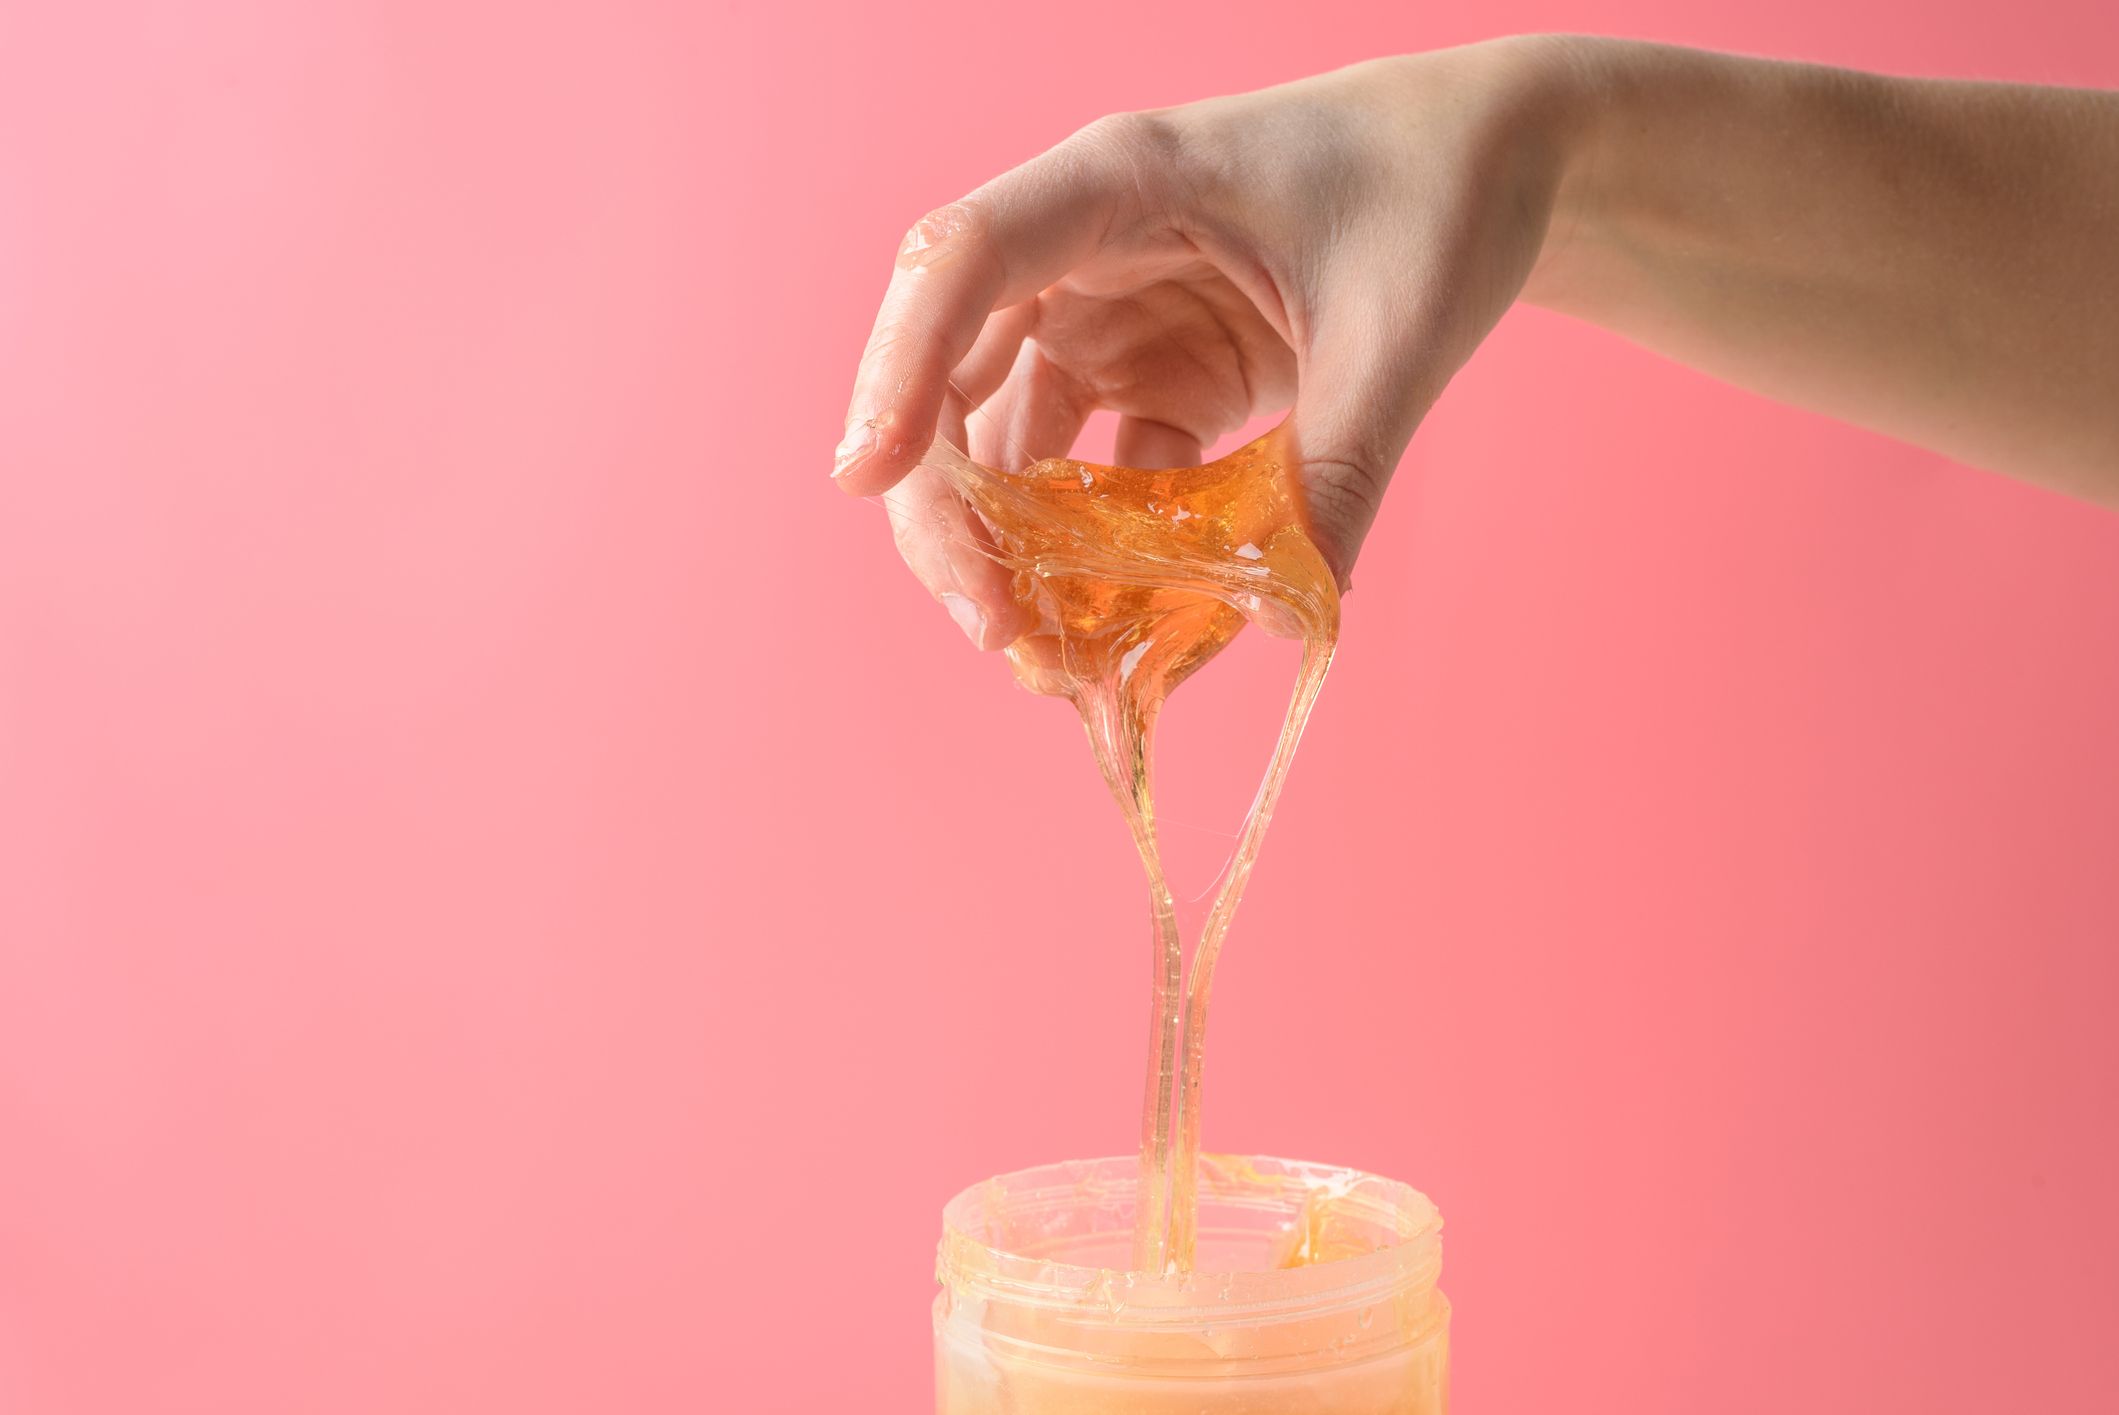
Wax Recipe
Now that you have all the necessary materials, it’s time to dive into making your own hair removal wax. Follow this simple recipe to create a smooth and effective wax:
- Start by setting up a double boiler or placing a microwave-safe bowl in a pot of simmering water. Ensure the water is not touching the bottom of the bowl.
- Measure 2 parts carnauba wax, 2 parts beeswax, and 1 part colophony resin. For example, if you’re using 1 cup of carnauba wax, you’ll need 1 cup of beeswax and 1/2 cup of colophony resin.
- Add the measured waxes and resin to the double boiler or microwave-safe bowl. Allow them to melt slowly, stirring occasionally with a wooden spatula or Popsicle stick.
- Once the mixture is fully melted and well combined, remove it from the heat source. Be cautious as the mixture will be hot.
- If desired, add a few drops of your preferred essential oil to add fragrance and additional benefits to the wax. Stir well to ensure even distribution.
- Allow the mixture to cool for a few minutes until it reaches a comfortable temperature for application. Avoid applying the hot wax to your skin to prevent burns.
And there you have it! Your homemade hair removal wax is ready to be used. In the next sections, we’ll guide you through the process of heating the wax, preparing your skin, applying the wax, and removing it with ease. Let’s continue with the steps necessary to heat the wax properly.
Heating the Wax
Once you have prepared the hair removal wax according to the recipe, it’s time to heat it to the optimal temperature for application. Follow these steps to ensure that your wax is heated correctly:
- If you used a double boiler, place it back on low heat to keep the wax warm and pliable. If you used a microwave-safe bowl, reheat the wax in short bursts of 10-15 seconds, stirring in between, until it reaches a smooth and liquefied consistency.
- Ensure that the wax is not too hot, as it can cause burns and discomfort when applied to the skin. Ideally, the wax should be warm to the touch, but not scorching.
- Before applying the wax to a larger area, perform a temperature test. Apply a small amount of wax to the inside of your wrist or forearm and wait a few seconds. If it feels comfortable and doesn’t cause any irritation, the wax is at the right temperature.
- If the wax is too hot, let it cool down for a few more minutes. If it’s too cool and starts to harden, briefly reheat it using the same method as before. Maintain a careful balance to ensure optimal temperature.
Once you have achieved the desired temperature, you’re ready to move on to the next steps: preparing your skin for waxing, applying the wax, and safely removing unwanted hair. Following these steps will help you achieve effective and long-lasting results from your homemade hair removal wax.
Testing the Temperature
Ensuring that the hair removal wax is at the correct temperature is crucial for a successful and comfortable waxing experience. Before applying the wax to a larger area, take the time to test its temperature using the following steps:
- Select a small patch of skin, such as the inside of your wrist or forearm, to perform the temperature test. This area is sensitive and can help gauge the reaction of your skin to the wax.
- Take a small amount of the heated wax using a wooden spatula or Popsicle stick and apply it to the test area. Spread it evenly, creating a thin layer over the skin.
- Wait for a few seconds to allow the wax to cool and adhere to the skin. You should pay attention to any sensations, such as excessive heat, discomfort, or burning.
- If the wax feels too hot or causes significant discomfort, it is an indication that it is too warm. Allow the wax to cool down for a few more minutes before retesting the temperature.
- On the other hand, if the wax feels too cool and doesn’t adhere well to the skin, it may require additional heating. Reheat the wax using the same method as before, being mindful of not overheating it.
- When the wax feels warm and comfortable on the test area, and there is no excessive heat or discomfort, it is at the optimal temperature for application. You can proceed with confidence to apply the wax to larger areas of your skin.
Remember, it is always better to have the wax a bit cooler than too hot. It can be reheated if necessary, but overheating can result in burns and skin irritation. By taking the time to test the temperature, you can ensure a safer and more comfortable waxing experience with your homemade hair removal wax.
Preparing the Skin
Before applying the hair removal wax, it’s essential to properly prepare your skin to ensure the best results and minimize any potential discomfort. Follow these steps to prepare your skin for waxing:
- Start by exfoliating the area you plan to wax. This helps remove any dead skin cells, allowing the wax to adhere better to the hair and minimizing the risk of ingrown hairs. Use a gentle scrub or exfoliating mitt in circular motions to buff the skin.
- Thoroughly cleanse the area with a mild soap or cleanser to remove any dirt, sweat, or oils. Ensure that the skin is clean and dry before proceeding with the waxing process.
- If your hair is too long, trim it to about ¼ to ½ inch in length. Hair that is too long can make waxing more difficult and increase the likelihood of discomfort during the process.
- Apply a light dusting of talcum powder or cornstarch to the skin. This helps to absorb any excess moisture, allowing the wax to adhere better to the hair and minimize pulling on the skin.
- Take a moment to mentally prepare yourself for the waxing process. Deep breaths and a relaxed mindset can help reduce any anxiety or tension, making the experience more comfortable.
By following these steps, you’ll ensure that your skin is clean, exfoliated, and prepared for the hair removal wax. This will help to achieve better adhesion, smoother hair removal, and minimize any potential discomfort. Now that your skin is prepped, it’s time to move on to the next step: applying the wax.
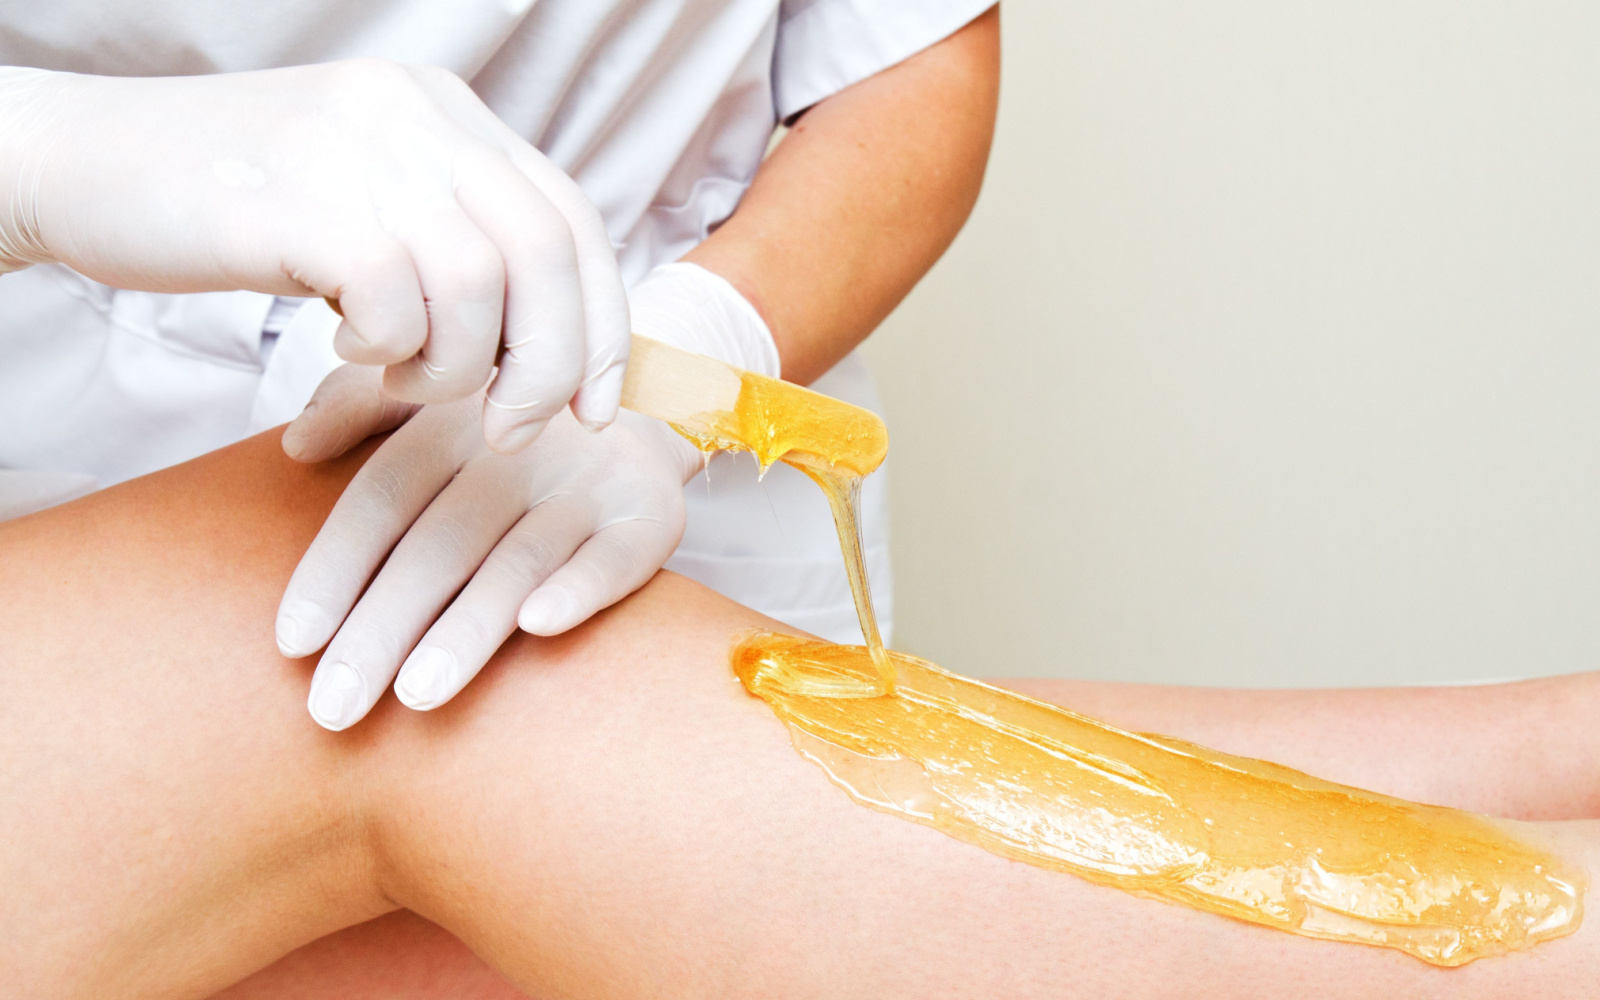
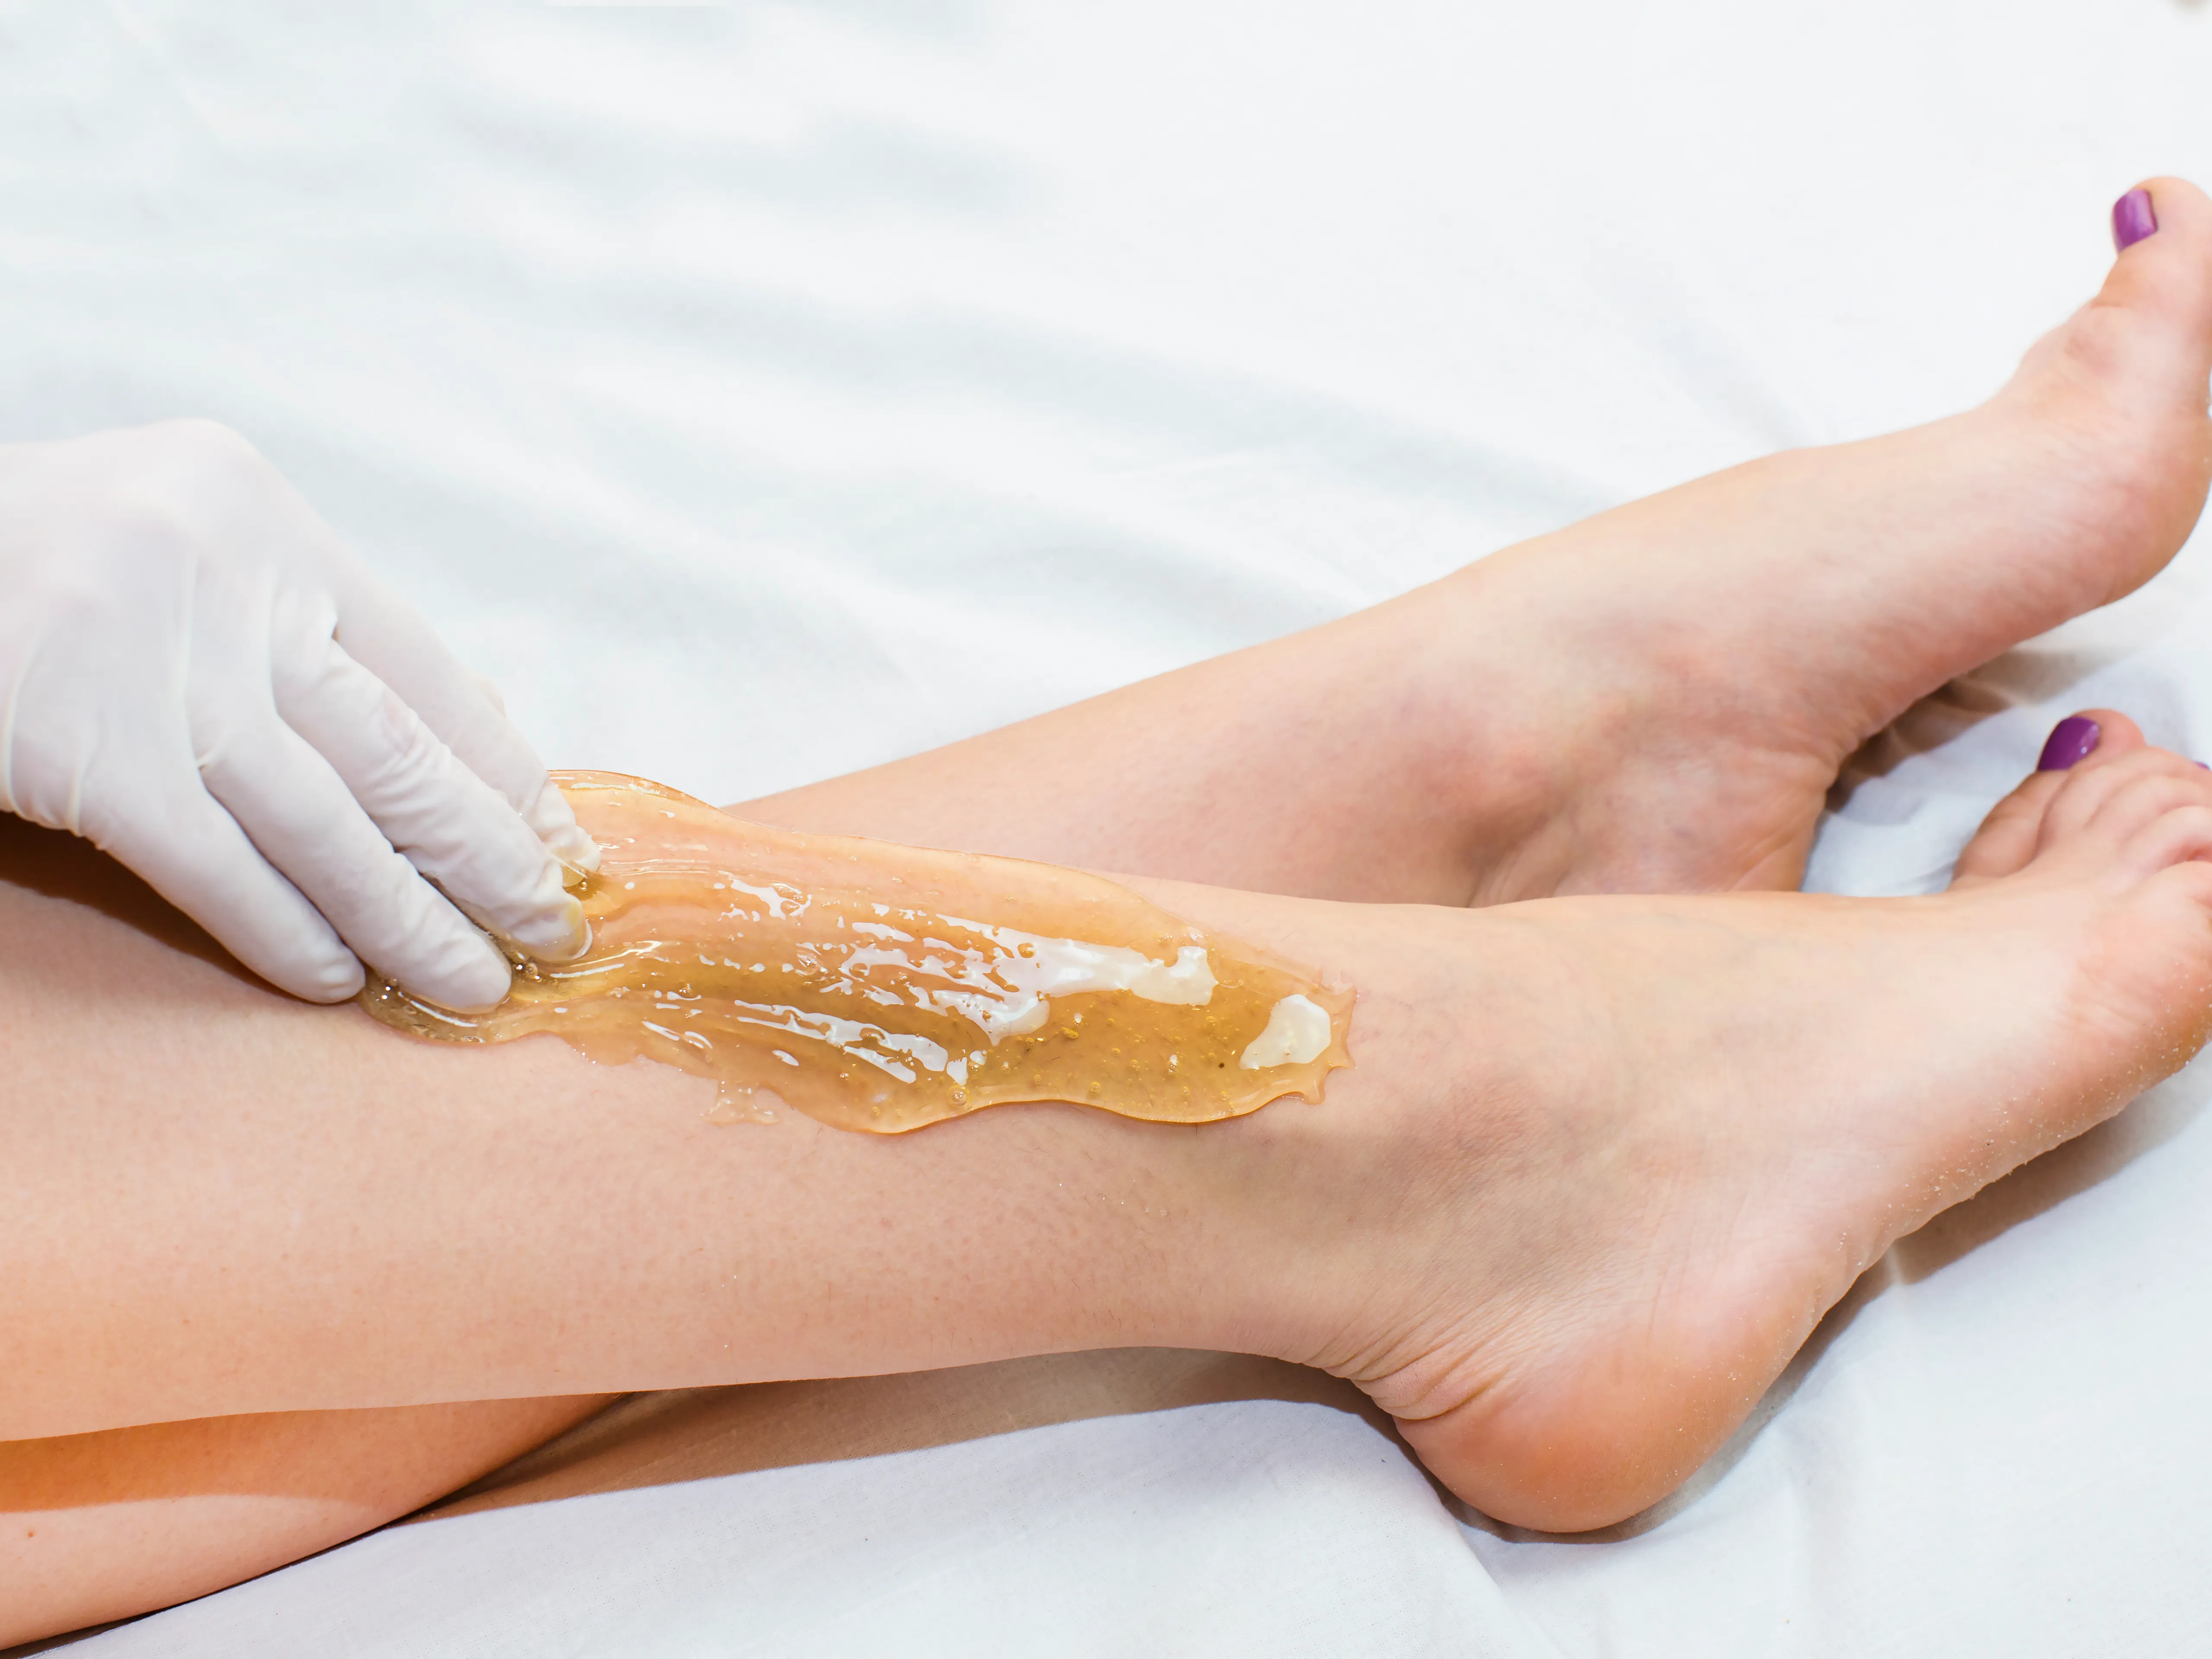
Applying the Wax
With your skin prepped and ready, it’s time to apply the hair removal wax. Follow these steps for a successful waxing experience:
- Using a wooden spatula or Popsicle stick, take a small amount of the warmed wax and spread a thin, even layer over the area you want to wax. Apply the wax in the direction of hair growth, ensuring complete coverage.
- Leave a small section at the end of the waxed area free of wax so that you have a grip to remove the wax later. This un-waxed section allows for easier removal without pulling on the skin.
- Press a wax strip or muslin cloth firmly onto the applied wax. Smooth it out in the direction of hair growth to ensure proper adhesion.
- Hold your skin taut with one hand and use the other hand to swiftly pull off the wax strip or muslin cloth in the opposite direction of hair growth. This should be done in one quick motion to minimize discomfort.
- Repeat these steps, working in small sections, until you have removed all the unwanted hair. Remember to reheat the wax if it starts to harden during the process.
- If necessary, you can reapply the wax to stubborn or missed areas and repeat the removal process until you achieve the desired results.
When applying the wax, it’s important to maintain good posture and steady hands for precise application. Ensure that you’re pulling the wax strip or muslin cloth parallel to the skin to minimize discomfort and reduce the chances of hair breakage.
Take breaks if needed and hydrate your skin throughout the process to prevent excessive moisture loss. Once you have finished removing all the unwanted hair, it’s time to move on to the aftercare phase.
Removing the Wax
After completing the waxing process, it’s important to properly remove any residual wax from your skin. Follow these steps to ensure a clean and comfortable finish:
- Inspect the waxed area to check for any remaining wax. If you notice any small wax remnants, gently lift the edge of the wax strip or muslin cloth and use a clean, dry cloth to remove it.
- If there are thick or stubborn wax spots, you can apply a small amount of oil, such as baby oil or olive oil, to help dissolve the wax. Massage the oil onto the affected area and gently wipe away the residue with a cloth.
- Once you have removed all traces of wax, rinse the waxed area with cool water to soothe the skin and close the pores. Avoid using hot water, as it can cause sensitivity and irritation.
- Pat the skin dry with a clean towel and avoid rubbing, as this can further irritate the waxed area.
- Apply a soothing and moisturizing product, such as aloe vera gel or a fragrance-free lotion, to nourish and calm the waxed skin. This will help reduce redness and any potential irritation.
It’s normal for the skin to appear slightly red or feel slightly sensitive after waxing. These symptoms should subside within a few hours. However, if you experience prolonged redness, swelling, or severe pain, it’s advisable to consult a dermatologist or healthcare professional.
Now that you have successfully removed the wax and taken care of your skin, let’s move on to the aftercare tips that will help maintain and prolong the results of your hair removal process.
Aftercare Tips
After completing a waxing session, it’s important to properly care for your skin to minimize any potential irritation and maintain smooth results. Follow these aftercare tips to ensure a comfortable and healthy post-waxing experience:
- Avoid exposing the waxed area to direct sunlight or UV rays for at least 24 hours. This can lead to increased sensitivity and potential sunburn.
- Avoid hot showers, steam rooms, saunas, or activities that cause excessive sweating for the first 24 hours. Heat and sweat can increase the risk of irritation or infection.
- Do not exfoliate the waxed area for at least 48 hours. This gives your skin time to recover and reduces the risk of further irritation.
- Avoid using harsh or fragranced products on the waxed area, as they can cause further irritation. Opt for gentle, fragrance-free cleansers and moisturizers.
- Avoid tight clothing that can rub against the waxed area and potentially cause irritation. Opt for loose-fitting, breathable clothing to allow your skin to breathe and heal.
- Avoid touching the waxed area with unwashed hands to prevent introducing bacteria that can lead to infection. Always ensure your hands are clean before touching the waxed skin.
- Avoid swimming in chlorinated pools or saltwater for at least 24 hours, as these can further irritate the skin. If you must swim, rinse off with clean water afterward and apply a moisturizer.
- Maintain proper hygiene by keeping the waxed area clean and dry. Regularly cleanse the area with a gentle cleanser and pat it dry with a clean towel.
- To prevent ingrown hairs, gently exfoliate the waxed area using a soft brush or exfoliating glove after 48 hours. This helps to remove dead skin cells and reduce the risk of hair follicles becoming trapped under the skin.
- Moisturize the waxed area daily to keep the skin hydrated and nourished. Look for moisturizers that are lightweight, fragrance-free, and suitable for sensitive skin.
Following these aftercare tips will help prolong the results of your waxing session and maintain the health and appearance of your skin. If you experience any prolonged or severe irritation, redness, or swelling, it’s advisable to seek medical advice.
Now that you’re equipped with the knowledge of how to care for your skin after waxing, let’s address some frequently asked questions that can help clarify any concerns you may have.
FAQs
Below are some commonly asked questions about making hair removal wax at home:
- Is it safe to make hair removal wax at home?
- Can I use the homemade wax on sensitive areas of the body?
- How long does homemade hair removal wax last?
- Can I reuse the wax strips or muslin cloth?
- How often should I wax my hair?
Yes, making hair removal wax at home can be safe if you follow proper instructions and use high-quality ingredients. However, it’s important to be cautious and maintain good hygiene throughout the process.
While homemade wax can be used on sensitive areas, such as the bikini line or underarms, it’s essential to be extra careful. Test the wax on a small area first and proceed only if there is no adverse reaction.
The shelf life of homemade hair removal wax can vary depending on the ingredients used. Generally, it can last up to several months if stored properly in an airtight container in a cool, dry place.
No, it’s advisable to use new wax strips or muslin cloth for each waxing session. Reusing them can lead to less effective hair removal and potential contamination.
The frequency of waxing varies depending on individual hair growth. For most people, waxing every 4-6 weeks is sufficient to maintain smooth skin. However, it’s best to wait until the hair is at least ¼ inch long for optimal results.
These answers should provide some clarity regarding homemade hair removal wax. However, if you have specific concerns or questions, it’s recommended to consult with a dermatologist or professional before proceeding.
Now that we’ve covered the frequently asked questions, let’s wrap up with some final thoughts.
Conclusion
Congratulations! You’ve learned how to make your own hair removal wax at home, giving you the freedom and flexibility to achieve smooth, hair-free skin on your own terms. By following the recipes and instructions provided, you can create a cost-effective and convenient solution for hair removal.
Remember to gather all the necessary materials beforehand and take your time in heating the wax to the right temperature. Properly preparing your skin and applying the wax with care will ensure the best results. Afterward, be sure to remove any residual wax and follow the recommended aftercare tips to maintain healthy and vibrant skin.
While making hair removal wax at home can be a rewarding and money-saving option, it’s important to prioritize safety and cleanliness throughout the process. Always perform a patch test, exercise caution when heating the wax, and maintain good hygiene practices.
If you have any concerns or specific skin conditions, it’s recommended to consult with a dermatologist before attempting home waxing. They can provide personalized advice and guidance based on your individual needs.
Now, armed with the knowledge and skills to make your own hair removal wax, you can enjoy the convenience and benefits of waxing in the comfort of your own home. Say goodbye to unwanted hair and hello to silky smooth skin!