Home>How-to Guides>For Women>How To Remove Hair Removal Wax From Clothes

For Women
How To Remove Hair Removal Wax From Clothes
Modified: August 2, 2023
Learn how to remove hair removal wax from clothes easily with these tips and tricks designed specifically for women. Say goodbye to stubborn wax stains!
(Many of the links in this article redirect to a specific reviewed product. Your purchase of these products through affiliate links helps to generate commission for Under-tec.com, at no extra cost. Learn more)
Table of Contents
Introduction
Waxing is a popular hair removal method that many women rely on to achieve smooth, hair-free skin. However, accidents happen, and sometimes drops of wax end up on our clothes, leaving stubborn stains behind. Thankfully, removing hair removal wax from clothes is not an impossible task. With the right materials and techniques, you can effectively get rid of those pesky stains and restore your clothes to their former glory.
Whether you accidentally spilled wax while waxing at home or had a mishap during a salon visit, there’s no need to panic. In this article, we will guide you through a step-by-step process to remove hair removal wax stains from your clothes. By following these instructions, you can salvage your favorite garments and prevent the need for a trip to the dry cleaner.
We will outline the materials needed for the stain removal process and provide detailed steps to effectively remove hair removal wax from clothes. By the end of this article, you’ll have all the knowledge you need to tackle those stubborn stains with confidence.
So, gather your materials and get ready to say goodbye to those unsightly wax stains. Let’s dive into the step-by-step process of removing hair removal wax from clothes.
Materials Needed
Before we begin the process of removing hair removal wax from clothes, it’s important to gather the necessary materials. Having these items on hand will make the stain removal process smoother and more effective. Here are the materials you will need:
- Butter knife or spoon: This will help you gently scrape off any excess wax from the fabric.
- Iron: An iron will be used to apply heat to the wax stain to help melt and transfer the wax onto a paper towel.
- White paper towels: These will be used to absorb the melted wax from the fabric.
- Stain remover: Choose a stain remover that is suitable for the fabric type of your clothing. Look for a product specifically designed for removing wax stains.
- Mild detergent: You will need a mild detergent to launder the clothing after treating the wax stain.
- Warm water: A basin or sink filled with warm water will be used to soak and rinse the clothing.
- Clean cloth: This will be used to blot the fabric and remove any remaining wax or stain remover.
Having these materials readily available will ensure that you can effectively remove the hair removal wax stains from your clothes. Now that you have everything you need, let’s move on to the step-by-step process of removing the wax stains.
Step 1: Scrape off Excess Wax
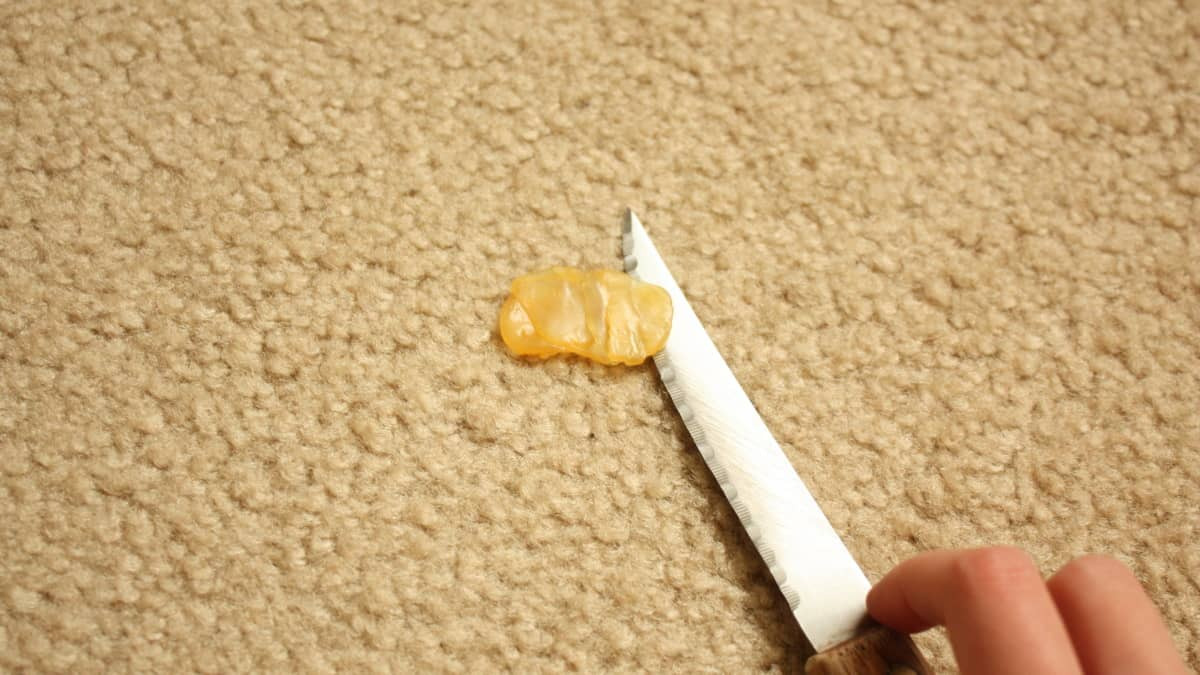
The first step in removing hair removal wax from clothes is to gently scrape off any excess wax from the fabric. This will help minimize the amount of wax that needs to be treated and prevent further spreading of the stain. Here’s how to do it:
- Start by allowing the wax to dry completely. If the wax is still soft and warm, it will smear and spread, making it more difficult to remove.
- Once the wax has dried, take a butter knife or spoon and carefully scrape off as much of the hardened wax as possible. Be gentle to avoid damaging the fabric.
- Work from the edges of the wax stain towards the center, using slow and steady motions. It’s important not to press too hard or scrape aggressively, as this can push the wax deeper into the fabric fibers.
- Continue scraping until you have removed as much of the wax as possible.
Remember, the goal is to remove the excess wax without rubbing and spreading it further. By scraping off the top layer of hardened wax, you will make the stain removal process easier in the following steps.
Now that you have successfully scraped off the excess wax, it’s time to move on to the next step: applying heat to the wax stain. This step will help melt and transfer the remaining wax from the fabric onto a paper towel for easy removal.
Step 2: Apply Heat to the Wax Stain
Applying heat to the hair removal wax stain is an effective method to melt the wax and facilitate its removal from the fabric. Here’s how to proceed:
- Place a clean, white paper towel or a few layers of absorbent paper onto the wax stain. Make sure the paper covers the entire affected area.
- Set your iron to a low or medium heat setting, ensuring that it does not exceed the fabric’s recommended temperature.
- Gently press the heated iron onto the paper towel, applying light pressure. The heat will melt the wax, causing it to transfer onto the paper towel.
- Move the iron in small, circular motions over the stained area to evenly distribute the heat and encourage further wax transfer.
- Continue this process until you no longer see wax transferring onto the paper towel. It may be necessary to use multiple paper towels to remove all the wax.
- Inspect the fabric to ensure that no trace of wax remains. If there are still visible stains, proceed to the next step.
Remember to exercise caution when using heat on fabric. Always test a small, inconspicuous area of the garment first to ensure that it can withstand the heat without getting damaged.
By applying heat and transferring the melted wax onto a paper towel, you will remove a significant amount of the wax stain. However, some residue may still be present on the fabric. In the next step, we will tackle these remaining stains using a stain remover.
Step 3: Blot the Wax with a Paper Towel
Once you have applied heat to the hair removal wax stain and transferred as much wax as possible onto the paper towel, it’s time to proceed to the next step: blotting the wax residue. This step will help further remove any remaining stains from the fabric. Follow these simple instructions:
- Take a clean section of a white paper towel and fold it in half.
- Place the folded paper towel over the stained area and gently press it onto the fabric.
- Apply slight pressure and blot the fabric. This will help absorb any remaining wax residue and stain that may be left behind after the previous step.
- Continue blotting with a fresh section of paper towel until you no longer see any wax or stain transferring onto the paper. Ensure that you move to a clean area of the paper towel each time to avoid spreading the wax around.
- Inspect the fabric to check if any traces of wax or stains remain. If needed, repeat the process with a new paper towel until the fabric appears clean.
Be careful not to rub the fabric vigorously, as this can spread the remaining wax or stain and make it more challenging to remove.
With this step, you have successfully removed a significant amount of the wax and stains from your clothes. However, it is not uncommon for some residual staining to linger. In the next step, we will address this issue by applying a stain remover to the affected area.
Step 4: Apply a Stain Remover
After completing the previous steps and removing as much of the wax and stains as possible, it’s time to tackle any remaining residue with a stain remover. Here’s how to effectively apply a stain remover to the fabric:
- Choose a stain remover that is suitable for the fabric type of your clothing. Look for a product specifically designed for removing wax stains.
- Read and follow the instructions provided on the stain remover product label.
- Apply a small amount of the stain remover directly to the affected area.
- Gently work the stain remover into the fabric using your fingers or a soft cloth. Massage it in a circular motion to loosen and lift the remaining stains.
- Allow the stain remover to sit on the fabric for the recommended amount of time specified on the product label. This will allow the formula to penetrate and break down the stains.
- After the designated time has passed, rinse the fabric with warm water to remove the stain remover. Ensure that all traces of the product are rinsed away.
It’s important to note that different stain removers may require different application techniques. Always follow the instructions provided by the manufacturer to achieve optimal results and avoid damaging the fabric.
Once you have applied the stain remover and rinsed the fabric, examine it to check if any remnants of the wax or stains are still visible. If necessary, you may need to repeat this step or move on to the next step to completely eliminate the stains.
Now that you have treated the fabric with a stain remover, it’s time to move on to laundering the clothing to remove any remaining traces of wax and stains.
Step 5: Launder the Clothing
After successfully removing the hair removal wax stains and treating the fabric with a stain remover, it’s time to launder the clothing to ensure that all traces of wax and stains are completely eliminated. Follow these steps to effectively launder your clothes:
- Check the care label on your clothing to determine the appropriate washing instructions, including water temperature and wash cycle.
- Pre-treat any remaining stains by applying a small amount of mild detergent directly onto the affected area.
- Gently rub the detergent into the fabric using your fingers or a soft cloth. Make sure to cover the entire stain.
- Fill a basin or sink with warm water and add the recommended amount of mild detergent.
- Submerge the clothing in the soapy water and agitate it gently to ensure even distribution of the detergent.
- Allow the clothing to soak for the recommended amount of time, usually around 15-30 minutes.
- After soaking, thoroughly rinse the clothing with clean water to remove all traces of detergent.
- Inspect the fabric to ensure that all wax stains have been completely eliminated.
- If stains are still visible, repeat the stain removal and laundering process.
- Once the stains are completely removed, proceed with the regular washing cycle according to the garment’s care instructions.
It is essential to launder the clothing promptly after treating the wax stains to prevent any residual stains from setting in. Following these steps will help ensure that your clothes come out of the washing machine fresh, clean, and free from any traces of hair removal wax.
Now that you have laundered the clothing, it’s important to check for any residual wax or stains before considering the process complete. Let’s move on to the final step.
Step 6: Check for Residual Wax
After completing the stain removal and laundering process, it’s crucial to check for any residual wax or stains on the fabric. Here’s how to ensure that your clothes are entirely free from hair removal wax:
- Inspect the fabric under good lighting to identify any remaining wax or stains.
- If you spot any residual wax, repeat the process of applying heat to the affected area using an iron and a clean paper towel. This will help remove any leftover wax that may not have been eliminated in previous steps.
- Blot the area with a clean paper towel to absorb the melted wax, similar to the blotting technique mentioned in earlier steps.
- If stubborn stains persist, reapply the stain remover and let it sit for the recommended time, then thoroughly rinse the fabric.
Remember to be patient and persistent when checking for residual wax or stains. It might take a few tries to completely remove all traces of the hair removal wax from your clothing.
Once you have checked and confirmed that there are no remaining wax or stains on the fabric, your clothes are now free from the hair removal wax. Congratulations!
Bear in mind that it’s always advised to read and follow the specific instructions on the product labels and garment care tags to ensure the best outcome for your clothes.
Now that you have successfully removed hair removal wax stains from your clothes, you can confidently enjoy your clean, wax-free garments once again.
Conclusion
Removing hair removal wax from clothes may seem like a daunting task, but with the right materials and techniques, it is entirely achievable. By following the step-by-step process outlined in this article, you can effectively eliminate those stubborn stains and restore your clothes to their original condition.
Remember to gather all the necessary materials, including a butter knife or spoon, an iron, white paper towels, stain remover, mild detergent, warm water, and a clean cloth. These items will provide you with the tools needed to tackle the wax stains with confidence.
The process begins by scraping off any excess wax from the fabric, followed by applying heat to transfer the remaining wax onto a paper towel. Blotting the wax residue with a fresh paper towel helps remove any remaining stains. Then, applying a suitable stain remover breaks down the stains further. The final step involves laundering the clothing to ensure complete removal of any traces of wax and stains.
After going through these steps, remember to check for any residual wax or stains and repeat the process if needed. It’s important to be patient and persistent when dealing with stubborn stains, as it may take multiple attempts to entirely eliminate them.
By successfully removing the hair removal wax stains, you can once again enjoy wearing your favorite clothes without any unsightly marks. The key is to act quickly and follow the instructions provided in this article, taking care to consider the fabric’s care instructions and using the appropriate products for stain removal.
Now that you have the knowledge and confidence to remove hair removal wax stains from clothes, you can handle any mishaps that may occur during your beauty routine. So don’t fret if wax accidentally ends up on your clothes – armed with these techniques, you can tackle any wax stain with ease.
