Home>How-to Guides>For Women>How To Remove Underwire From Bra
For Women
How To Remove Underwire From Bra
Modified: August 2, 2023
Learn how to remove underwire from your bra easily and painlessly. Perfect solution for women looking for added comfort without sacrificing support.
(Many of the links in this article redirect to a specific reviewed product. Your purchase of these products through affiliate links helps to generate commission for Under-tec.com, at no extra cost. Learn more)
Table of Contents
Introduction
Bras are an essential part of many women’s wardrobes. They provide support, shape, and comfort, helping women feel confident and comfortable throughout the day. However, sometimes the underwire in a bra can become uncomfortable or cause irritation. In these cases, it may be necessary to remove the underwire to continue wearing the bra comfortably.
Removing the underwire from a bra may seem like a daunting task, but with the right tools and techniques, it can be a simple and straightforward process. In this article, we will guide you through the steps to safely and effectively remove the underwire from your bra.
Before we delve into the process, it is important to note that not all bras are designed to have removable underwire. Some bras have the underwire sewn directly into the fabric or molded into the cups. It is advisable to check if your bra has removable underwire before attempting any modifications.
With that said, if your bra does have removable underwire, and you find it uncomfortable or it no longer serves its purpose, follow the steps outlined in this article to remove it safely and enjoy a more comfortable bra-wearing experience.
Step 1: Gathering the necessary tools
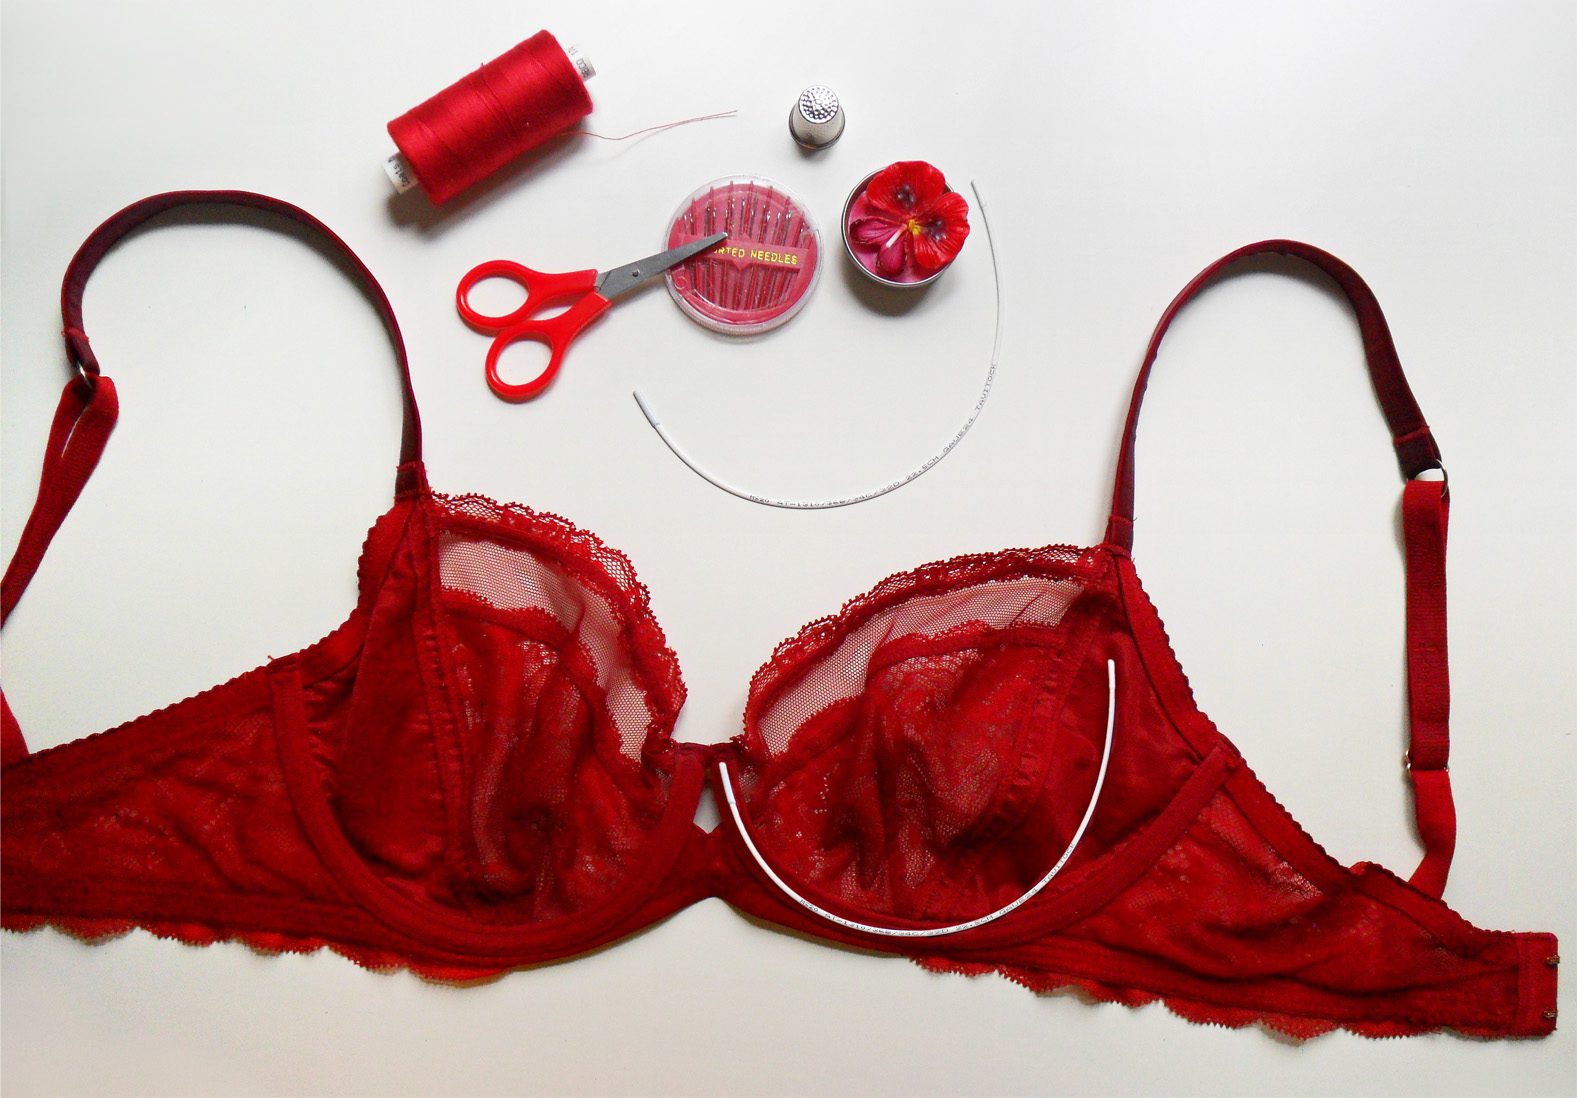
Before you begin the process of removing the underwire from your bra, you will need to gather a few essential tools. Having these tools handy will make the process easier and more efficient. Here are the tools you will need:
- Scissors: A pair of sharp scissors will be needed to cut the stitching holding the underwire in place.
- Seam ripper: A seam ripper is an invaluable tool for removing stitches without damaging the fabric. It will come in handy when opening the underwire casing.
- Needle and thread: You may need a needle and thread to secure the underwire casing after the underwire is removed.
- Pliers (optional): Pliers can be helpful if the underwire is difficult to remove. They can provide extra grip and leverage.
Make sure you have all these tools ready before starting the process. Having them within reach will save you time and effort as you proceed with removing the underwire.
Step 2: Finding the underwire casing
Once you have gathered the necessary tools, the next step is to locate the underwire casing in your bra. The underwire casing is a fabric channel that holds the underwire in place. It is usually located at the bottom of the bra cups, running along the curve where the cups meet the band.
To find the underwire casing, flip your bra inside out. Look for a long strip of fabric located along the bottom edge of each cup. It may be stitched or sewn into the bra, or it might be a separate fabric channel that you can feel through the lining.
Identifying the underwire casing is crucial as it determines where you need to focus your efforts when removing the underwire. Take your time to locate the casing and familiarize yourself with its placement. This will ensure that you are targeting the correct area during the next steps of the process.
Step 3: Opening the underwire casing
With the underwire casing located, it’s time to open it up to access the underwire. This step requires a seam ripper, which will help you carefully remove the stitches holding the casing together.
Take the seam ripper and gently insert the pointed end under one of the stitches on the casing. Apply slight pressure and push the ripper forward, cutting through the stitch. Repeat this process for each stitch along the casing, opening it up gradually.
Be cautious while using the seam ripper to avoid damaging the fabric of the bra or the casing itself. Take your time and work carefully to ensure the stitches are cleanly and completely removed.
Once you have removed the stitches along the entire length of the casing, you should be able to open it up fully. This will expose the underwire, which can now be safely removed from the bra.
Before moving on to the next step, take a moment to inspect the underwire casing for any remaining stitches or loose threads. Remove any excess threads using scissors or the seam ripper, ensuring that the casing is free from any obstructions that may hinder the removal of the underwire.
Step 4: Removing the underwire
Now that the underwire casing is open, it’s time to remove the underwire itself. With the casing fully exposed, carefully slide your fingers between the casing and the bra fabric to locate the underwire.
Gently grasp the underwire and slowly pull it out of the casing. Depending on the design of your bra, the underwire may be bent or shaped to fit the curves of your breasts. Take care to remove it without bending or damaging it further.
If you encounter any difficulty while removing the underwire, you can use a pair of pliers to provide better grip and leverage. However, be cautious not to squeeze too tightly, as this could cause the underwire to break or deform.
Once you have successfully removed the underwire, set it aside for disposal or future use, if desired. Take a moment to inspect the bra cups and ensure that there are no remnants of the underwire left behind. Clear any loose threads or debris from the underwire casing before proceeding to the next step.
Step 5: Closing the underwire casing
After removing the underwire, it’s important to close the underwire casing to ensure that the fabric remains secure and comfortable. This step will involve stitching the casing back together.
Thread a needle and tie a knot at the end of the thread. Begin by aligning the edges of the underwire casing, ensuring that they match up perfectly. Starting at one end, carefully sew the casing closed using small, neat stitches that blend in with the surrounding fabric. Be sure to secure the stitches at the beginning and end to prevent them from unraveling.
As you stitch, take care not to pull the thread too tight, as this may cause the fabric to gather or pucker. Keep the stitches evenly spaced and maintain tension that allows the fabric to lie flat.
Continue stitching along the entire length of the underwire casing until it is completely closed. Use a knot to secure the thread and trim any excess thread.
Once you have closed the underwire casing, inspect it for any loose threads or uneven stitches. Make any necessary adjustments to ensure a neat and tidy finish.
With the underwire casing closed, your bra is now ready to be worn without the discomfort of the underwire.
Step 6: Final touches
With the underwire casing securely closed, there are a few final touches you can consider to ensure a smooth and comfortable fit for your bra.
One option is to stitch a small fabric tab over the closed end of the underwire casing. This can help prevent any rough edges from rubbing against your skin and provide additional reinforcement. You can cut a small piece of fabric, fold it over the closed end of the casing, and stitch it in place using small, discreet stitches.
Another option is to add a bit of padding or cushioning to the area where the underwire used to be. You can find bra inserts or foam pads specifically designed for this purpose. These inserts can provide a bit of lift, shape, and comfort, compensating for the absence of the underwire. Simply slide the inserts into the cups of your bra and adjust as needed for a customized fit.
Lastly, take the time to try on your modified bra and ensure that it fits correctly and comfortably. Make any necessary adjustments, such as tightening or loosening the straps or adjusting the band, to achieve the perfect fit for your body.
By adding these final touches, you can optimize the comfort and support of your bra even without the underwire.
Conclusion
Removing the underwire from a bra is a simple process that can greatly improve comfort and fit, especially for those who find the underwire to be irritating or uncomfortable. By following the steps outlined in this article and gathering the necessary tools, you can successfully remove the underwire and enjoy a more comfortable bra-wearing experience.
Remember, not all bras are designed to have removable underwire, so it’s important to check your bra’s construction before attempting any modifications. Additionally, take your time and work carefully to avoid damaging the fabric or the underwire casing.
Once the underwire is removed, you can close the underwire casing, add any desired final touches, and ensure a secure and comfortable fit for your bra. By making these adjustments, you can continue to wear your favorite bra with confidence and without the constraints of the underwire.
However, it’s important to note that removing the underwire may impact the support and shaping that the bra originally provided. If you find that the modified bra no longer offers the desired level of support, it may be worth considering alternative bra styles or seeking professional advice to find the best fitting option for your needs.
Ultimately, the goal is to feel comfortable and confident in your bra. Removing the underwire can be a great solution for those who prefer a wire-free experience or find it uncomfortable. With the right tools, techniques, and attention to detail, you can successfully remove the underwire from your bra and enjoy a more comfortable and personalized fit.