Home>How-to Guides>For Women>How To Crochet A Bikini Bottom

For Women
How To Crochet A Bikini Bottom
Modified: August 2, 2023
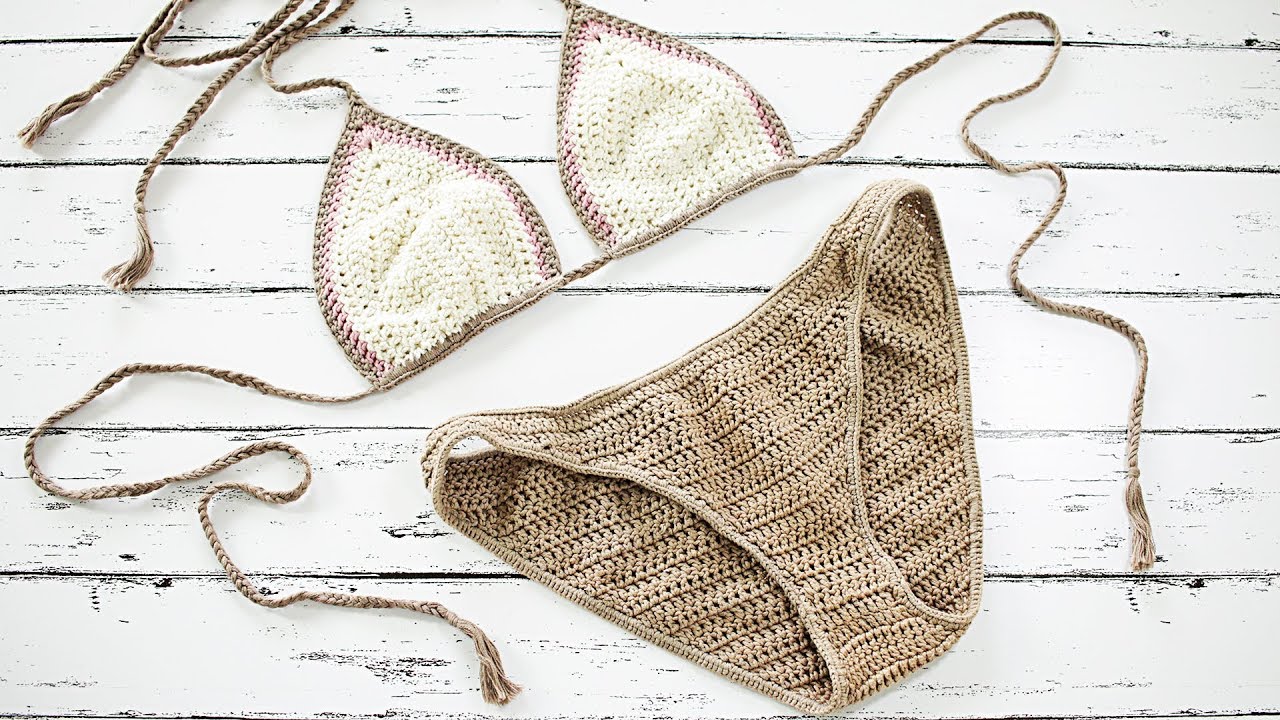
Learn how to crochet a stylish bikini bottom for women with our step-by-step guide and create your perfect beach outfit.
(Many of the links in this article redirect to a specific reviewed product. Your purchase of these products through affiliate links helps to generate commission for Under-tec.com, at no extra cost. Learn more)
Table of Contents
Introduction
Welcome to the world of crochet! If you’re looking for a fun and creative project, crocheting a bikini bottom is a great choice. Not only is it a useful and stylish addition to your summer wardrobe, but it also allows you to express your individuality and personal style. Whether you’re a crochet beginner or an experienced crafter, this step-by-step guide will help you create a unique and flattering bikini bottom.
Crocheting your own bikini bottom is a fantastic way to customize your swimwear and ensure a perfect fit. By choosing your yarn, hook size, and stitch patterns, you have complete control over the design and construction of your bikini. Plus, it’s a great opportunity to experiment with different colors and textures, making your creation truly one-of-a-kind.
In this tutorial, we will go through the process of crocheting a basic bikini bottom. We’ll cover everything from selecting the materials and creating the foundation chain to working the body of the bikini and adding decorative stitches. Whether you prefer a simple design or wish to incorporate intricate details, this guide will help you every step of the way.
Keep in mind that crocheting a bikini bottom requires some basic crochet skills. If you’re new to crochet, don’t worry! This guide will explain the necessary techniques and provide clear instructions. All you need is a little patience and practice, and soon you’ll be proudly sporting your handmade crochet bikini bottom at the beach or poolside.
So, grab your crochet hook, gather your materials, and let’s get started on this exciting and rewarding crochet journey. Get ready to create a stylish and unique bikini bottom that fits you perfectly and shows off your creativity!
Materials Needed
To crochet a bikini bottom, you will need a few basic materials. Here’s what you’ll need to get started:
- Crochet Hook: Choose a hook size that matches the recommended size for the yarn you’ll be using. Generally, a size G (4.0 mm) hook works well for most crochet bikini patterns.
- Yarn: Select a yarn that is suitable for swimwear. Look for yarn that is made from a blend of cotton and synthetic fibers, as these materials are durable and quick-drying. Opt for a color that complements your personal style and matches your swimwear preferences.
- Tape Measure: A tape measure or ruler will come in handy for ensuring accurate measurements, especially when working on the waistband and adjusting the size of the bikini bottom.
- Scissors: A pair of sharp scissors will be needed for cutting the yarn at various stages of your crochet project.
- Stitch Markers (optional): Stitch markers can be useful for marking specific stitches or points in your pattern, especially when working on complex stitch patterns or shaping the bikini bottom.
- Tapestry Needle: A tapestry needle or yarn needle is used for weaving in ends and sewing any necessary seams or finishing touches.
Having all the necessary materials ready before you begin will make the crochet process smoother and more enjoyable. Make sure to choose high-quality materials that are suitable for swimwear, as this will ensure the durability and longevity of your finished bikini bottom.
Remember, part of the excitement of crochet is the ability to personalize your projects. Feel free to experiment with different yarn types, colors, and hook sizes to achieve the desired look and fit for your bikini bottom. Now that you have all the materials ready, let’s move on to the next step: choosing the yarn and hook size.
Step 1: Choosing Yarn and Hook Size
Choosing the right yarn and hook size is crucial for creating a well-fitting and comfortable bikini bottom. Here are a few factors to consider when making your selection:
Yarn: Look for a yarn that is specifically designed for swimwear or has properties suitable for water activities. A blend of cotton and synthetic fibers is ideal, as it provides the necessary elasticity, durability, and quick-drying capabilities. Avoid using yarns made solely from natural fibers, as they can stretch and lose shape when wet.
Color: Select a color that complements your style and personal taste. Consider the color of your other swimwear pieces and choose a yarn color that either matches or contrasts nicely. Vibrant and bold colors can make a statement, while neutral or pastel tones can create a more subtle and versatile bikini bottom.
Hook Size: The hook size you choose will depend on the type of yarn you’re using and your personal tension. It’s important to match the recommended hook size provided on the yarn label. If you crochet tightly, you may need to go up a hook size to achieve the correct gauge. If you crochet loosely, you may need to go down a hook size.
Gauge: Before starting your project, it’s a good idea to crochet a gauge swatch. This involves crocheting a small square using your chosen yarn and hook size, following the recommended stitch pattern. Measure the number of stitches and rows per inch to ensure that your gauge matches the pattern gauge. Adjust your hook size if necessary to achieve the correct gauge, as this will ensure the proper fit of your bikini bottom.
By spending a little time selecting the right yarn and hook size, you can set yourself up for success in creating a beautiful and well-fitting bikini bottom. Now that you have your materials ready, let’s move on to the next step: creating a foundation chain.
Step 2: Creating a Foundation Chain
The foundation chain is the starting point for your bikini bottom. It forms the base upon which you will build the rest of your crochet stitches. Follow these steps to create your foundation chain:
- Hold your crochet hook in your dominant hand and make a slipknot. This will serve as the first loop on your hook.
- Using your hook, insert it through the slipknot loop, and tighten the loop by pulling the yarn tail gently.
- Hold the crochet hook and the yarn tail together with your non-dominant hand.
- With your dominant hand, yarn over by bringing the yarn over the top of the hook from back to front.
- Using the hook, pull the yarn through the slipknot loop, creating a new loop on the hook.
- Repeat steps 4 and 5 for the desired number of foundation chain stitches. The pattern you’re following or your personal preference will dictate the exact number of stitches needed.
- Once you have completed your desired number of chain stitches, you’re ready to move on to the next step.
It’s essential to keep your foundation chain loose enough so that it can easily accommodate subsequent stitches. Avoid pulling the yarn too tightly, as this will make it difficult to work into the chain in the following rows.
Count your foundation chain stitches to ensure you have the correct number before moving on to the next step. If you find that you have too few or too many stitches, you may need to undo and adjust your foundation chain accordingly.
Now that you have your foundation chain ready, it’s time to move forward and work on the waistband of your bikini bottom. We’ll cover that in the next step.
Step 3: Working the Waistband
The waistband is an essential part of the bikini bottom as it provides support and ensures a comfortable fit. Follow these steps to work the waistband:
- Start by making a turning chain. The turning chain is usually equivalent to the height of the stitch you’ll be working. For example, if you’ll be working double crochet stitches, make a turning chain of three.
- Insert your hook into the second chain from the hook or the first stitch of the foundation chain, depending on the pattern you’re following.
- Yarn over and pull through the stitch, making three loops on the hook.
- Yarn over again and pull through the first two loops on the hook, leaving two loops on the hook.
- Yarn over once more and pull through the remaining two loops on the hook, completing the first double crochet stitch.
- Continue working double crochet stitches into each chain of the foundation chain until you reach the end.
- Once you reach the end of the row, make the required number of turning chains (as specified in your pattern) to bring your hook up to the height of the next row.
- Turn your work to begin the next row.
- Repeat the steps for each row of the waistband until the desired width of the waistband is achieved.
Remember to count your stitches at the end of each row to ensure you have the correct number. If necessary, adjust your tension to keep your stitches consistent throughout the waistband.
The waistband serves as the foundation for the body of the bikini bottom, and it provides structure and stability. Once you have completed the waistband, you’re ready to move on to the next step: crocheting the body of the bikini bottom.
Step 4: Crocheting the Body of the Bikini Bottom
Now that you have the waistband complete, it’s time to move onto crocheting the body of the bikini bottom. Here’s how to do it:
- Start by making the required number of turning chains as indicated in your pattern to bring your hook up to the height of the next row.
- Turn your work to begin the next row.
- Now, work the specified stitches for the body of the bikini bottom, following the pattern instructions.
- Keep working rows of stitches until you reach the desired length for the body of your bikini bottom. This length can vary depending on your personal preference and the style of bikini you’re making.
- Remember to count your stitches at the end of each row to ensure you have the correct number. This will help maintain consistency and prevent any shaping issues.
- Continue working rows until the body of the bikini bottom is complete and you’re satisfied with the length. Remember to refer to your pattern for any specific instructions regarding increases, decreases, or stitch variations.
When crocheting the body of the bikini bottom, it’s important to maintain an even tension to ensure a smooth and uniform appearance. Take your time and focus on creating neat and consistent stitches.
Additionally, feel free to experiment with different stitch patterns and textures to add your personal touch to the design. You can incorporate lace stitches, shell stitches, or any other decorative pattern that enhances the overall look of your bikini bottom.
Once you have completed crocheting the body of the bikini bottom, it’s time to add some decorative stitches, if desired. We’ll cover this optional step in the next section.
Step 5: Adding Decorative Stitches (Optional)
If you’re looking to add extra flair and personality to your crochet bikini bottom, you can include decorative stitches. These stitches can create unique patterns and textures, making your bikini bottom truly stand out. Here’s how to add decorative stitches:
- Choose the decorative stitch or pattern you want to incorporate into your design. Some popular options include shells, bobbles, picots, or popcorn stitches.
- Identify the placement for the decorative stitches. Common areas to add them include the edges, the bottom hem, or even as accents within the body of the bikini bottom.
- Follow the instructions for the chosen stitch or pattern, ensuring that you understand how to execute it correctly.
- When working the decorative stitches, be mindful of the tension and gauge to ensure consistency with the rest of your crochet work.
- Repeat the decorative stitch or pattern as desired, according to your personal preference and the effect you want to achieve.
- Continue incorporating the decorative stitches until you are satisfied with the overall look of your bikini bottom.
Adding decorative stitches is an optional step, so feel free to skip it if you prefer a minimalist design. However, if you decide to include them, they can elevate your bikini bottom to another level, showcasing your creativity and crochet skills.
Remember to refer to your pattern, if you’re following one, for any specific instructions on incorporating decorative stitches. Alternatively, feel free to experiment and create your own unique stitch combinations to make your crochet bikini bottom truly one-of-a-kind.
Once you have added the desired decorative stitches, you’re ready to move on to the final step: adding the finishing touches.
Step 6: Finishing Touches
After completing the main body of your crochet bikini bottom, it’s time to add the finishing touches that will give it a polished and professional look. Here are some steps to consider:
- Secure your yarn tails: Take a tapestry needle or yarn needle and weave in any loose yarn tails from the starting chain and any color changes. This will ensure that your bikini bottom is tidy and secure.
- Block your work (if necessary): Blocking is the process of wetting or steaming your crochet piece to shape and smooth the stitches. This step can enhance the overall look and drape of your bikini bottom.
- Try on your bikini bottom: Before considering your project complete, try on the bikini bottom to ensure that it fits comfortably and flatters your body shape. Make any necessary adjustments or modifications as needed.
- Add optional elements: If desired, you can further enhance your crochet bikini bottom by adding straps, ties, or other decorative elements. This can personalize the design and provide additional support and style.
- Give it a final touch: Take a moment to inspect your work and make any final adjustments or corrections. Check for any missed stitches, loose threads, or uneven edges that may need to be fixed.
When completing the finishing touches, attention to detail is key. It’s important to take the time to ensure that each element is well-executed and aligns with your desired outcome.
Once you’re satisfied with the finishing touches, you can proudly wear your handmade crochet bikini bottom and showcase your crochet skills. Whether you’re lounging by the pool or strolling along the beach, you’ll have a unique and stylish piece that you can confidently rock!
Congratulations on completing your crochet bikini bottom! Enjoy the process of creating and wearing your handmade piece, and don’t hesitate to show off your crafting skills to others.
Conclusion
Crocheting your own bikini bottom is a fulfilling and rewarding experience. From choosing the materials to adding the finishing touches, each step allows you to exercise your creativity and create a unique piece that reflects your personal style.
By following this step-by-step guide, you learned how to choose the right yarn and hook size, create a foundation chain, work the waistband, crochet the body of the bikini bottom, and even add decorative stitches if desired. These techniques, combined with your imagination, enable you to craft a well-fitting and fashionable bikini bottom.
Remember, as you embark on your crochet journey, it’s essential to have patience and embrace the learning process. Mistakes and challenges are all part of the experience, and they provide opportunities for growth and improvement in your skills.
Don’t be afraid to customize your design and make it your own. Experiment with different stitch patterns, colors, and decorative elements to create a bikini bottom that perfectly suits your preferences and showcases your individuality.
Lastly, be proud of your accomplishment. Wearing a crochet bikini bottom that you made with your own hands is not only a testament to your craftsmanship but also a unique reflection of your personal style and creativity.
So, grab your crochet hook, choose your favorite yarn, and let your imagination soar as you embark on the journey of crafting your own beautiful crochet bikini bottom. Enjoy the process, embrace the challenges, and revel in the satisfaction of wearing your handmade creation with pride.
