Home>How-to Guides>For All>How To Install Robe Hook
For All
How To Install Robe Hook
Modified: August 24, 2023
Learn how to install robe hooks for all of your hanging needs. Step-by-step guide and expert tips to ensure a secure and stylish installation.
(Many of the links in this article redirect to a specific reviewed product. Your purchase of these products through affiliate links helps to generate commission for Under-tec.com, at no extra cost. Learn more)
Table of Contents
Introduction
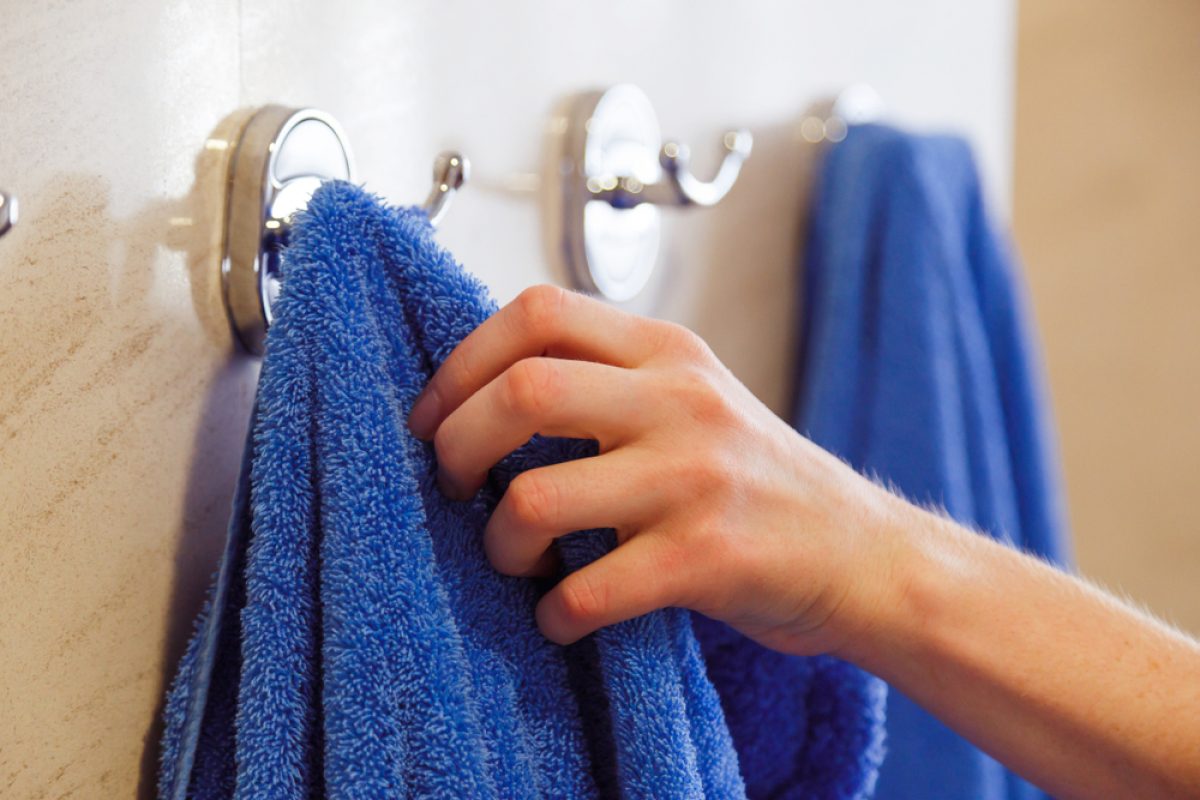
Welcome to our guide on how to install a robe hook! Robe hooks are a convenient and stylish addition to any bathroom or bedroom. They provide a practical solution for hanging robes, towels, or other items, keeping them easily accessible and neatly organized. Whether you are looking to add a functional element to your bathroom or simply upgrade the existing robe hook, this step-by-step guide will walk you through the installation process.
Installing a robe hook may seem like a daunting task, but with the right tools and a little bit of patience, it can be a straightforward and rewarding DIY project. By following these instructions, you will be able to successfully install a robe hook and enhance the functionality and aesthetics of your space.
Before diving into the installation process, it is important to gather all the necessary materials and tools. This will ensure a smooth and efficient installation. You may already have some of the tools on hand, but if not, a trip to your local hardware store should provide everything you need.
Once you have everything ready, you can move on to choosing a suitable location for your robe hook. This is an important step as it determines the functionality and accessibility of the hook. Consider factors such as height, proximity to other fixtures, and the weight that the hook will need to support. Once you have selected the perfect spot, you can proceed with measuring and marking the position.
Preparing the surface is crucial to ensure a secure and long-lasting installation. If you are working with a tiled surface, you may need to use a tile drill bit to create the necessary holes. For other surfaces, a standard drill will suffice. After preparing the surface, you can then install the mounting plate or anchor, which provides a stable foundation for the robe hook.
With the groundwork laid, it’s time to attach the robe hook itself. Depending on the design, you may need to screw it onto the mounting plate or anchor, or it may have a simple adhesive backing. Once the hook is attached, give it a gentle test to ensure it is secure and can hold the weight it is intended for.
After testing, you can make any necessary adjustments to the positioning or tightness of the hook. Once you are satisfied, it’s time to finalize the installation by checking for any loose screws or adhesive and ensuring that the hook is securely in place.
Now that you have completed the installation process, you can step back and admire your newly installed robe hook. Not only will it provide practicality and organization, but it can also add a touch of style to your space. So go ahead and enjoy the convenience and functionality that a robe hook brings!
Step 1: Gather Materials
Before you begin the installation process, it is important to gather all the necessary materials and tools. This will ensure that you have everything you need on hand and can complete the installation smoothly and efficiently. Here is a list of the materials and tools you will need:
- Robe hook
- Mounting plate or anchor (if not included with the robe hook)
- Screws or adhesive (depending on the type of robe hook)
- Drill
- Drill bits (appropriate for your surface, such as tile or wood)
- Tape measure
- Pencil or marker
- Screwdriver or screwdriver bit (if applicable)
- Level
- Masking tape (optional)
- Clean cloth
It is essential to have the correct size and type of screws or adhesive for your specific robe hook. Check the instructions or packaging of the robe hook to determine the recommended screw size and length. Using the wrong type of screws or adhesive can compromise the installation and affect the durability of the robe hook.
The drill and drill bits will be used to create the necessary holes in the wall or surface for mounting the robe hook. Make sure you have the appropriate drill bits for the material you are working with. For example, if you are installing the robe hook on a tiled surface, you will need a tile drill bit to prevent cracking or damage to the tiles.
A tape measure is essential for accurately measuring and marking the position of the robe hook. This will ensure that the hook is installed at the desired height and in the right location. Use a pencil or marker to make clear and visible marks on the wall or surface.
A level is a handy tool for ensuring that the robe hook is installed straight and level. This is especially important for aesthetic purposes and to prevent items from sliding off the hook. If you don’t have a level, you can use masking tape to create a level line for reference.
Lastly, have a clean cloth on hand to wipe away any dust or debris and to clean the surface before installation. This will help ensure a secure and long-lasting installation.
With all the materials and tools gathered, you are now ready to move on to the next step: choosing a suitable location for your robe hook.
Step 2: Choose a Suitable Location
Choosing a suitable location for your robe hook is crucial for both functionality and aesthetics. Consider the following factors when selecting the perfect spot:
- Height: Determine the ideal height for your robe hook based on its intended use. For towel hooks, a height of around 48 to 72 inches (122 to 183 cm) from the floor is recommended. Robe hooks can be placed slightly lower, around 60 inches (152 cm), to accommodate the hanging length of most robes. However, adjust the height according to your preferences and the users’ heights.
- Proximity to other fixtures: Take into consideration other fixtures or items in the area where you plan to install the robe hook. Ensure that there is enough space between the hook and nearby items such as towel bars, shower doors, or cabinets. This will prevent obstructions and allow for easy access and usage.
- Weight capacity: Consider the weight that the robe hook will need to support. If you will be hanging heavy towels or robes, ensure that the wall or surface can handle their weight. The packaging or instructions of the robe hook should specify the weight capacity. If in doubt, choose a more secure location such as a stud in the wall or use wall anchors for added support.
- Visibility and accessibility: Select a location that is easily visible and accessible. You want the robe hook to be conveniently located so that you can easily grab and hang your items. Avoid placing it behind doors or in tight corners where it may be hidden or difficult to reach.
- Style and aesthetics: Consider the overall aesthetic of your space. Choose a location that complements the design and layout of your bathroom or bedroom. The robe hook should blend seamlessly with the existing fixtures and decor, enhancing the overall visual appeal.
Remember to take measurements and mark the chosen location using a tape measure and pencil or marker. Double-check the height, positioning, and distance from other fixtures to ensure accuracy before moving on to the next step.
Now that you have selected a suitable location, it’s time to measure and mark the position for the installation of the robe hook.
Step 3: Measure and Mark the Position
Before you start drilling or attaching the robe hook, it is crucial to measure and mark the precise position for installation. Taking the time to accurately measure and mark will ensure that the robe hook is aligned and securely mounted. Follow these steps to measure and mark the position:
- Measure the height: Use a measuring tape to determine the desired height for the robe hook. As mentioned previously, the ideal height for a robe hook is typically around 60 inches (152 cm) from the floor. However, adjust the height based on your preferences and the users’ heights.
- Find the center point: Once you’ve determined the height, find the center point on the wall or surface where the robe hook will be installed. You can use a tape measure to measure the width of the wall section and divide it in half to find the center point.
- Mark the position: Using a pencil or marker, make a small mark at the center point you identified. This mark will serve as your reference point for accurate installation. If you’re installing multiple robe hooks, measure the appropriate distance from the center mark to position the additional hooks evenly.
- Use a level: To ensure that the robe hook will be installed straight, use a level to create a horizontal line. Place the level vertically against the wall, aligning it with the center mark. Adjust the level until the bubble is centered, indicating a straight line. Then, with the level still in place, draw a light horizontal line across the wall.
- Double-check the measurements: Before proceeding to the next step, double-check your measurements and make any necessary adjustments. Ensure that the marks are at the correct height and that the horizontal line is straight. Take a step back and visually confirm that the positioning is aesthetically pleasing and functional.
By measuring and marking the position accurately, you will have a guide to follow during the installation process. This will help ensure that the robe hook is installed at the desired height and in the correct location. Take your time with this step to avoid any potential issues or misalignment later on.
Once you’ve measured and marked the position, you’re ready to move on to the next step: preparing the surface for installation.
Step 4: Preparing the Surface
Preparing the surface is an essential step in the robe hook installation process. Properly preparing the surface will ensure a secure and long-lasting installation. The method of preparation may vary depending on the type of surface you are working with. Follow these guidelines to prepare the surface:
- Clean the surface: Before installation, clean the area where the robe hook will be mounted. Remove any dirt, dust, or debris using a clean cloth or a mild cleaning solution. A clean surface will allow for better adhesion and ensure that the robe hook adheres properly or that screws go in smoothly.
- Tile surface: If you are installing the robe hook on a tiled surface, you may need to use a tile drill bit. This specialized drill bit is designed to minimize the risk of cracking or damaging the tile. Before drilling, mark the tile’s position using masking tape to prevent the drill bit from slipping. Remember to wear safety goggles to protect your eyes from any debris.
- Drywall or wood surface: For drywall or wood surfaces, you can use a standard drill to create the necessary holes. Use a drill bit that matches the size recommended by the robe hook manufacturer. To prevent any damage, start by drilling a pilot hole, then widen it using the appropriate size drill bit.
- Wall anchors: Depending on the weight capacity of the robe hook and the surface you are working with, you may need to use wall anchors. Wall anchors provide extra support and stability, especially if you are unable to secure the robe hook to a stud or if you are working with a weaker material like drywall. Follow the manufacturer’s instructions for installing the wall anchors correctly.
- Fill any existing holes: If you are replacing an existing robe hook or mounting a new one in a different location, make sure to fill any previous holes. Use spackle or filler to fill the holes and smooth out the surface. Once the filler has dried, sand it down if necessary to create a flat and even surface for the new installation.
Take your time during the surface preparation process to ensure that the area is clean, free of debris, and ready for mounting the robe hook. Proper preparation will optimize the installation process and help create a secure and durable attachment.
With the surface prepared, you are now ready to move on to the next step: installing the mounting plate or anchor.
Step 5: Install the Mounting Plate or Anchor
Installing the mounting plate or anchor is a crucial step in ensuring the stability and strength of your robe hook. The method of installation may vary depending on the type of robe hook you are working with. Follow these guidelines to properly install the mounting plate or anchor:
- Read the instructions: Refer to the instructions provided by the manufacturer of your robe hook for specific guidance on installing the mounting plate or anchor. Some robe hooks come with pre-installed mounting plates, while others may require separate installation.
- Position the mounting plate or anchor: Hold the mounting plate or anchor against the wall at the marked position. Make sure it is aligned with the horizontal line or center mark. Use a level to ensure it is straight. If using wall anchors, insert them into the pre-drilled holes, aligning them with the mounting plate’s screw holes.
- Secure the mounting plate or anchor: Depending on the type of mounting plate or anchor, use screws or other appropriate fasteners to secure it to the wall. For wall anchors, insert the screws into the anchors and tighten them until the mounting plate is securely in place. If necessary, use a screwdriver or screwdriver bit to tighten the screws.
- Check stability: Once the mounting plate or anchor is installed, give it a gentle tug to ensure it is firmly secured to the wall. Wiggle it slightly to check for any looseness or movement. If there are any issues, double-check the installation and tighten any screws or fasteners as needed.
When installing the mounting plate or anchor, follow the manufacturer’s instructions carefully to ensure proper installation and stability. A secure mounting plate or anchor will provide a solid foundation for attaching the robe hook.
With the mounting plate or anchor installed, you are now ready to move on to the next step: attaching the robe hook itself.
Step 6: Attach the Robe Hook
Now that you have properly installed the mounting plate or anchor, it’s time to attach the robe hook itself. Depending on the design of your robe hook, the attachment process may vary. Follow these guidelines to securely attach the robe hook:
- Position the robe hook: Hold the robe hook against the mounting plate or anchor, aligning the screw holes. Make sure it is positioned correctly and level with the horizontal line or center mark.
- If using screws: For robe hooks that require screws, insert the screws through the screw holes and into the mounting plate or anchor. Use a screwdriver or screwdriver bit to tighten the screws until the robe hook is securely attached. Take care not to overtighten the screws, as this may damage the mounting plate or anchor.
- If using adhesive: If your robe hook has an adhesive backing, carefully peel off the adhesive liner. Press the robe hook firmly against the mounting plate or anchor, ensuring that it is level and aligned. Apply gentle pressure for a few moments to allow the adhesive to bond with the surface. Follow any additional instructions provided by the manufacturer to ensure proper adhesion.
- Double-check stability: Once the robe hook is attached, give it a gentle tug to ensure it is securely in place. Verify that it can support the weight intended for hanging robes, towels, or other items. If there are any signs of movement or instability, reinforce the attachment by tightening any screws or adjusting the adhesive if possible.
It is important to follow the specific instructions provided by the manufacturer when attaching the robe hook. This will help ensure a secure and reliable attachment that can withstand regular use.
Now that the robe hook is attached, you can move on to the next step: testing and adjusting the position if needed.
Step 7: Test and Adjust
After attaching the robe hook, it’s important to test its stability and make any necessary adjustments to ensure proper functionality and positioning. Follow these steps to test and adjust the robe hook:
- Test the stability: Hang a robe, towel, or any item that you plan to use on the robe hook. Give it a gentle tug to make sure that the hook can securely hold the weight. It should not wobble or come loose from the wall. If you notice any issues with stability, consider reinforcing the attachment by tightening screws or adjusting the adhesive as necessary.
- Check for proper positioning: Step back and assess the positioning of the robe hook. Ensure that it is at the desired height and aligned with the horizontal line or center mark. Take a moment to look at it from different angles to confirm that it is visually pleasing and functional.
- Make adjustments if needed: If you are not satisfied with the position of the robe hook, use a screwdriver to loosen the screws if applicable. Gently adjust the positioning and then tighten the screws again. For adhesive-mounted hooks, carefully remove the hook and reposition it as desired. Be cautious not to damage the surface or adhesive when making adjustments.
Taking the time to test and make any necessary adjustments will ensure that the robe hook is securely installed and properly positioned. It is better to address any issues now to avoid future problems or the need for reinstallation.
Once you are satisfied with the stability and positioning, you can proceed to the final step: finalizing the installation of the robe hook.
Step 8: Finalize Installation
With the robe hook attached and any necessary adjustments made, it’s time to finalize the installation. Follow these steps to ensure that the robe hook is securely in place:
- Tighten screws: If your robe hook is secured with screws, double-check that they are tightened securely. Use a screwdriver or screwdriver bit to ensure that there is no wobbling or movement.
- Clean the area: Take a clean cloth and wipe away any dust or debris that may have accumulated during the installation process. This will give your robe hook a clean and polished look.
- Inspect the installation: Carefully examine the robe hook and its attachment to the wall or surface. Check for any loose screws, gaps, or adhesive that may require adjustment. Ensure that the hook is secure and stable, capable of holding the intended weight without any issues.
- Re-test stability: As a final step, give the robe hook a firm tug to confirm its stability. Confirm that it can support the weight of robes, towels, or other items without coming loose or shifting position. This will give you peace of mind that your robe hook is securely installed.
By following the steps outlined above, you can rest assured that your robe hook is properly installed and ready for use. Taking the time to finalize the installation will ensure its durability and longevity.
Congratulations! You have successfully completed the installation process for your robe hook. Enjoy the convenience and organization it brings to your bathroom or bedroom.
Conclusion
Installing a robe hook is a simple yet effective way to add functionality and style to your bathroom or bedroom. By following the step-by-step guide outlined in this article, you can confidently install a robe hook and enjoy the convenience of having a dedicated spot for hanging robes, towels, or other items.
Throughout the installation process, it is important to gather all the necessary materials and tools, choose a suitable location, measure and mark the position accurately, prepare the surface properly, install the mounting plate or anchor securely, attach the robe hook with screws or adhesive, test and adjust for stability and positioning, and finalize the installation by tightening screws and inspecting the attachment.
Remember to take your time and follow the manufacturer’s instructions for your specific robe hook. This will ensure a secure and reliable installation that can withstand regular use.
With your newly installed robe hook, you can enjoy the convenience of having your towels or robes easily accessible and organized. Not only will it enhance the functionality of your space, but it can also add a touch of style to your bathroom or bedroom.
So go ahead and transform your space with a robe hook installation. Enjoy the ease and organization it brings to your daily routine!