Home>How-to Guides>For Women>How To Make A Bodysuit Fit Better
For Women
How To Make A Bodysuit Fit Better
Modified: August 2, 2023
Discover effective tips and tricks to make your women's bodysuit fit better. Ensure a comfortable and flattering fit with expert advice for a confident and stylish look.
(Many of the links in this article redirect to a specific reviewed product. Your purchase of these products through affiliate links helps to generate commission for Under-tec.com, at no extra cost. Learn more)
Table of Contents
- Introduction
- Evaluating the Fit
- Understanding Your Body Measurements
- Analyzing the Existing Fit Issues
- Identifying the Problem Areas
- Modifying the Bodysuit Fit
- Adjusting the Shoulder Straps
- Taking in or Letting out the Bodysuit Seams
- Altering the Leg Openings
- Resizing the Waistband
- Enhancing the Fit
- Adding Elastic or Gripper Tape
- Using Shapewear for Better Silhouette
- Accessorizing to Improve the Fit
- Conclusion
Introduction
Finding the perfect fit is essential when it comes to clothing, and this holds true for bodysuits as well. Whether you’re wearing a bodysuit for a casual outing or for a special occasion, a well-fitted bodysuit not only enhances your confidence but also flatters your body shape. However, sometimes finding a bodysuit that fits perfectly off the rack can be challenging, as everyone’s body shape is unique.
But don’t worry! With a few simple adjustments and modifications, you can make your bodysuit fit better and ensure that you look and feel your best. In this article, we’ll guide you through the process of evaluating the fit of your bodysuit, identifying any fit issues, and providing practical tips on modifying and enhancing the fit to achieve the desired look.
We’ll start by understanding your body measurements, as this is key to finding the right size and fit. Then, we’ll delve into analyzing the existing fit issues and identifying the specific problem areas that need adjustment. From there, we’ll move on to providing step-by-step instructions on how to modify the bodysuit fit to address these issues effectively.
Once you’ve made the necessary adjustments, we’ll explore additional ways to enhance the fit of your bodysuit. We’ll discuss adding elastic or gripper tape to ensure the bodysuit stays in place, using shapewear to create a smoother silhouette, and even accessorizing to further accentuate the flattering fit.
By the end of this article, you’ll have a comprehensive understanding of how to make your bodysuit fit better and the confidence to tackle any fit issues that may arise. So, let’s dive in and learn how to achieve that perfect fit for your bodysuit!
Evaluating the Fit
Before you begin making any adjustments to your bodysuit, it’s important to evaluate the fit and identify any areas that need improvement. Here are some steps to help you assess the fit of your bodysuit:
- Understanding Your Body Measurements: Start by measuring your bust, waist, and hip circumference with a measuring tape. Compare these measurements to the size chart provided by the bodysuit brand to ensure you have chosen the correct size.
- Analyzing the Existing Fit Issues: Put on the bodysuit and take note of any areas where it feels too tight, too loose, or uncomfortable. Check for puckering, sagging, or gaping in specific areas such as the bust, waist, or leg openings.
- Identifying the Problem Areas: Pinpoint the specific areas that are causing the fit issues. It could be the shoulder straps, the waistband, or even the leg openings. Assess whether the bodysuit is too long or too short for your torso length.
By evaluating the fit in these steps, you’ll have a clearer understanding of the adjustments needed to achieve a better fit for your bodysuit. Next, we’ll move on to modifying the bodysuit fit with practical tips and techniques. So, let’s get started!
Understanding Your Body Measurements
Understanding your body measurements is crucial when it comes to finding the right fit for your bodysuit. Here are some steps to help you determine your measurements accurately:
- Bust Measurement: Start by wrapping the measuring tape around the fullest part of your bust, ensuring it is parallel to the ground. Make sure the tape is snug but not too tight. Note down the measurement in inches or centimeters.
- Waist Measurement: Locate your natural waistline, which is typically the narrowest part of your torso. Wrap the measuring tape around this area and record the measurement.
- Hip Measurement: Measure the widest part of your hips, usually around the hip bone area. Wrap the measuring tape around this area and take note of the measurement.
Once you have these measurements, compare them to the size chart provided by the bodysuit brand. Look for the size that corresponds to your measurements for the best fit. Remember that different brands may have slight variations in their size charts, so it’s essential to refer to the specific brand’s chart.
It’s worth noting that some bodysuits may have adjustable closures, such as hook-and-eye closures or adjustable shoulder straps. If this is the case, you may have some flexibility in achieving a better fit by adjusting these elements.
Understanding your body measurements is the first step in finding a bodysuit that fits you well. Armed with this knowledge, you can confidently choose the right size and move on to evaluating the fit of the bodysuit on your body. Let’s now move on to analyzing the existing fit issues to make further improvements.
Analyzing the Existing Fit Issues
Once you have put on the bodysuit, it’s time to analyze the existing fit and identify any specific issues that need to be addressed. Pay close attention to the following fit issues:
- Bust Fit: Determine whether the bodysuit provides adequate support and coverage for your bust. Look for any signs of puckering or gaping, which may indicate that the bodysuit is too loose or ill-fitting in the bust area.
- Waist Fit: Check if the bodysuit hugs your waist comfortably without feeling overly tight or causing discomfort. A bodysuit that is too loose in the waist can create a baggy or saggy appearance.
- Leg Opening Fit: Assess if the leg openings of the bodysuit are snug but not too tight. The elastic should provide a secure fit without digging into your skin or causing discomfort.
- Shoulder Strap Fit: Examine the fit of the shoulder straps. Ensure they are not too loose or too tight, as this can affect the overall comfort and support of the bodysuit.
- Torso Length: Evaluate whether the length of the bodysuit is suitable for your torso. A bodysuit that is too long or too short for your torso length can cause fit issues and make it uncomfortable to wear.
By identifying these fit issues, you can pinpoint the specific areas that require modification or adjustment in the next steps. It’s important to be thorough in this analysis to ensure that the final modifications result in a well-fitted bodysuit that flatters your body shape.
In the next section, we will delve into specific techniques and tips for modifying the fit of the bodysuit to address these issues effectively. So, let’s proceed to the next step and start making adjustments for a better fit!
Identifying the Problem Areas
After analyzing the existing fit of your bodysuit, it’s time to pinpoint the specific problem areas that need to be addressed. By identifying these areas, you can focus your efforts on making targeted modifications for a better fit. Here are some common problem areas to look out for:
- Bust: If you notice puckering or gaping in the bust area, it may indicate that the bodysuit is too loose. On the other hand, if the bodysuit feels constricting or flattens your bust, it may be too tight.
- Waist: A bodysuit that is too loose in the waist can create a baggy appearance, while one that is too tight can be uncomfortable and restrict your movement. Pay attention to how the bodysuit fits around your waistline.
- Leg Openings: The leg openings should be snug but not overly tight. If they dig into your skin or cause discomfort, it indicates that the bodysuit is too tight in this area.
- Shoulder Straps: Check the fit of the shoulder straps. They should provide adequate support without digging into your shoulders or slipping off. If the straps are too loose or too tight, adjustments may be needed.
- Torso Length: Consider whether the bodysuit’s length is suitable for your torso. If it feels too long or too short, it can create fit issues and affect overall comfort.
Take note of the specific problem areas you have identified. This will serve as a roadmap for the modifications you’ll make in the next section. It’s important to address these problem areas individually to achieve an overall better fit for your bodysuit.
Now that you have identified the problem areas, it’s time to move on to modifying the fit of your bodysuit. In the following section, we will provide practical tips and techniques to adjust the shoulder straps, alter the seams, resize the leg openings, and more. So, let’s continue on our journey to make your bodysuit fit better!
Modifying the Bodysuit Fit
Now that you have evaluated the fit of your bodysuit and identified the problem areas, it’s time to make the necessary modifications to achieve a better fit. Here are some practical tips and techniques to help you modify the bodysuit fit:
- Adjusting the Shoulder Straps: If the shoulder straps are too loose or too tight, you can easily make adjustments. For tighter straps, shorten them by sewing or using safety pins to create pleats. Alternatively, if the straps are too tight, you can let them out by removing stitches or adding fabric extenders.
- Taking in or Letting out the Bodysuit Seams: If the bodysuit is too loose or too tight in certain areas such as the bust, waist, or hips, you can modify the fit by taking in or letting out the seams. This can be done by either sewing along the existing seams or creating new seams to achieve the desired fit.
- Altering the Leg Openings: If the leg openings are too tight or too loose, you can make adjustments to ensure a comfortable fit. For tighter leg openings, you can remove the elastic and reattach it with a shorter length. Conversely, if the leg openings are too loose, you can add additional elastic or use a zigzag stitch to create a tighter edge.
- Resizing the Waistband: If the waistband is too loose or too tight, you can resize it to achieve a better fit. For a tighter waistband, you can sew additional darts or take in the sides. If the waistband is too tight, you can add elastic or extend the waistband by sewing in additional fabric.
As you make these modifications, it’s important to try on the bodysuit periodically to check the fit and make any necessary adjustments along the way. Remember to sew or secure any changes properly to ensure they withstand regular wear and washing.
By making these modifications, you can transform a bodysuit that doesn’t quite fit into one that flatters and accentuates your curves. In the next section, we will explore additional techniques to enhance the fit of your bodysuit. So, let’s continue our journey toward achieving the perfect fit!
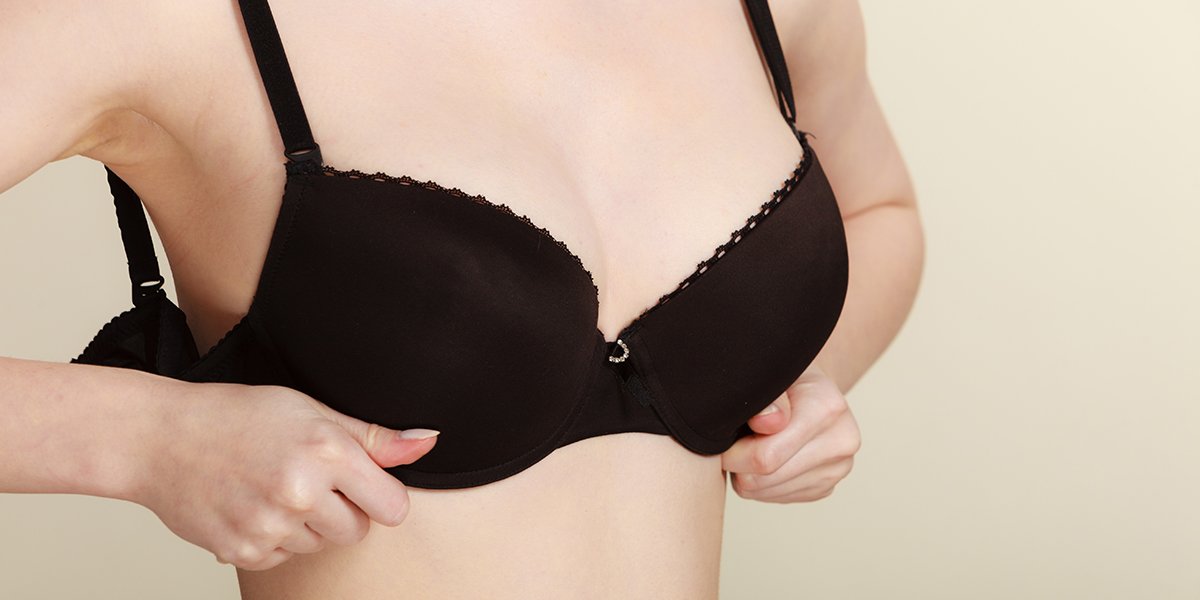
Adjusting the Shoulder Straps
One common fit issue with bodysuits is shoulder straps that are either too loose or too tight. Luckily, adjusting the shoulder straps is a relatively simple modification that can greatly improve the fit. Here’s how you can adjust the shoulder straps of your bodysuit:
- Tightening the Shoulder Straps: If the shoulder straps are too loose and not providing enough support, you can tighten them. One option is to sew pleats into the strap at the shoulder seam. This will shorten the strap and create a more snug fit. Alternatively, you can use safety pins to create temporary pleats until you achieve the desired fit.
- Lengthening the Shoulder Straps: In the case where the shoulder straps are too tight and digging into your shoulders, you can lengthen them to alleviate discomfort. Carefully remove any stitching that attaches the shoulder straps to the bodysuit. Then, cut a piece of fabric or add a strap extender to the shoulder strap to increase its length. Sew the extension in place, ensuring it is secure, and reattach the straps to the bodysuit.
When adjusting the shoulder straps, it’s essential to keep the strapping even on both sides to maintain balance and symmetry. Take your time to ensure that both straps are adjusted to the same length and fit snugly without causing any discomfort.
Once you have made the necessary adjustments to the shoulder straps, try on the bodysuit to assess the fit. Take note of how the adjusted straps feel and make any additional tweaks if needed. Remember to sew or secure any changes properly to maintain the durability of your bodysuit.
Now that you have learned how to adjust the shoulder straps, you can move on to other modifications to further enhance the fit of your bodysuit. In the next section, we will explore methods for taking in or letting out the bodysuit seams. Let’s continue making our bodysuit fit like a dream!
Taking in or Letting out the Bodysuit Seams
If your bodysuit is too loose or too tight in specific areas such as the bust, waist, or hips, you can modify the fit by taking in or letting out the seams. This allows you to customize the bodysuit to your individual body shape. Here’s how you can make these adjustments:
- Taking In Seams: If the bodysuit is too loose in certain areas, you can take in the seams to create a more fitted look. This involves stitching along the existing seams, but narrower, to reduce the overall size of the bodysuit. Start by marking the desired seam line on the inside of the bodysuit. Then, carefully sew along this line, ensuring the stitches are secure. Repeat the process on both sides of the bodysuit to maintain balance and symmetry.
- Letting Out Seams: If the bodysuit feels too tight and restrictive, you can let out the seams to increase the overall size. This is done by removing the existing stitches along the specific seams that need adjustment. Once the stitches are removed, you can add extra fabric to widen the bodysuit. Make sure the new fabric matches the existing fabric in color and stretch. Pin the new fabric in place and sew it securely along the seam line. Remember to maintain symmetry by making the same modifications on both sides of the bodysuit.
When taking in or letting out the bodysuit seams, it’s important to be patient and make gradual adjustments. You can always try on the bodysuit throughout the process to ensure that the fit is improving in the desired way. Take note of any additional alterations that may be needed as you progress.
After completing the seam adjustments, carefully press the seams with a hot iron to flatten any creases and give the bodysuit a polished look. This step also helps to ensure that the new seam lines blend seamlessly with the rest of the bodysuit.
Now that you have learned how to take in or let out the bodysuit seams, you have the power to achieve a customized fit that flatters your body shape. In the next section, we will explore techniques for altering the leg openings of your bodysuit. Let’s continue our journey towards a better fit!
Altering the Leg Openings
If the leg openings of your bodysuit are too tight or too loose, you can make adjustments to ensure a comfortable and flattering fit. Here’s how you can alter the leg openings:
- Tightening the Leg Openings: If the leg openings are too loose and not providing a secure fit, you can tighten them. Start by removing any existing elastic from the openings. Cut a new piece of elastic that is slightly shorter than the original length. Pin one end of the elastic to the leg opening and begin sewing it in place, gradually stretching the elastic as you sew. Make sure that the elastic is evenly distributed and sewn securely. Repeat the process for the other leg opening.
- Widening the Leg Openings: Alternatively, if the leg openings are too tight and digging into your skin, you can widen them for a more comfortable fit. Carefully remove the existing seam stitching around the leg openings. Cut a strip of matching fabric that is longer than the removed piece. Attach the fabric strip to each leg opening, ensuring that it blends seamlessly with the rest of the bodysuit. Sew the strip securely, stretching it slightly to match the shape of the leg opening.
When altering the leg openings, it’s important to maintain a balanced and symmetrical fit. Take your time to ensure that both leg openings are modified in the same way and align properly with each other.
As with any modifications, try on the bodysuit periodically during the process to check the fit and make any necessary adjustments. This ensures that the leg openings are comfortable and provide the desired fit without causing any discomfort or constriction.
Once you have successfully altered the leg openings, your bodysuit will fit better and feel more comfortable against your skin. In the next section, we will explore resizing the waistband to achieve an optimal fit. Let’s continue our journey towards the perfect bodysuit fit!
Resizing the Waistband
If the waistband of your bodysuit is too loose or too tight, resizing it can help achieve a better fit and enhance your overall comfort. Here’s how you can resize the waistband:
- Tightening the Waistband: If the waistband is too loose and causing the bodysuit to sag, you can tighten it for a more secure fit. One option is to create darts along the waistband. Mark the desired dart locations on the inside of the bodysuit, ensuring they are evenly spaced. From the marked points, fold the waistband inward along the seam line and sew it securely. Repeat this process for each dart, making sure to maintain balance on both sides of the bodysuit.
- Letting Out the Waistband: In the case where the waistband is uncomfortably tight, you can let it out to achieve a better fit. Start by carefully removing any stitching that secures the waistband to the bodysuit. Cut a strip of fabric that matches the waistband’s material and is long enough to extend the waistband to the desired size. Attach the fabric strip using a sewing machine, making sure to blend it seamlessly with the existing waistband. Remember to sew securely along the entire length of the fabric strip.
When resizing the waistband, consider how the adjustment may affect the overall fit of the bodysuit. It’s important to maintain balance and symmetry while ensuring optimal comfort and flexibility.
After resizing the waistband, try on the bodysuit to assess the fit. Take note of how the adjusted waistband feels and make any additional tweaks if necessary. Remember to sew or secure any changes properly to maintain the durability of your bodysuit.
Now that you have successfully resized the waistband, your bodysuit will fit better around your waist and provide a more flattering silhouette. In the next section, we will explore additional techniques to enhance the fit of your bodysuit. Let’s continue our journey towards achieving the perfect fit!
Enhancing the Fit
While modifying the fit of your bodysuit can greatly improve its overall comfort and appearance, there are additional techniques you can use to enhance the fit even further. These methods work in conjunction with the previous modifications to create a more flattering and well-fitted bodysuit. Here are some ways to enhance the fit:
- Adding Elastic or Gripper Tape: To ensure that the bodysuit stays in place and doesn’t shift or ride up, you can add elastic or gripper tape to certain areas. Sewing a narrow strip of elastic along the leg openings or using gripper tape along the waistband can provide extra grip and prevent the bodysuit from moving out of place.
- Using Shapewear for Better Silhouette: If you desire a smoother silhouette or added support, consider wearing shapewear underneath your bodysuit. Shapewear can help contour and shape your body, providing a more streamlined and polished look.
- Accessorizing to Improve the Fit: Sometimes, adding the right accessories can enhance the fit of your bodysuit. For example, a belt around the waist can help define and accentuate your curves. Similarly, a well-fitted jacket or cardigan worn over the bodysuit can add structure and enhance the overall look.
By incorporating these enhancement techniques, you can elevate the fit of your bodysuit to a new level. Remember to experiment and find what works best for you in terms of comfort and style.
Keep in mind that while these enhancements can improve the fit and aesthetics of your bodysuit, it’s essential to prioritize your comfort. Choose materials that are soft, breathable, and stretchy to ensure that you feel good while wearing your bodysuit.
Now that you have learned how to enhance the fit of your bodysuit, you can confidently wear it with the assurance that it flatters your body shape and highlights your best features. In the next section, we will conclude our discussion and recap the key takeaways. So, let’s wrap up our guide to making a bodysuit fit better!
Adding Elastic or Gripper Tape
To further improve the fit of your bodysuit and ensure it stays in place, adding elastic or gripper tape can be a game-changer. These modifications provide extra grip and prevent the bodysuit from shifting or riding up. Here’s how you can add elastic or gripper tape:
- Adding Elastic: Begin by selecting a narrow elastic that matches the color of your bodysuit. For the leg openings, cut a length of elastic that fits comfortably around your leg but is still snug. Pin the elastic to the wrong side of the fabric, ensuring it is evenly distributed. Sew the elastic in place using a stretch stitch, stretching it slightly as you sew. Trim any excess elastic and finish the ends securely. Repeat the process for the other leg opening. For added security, you can topstitch along the elastic seam.
- Using Gripper Tape: Gripper tape is a great alternative to elastic, especially for creating a non-slip fit around the waistband. Simply measure the length of the waistband and cut a strip of gripper tape to match. Align the gripper tape with the inside edge of the waistband and sew it securely in place. Ensure the gripper side is facing the bodysuit fabric, as this is what will grip your skin or undergarments and prevent slipping.
When applying elastic or gripper tape, it’s important to maintain an even and balanced placement. Take your time to ensure that the elastic or gripper tape is stitched securely and evenly around the leg openings or waistband.
By adding elastic or gripper tape, you can feel confident that your bodysuit will stay in place throughout the day or evening, allowing you to move freely and comfortably. These modifications are especially useful if you plan to engage in activities that require a lot of movement.
Now that you have learned how to add elastic or gripper tape, your bodysuit will have that extra element of security and fit you desire. In the next section, we will discuss the use of shapewear to further enhance the silhouette of your bodysuit. Let’s continue our journey towards a better-fitting bodysuit!
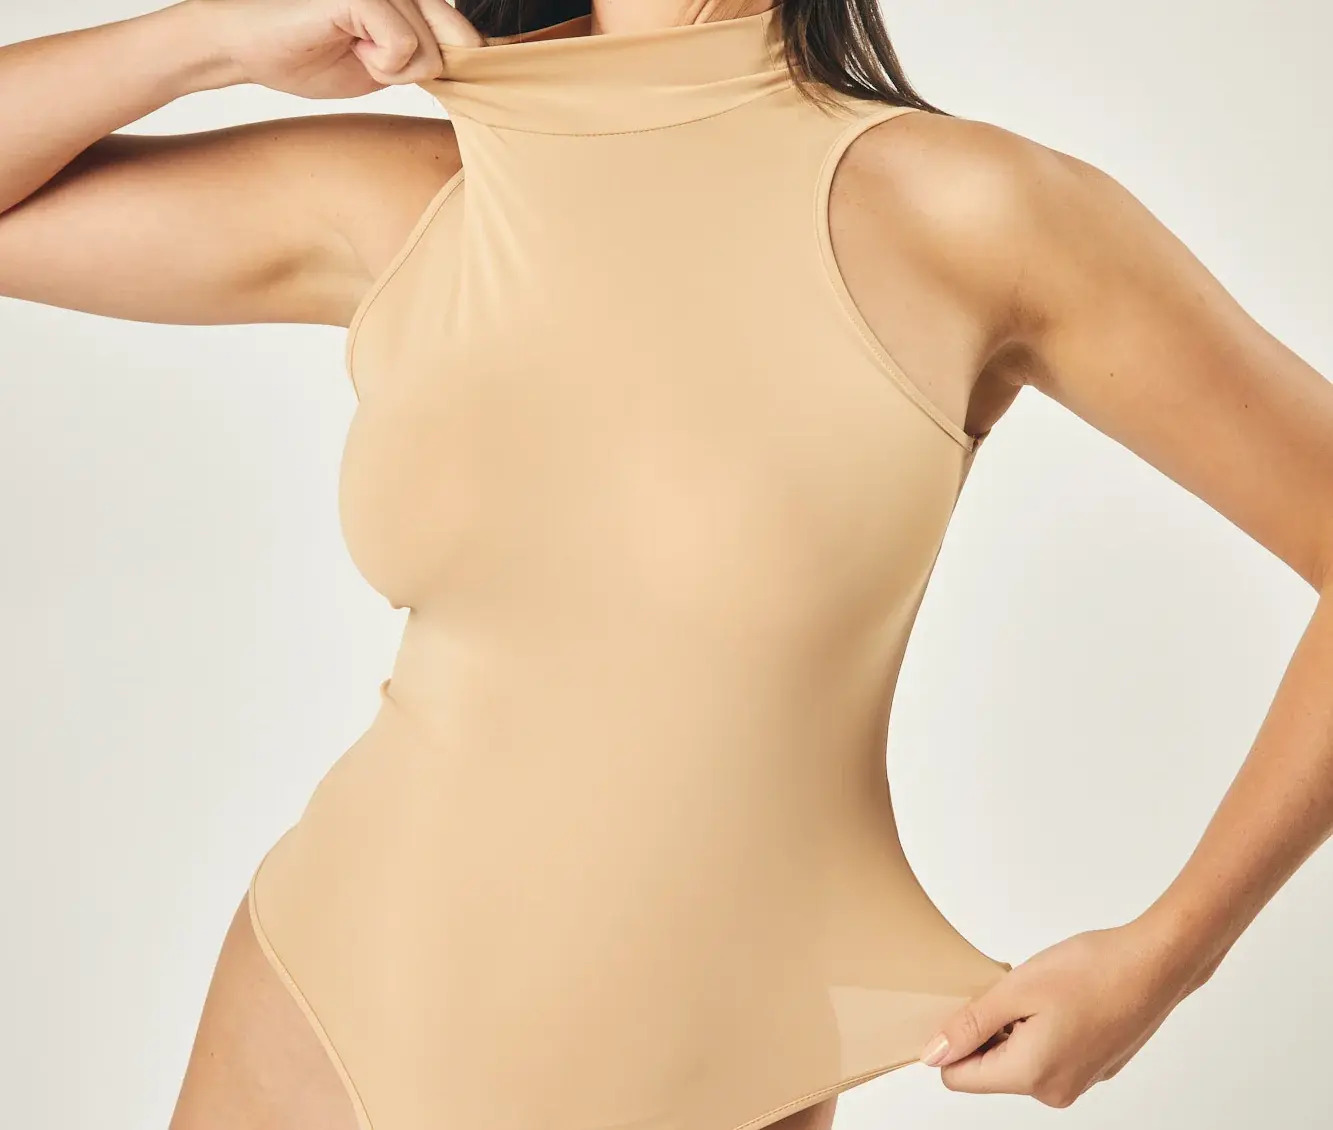
Using Shapewear for Better Silhouette
To enhance the fit of your bodysuit and create a smoother silhouette, consider incorporating shapewear into your outfit. Shapewear is designed to shape and contour your body, providing support and enhancing your curves. Here’s how you can use shapewear for a better silhouette:
- Select the Right Shapewear: Start by choosing shapewear that is suitable for the area you want to target. For example, if you want to smooth your midsection, opt for high-waisted shapewear shorts or briefs. If you want to enhance your bust, consider a shaping camisole or bodysuit with built-in underwire support. Select a size that fits snugly but is still comfortable.
- Put on the Shapewear Properly: When putting on shapewear, take your time to ensure it is properly adjusted. Step into the shapewear and gradually pull it up, making sure it sits snugly against your body. Smooth out any wrinkles or folds and ensure that the shapewear is flat against your skin.
- Wear the Bodysuit Over the Shapewear: Once your shapewear is in place, put on your bodysuit over it. The shapewear will help to create a smoother and more streamlined appearance, while also providing additional support. It can help to smooth out any problem areas and create a more flattering silhouette.
When selecting shapewear, consider the color and thickness of the fabric to ensure it is seamless and doesn’t show through your bodysuit. Additionally, choose shapewear that allows for easy movement and breathability to ensure your comfort throughout the day or evening.
Remember that shapewear is meant to enhance your natural curves and provide support, but ultimately the choice to wear it is up to your personal preference. Experiment with different styles and combinations to find the ones that work best for you and make you feel confident in your bodysuit.
By incorporating shapewear into your outfit, you can achieve a more sculpted and polished look, enhancing the fit and overall appearance of your bodysuit. In the next section, we will discuss how accessorizing can further improve the fit of your bodysuit. Let’s continue our journey towards achieving the perfect-fitting bodysuit!
Accessorizing to Improve the Fit
Accessorizing is another effective way to improve the fit of your bodysuit and create a more stylish and flattering look. By strategically adding accessories, you can draw attention to your best features and enhance the overall fit of your outfit. Here are some tips on how to accessorize to improve the fit:
- Belts: Adding a belt can work wonders in accentuating your waist and creating a more defined shape. Opt for a belt that complements the color and style of your bodysuit. Cinch it at your natural waistline to create an hourglass silhouette.
- Layering: Layering can help create additional structure and enhance the fit of your bodysuit. Consider adding a well-fitted jacket or cardigan that complements the color and style of your bodysuit. This layering technique can provide extra coverage and enhance the overall silhouette.
- Jewelry: Dainty necklaces or statement earrings can draw attention to your face and add a touch of elegance to your bodysuit. These accessories can help to divert attention from any fit issues and add a polished touch to your overall look.
- Tights or Stockings: Wearing tights or stockings can improve the fit of your bodysuit by providing coverage and creating a smoother look. Opt for sheer or opaque tights depending on the occasion and the desired level of coverage.
When accessorizing, make sure to choose pieces that complement your bodysuit while also reflecting your personal style. Experiment with different accessories to see which ones enhance the fit and make you feel confident in your outfit.
Remember that accessorizing is a way to enhance the overall look of your bodysuit, but it should not detract from the fit or comfort. Choose accessories that do not impede movement or create discomfort and prioritize a harmonious balance between style and functionality.
By accessorizing strategically, you can elevate the fit of your bodysuit and create a unique and personalized look. With these techniques, you’ll feel confident and stylish in any outfit combination.
Now that you have learned how to accessorize to improve the fit of your bodysuit, you have a variety of tools at your disposal to create the perfect look. In the next section, we will conclude our discussion and recap the key takeaways. So, let’s wrap up our guide to making a bodysuit fit better!
Conclusion
Finding the perfect fit for a bodysuit may require some adjustments and modifications, but with the right techniques and a little bit of patience, you can achieve a fit that flatters your body shape and enhances your confidence. Throughout this guide, we explored various methods to make a bodysuit fit better.
We began by evaluating the fit of the bodysuit, understanding our body measurements, and identifying the specific fit issues. We learned how to adjust the shoulder straps, take in or let out the bodysuit seams, alter the leg openings, and resize the waistband. These modifications allow for a customized fit that addresses our unique body shape.
Additionally, we discussed enhancing the fit by adding elastic or gripper tape, using shapewear to create a smoother silhouette, and accessorizing to further improve the overall look and feel of the bodysuit.
Remeber, the key to achieving the perfect fit is paying close attention to the details and making gradual adjustments along the way. Take the time to try on the bodysuit regularly, ensuring that each modification brings you closer to a comfortable and flattering fit.
By incorporating these techniques and modifications into your bodysuit fitting process, you can feel confident and comfortable in your outfit choices. Remember to prioritize your own comfort and individual style preferences when making adjustments.
Now that you have the knowledge and tools to make a bodysuit fit better, embrace the process and enjoy the journey of transforming your bodysuit into a garment that flatters your body and reflects your personal style. Show off your confidence and rock that well-fitted bodysuit with pride!