Home>How-to Guides>For Women>How To Make Leather Garters

For Women
How To Make Leather Garters
Modified: August 2, 2023
Learn how to make stylish leather garters for women with our easy step-by-step guide. Create your unique accessory and add a touch of elegance to any outfit.
(Many of the links in this article redirect to a specific reviewed product. Your purchase of these products through affiliate links helps to generate commission for Under-tec.com, at no extra cost. Learn more)
Table of Contents
Introduction
Leather garters are a stylish and versatile accessory that can add a touch of edgy elegance to any outfit. Whether you want to showcase your personal style, complete a costume, or simply add a unique element to your wardrobe, making your own leather garters can be a rewarding and creative endeavor.
These leather straps, traditionally used to hold up stockings, have evolved into a fashionable statement piece for women. From steampunk inspired designs to delicate and feminine styles, leather garters offer endless possibilities for customization.
Creating your own leather garters allows you to express your individuality and experiment with different materials, colors, and embellishments. It also gives you the freedom to personalize the fit and design to suit your preferences.
In this article, we will guide you through the process of making your own leather garters. We will provide step-by-step instructions and share tips for choosing the right materials. Whether you are a seasoned DIY enthusiast or a beginner looking to embark on a creative project, this guide will help you bring your vision to life.
So, grab your creativity and let’s dive into the magical world of leather crafting to create unique and stunning leather garters that will make heads turn.
What are Leather Garters?
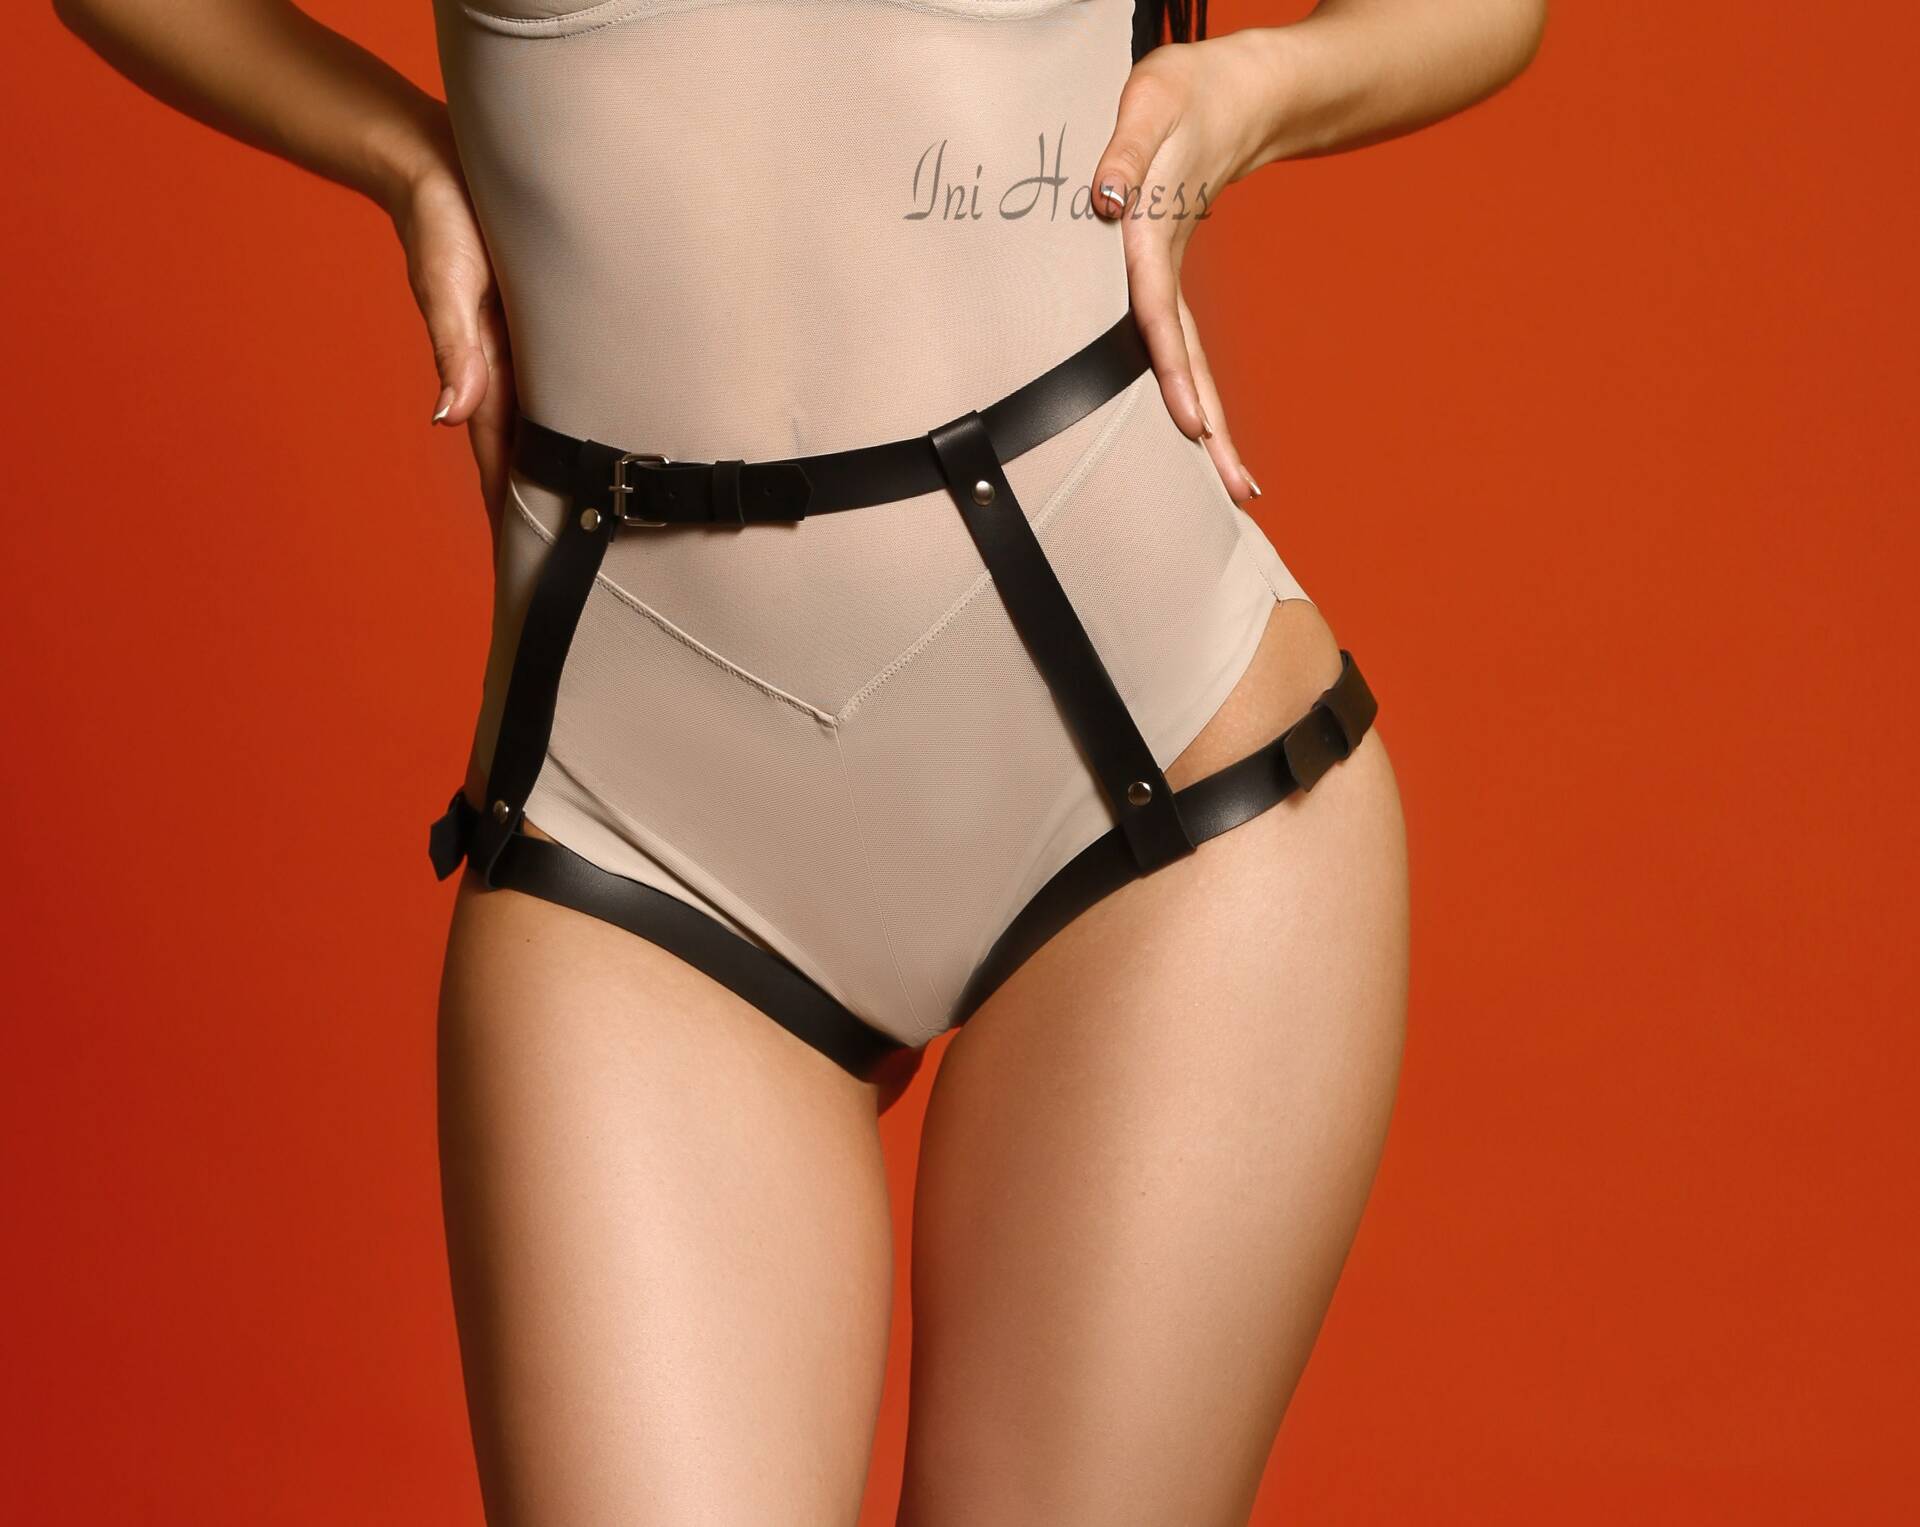
Leather garters are straps or bands made from high-quality leather that are worn around the thigh, just above the knee or lower leg. They are often associated with vintage fashion and have been used historically to hold up stockings, preventing them from slipping down.
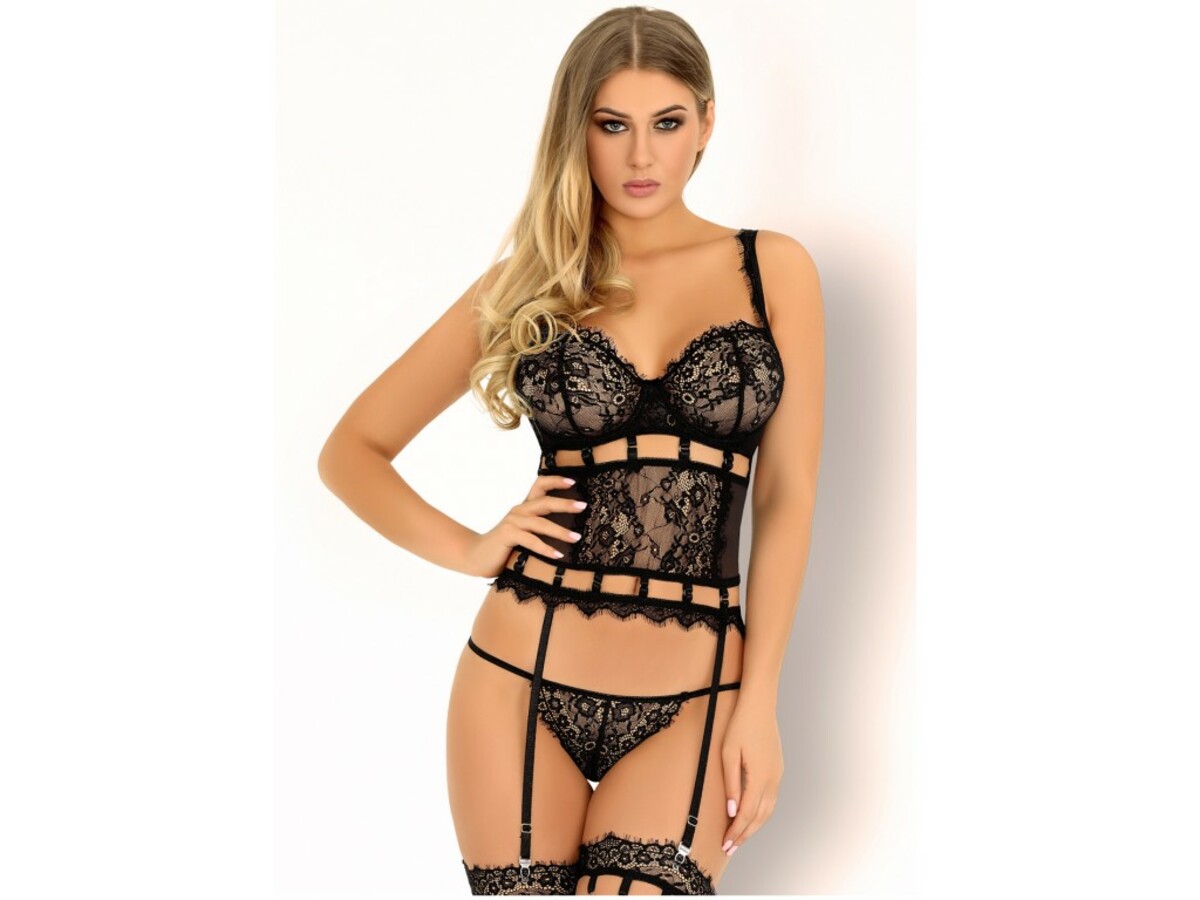
However, in recent years, leather garters have become more than just a practical accessory. They have evolved into a statement piece that adds a touch of sensuality and intrigue to any outfit. From sultry lingerie sets to festival outfits and even everyday wear, leather garters offer a unique way to elevate your style.
The versatility of leather garters allows them to be worn in many different ways. They can be a focal point of an ensemble or a subtle peek of leather peeking out from under a skirt or shorts. They can be paired with stockings, worn over leggings or jeans, or even combined with a sexy body harness to create a daring and alluring look.
Leather garters come in various styles and designs to suit different tastes and occasions. Classic and minimalist designs feature sleek leather bands with minimal adornments, while more elaborate designs may include intricate stitching, metal hardware, or decorative elements such as studs, buckles, or lace-up details.
While traditionally associated with lingerie or boudoir fashion, leather garters have crossed over into mainstream fashion as well. They have become popular accessories in alternative fashion scenes such as goth, punk, and steampunk. Leather garters can also be incorporated into cosplay costumes or themed events to add an extra touch of authenticity.
Whether worn as a playful and seductive addition to a bedroom ensemble or as a bold fashion statement, leather garters exude confidence and style. They are a versatile accessory that can be customized to suit any aesthetic, making them a must-have for anyone looking to add a touch of allure and individuality to their wardrobe.
Materials Needed
Before you begin making your leather garters, it’s important to gather all the necessary materials. Here’s a list of the materials you’ll need:
- High-quality leather: Choose a leather that is thick enough to hold its shape but still flexible enough to comfortably wrap around your thigh. Look for leather in various colors and finishes to match your desired style.
- Measuring tape or ruler: This will help you accurately measure your thigh to ensure the garters fit correctly.
- Scissors or a utility knife: You’ll need these to cut the leather strips to the desired length.
- Leather hole punch or awl: This tool is essential for creating holes in the leather for attaching buckles and adjusters.
- Buckles and adjusters: These hardware components will allow you to adjust the size of the garters and secure them in place. Choose buckles and adjusters that match the style and width of your leather strips.
- Decorative elements: If you want to add a personal touch to your garters, consider embellishments such as studs, grommets, or embroidery thread.
- Edge beveler or sandpaper: This will help smooth and finish the edges of the leather strips for a polished look.
- Leather glue or adhesive: If necessary, you can use leather glue or adhesive to secure any additional decorations or embellishments.
- Optional: Leather conditioner or finisher to protect and enhance the appearance of the leather.
Make sure you have all these materials on hand before you start your project. Having everything ready beforehand will streamline the process and allow you to focus on creating beautiful leather garters.
Step 1: Measuring and Cutting the Leather Strips
The first step in making leather garters is to measure your thigh and cut the leather strips to the appropriate length. Follow these steps:
- Using a measuring tape or ruler, measure the circumference of your thigh where you want the garter to sit. Make sure to measure snugly but not too tight, as you want the garter to be comfortable to wear.
- Once you have the measurement, add a few inches to allow for overlap and adjustability. This will ensure the garter fits well and can be securely fastened.
- With the measurement in mind, cut two leather strips from the chosen leather material. The width of the strips can vary depending on your preference, but a width of 1-1.5 inches is a common choice.
- Using scissors or a utility knife, carefully cut along the measured lines to create two equal-sized leather strips.
It’s important to ensure clean, straight cuts to achieve neat and professional-looking garters. Take your time and use sharp tools for the best results. If needed, you can use a ruler or straight edge to guide your cutting.
Remember, it’s better to have the strips slightly longer than necessary, as you can always trim them later if needed. Once you have measured and cut the leather strips, you are ready to move on to the next step: punching holes for attachment points.
Step 2: Punching Holes
After cutting the leather strips, the next step in making leather garters is to punch holes for attaching the buckles and adjusters. Follow these steps:
- On each end of the leather strips, mark the desired positions for the holes. These marks will indicate where the buckles and adjusters will be attached.
- Using a leather hole punch or awl, carefully create holes on the marked positions. Make sure the holes are evenly spaced and aligned on both ends of the strips.
- The size of the holes should match the size of your buckles and adjusters. Test the fit by inserting the hardware into the holes to ensure they go through easily but are not too loose.
- For a clean and professional-looking finish, you can use a leather hole punch with different hole sizes to create decorative patterns along the length of the leather strips. This step is optional but can add visual interest to your garters.
When punching holes, it’s crucial to be precise and careful. Start with a small hole and gradually enlarge it to the desired size to prevent tearing or damaging the leather. If you don’t have a leather hole punch, an awl can be used to manually create the holes, although it may require more effort.
Remember to position the holes slightly away from the edges to avoid weakening the leather. Leave enough space between the holes to ensure the garters can be adjusted to your desired size comfortably.
Once you have punched the holes, you can move on to the next step: attaching the buckles and adjusters.
Step 3: Attaching Buckles and Adjusters
After punching the holes, it’s time to attach the buckles and adjusters to your leather garters. Follow these steps:
- Beginning with one end of the leather strip, insert one side of the buckle or adjuster through the hole.
- Fold the end of the leather strip over and secure it by stitching or using a leather adhesive. This will create a loop that the buckle or adjuster can slide through.
- Slide the other side of the buckle or adjuster through the loop created by the leather strip.
- Adjust the position of the buckle or adjuster to your desired tightness and insert it through the corresponding hole on the opposite end of the leather strip.
- Repeat this process for the second leather strip, ensuring that the buckles and adjusters are aligned symmetrically.
Take your time to ensure that the buckles and adjusters are securely attached and aligned properly. You can double-check the tightness of the garters by adjusting the buckles and making sure they hold the leather strips in place without being too loose or too tight.
If you prefer a more permanent attachment, you can use a strong adhesive or stitches to secure the ends of the leather strips around the buckles and adjusters. This will provide added durability and strength to your garters.
Once you have successfully attached the buckles and adjusters, you can move on to the next step: adding decorative elements to personalize your leather garters.
Step 4: Adding Decorative Elements
Now that you have the basic structure of your leather garters complete, it’s time to add some personal flair by incorporating decorative elements. Here’s how you can do it:
- If you desire studs, grommets, or other embellishments, mark the positions where you want them on the leather strips.
- Using a leather hole punch or awl, create holes at the marked positions. Make sure the size of the holes matches the size of the studs or grommets you will be using.
- Insert the studs or grommets into the holes and secure them in place using a hammer or the appropriate tool provided with the hardware.
- If you want to add decorative stitching, use a leather needle and waxed thread to sew patterns or designs along the length of the leather strips.
- Be creative with your choice of decorative elements. Consider using lace, ribbons, or charms to enhance the aesthetic appeal of your garters.
When adding decorative elements, remember to keep the overall balance and symmetry of the garters in mind. You want the additional embellishments to enhance the design without overwhelming the overall look.
Before finalizing the decoration process, it’s important to step back and assess the overall appearance of your leather garters. Make sure the decorative elements are aligned properly, and take the time to adjust and refine as needed.
Once you are satisfied with the decorative elements, you are ready to move on to the next step: smoothing and finishing the edges of the leather strips.
Step 5: Smoothing and Finishing the Edges
After adding decorative elements, it’s important to smooth and finish the edges of the leather strips for a polished and professional look. Follow these steps:
- Using an edge beveler or sandpaper, carefully smooth the edges of the leather strips. This step helps remove any roughness or sharp edges.
- Hold the edge beveler at a slight angle against the edge of the leather and gently push it along the entire length. This will create a beveled edge, giving it a more refined appearance.
- If you do not have an edge beveler, you can achieve a similar effect by folding a piece of sandpaper and using it to sand down the edges.
- Continue smoothing and beveling the edges until you are satisfied with the result. Pay attention to any areas that may need more attention to ensure a consistent and clean finish.
Smoothing and finishing the edges of the leather strips not only improves the aesthetic appearance, but it also ensures a comfortable and irritation-free wearing experience. It removes any rough or uneven surfaces that could potentially cause discomfort against your skin.
Take your time with this step and be patient. It may require some trial and error to achieve the desired smoothness and consistency in the edge finishing.
Once you have completed this step, your leather garters are almost ready for wear. But before that, there is one final step: making any necessary adjustments and ensuring the garters fit perfectly.
Step 6: Final Adjustments and Fitting
With the leather garters almost complete, it’s time to make any final adjustments and ensure that they fit perfectly. Follow these steps:
- Put on the garters and adjust the buckles and adjusters to your desired fit. Make sure they are secure but still comfortable.
- Check the length of the garters to ensure they sit at your desired position on your thigh. If necessary, trim the leather strips to achieve the desired length, keeping in mind that it’s always better to err on the side of caution and start with slightly longer strips.
- Once you have made any necessary adjustments, wear the garters again to ensure that they feel comfortable and secure. Move around, sit, and walk to test their stability and adjustability.
- Take a final look at the overall appearance and fit of the garters. Make any small tweaks or adjustments as needed to achieve your desired look and fit.
It’s important to take the time to properly fit and adjust the garters to your unique body shape and size. This will ensure that they stay in place and provide a comfortable wearing experience.
Remember that minor adjustments and refinements may be needed as you try on and wear the garters. Don’t be afraid to make those adjustments until you are completely satisfied.
Once you are happy with the fit and appearance of the garters, you can confidently wear them with pride and showcase your unique style.
Conclusion
Congratulations on creating your own leather garters! By following the step-by-step instructions in this guide, you have learned how to make a stylish and personalized accessory that adds a touch of elegance and allure to any outfit.
Through measuring and cutting the leather strips, punching holes, attaching buckles and adjusters, adding decorative elements, and smoothing the edges, you have created a unique and eye-catching piece of fashion.
By customizing the design, incorporating your preferred materials, and adding personal touches, you have made your leather garters a true reflection of your style and creativity.
Now that you have completed your leather garters, it’s time to confidently wear them and embrace the confidence and individuality they bring to your fashion choices. Whether you pair them with stockings, leggings, jeans, or even as a standalone accent, your leather garters will be sure to turn heads and make a statement.
Remember, making leather garters is just the beginning of your DIY journey. Now that you have mastered the basics, feel free to experiment with different materials, colors, and designs to create even more unique pieces. Let your imagination run wild and unleash your inner creativity.
So go ahead, enjoy your newly crafted leather garters, and revel in the satisfaction that comes with creating something beautiful and personally meaningful. Embrace your individual style and continue to explore the world of DIY fashion and accessories. Happy garter making!