Home>How-to Guides>For Men>How To Make Boy Doll Boxer Shorts
For Men
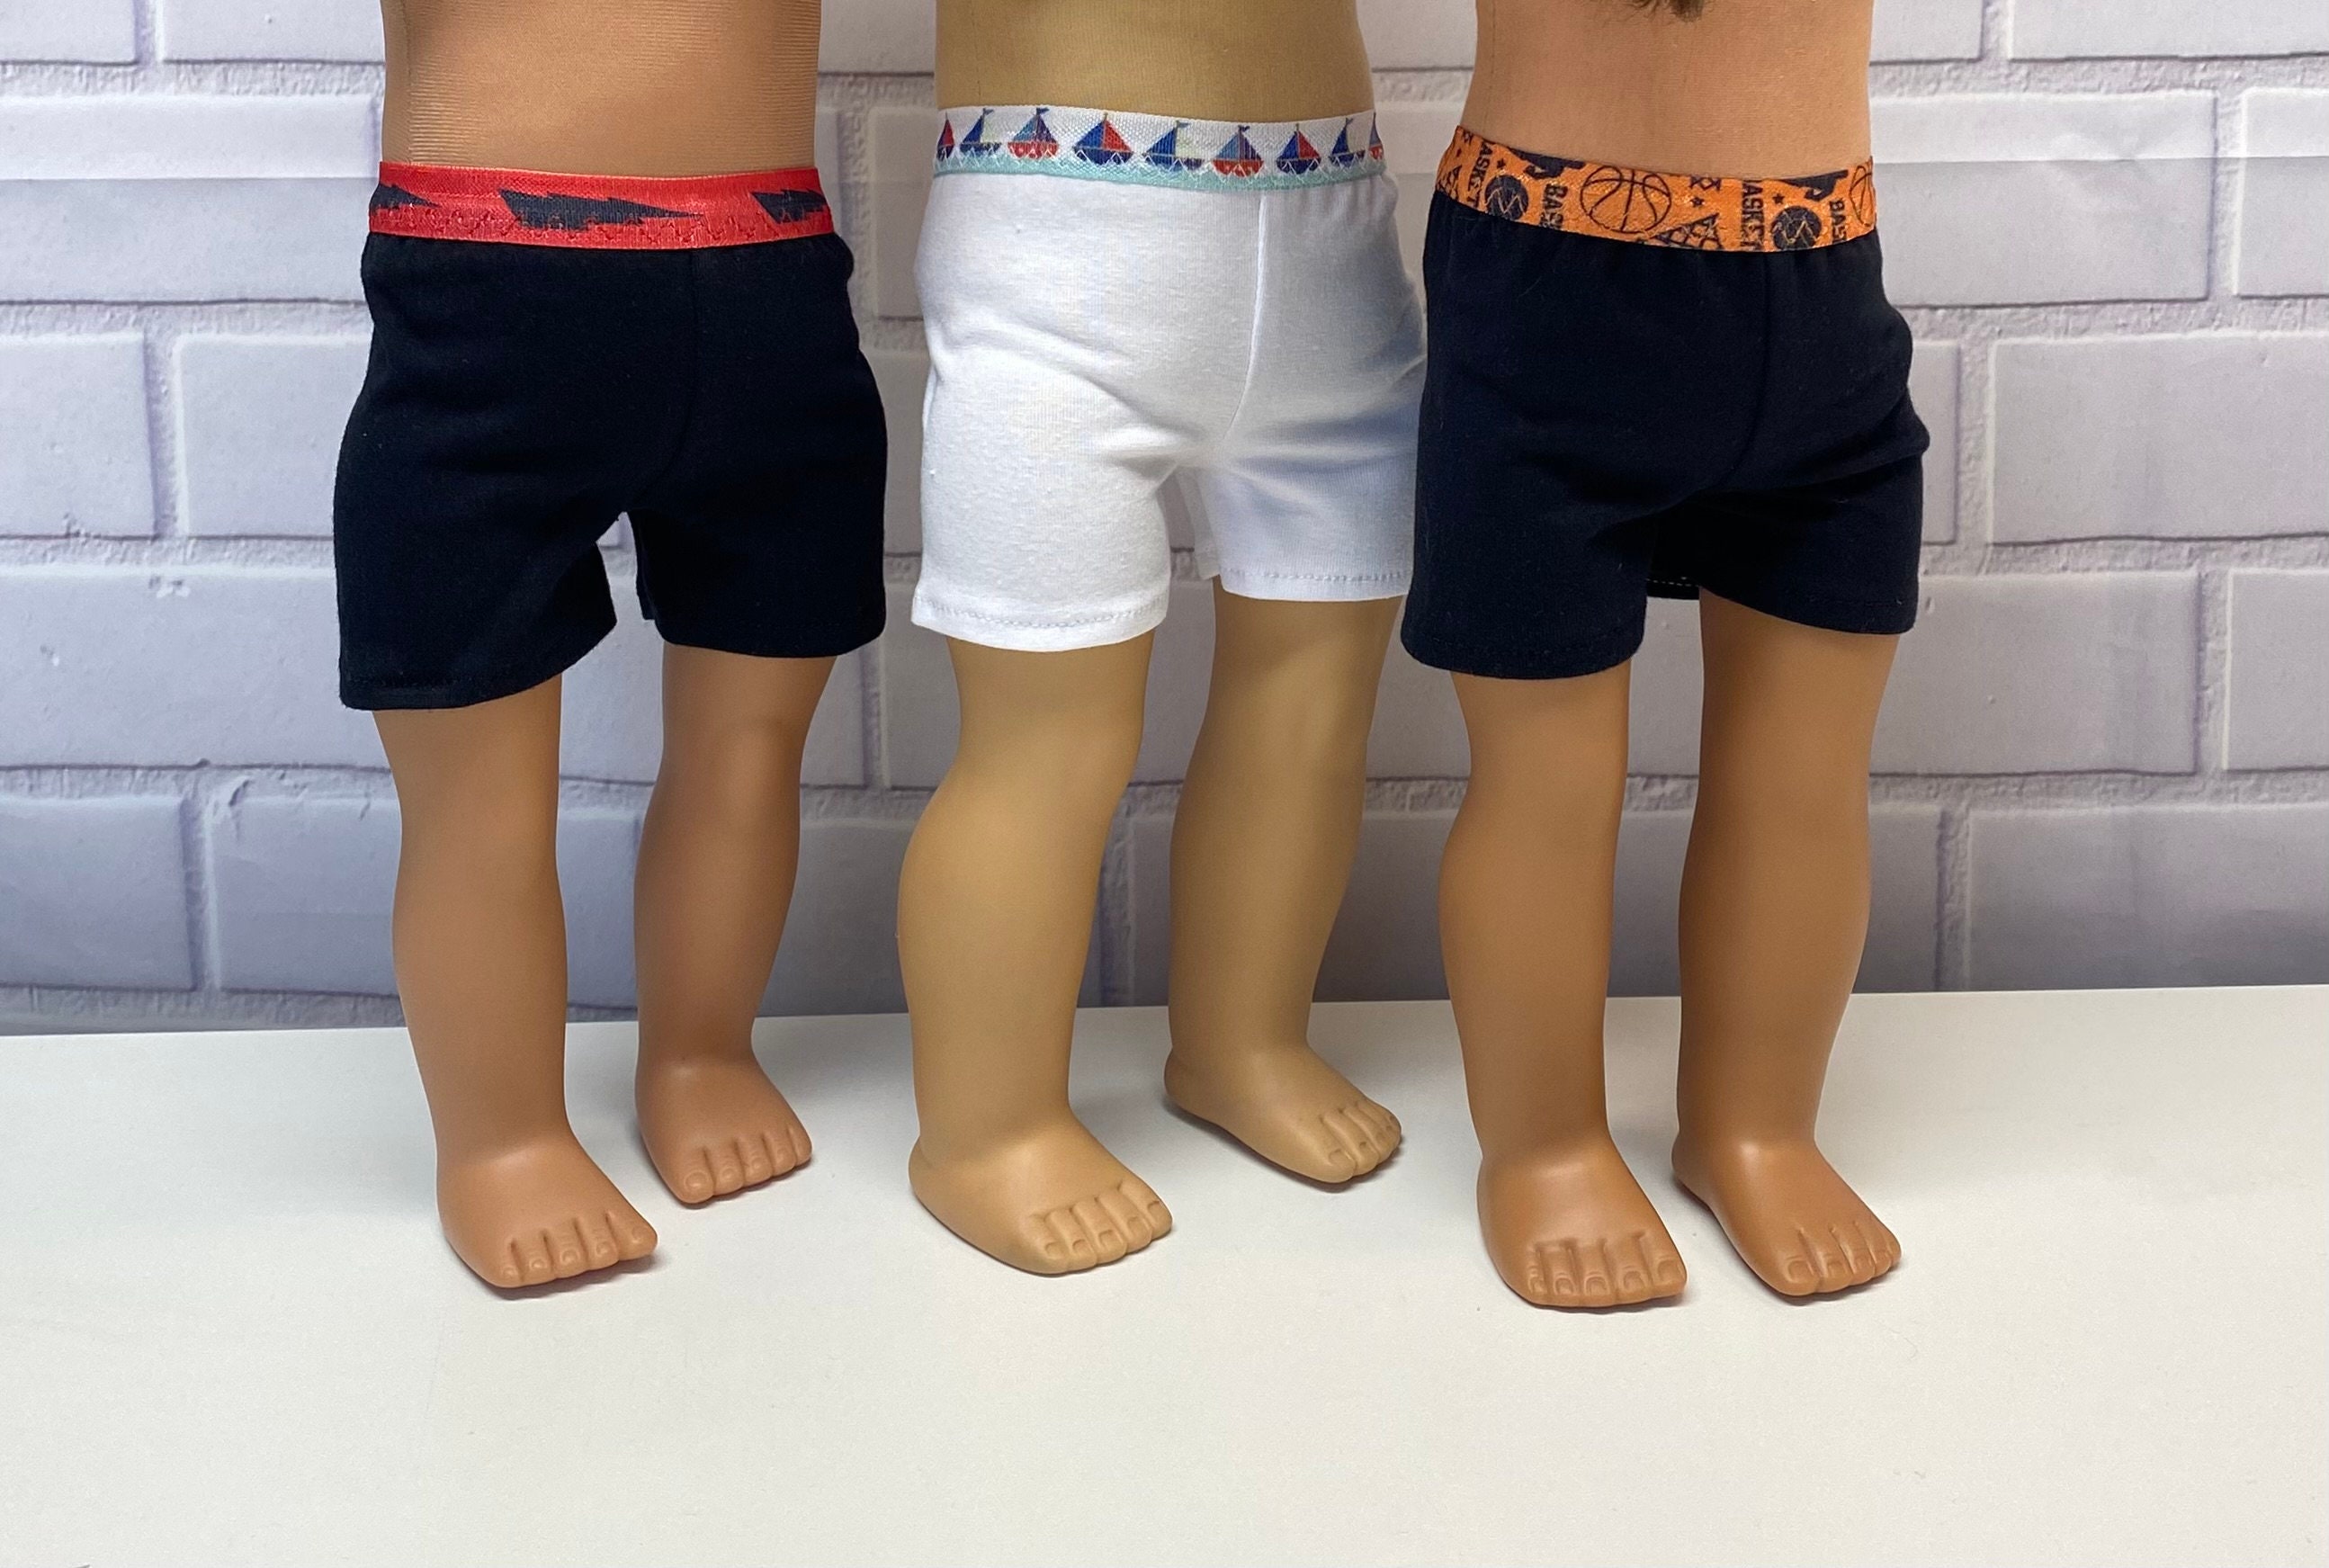
How To Make Boy Doll Boxer Shorts
Modified: August 2, 2023
Learn how to make stylish boxer shorts for men with this step-by-step tutorial. Perfect for DIY enthusiasts looking to upgrade their wardrobe.
(Many of the links in this article redirect to a specific reviewed product. Your purchase of these products through affiliate links helps to generate commission for Under-tec.com, at no extra cost. Learn more)
Table of Contents
Introduction
Welcome to the wonderful world of sewing! Whether you’re an experienced seamstress or a complete novice, making your own boxer shorts can be a fun and rewarding project. Not only do you get to unleash your creativity, but you also get a comfortable and personalized pair of boxer shorts in the end. In this article, we will guide you step-by-step on how to make boy doll boxer shorts.
Dressing up boy dolls can be just as exciting as dressing up their female counterparts. By customizing the clothes, you can give your dolls a unique style that reflects their personalities. And what better way to start than with a pair of trendy and stylish boxer shorts?
Whether you’re making the boxer shorts for your child’s doll, as a gift, or simply for your own enjoyment, we’ve got you covered. All you need is some basic sewing skills, a few materials, and a dash of creativity. So let’s dive in and get started!
Materials Needed
Before we begin, let’s gather all the necessary materials for making the boy doll boxer shorts. Having everything prepared beforehand will ensure a smooth and hassle-free sewing process. Here is a list of materials you will need:
- Fabric: Choose a soft and breathable fabric like cotton or flannel. You will need about 1/4 yard of fabric, depending on the size of the doll.
- Elastic: Select a narrow elastic band that can comfortably fit around the doll’s waist. Approximately 1/4 inch wide elastic should do the trick.
- Thread: Use a thread that matches the color of your fabric. This will help create a seamless and polished look.
- Sewing machine: It is recommended to use a sewing machine for this project, but if you don’t have one, you can hand sew the boxer shorts instead.
- Pins: These will be used to hold the fabric pieces together while sewing.
- Scissors: Make sure you have a good pair of fabric scissors for cutting the fabric accurately.
- Measuring tape: Essential for taking accurate measurements of the doll’s waist and leg length.
- Iron: You will need an iron to press the fabric and create crisp edges.
- Buttons or embellishments (optional): If you want to add extra flair to the boxer shorts, you can include buttons or other decorative elements.
Having these materials ready will ensure that you have everything you need to complete the project without any interruptions. Take a few moments to gather these supplies, and once you’re all set, we can move on to the next step: measuring and cutting the fabric.
Step 1: Measuring and Cutting the Fabric
The first step in making the boy doll boxer shorts is to measure the doll’s waist and leg length. This will ensure a perfect fit when it comes to sewing the fabric. Here’s how you can do it:
- Measure the doll’s waist: Carefully wrap the measuring tape around the doll’s waist, making sure it sits comfortably. Take note of this measurement.
- Measure the leg length: Determine how long you want the boxer shorts to be. Measure from the doll’s waist down to the desired length for the legs. This will be the length of the fabric pieces.
Now that you have the necessary measurements, it’s time to cut the fabric for the boxer shorts. Here’s what you need to do:
- Using the measurements you took earlier, mark and cut out two rectangular pieces of fabric. These will be the front and back panels of the boxer shorts.
- Make sure to add an extra 1/4 inch on each side of the fabric for seam allowances.
- If you want to add a fly opening, you can also cut out a smaller rectangular piece for the front panel.
Once you have cut the necessary pieces, it’s a good idea to iron the fabric to remove any wrinkles and ensure a smooth sewing process. Your fabric is now ready for the next step: sewing the front panel.
Step 2: Sewing the Front Panel
Now that you have the fabric pieces cut out, it’s time to start sewing the boy doll boxer shorts. We’ll begin by sewing the front panel. Follow these steps:
- If you’re adding a fly opening, fold and press the edges of the smaller rectangular piece that you cut out earlier.
- Align the folded edges of the smaller piece with the top edge of the larger rectangular piece (the front panel), right sides together. Pin them in place.
- Using a sewing machine or hand stitching, sew along the pinned edges to attach the smaller piece to the front panel. Remember to backstitch at the beginning and end to secure the stitches.
- Once the front panel is sewn together, press the seam allowances open or to one side using an iron. This will create a clean and professional finish.
Now that you have completed the sewing of the front panel, it’s time to move on to the next step: sewing the back panel. Stay tuned for step 3!
Step 3: Sewing the Back Panel
With the front panel sewn, it’s time to move on to sewing the back panel of the boy doll boxer shorts. This step will bring the shorts to life. Follow these instructions:
- Take the larger rectangular piece of fabric (the back panel) and fold the top edge down by 1/2 inch. Press the fold with an iron to create a clean edge.
- Next, fold the same edge down by another 1/2 inch and press it again. This will create the casing for inserting the elastic waistband.
- Secure the folded edge in place by sewing a straight stitch along the bottom of the casing. Make sure to leave a small opening to insert the elastic later.
- Once the casing is sewn, fold the fabric in half, right sides together, aligning the side seams.
- Pin the side seams together and sew along the pinned edges, starting from the bottom of the shorts and ending at the top of the casing. Remember to backstitch at the beginning and end.
- Press the side seams open or to one side using an iron.
With the back panel sewn, the boxer shorts are starting to take shape. In the next step, we will add the waistband. Keep reading to find out how!
Step 4: Attaching the Waistband
Attaching the waistband is an important step in ensuring a comfortable fit for the boy doll boxer shorts. Follow these steps to complete this stage of the sewing process:
- Measure the doll’s waist and cut a piece of elastic that is slightly smaller than the waist measurement. This will ensure a snug fit without being too tight.
- Thread the elastic through the opening in the waistband casing that you left earlier, using a safety pin or a bodkin.
- Once the elastic is threaded through, make sure the ends of the elastic are secure and overlap them by about 1/2 inch.
- Sew the ends of the elastic together securely, either by hand stitching or using a sewing machine. Make sure to reinforce the stitching to prevent the elastic from coming undone.
- Once the elastic is securely attached, sew the small opening in the waistband casing closed to complete the waistband.
With the waistband attached, the boxer shorts are almost complete. In the next step, we will add some finishing touches to give them a polished look. Stay tuned!
Step 5: Hemming the Bottom
Now that the waistband is attached, it’s time to give the boy doll boxer shorts a neat and professional finish by hemming the bottom edge. Follow these steps to complete this final sewing step:
- Turn the boxer shorts inside out and fold the bottom edge up by 1/2 inch.
- Press the fold with an iron to create a crease along the edge.
- Fold the fabric up again by another 1/2 inch to hide the raw edge, and press it again.
- Pin the folded hem in place to keep it secure and prevent it from shifting while sewing.
- Using a sewing machine or hand stitching, sew a straight stitch along the folded hem, ensuring that you catch both layers of fabric. Remember to backstitch at the beginning and end.
- Remove the pins and turn the boxer shorts right side out.
With the bottom edge hemmed, your boy doll boxer shorts are now finished! However, if you’d like to add some extra flair, you can move on to the next step and add some finishing touches to personalize the shorts. Keep reading to find out more!
Step 6: Adding Finishing Touches
Now that the basic construction of the boy doll boxer shorts is complete, it’s time to add some finishing touches to make them truly unique. Here are a few ideas to personalize your creation:
- Decorative Buttons: Sewing small buttons along the fly opening or on the front panel can add a stylish touch to the boxer shorts. Choose buttons that complement the fabric and enhance the overall look.
- Embroidery: If you have embroidery skills or a sewing machine with embroidery capabilities, you can add some creative designs to the boxer shorts. Consider stitching the doll’s initials, a fun pattern, or any other desired embellishments.
- Ribbons or Bows: Attach small ribbons or bows to the waistband or sides of the boxer shorts for a cute and feminine look. Coordinate the color and style of the ribbons with the fabric for a harmonious finish.
- Contrasting Trim: Adding a contrasting trim along the hems or waistband can create visual interest and elevate the design of the boxer shorts. Experiment with different colors and textures to find the perfect combination.
Remember, these finishing touches are optional and depend on your personal preference and the style you want to achieve with the boxer shorts. Get creative and have fun with it!
Once you’re satisfied with the finishing touches, your boy doll boxer shorts are ready to be worn by your doll. Admire your handiwork and enjoy the satisfaction of creating a one-of-a-kind garment!
Now that you know how to make boy doll boxer shorts, you can explore various fabric choices, patterns, and designs to create a wardrobe full of fashionable and trendy options for your doll. Happy sewing!
Conclusion
Congratulations! You have successfully learned how to make boy doll boxer shorts. By following the step-by-step instructions in this guide, you have created a personalized and stylish garment for your doll. Sewing your own doll clothes allows for creativity, customization, and a sense of accomplishment.
Throughout this process, we covered important steps such as measuring and cutting the fabric, sewing the front and back panels, attaching the waistband, hemming the bottom, and adding finishing touches. Each step plays a vital role in creating a well-fitted, comfortable, and stylish pair of boxer shorts that your doll will love.
Remember to gather all the necessary materials and take precise measurements to ensure a perfect fit. Don’t be afraid to unleash your creativity by adding embellishments such as buttons, embroidery, ribbons, or contrasting trim to make the boxer shorts truly unique.
By sewing clothes for your boy dolls, you can expand their wardrobe and give them a personalized touch that reflects their individuality. It’s also a great way to practice and improve your sewing skills.
We hope this guide has inspired you to dive into the world of doll clothes sewing. With the knowledge and skills you have gained, you can now continue to explore and create a variety of clothing styles for your boy dolls.
So go ahead, grab your fabric and sewing machine, and let your creativity soar as you embark on this delightful sewing journey. Happy sewing!