Home>Women's Underwear>Bras>How To Draw A Bra
Bras
How To Draw A Bra
Modified: August 2, 2023
Learn how to draw bras and create stunning lingerie designs with this step-by-step guide. Perfect for artists and fashion enthusiasts.
(Many of the links in this article redirect to a specific reviewed product. Your purchase of these products through affiliate links helps to generate commission for Under-tec.com, at no extra cost. Learn more)
Table of Contents
Introduction
When it comes to drawing, mastering the art of illustrating clothing and accessories can take your creativity to the next level. One such item that can be challenging to draw but offers a unique opportunity for artistic expression is a bra. Whether you’re creating fashion designs, studying anatomy, or simply honing your drawing skills, learning how to draw a bra can add depth and realism to your artwork.
This step-by-step guide will walk you through the process of drawing a bra, from gathering your materials to adding the final touches. By following these instructions and incorporating your own personal style and creativity, you will be able to create a realistic and visually appealing representation of a bra.
It’s important to note that drawing a bra requires attention to detail and an understanding of its structure. By breaking down the drawing process into manageable steps, you can gradually build up the intricacies of the bra while maintaining accuracy. So, grab your sketchbook, pencils, and imagination, and let’s get started!
Step 1: Gather your materials
Before you begin drawing a bra, it’s essential to gather the necessary materials. Having the right tools enables better accuracy and control over your artwork. Here’s a list of items you’ll need:
- Pencil: Use a pencil with a softer lead (such as a 2B or 4B) to create preliminary sketches and lighter lines for the initial stages of drawing.
- Eraser: A kneaded eraser or a soft eraser is ideal for making corrections and lightening lines without damaging the paper.
- Sketchbook or drawing paper: Choose a quality sketchbook or drawing paper that can handle your preferred drawing medium.
- Ruler: A ruler will help you maintain straight and even lines while drawing the bra’s straps and band.
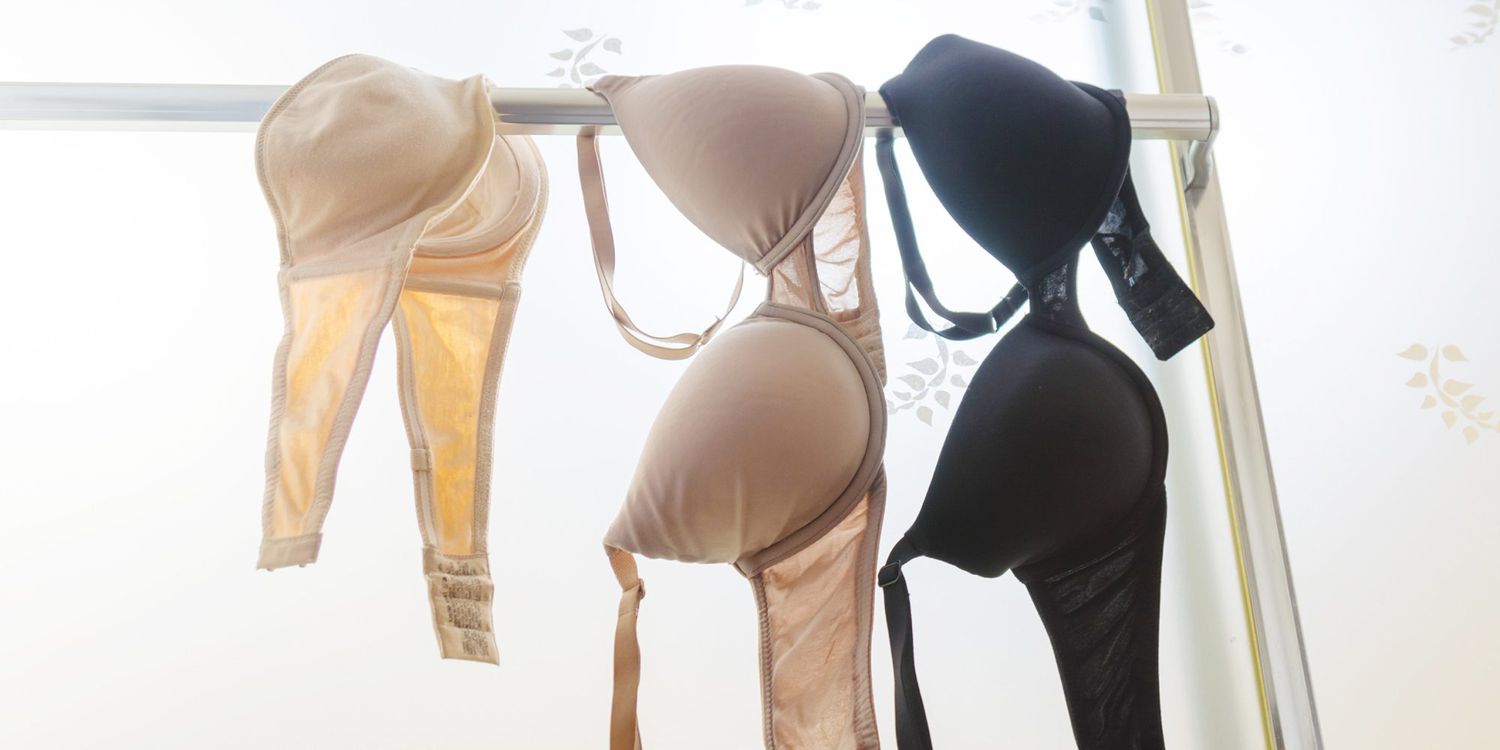
- Reference images: Gather a collection of reference images depicting various styles of bras. These references will assist you in understanding the different elements and structures of a bra.
Once you have gathered all your materials, find a quiet and well-lit space where you can comfortably work on your drawing. Ensure that your workspace is clean and clutter-free, allowing you to focus solely on your artwork.
Remember, gathering the appropriate materials sets you up for success by providing you with the necessary tools to bring your vision to life. Now that you have everything you need, let’s move on to the next step: creating the basic outline of the bra.
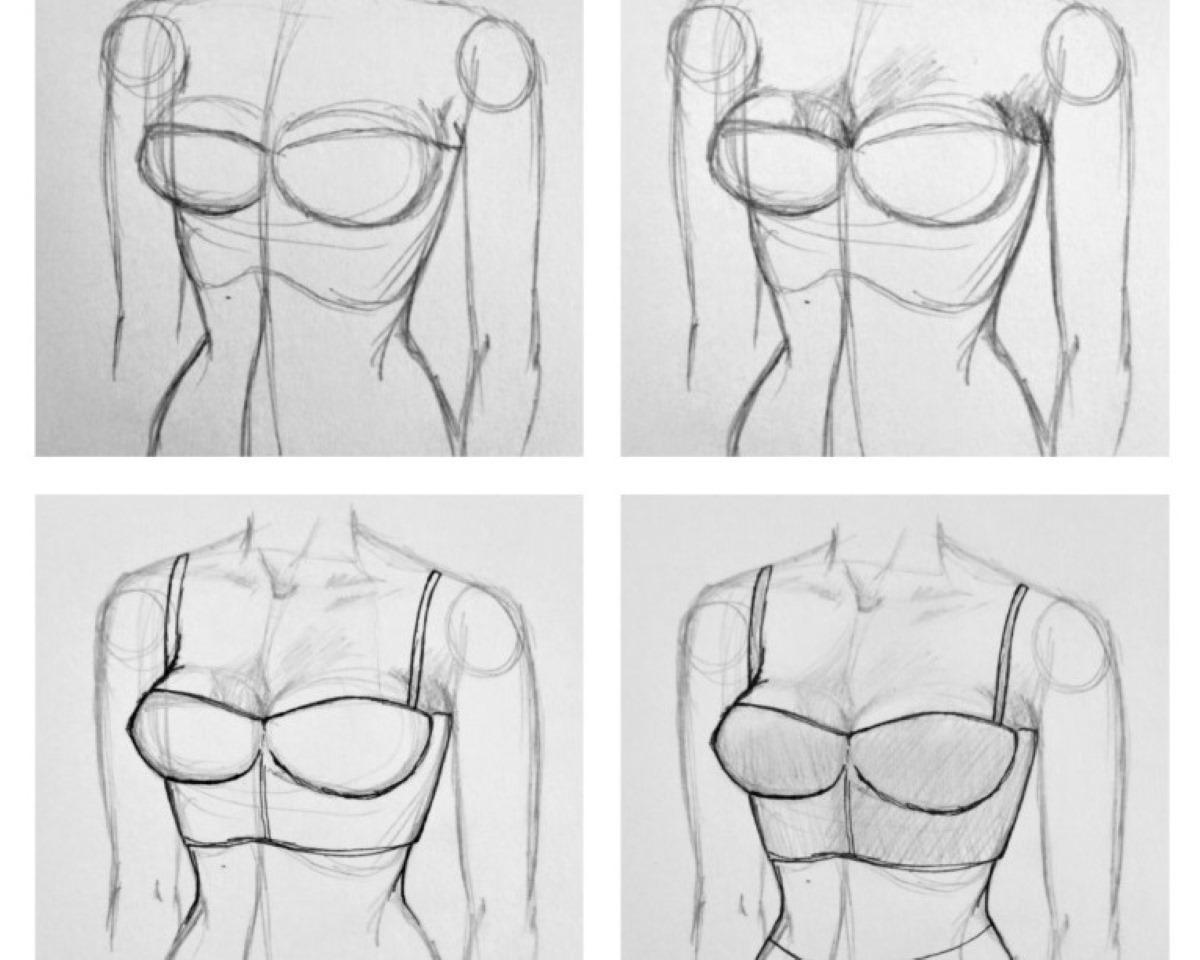
Step 2: Start with the basic outline
Now that you have your materials ready, it’s time to start drawing the basic outline of the bra. This step will establish the foundation for the rest of your drawing. Follow these steps to create a solid framework:
- Begin by lightly sketching the general shape of the bra cups. Start with two curved lines that face each other, indicating the left and right sides of the cups. Take your time to ensure that the lines are symmetrical and proportionate.
- Next, draw a line across the bottom of the cups to represent the band. The band should follow the natural curve of the cups and connect them.
- Once you have the cups and band in place, begin refining the outline. Use slightly darker lines to define the edges of the cups and the band. Pay attention to the curves and contours, making sure they flow smoothly.
- At this stage, you can also add small details, such as the center seam of each cup or any decorative elements on the band. Keep the lines gentle and subtle, as these details will be further developed in later steps.
It’s important to remember that the bra outline will vary depending on the style you’re drawing. Some bras may have balconette cups, while others may have plunge or sports-style cups. Refer to your reference images and adjust the shape and size of the cups accordingly.
Once you are satisfied with the basic outline, carefully erase any unnecessary guidelines and lightly shade the areas of the cups and band. This shading will help add dimension to your drawing and make it easier to visualize the final result.
With the basic outline in place, you’ve laid the groundwork for the intricate details that will bring your bra drawing to life. Now, let’s move on to the next step: adding details to the cups.
Step 3: Add details to the cups
Now that you have the basic outline of the bra in place, it’s time to add more details to the cups. This step will give your drawing depth and realism. Follow these steps to enhance the appearance of the cups:
- Start by adding the underwire to the bottom of each cup. Draw a curved line along the lower edge of each cup, indicating the location of the underwire. Make sure the lines follow the contour of the cups and are evenly spaced.
- Next, add the seams and stitching detail. Draw small curved lines along the cups, representing the seams where the fabric of the bra is stitched together. Remember to keep the lines soft and subtle, as they should blend with the overall design.
- Now, focus on the shape and texture of the cups. Depending on the style of the bra, it may have molded or unpadded cups. Use shading techniques to create the illusion of depth and highlight the curves and contours of the cups.
- If the bra has lace or other decorative elements on the cups, carefully add those details. Pay attention to the intricate patterns and textures, using light, delicate strokes to draw the lace or embellishments.
As you add these details, regularly refer to your reference images to ensure accuracy and realism. Take your time and observe the subtle nuances of the bra’s design. Remember, the goal is to capture the essence of the bra while infusing your unique style and interpretation.
Once you’ve added the necessary details to the cups, step back and assess your drawing. Make any necessary adjustments, ensuring that the cups are proportionate and symmetrical. At this point, your bra drawing is starting to take shape.
Now that you have added details to the cups, it’s time to move on to the next step: drawing the straps and band.
Step 4: Draw the straps and band
With the cups of the bra taking shape, it’s time to focus on drawing the straps and band. The straps and band play a crucial role in providing support and structure to the bra. Follow these steps to draw them accurately:
- Start by drawing the shoulder straps. Extend the straps from the top corners of each cup and draw them diagonally towards the shoulder area. Keep in mind that the thickness and width of the straps can vary depending on the style of the bra. Use a ruler or your artistic judgment to ensure the straps are even and symmetrical.
- Next, draw the back straps. Extend two lines from the outer edges of the band, curving them towards the back. These lines represent the back straps that secure the bra in place. Again, maintain symmetry and proportion as you draw these lines.
- Now, it’s time to focus on the band. Draw a curved line parallel to the bottom edge of the cups, connecting the back straps. The band should have a smooth and gradual curve that hugs the body. Pay attention to the tension and fit of the band, as it determines the comfort and support provided by the bra.
- Add any additional details, such as hooks or closures on the band, using small intersecting lines or other design elements. These details enhance the overall appearance and realism of the bra.
As you draw the straps and band, consider the fabric or material of the bra. This will influence how the straps and band fold, drape, or stretch. Use shading techniques to create the illusion of texture and depth, emphasizing the three-dimensional aspect of the bra.
Once you’re satisfied with the straps and band, take a moment to step back and assess your drawing. Make any necessary adjustments to ensure that the proportions and positioning of the straps and band are accurate and visually appealing.
Now that you have drawn the straps and band, your bra drawing is almost complete! Let’s move on to the final step: refining and adding the final touches.
Step 5: Refine and add final touches
At this stage, your bra drawing is almost complete. It’s time to refine any rough lines, add final details, and make any necessary adjustments to bring your artwork to life. Follow these steps to add the finishing touches:
- Review your drawing and identify any areas that need refinement. Use an eraser to carefully erase or lighten any unwanted lines or smudges. Take your time to achieve clean and crisp lines throughout the drawing.
- Pay attention to the shading and highlighting on the cups, straps, and band. Use your pencil to add depth and dimension by creating subtle gradations of light and shadow. Consider the lighting direction and the fabric’s properties to determine where shading should be applied.
- Refine the details of the lace, stitching, or any other decorative elements. Take a closer look at your reference images and add intricate patterns or textures to enhance the bra’s design. Use small, precise strokes to capture the details accurately.
- Evaluate the overall composition of your drawing. Consider the balance and placement of the various elements. Make any necessary adjustments to ensure that the bra appears realistic and visually appealing.
As you make these final refinements, don’t be afraid to add your own touch of creativity. Feel free to experiment with different techniques or styles that align with your artistic vision. Remember that your drawing should reflect your unique interpretation and style.
Once you’re satisfied with the refinements and final touches, step back and admire your completed bra drawing. Take a moment to appreciate the effort and skill you’ve put into creating such an intricate and detailed artwork.
Now that you have successfully drawn a bra, you can apply your newfound knowledge and techniques to further explore the world of fashion illustration, figure drawing, or any other creative endeavor that involves depicting clothing and accessories.
Congratulations on completing your bra drawing! Continue to practice and refine your skills, and soon you’ll be able to draw bras of various styles and designs with confidence and ease.
Conclusion
Drawing a bra can be a challenging yet rewarding artistic endeavor. By following the step-by-step process outlined in this guide, you have learned how to draw a bra with accuracy, attention to detail, and a touch of creativity.
Starting with gathering your materials, you ensured that you had the necessary tools at hand to create a realistic and visually appealing bra drawing. Moving on to the basic outline, you established the foundation for the cups, straps, and band. Adding details to the cups brought depth and realism to your artwork, while drawing the straps and band provided the necessary structure and support to the bra.
Lastly, refining and adding final touches brought your bra drawing to life. It allowed you to add intricate details, shading, and highlights to enhance the overall composition. Through this process, you’ve not only learned how to draw a bra but also developed a deeper understanding of different styles and elements within bra design.
Remember, practice is key in improving your artistic skills. As you continue to draw, explore different bra styles, experiment with various textures and materials, and incorporate your unique style and creativity. Embrace the challenges and enjoy the process of creating beautiful and realistic bra drawings.
Now, armed with the knowledge and techniques you’ve gained, you can confidently tackle drawing bras in your future artistic endeavors. So, grab your sketchbook, sharpen your pencils, and let your imagination take flight as you create stunning illustrations of bras and other fashion accessories.