Home>How-to Guides>For Women>How To Knit Bra
For Women
How To Knit Bra
Modified: August 2, 2023
Learn how to knit bras for women with our step-by-step guide. Create comfortable and stylish undergarments with ease and gain a new skill.
(Many of the links in this article redirect to a specific reviewed product. Your purchase of these products through affiliate links helps to generate commission for Under-tec.com, at no extra cost. Learn more)
Table of Contents
Introduction
The art of knitting has been practiced for centuries, allowing people to create beautiful and functional garments. From cozy sweaters to warm scarves, the possibilities are endless. But did you know that you can also use your knitting skills to create unique and comfortable undergarments? In this article, we will guide you through the process of knitting your very own bra.
Knitting a bra may seem like a daunting task, but with the right materials, patterns, and techniques, you can create a bra that fits perfectly and provides the support you need. Whether you are a beginner or an experienced knitter, this project will challenge your skills and allow you to explore new possibilities.
Creating your own bra has several advantages. Firstly, it allows you to customize the design and fit according to your preferences and body shape. You can choose from a variety of yarns, colors, and stitch patterns to create a bra that is unique to you. Secondly, knitting your own bra can be a sustainable and cost-effective choice. Instead of buying mass-produced bras that may not fit well or have limited design options, you can create a one-of-a-kind piece that reflects your personal style and values.
Before we dive into the knitting process, let’s gather all the materials you will need to get started.
Materials Needed
Before you begin knitting your own bra, it’s important to have the right materials on hand. Here’s a list of the essentials you’ll need:
- Yarn: Choose a yarn that is soft, lightweight, and has some stretch to it. Opt for a yarn that is specifically designed for undergarments, as it will be more comfortable against the skin. Consider the color and texture of the yarn to match your personal style.
- Knitting Needles: Select needles that match the recommended gauge for the yarn you have chosen. Circular needles in the appropriate size are recommended for knitting the cups, as they can hold a large number of stitches. Double-pointed needles or straight needles can be used for smaller sections, such as the straps.
- Tape Measure: A tape measure is essential for taking accurate measurements of your body to ensure proper fit. Measure your underbust, bust, and desired cup size to determine the number of stitches and rows needed.
- Stitch Markers: These small plastic or metal rings are used to mark specific stitches or sections in your knitting. They are particularly helpful when shaping the cups or adding straps to your bra.
- Scissors: You’ll need a sharp pair of scissors to cut the yarn and trim any excess threads.
- Yarn Needle: A yarn needle, also known as a darning needle, is used for sewing in loose ends and attaching different pieces of your bra together.
- Elastic: Depending on the design of your bra, you may need elastic to provide additional support. Choose wide elastic for underbust bands and narrower elastic for straps.
- Pattern: Find a knitting pattern or bra blueprint that suits your style and skill level. There are many resources available online and in knitting books that offer bra knitting patterns, providing you with step-by-step instructions and measurements.
Once you have gathered all of these materials, you’re ready to dive into the exciting process of knitting your own bra. The next section will guide you through the first step: choosing the right yarn.
Step 1: Choosing the Right Yarn
When it comes to knitting a bra, selecting the right yarn is crucial. You want a yarn that is soft, breathable, and comfortable against the skin. Additionally, the yarn should have enough stretch to provide support and maintain its shape. Here are some factors to consider when choosing the perfect yarn for your bra:
- Fiber Content: Look for yarns that are made from natural fibers such as cotton, bamboo, or silk. These fibers are known for their breathability and softness, ensuring a comfortable fit. Avoid synthetic fibers like acrylic or polyester, as they may not have the same comfort and breathability properties.
- Weight: Consider the weight of the yarn, as it will affect the drape and stretch of your bra. A lighter weight yarn, such as fingering or sport weight, is generally recommended for creating a delicate and lightweight bra. However, if you prefer a more substantial bra, you can opt for a DK or worsted weight yarn.
- Elasticity: Check the yarn label for information on elasticity or stretch. It’s important to choose a yarn that has some stretch to ensure a snug fit and proper support. Look for yarns that have a blend of elastic fibers or have a natural stretch, such as bamboo or silk.
- Color and Texture: Consider the color and texture of the yarn to match your personal style and aesthetic. You may want a solid color for a classic look or opt for variegated yarn for a more playful and unique bra. Additionally, pay attention to the texture of the yarn, as it can add visual interest to your bra.
Remember to check the yarn label for any specific care instructions. Some yarns may require hand washing or delicate machine washing, so it’s important to choose a yarn that aligns with your preferred care routine.
By taking these factors into consideration, you can select the perfect yarn that will make your knitted bra both comfortable and stylish. Once you have chosen your yarn, it’s time to move on to the next step: selecting the appropriate needle size.
Step 2: Selecting the Appropriate Needle Size
After choosing the right yarn for your knitted bra, it’s essential to select the appropriate needle size. The needle size will affect the gauge of your stitches and ultimately determine the fit and shape of your bra. Here are some considerations when selecting needle size:
- Gauge: Gauge refers to the number of stitches and rows per inch in your knitting. It is crucial to match the gauge mentioned in your pattern or blueprint to ensure that your bra turns out the right size. If the gauge is too tight, you will end up with a smaller bra, while a looser gauge will result in a larger bra. Use the recommended needle size to achieve the correct gauge.
- Yarn Thickness: The thickness of the yarn also plays a role in choosing the needle size. Thicker yarns require larger needles to create the desired tension, while thinner yarns need smaller needles for a tighter fabric. Refer to the yarn label for suggestions on needle size or check the pattern instructions for recommendations.
- Construction: Consider the construction of your bra when selecting the needle size. For knitting the cups, circular needles are often recommended as they can hold a larger number of stitches. Double-pointed needles or straight needles can be used for smaller sections such as straps or bands. Choose needle types that you are comfortable working with and that suit the specific design of your bra.
It’s important to knit a gauge swatch before starting your bra to ensure your tension matches the pattern’s requirements. Follow the instructions for the swatch and measure the number of stitches and rows in a four-inch square. If your gauge differs from the pattern gauge, adjust the needle size accordingly.
By selecting the appropriate needle size, you can achieve a well-fitted and professionally finished bra. Once you have determined the right needles, you are ready to move on to the next step: casting on stitches for the cups.
Step 3: Casting On Stitches
Now that you have your yarn and needles ready, it’s time to cast on stitches to start knitting the cups of your bra. Casting on is the process of creating the foundation row of stitches on your needle. Here’s how you can cast on stitches:
- Choose a Cast-On Method: There are several cast-on methods you can use, such as the long-tail cast-on, knitted cast-on, or cable cast-on. The choice of cast-on method may depend on the pattern instructions or your personal preference. Consult your pattern or refer to online tutorials for instructions on your chosen method.
- Determine the Number of Stitches: The number of stitches you need to cast on will depend on your desired cup size and the stitch pattern you’re using. Consult your pattern for specific measurements and instructions. You may need to take your underbust and bust measurements into account to ensure proper sizing.
- Estimate Cup Placement: Determine where the center of each cup will be and mark those points with stitch markers or contrasting yarn. This will help you keep track of the cup placement as you knit.
- Begin Casting On: Hold the needle with the slipknot in your dominant hand and the empty needle in your non-dominant hand. Follow the instructions for your chosen cast-on method to create the specified number of stitches onto your needle. Make sure the stitches are not too tight or too loose, as this will affect the overall fit of your bra.
Once you have cast on the required number of stitches, you are ready to start knitting the cups of your bra. Follow the pattern instructions for the stitch pattern and shaping details. Take your time and enjoy the process as you bring your bra to life stitch by stitch.
In the next step, we will cover the techniques for knitting the cups of your bra. Stay tuned!
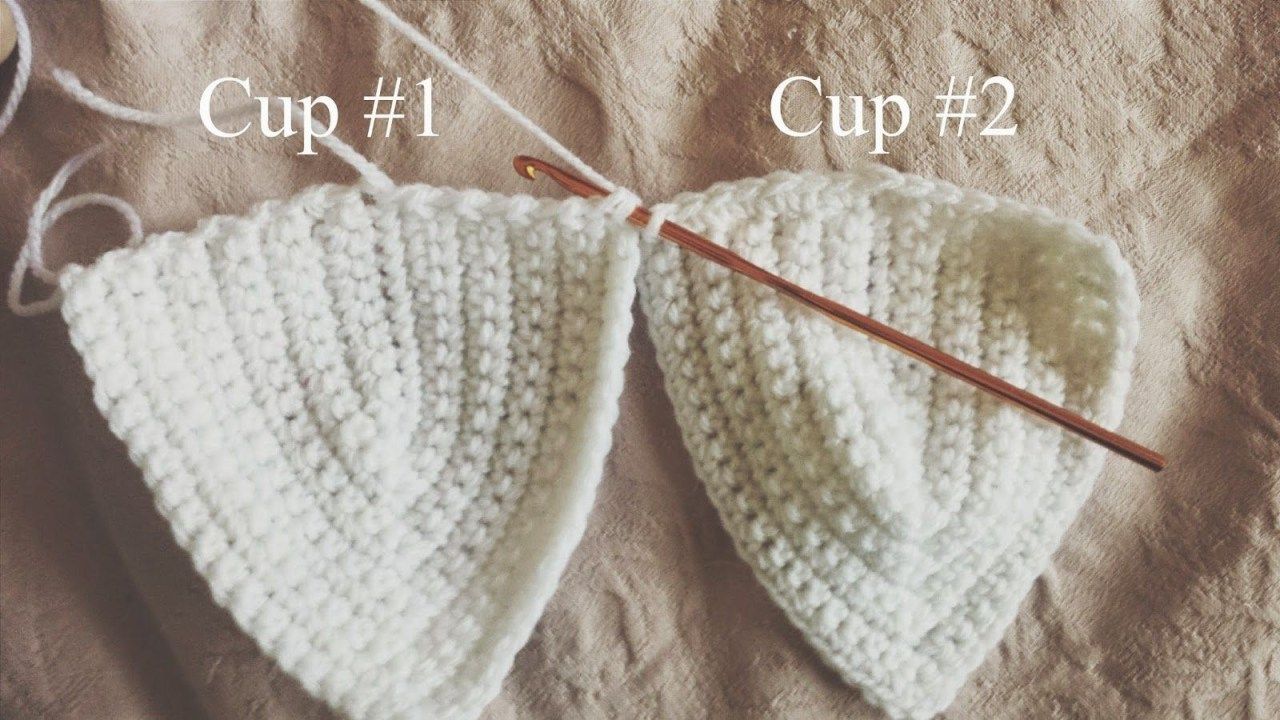
Step 4: Knitting the Cups
Now that you have cast on the stitches, it’s time to start knitting the cups of your bra. This step involves working the main body of the bra cups using the stitch pattern specified in your pattern or blueprint. Follow these guidelines to successfully knit the cups:
- Follow the Pattern: Refer to your pattern instructions for the stitch pattern and any shaping details for the cups. Pay attention to specific stitch counts, increases, decreases, and any other instructions provided.
- Maintain Accurate Gauge: As you knit, it’s important to maintain the gauge specified in the pattern. This ensures that the cups will have the desired size and fit. Check your gauge regularly by measuring your stitches and rows against the pattern’s gauge swatch.
- Use Stitch Markers: Place stitch markers at key points indicated in the pattern, such as the edges of the cups or the center point where shaping occurs. This will help you keep track of your progress and ensure that you’re following the pattern correctly.
- Paying Attention to Shaping: The shaping of the cups is crucial, as it determines the fit and support of your bra. Follow the pattern’s instructions for increasing or decreasing stitches to create the desired cup shape. Take your time and double-check your work to ensure the cups are symmetrical and aligned properly.
- Enjoy the Process: Knitting the cups of your bra can be a rewarding experience. Take your time, enjoy the rhythm of the stitches, and see your bra slowly take shape. If you encounter any difficulties or have questions, consult your pattern or reach out to the knitting community for guidance and support.
Remember to try on your bra cups periodically to check the fit and make any necessary adjustments. Once you are satisfied with the cups, you can move on to the next step: shaping the bra for a comfortable and supportive fit.
Step 5: Shaping the Bra
After knitting the cups of your bra, it’s time to shape it for a comfortable and supportive fit. This step involves adding shaping and structure to the bra to ensure it contours to your body properly. Here are some key considerations for shaping your bra:
- Underbust Band: Depending on your design, you may need to shape the underbust band to provide additional support. This can be done by decreasing or increasing stitches gradually to create a snug fit around your ribcage. The pattern instructions will guide you on when and how to shape the band.
- Side Shaping: The sides of the bra can be shaped to provide a more tailored fit. This is typically achieved by decreasing stitches gradually along the sides, which creates a slight curve. It helps to measure your underbust and bust circumference to ensure the shaping aligns with your measurements.
- Back Shaping: Shaping the back of the bra ensures a better fit and prevents the band from riding up. This can be done by adding short rows or by decreasing stitches gradually across the back. Refer to your pattern instructions for specific back shaping techniques.
- Darts or Bust Shaping: If your bra design includes darts or bust shaping, follow the pattern instructions to create these elements. Bust shaping helps create a more natural and flattering fit, especially for fuller busts. Darts add extra shaping and structure to the cups.
- Try It On: As you shape your bra, try it on periodically to check the fit and make any necessary adjustments. This will ensure that the bra contours to your body shape and provides the desired level of support and comfort.
Shaping the bra requires attention to detail and patience. Take your time and follow the pattern instructions meticulously. If you encounter any difficulties or have questions, don’t hesitate to seek help from knitting forums or groups. Once you are satisfied with the shaping, you can move on to the next step: adding straps to complete your bra.
Step 6: Adding Straps
Adding straps to your knitted bra is the next step in creating a functional and comfortable undergarment. The straps provide support and help keep the bra in place. Here are some guidelines for adding straps to your bra:
- Selecting the Strap Style: Choose the type of straps you prefer for your bra. Options include adjustable straps, non-adjustable straps, or even removable straps. Consider your personal preferences and the level of support you desire.
- Casting On Stitches for the Straps: Determine the number of stitches needed for each strap. This can vary depending on your desired strap width and the thickness of the yarn. Cast on the required number of stitches using the same method you used for casting on the cups.
- Knitting the Straps: Follow the pattern instructions for knitting the straps. This may involve simple knitting or working a specified stitch pattern. It’s important to maintain the same gauge and tension as the rest of your bra to ensure a consistent look.
- Attaching the Straps: Once you have knitted both straps, it’s time to attach them to the cups. You can use a yarn needle to sew the straps securely onto the designated spots on the cups. Ensure that the straps are evenly spaced and aligned properly.
- Adjusting Strap Length: If you have chosen adjustable straps, you can adjust the length according to your preference. Simply thread the straps through the appropriate strap hardware or adjusters, and then sew the ends securely in place.
As you work on adding the straps, remember to try on your bra periodically to check for the desired fit and adjust the strap length if necessary. The final step of finishing touches will bring your knitted bra to completion.
Step 7: Finishing Touches
Congratulations, you’re nearing the completion of your knitted bra! The finishing touches will give your bra a polished and professional look. Here are some final steps to consider:
- Blocking: After completing your bra, consider blocking it to even out the stitches and shape. This involves soaking the bra in lukewarm water and gently squeezing out the excess moisture. Lay it flat on a towel and shape it to the desired dimensions. Allow it to dry completely before proceeding.
- Seaming Securely: If your bra is comprised of multiple pieces, such as separate cups or a band, you’ll need to seam them together using a yarn needle. Take care to sew the pieces securely, ensuring that the seams are smooth and tidy.
- Weaving in Loose Ends: Use a yarn needle to weave in any loose ends of yarn from changing colors or attaching the straps. This will ensure a neat and tidy appearance.
- Adding Embellishments (Optional): If you want to personalize your knitted bra, consider adding decorative elements such as buttons, lace trim, or small bows. Be mindful of the placement and weight of these embellishments to maintain the comfort and functionality of the bra.
- Trying It On: After completing the finishing touches, try on your bra to ensure the fit is to your liking. Make any final adjustments if needed, such as tightening or loosening the straps or reshaping the cups.
Once you are satisfied with the fit and appearance of your knitted bra, it’s time to proudly wear your handmade creation. Enjoy the comfort, support, and uniqueness that comes with wearing a bra that was crafted by your own hands.
Conclusion
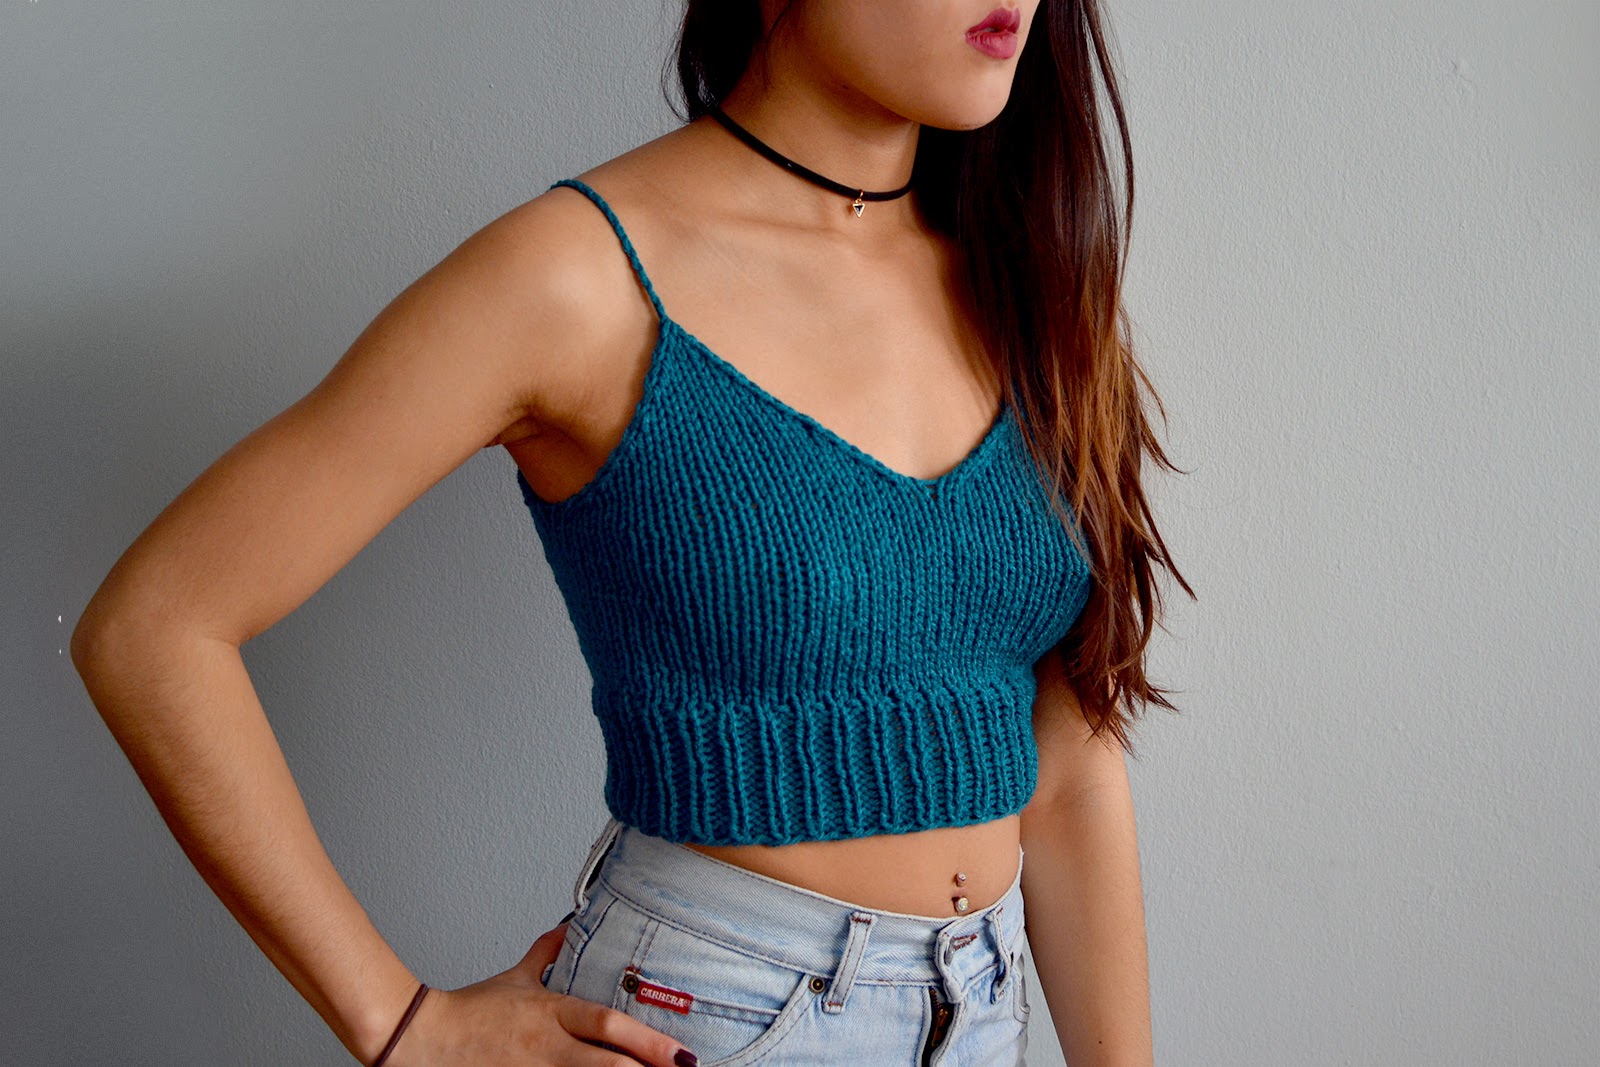
Knitting your own bra is a fulfilling and creative project that allows you to design a garment tailored to your body and style. By choosing the right materials, such as soft and stretchy yarn, and selecting appropriate needle sizes, you can ensure a comfortable and well-fitted bra. Casting on stitches, knitting the cups, shaping the bra, adding straps, and applying finishing touches all contribute to the process of creating a beautiful and functional undergarment.
Through each step, it’s important to follow your pattern or blueprint instructions, maintain consistent gauge, and make any necessary adjustments along the way. Trying on the bra periodically during the construction process helps ensure a proper fit and allows for customization based on your body shape and personal preferences.
Knitting a bra offers numerous benefits, from the ability to customize the design, color, and texture to achieving a sustainable and cost-effective alternative to store-bought bras. Additionally, the craft of knitting itself can be a meditative and therapeutic experience, allowing you to relax and express your creativity.
Remember, knitting your own bra requires time, patience, and attention to detail. If you encounter any challenges or have questions, don’t hesitate to seek guidance from fellow knitters or online resources.
So why not embark on this knitting journey and create a unique and comfortable bra that reflects your individual style and fits you perfectly? Enjoy the process, embrace your creativity, and revel in the satisfaction of wearing a bra that you crafted with your own hands.