Home>How-to Guides>For Women>How To Make A Fringed Bikini Top
For Women
How To Make A Fringed Bikini Top
Modified: August 2, 2023
Learn how to create a stylish and trendy fringed bikini top for women, perfect for summer beach days and pool parties. Step-by-step tutorial included!
(Many of the links in this article redirect to a specific reviewed product. Your purchase of these products through affiliate links helps to generate commission for Under-tec.com, at no extra cost. Learn more)
Table of Contents
Introduction
Summer is just around the corner, and what better way to make a stylish statement at the beach or by the pool than with a fringed bikini top? Fringe has been a popular trend in fashion for years, and it adds a fun and playful touch to any outfit. By creating your own fringed bikini top, you can not only save money but also customize it to suit your personal style.
In this article, we will guide you through the step-by-step process of making a fringed bikini top. Whether you’re a DIY enthusiast or simply looking for a unique and eye-catching piece, this tutorial is perfect for you. We will provide you with all the information you need, from choosing the right bikini top to attaching the fringe and adding optional embellishments.
Creating your own fringed bikini top allows you to express your creativity and individuality. You can choose the color and type of fringe that best fits your personality and preferences. Additionally, this DIY project is not only fun but also eco-friendly, as you can repurpose an old bikini top or use sustainable materials.
So, grab your materials and let’s get started on making a fabulous fringed bikini top that will make you stand out from the crowd!
Materials Needed
Before we begin the process of creating a fringed bikini top, it’s important to gather all the necessary materials. Here’s a list of what you’ll need:
- A bikini top of your choice
- Fringe trim or fabric in your desired color
- Scissors
- Measuring tape
- Pins
- Needle and thread or fabric glue
- Optional embellishments such as beads, sequins, or charms
When selecting a bikini top, it’s essential to choose one that fits you well and provides adequate support. You can either use a brand new bikini top or repurpose an old one that you no longer wear. Make sure the bikini top is in good condition, without any tears or loose threads.
As for the fringe, you have a few options. You can purchase pre-made fringe trim from a fabric store, or you can make your own fringe using fabric of your choice. If you decide to make your own, select a fabric that matches your style and complements the color of your bikini top. You can opt for a solid color or go for a patterned fabric for added visual interest.
For attaching the fringe to the bikini top, you can choose between sewing or using fabric glue. If you are comfortable with sewing, using a needle and thread will provide a more secure and durable attachment. However, if you prefer a quicker and easier method, fabric glue can be a good alternative. Just make sure to choose a fabric glue that is specifically designed for bonding fabric.
The optional embellishments such as beads, sequins, or charms can add a touch of personalization to your fringed bikini top. Choose embellishments that complement your style and enhance the overall look of the bikini top. You can sew them onto the fringe or use fabric glue to attach them.
Now that you have all the necessary materials, it’s time to move on to the next step: choosing the right bikini top.
Step 1: Choosing the Right Bikini Top
When it comes to creating a fringed bikini top, selecting the right base is crucial. The fit and style of the bikini top will determine how the fringe lays and how comfortable you feel wearing it. Here are some tips to help you choose the perfect bikini top:
- Consider your body shape: Every body is unique, and different bikini top styles flatter different body shapes. Determine what type of bikini top suits your body shape the best. For example, if you have a smaller bust, a bandeau-style top can create the illusion of more curves. If you have a larger bust, look for a bikini top with built-in underwire or adjustable straps for better support.
- Think about your comfort: It’s important to choose a bikini top that you feel comfortable and confident in. Consider factors such as the level of coverage you prefer, the amount of support you need, and any specific features that make you feel more at ease, such as adjustable straps or removable padding.
- Consider the occasion: Think about where and when you plan to wear your fringed bikini top. If it’s for a casual beach day or pool party, you may opt for a more relaxed and fun design. If you’re planning to wear it for more active water sports, choose a bikini top that provides secure coverage and support.
- Choose a color that complements your skin tone: Consider your skin tone when selecting the color of your bikini top. Certain colors can enhance your complexion and make you glow. For example, if you have warm undertones, earthy tones like burgundy or olive green can be flattering. If you have cool undertones, shades like navy blue or pastel pink can complement your skin.
- Experiment with different styles: Don’t be afraid to try out different bikini top styles to find the one that suits you best. Play around with different necklines, strap designs, and back closures to see what works for you. Trying on different options can help you determine which style will look and feel great with the added fringe.
Remember, choosing the right bikini top is the foundation for creating a stunning fringed bikini top. Take your time, consider your preferences and body shape, and find a style that makes you feel confident and comfortable. Once you have your ideal base, you’re ready to move on to the next step: gathering the fringe materials.
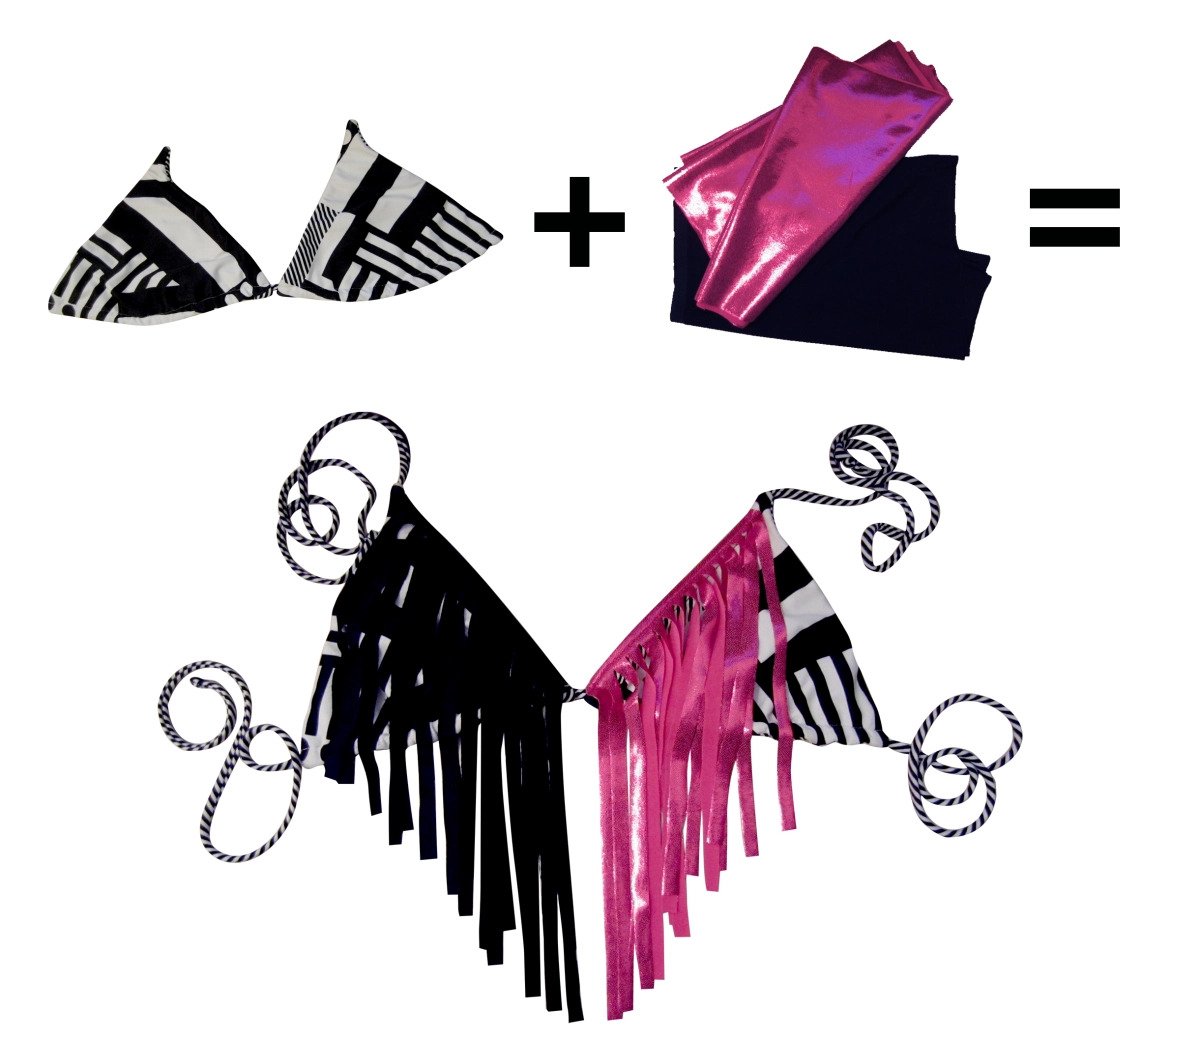
Step 2: Gathering the Fringe Materials
Now that you have chosen the perfect bikini top, it’s time to gather the fringe materials. The fringe will add movement, texture, and a touch of flair to your bikini top. Here’s what you need to do:
- Determine the length of the fringe: Measure the area where you want to attach the fringe on the bikini top. Keep in mind that the length of the fringe will depend on your personal preference. Some people prefer shorter fringe for a more subtle look, while others opt for longer fringe for a more dramatic effect.
- Select the fringe trim or fabric: There are various options when it comes to fringe trim. You can choose pre-made fringe trim from a fabric store, which usually comes in different colors, textures, and lengths. Alternatively, you can make your own fringe using fabric. Cut strips of fabric to the desired length and width, and ensure that they are uniform in size.
- Consider the material of the fringe: Fringe can be made from a variety of materials, such as cotton, polyester, or even leather. Consider the durability, comfort, and overall aesthetic of the material when making your selection. Keep in mind that lighter materials will create a softer and more flowing effect, while heavier materials will add more structure and weight to the fringe.
- Choose the color: Select a color that complements your bikini top and matches your personal style. You can go for a matching color for a cohesive look or choose a contrasting color to create a statement. Remember that the color of the fringe can significantly impact the overall appearance of your fringed bikini top.
- Calculate the quantity: Determine the amount of fringe you need based on the measurements of your bikini top. It’s always better to have a little extra fringe than to run out in the middle of the project. Consider the width and density of the fringe when calculating the quantity needed.
Once you have gathered all the fringe materials, you are ready to move on to the next step: measuring and cutting the fringe.
Step 3: Measuring and Cutting the Fringe
Now that you have all the fringe materials ready, it’s time to measure and cut the fringe to the desired length. This step is crucial to ensure that the fringe hangs evenly and beautifully on your fringed bikini top. Follow these steps to measure and cut the fringe:
- Prepare your workspace: Find a clean and flat surface to work on. Make sure you have enough space to spread out the fringe and accurately measure and cut it.
- Prepare the fringe: If you are using pre-made fringe trim, unravel it and lay it flat. If you are using fabric to create your own fringe, make sure the fabric is ironed and free from any wrinkles or creases.
- Measure the length: Using a measuring tape, determine the desired length of the fringe. Remember to take into account any additional factors, such as how far you want the fringe to hang from the bikini top.
- Use pins or marking tools: Once you have measured the length, pin or mark the fringe at the desired length. This will act as a guide when cutting the fringe uniformly.
- Cut the fringe: Carefully cut along the marked or pinned line. Use sharp fabric scissors to ensure clean and precise cuts. Take your time and be mindful of keeping the fringe straight as you cut.
- Repeat the process: Repeat the measuring and cutting process for each strip of fringe that you need. Make sure each strip is the same length to maintain consistency in the appearance of the fringed bikini top.
Remember, when cutting the fringe, it’s always better to start with a longer length and trim it later if needed. This way, you can adjust the length of the fringe to your liking and make sure it suits your style and preferences.
Now that the fringe has been measured and cut, you’re ready to move on to the next exciting step: attaching the fringe to the bikini top!
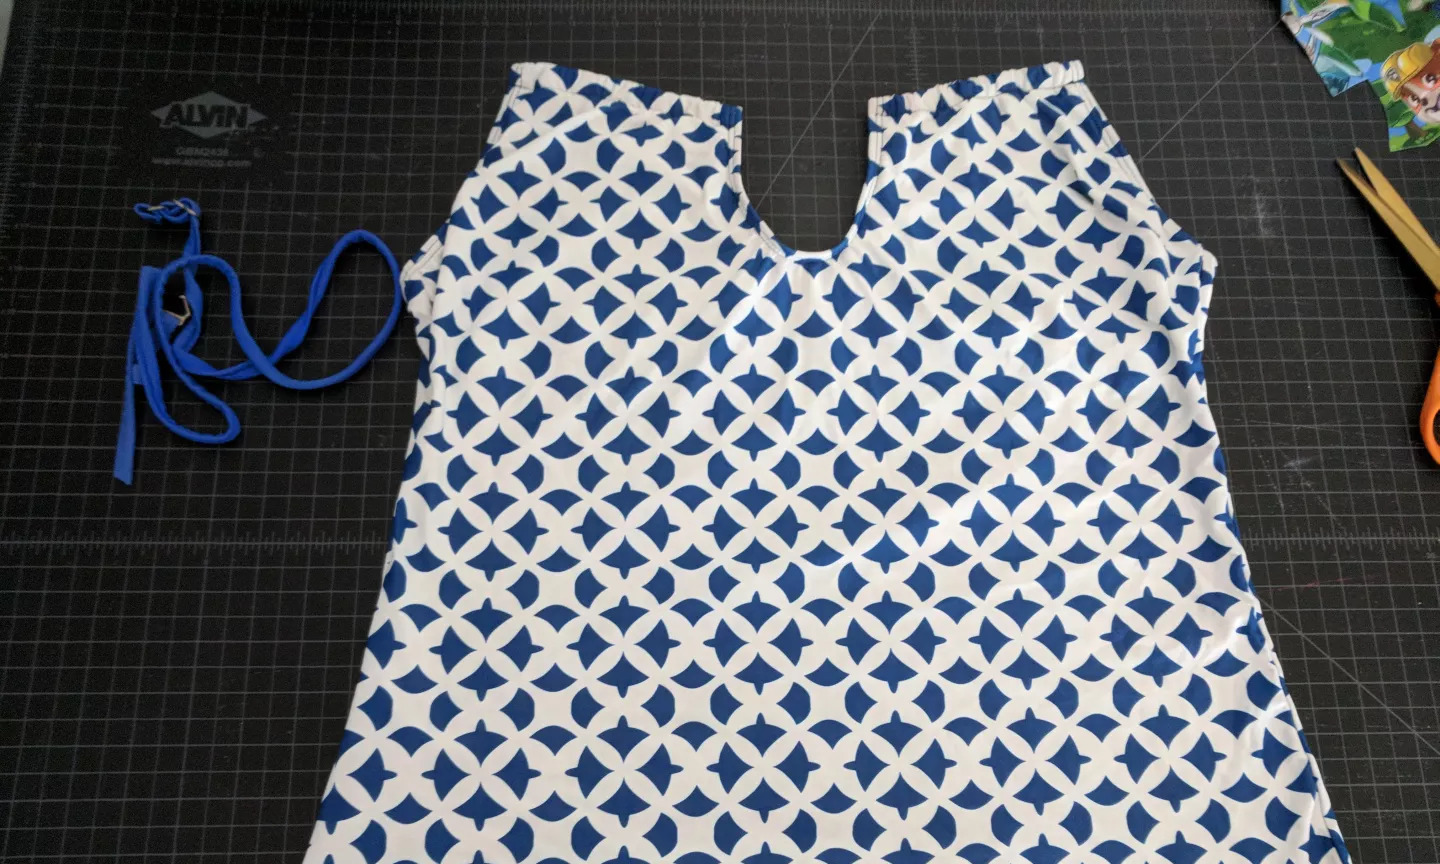
Step 4: Attaching the Fringe to the Bikini Top
With the fringe materials measured and cut, it’s time to attach the fringe to the bikini top. This step will bring your fringed bikini top to life. Follow these steps for a secure and visually appealing attachment:
- Decide on the placement: Lay your bikini top flat and visualize where you want the fringe to be attached. You can opt for a single row of fringe along the bustline or experiment with multiple rows for a more layered look. Pin the fringe in place on the bikini top to get a clear idea of how it will look.
- Choose the attachment method: Decide whether you will sew the fringe onto the bikini top or use fabric glue. Sewing provides a more durable and secure attachment, whereas fabric glue offers a quicker and easier option. Choose the method that suits your crafting skills and preference.
- Start attaching the fringe: If you are sewing the fringe, thread your needle and knot the end of the thread. Begin sewing the fringe to the bikini top, starting from one end and moving towards the other. Use small and discreet stitches to secure the fringe in place. If you are using fabric glue, carefully apply a thin line of glue along the edge of the fringe and press it onto the bikini top. Hold it in place for a few seconds to ensure it sticks.
- Ensure even spacing: As you attach the fringe, ensure that it is evenly spaced along the bikini top. You can use pins or small dots of fabric glue to hold the fringe in place temporarily before sewing or gluing it permanently. Take your time and adjust the positioning of the fringe as needed.
- Continue attaching the fringe: Work your way across the bikini top, attaching the fringe row by row. Make sure to maintain consistent spacing and alignment. Pay attention to any curves or corners of the bikini top and adjust the fringe accordingly to ensure a smooth and seamless attachment.
- Secure the ends: Once you have attached all the fringe, secure the ends of each row to prevent fraying. If you are sewing, make a small knot at the end of the thread. If you are using fabric glue, apply a dab of glue at the end of each row to secure the fringe in place.
Remember to take your time and work carefully while attaching the fringe to the bikini top. It’s essential to ensure that the fringe is securely attached and evenly spaced for the best results.
Now that the fringe is attached, it’s time to add some optional embellishments to further personalize your fringed bikini top!
Step 5: Adding Optional Embellishments
Now that you have attached the fringe to your bikini top, it’s time to add some optional embellishments to make your fringed bikini top truly unique. Adding embellishments will elevate the look and add an extra touch of style and personality. Here’s how you can do it:
- Choose your embellishments: Determine the type of embellishments you want to add to your fringed bikini top. Beads, sequins, charms, or even fabric flowers are popular options. Select embellishments that complement the overall aesthetic of your bikini top and match your personal style.
- Position the embellishments: Visualize where you want to place the embellishments on the bikini top. You can cluster them together in certain areas or scatter them randomly for a more playful look. Pin the embellishments onto the fringe to test different placements and decide on the final arrangement.
- Attach the embellishments: If you are sewing the embellishments, thread your needle and secure it with a knot. Carefully sew each embellishment onto the fringe, making sure to sew through both the embellishment and the bikini top for a secure attachment. If you are using fabric glue, apply a small dab of glue to the back of each embellishment and press it firmly onto the fringe. Hold it in place for a few seconds to ensure it sticks.
- Experiment and get creative: Don’t be afraid to experiment with different combinations and placements of embellishments. You can create patterns, mix and match colors, or even layer different types of embellishments. Let your creativity flow and have fun with the process!
- Secure and reinforce: Once you have attached all the embellishments, take a moment to ensure they are securely attached. If needed, sew or glue any loose ends or areas that may be prone to unraveling. This will ensure that your fringed bikini top withstands the beach or poolside adventures.
Adding optional embellishments enhances the overall look of your fringed bikini top and allows you to showcase your personal style. The key is to find the right balance and not overcrowd the bikini top with too many embellishments. Let your creativity shine while keeping in mind that less is often more.
Now that you have beautifully adorned your fringed bikini top, it’s time for the final step: trying it on and making any necessary adjustments!
Step 6: Trying on and Adjusting the Fringed Bikini Top
Congratulations on completing your fringed bikini top! The last step is to try it on, assess the fit and look, and make any necessary adjustments to ensure a perfect fit. Here’s what you need to do:
- Put on the bikini top: Put on your newly created fringed bikini top and fasten it securely. Take a moment to admire your handiwork and see how the fringe lays on your body. Observe the length and movement of the fringe, as well as how the embellishments enhance the overall look.
- Check the fit: Move around and ensure that the bikini top fits comfortably and securely. Pay attention to the coverage, support, and any areas that may need adjustments. If the bikini top feels too loose, you can consider adding adjustable straps or tightening the back closure. If it feels too tight, you may need to adjust the positioning of the fringe for a better fit.
- Assess the fringe: Look closely at how the fringe hangs on your body. Check for any sections that may appear uneven or require trimming. If needed, trim the fringe to achieve a uniform and polished look. Be mindful of the length of the fringe and make adjustments as desired to suit your style and preferences.
- Make any necessary alterations: If you notice any areas of the bikini top that need fixing, take the time to make the necessary alterations. This may include sewing any loose fringe or embellishments, reinforcing the attachment points, or adjusting the size or shape of the bikini top itself.
- Experiment and embrace customization: Don’t be afraid to experiment with different styling options. You can tie the fringe in knots, braid it, or even trim it into a V-shape or asymmetrical pattern. Embrace the customization aspect of your fringed bikini top to truly make it your own.
Remember, the beauty of creating your own fringed bikini top is that you have full control over the fit and style. Take the time to make any necessary adjustments to ensure that the bikini top is comfortable, flattering, and reflects your unique taste.
Now that you have tried on and made any necessary adjustments, you’re all set to flaunt your stunning fringed bikini top with confidence. Enjoy the summer vibes and have a blast rocking your stylish creation!
Conclusion
Congratulations on completing your journey to create a fabulous fringed bikini top! By following the step-by-step process provided in this article, you have successfully crafted a unique and eye-catching piece that reflects your personal style and creativity.
Throughout this DIY project, you have learned the importance of choosing the right bikini top, gathering the fringe materials, measuring and cutting the fringe, attaching it to the bikini top with precision, adding optional embellishments, and making any necessary adjustments for a perfect fit.
Creating your own fringed bikini top not only allows you to express your individuality but also gives you the opportunity to contribute to a more sustainable fashion culture. By repurposing an old bikini top or using sustainable materials, you have made a conscious choice to reduce waste and minimize your environmental footprint.
Remember that the journey doesn’t end here. Feel free to experiment further with different styling options, such as tying knots, braiding the fringe, or incorporating other creative elements. Embrace customization and make your fringed bikini top even more unique!
Now that you have your fringed bikini top ready, it’s time to make a splash and enjoy the summer season with confidence and style. Whether you’re lounging by the pool, sunbathing on the beach, or dancing at a poolside party, your fringed bikini top is sure to turn heads and make a statement.
So go ahead, have fun, and embrace your inner fashion designer as you rock your one-of-a-kind fringed bikini top. Remember, the possibilities are endless, and this DIY project is just the beginning of your creative journey in exploring fashion in a sustainable and personalized way.