Home>How-to Guides>For Women>How To Make A Mermaid Bra Top
For Women
How To Make A Mermaid Bra Top
Modified: August 5, 2023
Discover the secrets of creating your own stunning mermaid bra top! Perfect for women who want to add a touch of enchantment to their wardrobe.
(Many of the links in this article redirect to a specific reviewed product. Your purchase of these products through affiliate links helps to generate commission for Under-tec.com, at no extra cost. Learn more)
Table of Contents
Introduction
Welcome to this step-by-step guide on how to make a stunning mermaid bra top! Whether you’re planning a beach vacation, attending a music festival, or simply looking to unleash your inner mermaid, this DIY project is perfect for you. Creating your own mermaid bra top allows you to customize the design, choose your preferred colors and embellishments, and achieve a unique look that will surely make waves.
The mermaid trend has taken the fashion world by storm, and with good reason. With its mesmerizing iridescent colors and intricate details, the mermaid aesthetic is both enchanting and empowering. Making your own mermaid bra top not only lets you express your creativity but also enables you to embrace your inner beauty and confidence.
Don’t worry if you’re new to sewing or crafting – this tutorial is designed to be beginner-friendly, with simple instructions and easy-to-follow steps. By the end of this guide, you’ll have a dazzling mermaid bra top that will make you feel like the mermaid goddess you truly are.
Before we dive into the tutorial, let’s take a look at the materials you’ll need to get started.
Materials Needed
Before you begin making your mermaid bra top, gather the following materials:
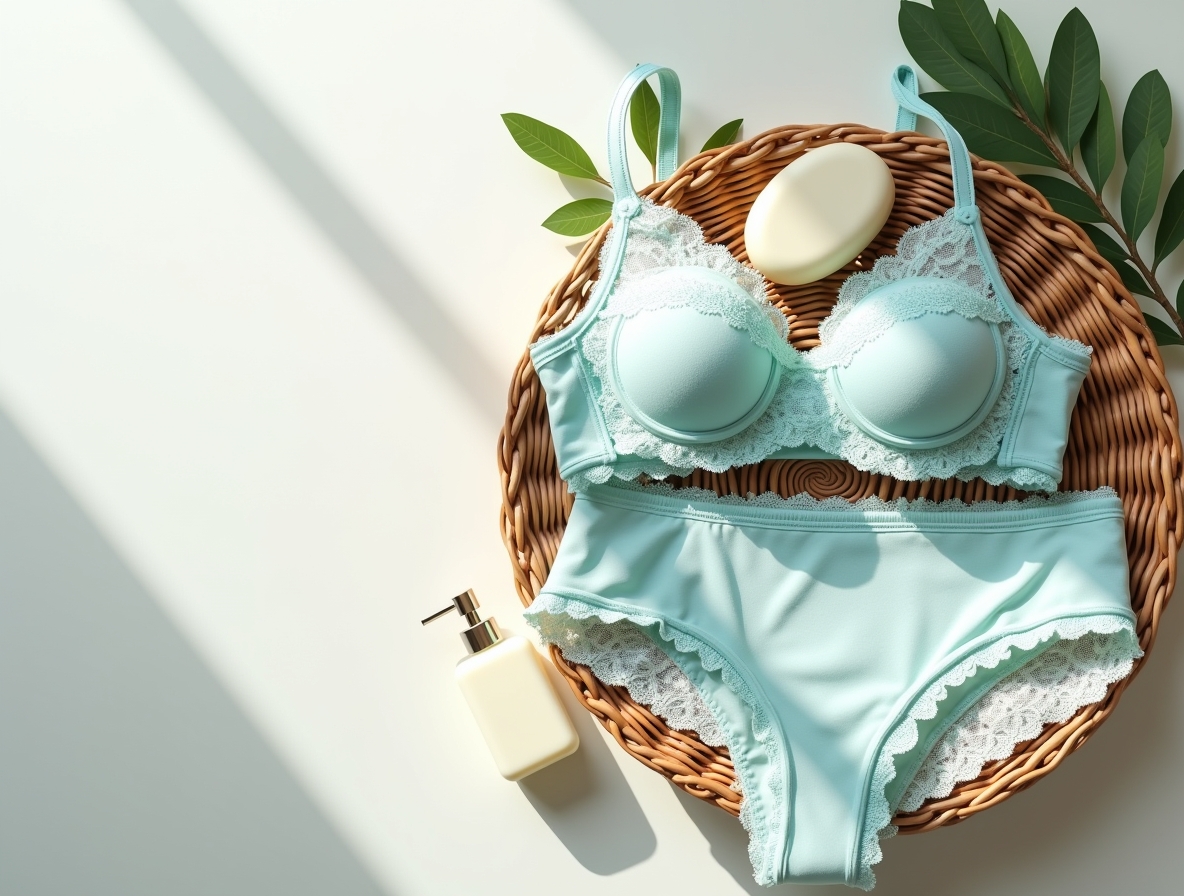
- Plain bra – Choose a bra with a basic, non-padded cup and adjustable straps. A light-colored or nude bra works best as it provides a blank canvas for your mermaid transformation.
- Stretch holographic fabric – Look for stretch holographic fabric in your desired color. This type of fabric gives off a shimmery, iridescent effect reminiscent of mermaid scales. You will need enough fabric to cover the cups of your bra and create straps if desired.
- Scissors – Use fabric scissors to accurately cut the fabric without fraying the edges.
- Needle and thread – Opt for a color that complements your fabric. Alternatively, you can use a sewing machine if you have one available.
- Embellishments – Choose embellishments such as rhinestones, beads, pearls, sequins, or shells to add extra flair to your mermaid bra top. These can be sewn or glued onto the fabric.
- Measuring tape – This will help ensure precise measurements for a perfect fit.
- Pins – Use pins to hold the fabric in place while sewing.
- Elastic – If you prefer adjustable straps for your bra top, you will need elastic to create them.
- Velcro or hook-and-eye closures – These closures will be used to secure the bra in the back.
Having these materials ready will make the process smoother and more enjoyable. Once you have everything prepared, it’s time to start creating your mermaid masterpiece!
Step 1: Measure and Cut the Fabric
The first step in making your mermaid bra top is to measure and cut the holographic fabric to fit the cups of your bra. Here’s how:
- Place your bra on a flat surface and measure the width and height of each cup. Make sure to measure at the widest and highest points of the cups.
- Add an extra inch to each measurement for seam allowance.
- Using your measurements, cut out two rectangular pieces of holographic fabric – one for each cup of the bra. The width of the fabric should match the width of the cup, and the height should be equal to the cup’s height plus the seam allowance.
- If you prefer to have straps on your mermaid bra top, measure and cut two long strips of fabric for the straps. The length and width of the straps can be adjusted to your desired fit.
Once you have cut the fabric pieces, ensure that the edges are neat and not frayed. This will give your bra top a polished and professional finish.
With the fabric cut and ready, you’re now ready to move on to the next step – sewing the side seams of the bra top.
Step 2: Sew the Side Seams
Now that you have your fabric pieces cut, it’s time to sew the side seams of the mermaid bra top. Follow these steps:
- Take one of the fabric pieces and fold it in half lengthwise, with the right sides facing each other. This will create a small pocket for the cup.
- Pin the raw edges of the fabric together, ensuring that they align properly.
- Using a needle and thread or a sewing machine, stitch along the pinned edges to create a seam. Make sure to secure the beginning and end of the seam with backstitches or reverse stitches for added durability.
- Repeat the process for the other fabric piece and cup.
- After sewing the side seams, turn the fabric pieces right side out to reveal the mermaid scales.
Once the side seams are sewn, try placing the fabric cups on the bra to ensure they fit properly. Adjust the seams if necessary to achieve the desired fit and look.
With the side seams completed, you’re now ready for the next step – creating the cups of the mermaid bra top.
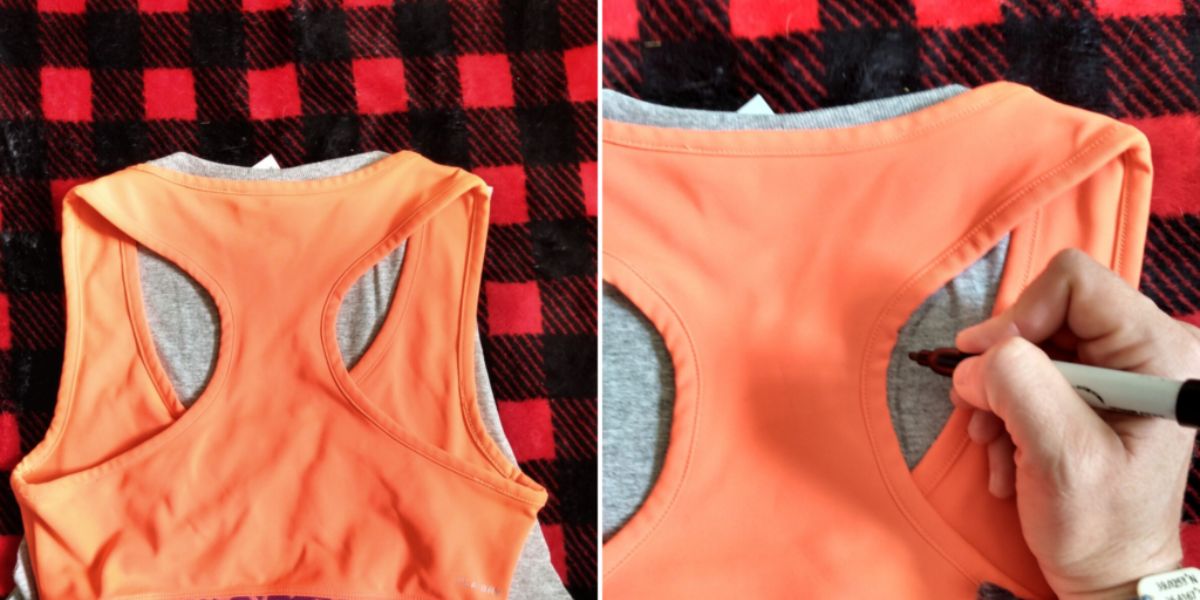
Step 3: Create the Cups
Now that the side seams are done, let’s move on to creating the cups of your mermaid bra top. Follow these steps:
- Take one fabric cup and place it on the bra, ensuring that it covers the existing cup completely.
- Pin the fabric cup in place, aligning the edges of the fabric with the edges of the bra cup.
- Using a needle and thread or a sewing machine, stitch the fabric cup onto the bra cup. Make sure to securely attach the fabric, ensuring it is tight and doesn’t loosen or shift.
- Repeat the process for the other fabric cup and bra cup.
As you sew the fabric cups onto the bra cups, take your time to ensure a smooth and seamless finish. You can use a straight stitch or a zigzag stitch, depending on your preference and the type of fabric you are working with.
Once both cups are attached, try on the bra to ensure a comfortable fit. Make any adjustments if needed, such as trimming the fabric or reinforcing the stitches.
With the cups in place, you’re ready to move on to the next step – attaching the straps to complete your mermaid bra top.
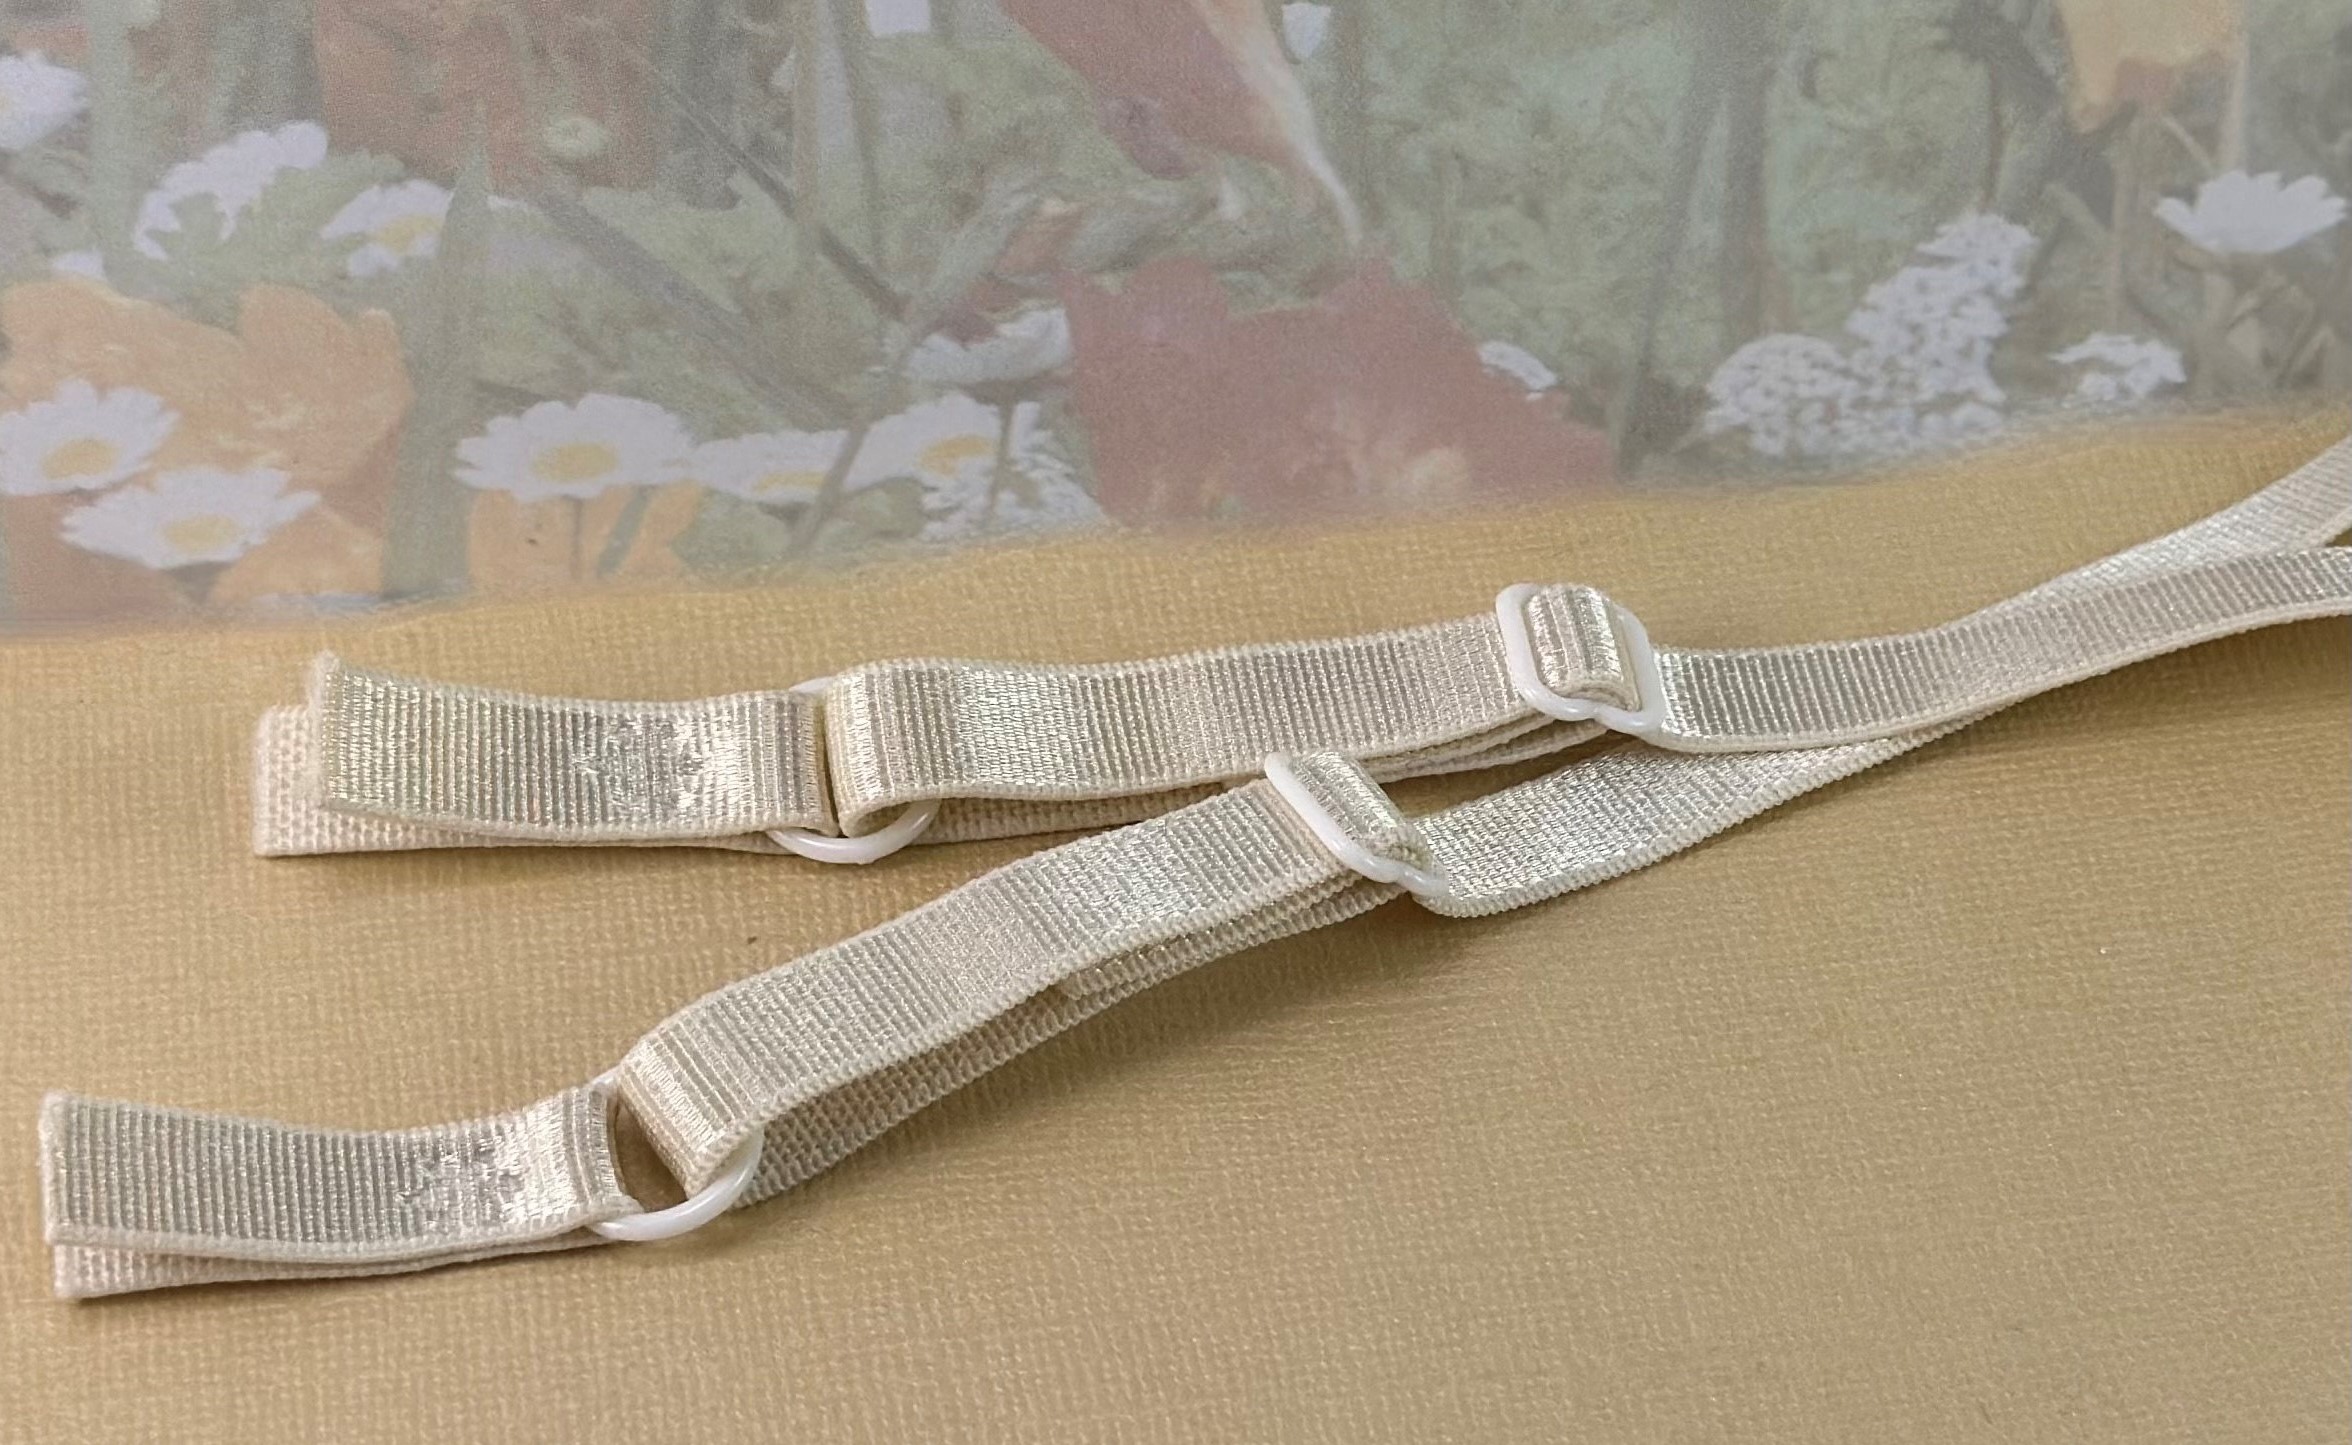
Step 4: Attach the Straps
Now that the cups of your mermaid bra top are ready, it’s time to attach the straps. Follow these steps:
- If you prefer to have adjustable straps, measure and cut two pieces of elastic to your desired length. Alternatively, you can use the fabric strips you cut earlier.
- Position one end of the strap on the back edge of the cup, aligning it with the inside of the cup and the bra strap attachment point.
- Sew the strap securely in place, making sure to reinforce the stitches to ensure durability.
- Repeat the process for the other strap and cup.
- If using fabric strips for the straps, you can adjust the length and tie them in a knot or a bow at the desired length.
When attaching the straps, make sure they are positioned comfortably and securely to prevent any discomfort or shifting while wearing the bra top. Adjust the straps’ length according to your preference, ensuring a snug and supportive fit.
With the straps attached, try on the mermaid bra top to ensure that it fits well and provides the desired support. Make any necessary adjustments or reinforce the stitches as needed.
Now that your mermaid bra top is taking shape, it’s time to add some embellishments to truly make it shine.
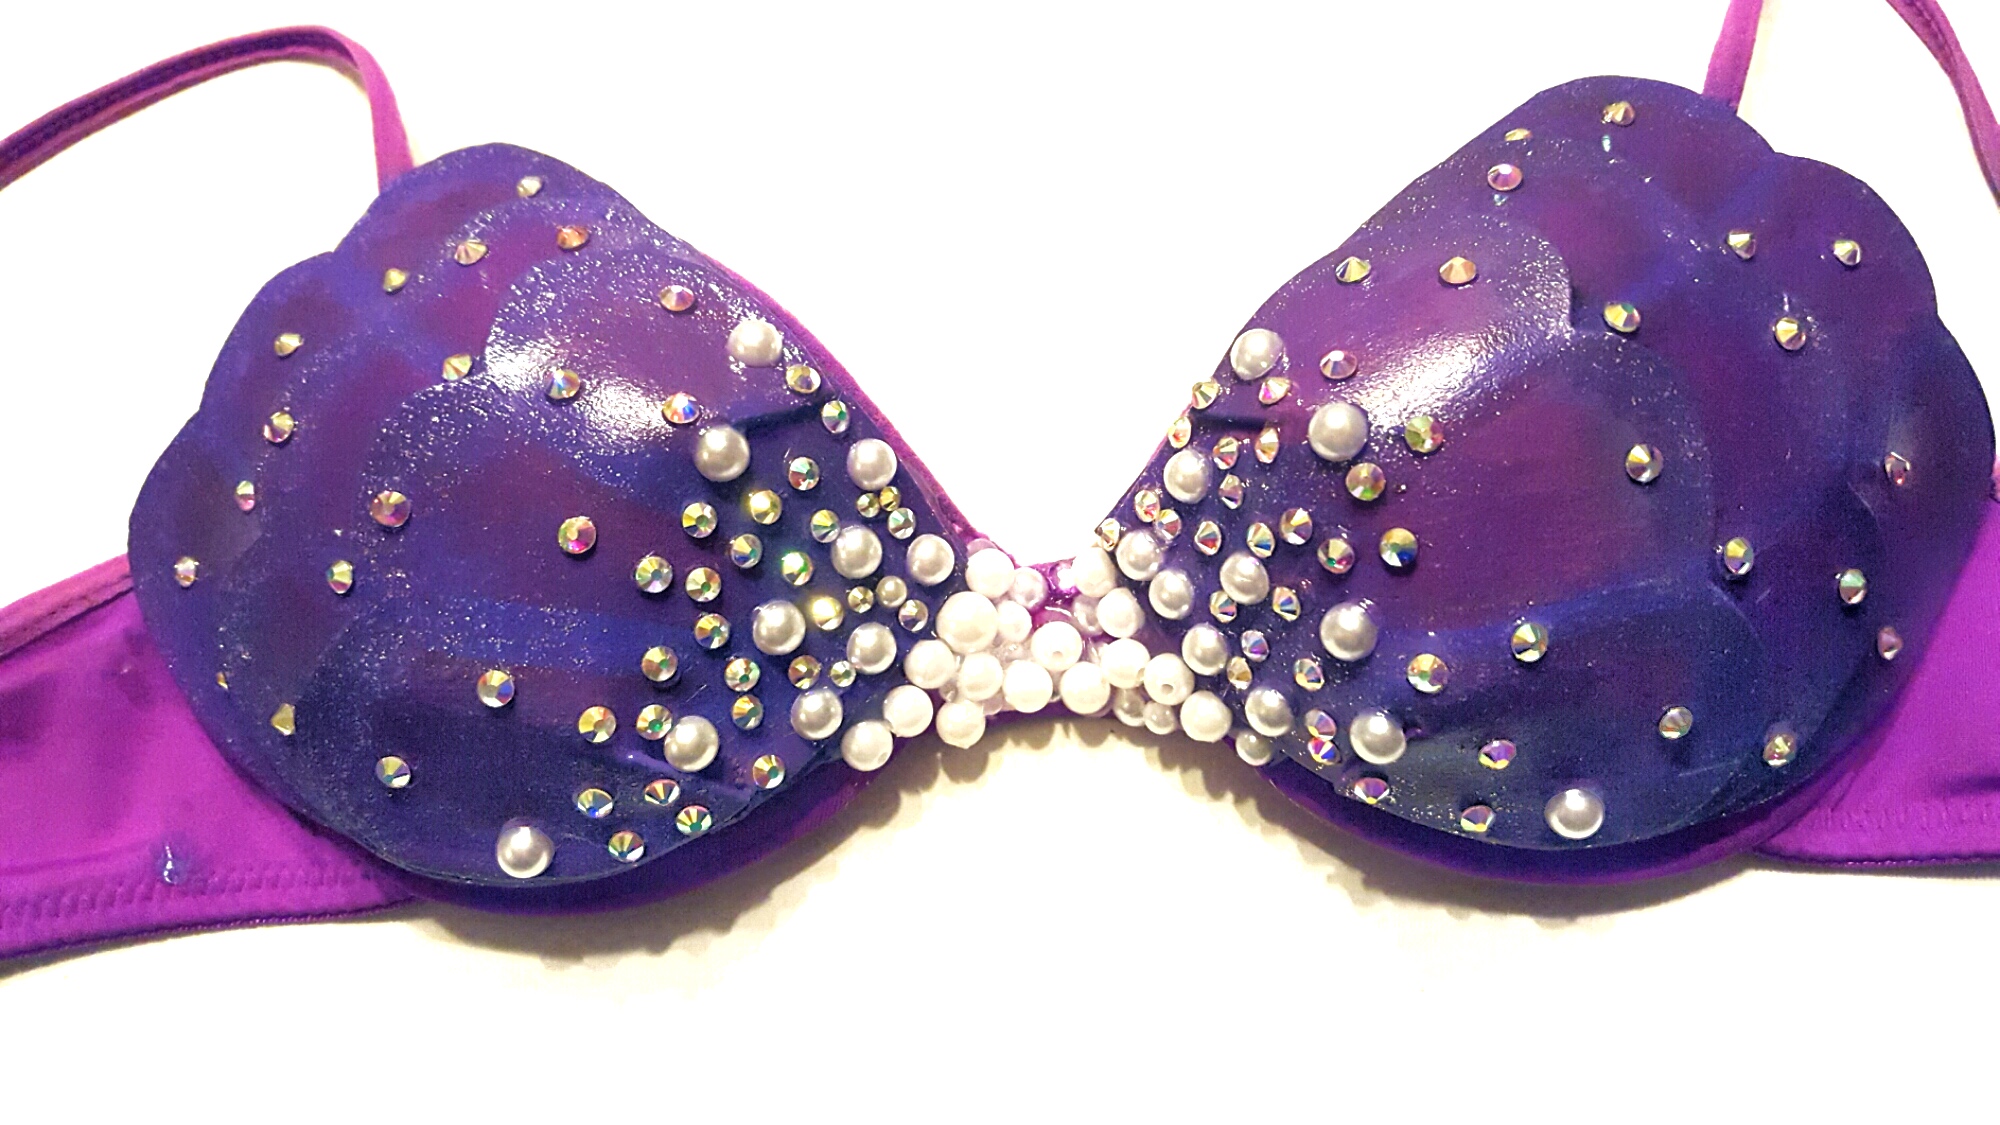
Step 5: Add Embellishments
Now that you’ve assembled the base of your mermaid bra top, it’s time to add some dazzling embellishments to enhance its mermaid-inspired look. Follow these steps:
- Choose your desired embellishments, such as rhinestones, beads, pearls, sequins, or shells.
- Plan out your design by placing the embellishments on the fabric cups, experimenting with different arrangements until you are satisfied with the look.
- Once you’ve finalized your design, use fabric glue or a needle and thread to secure the embellishments in place. Take your time and work carefully to ensure they are attached securely.
When adding embellishments, feel free to get creative! You can create patterns, spell out words or symbols, or scatter the decorations randomly for an organic look. Let your imagination guide you as you bring your mermaid bra top to life.
Remember, the key is to strike a balance between adding enough embellishments to achieve a stunning look without overwhelming the overall design. Play with different sizes, colors, and textures to create a visually striking and harmonious arrangement.
Once the embellishments are securely attached, allow them to dry or set according to the instructions provided with the adhesive you used.
Now that your mermaid bra top is beautifully adorned, it’s time for the final step – adding some finishing touches.
Step 6: Finishing Touches
Congratulations, you’re in the final stretch of creating your stunning mermaid bra top! Now it’s time to add some finishing touches to complete the look. Follow these steps:
- If your bra has a hook-and-eye closure at the back, ensure that it is securely fastened and aligned properly.
- If you prefer a seamless look, you can add a thin strip of fabric or elastic along the back edge of the cups to create a smooth, finished appearance.
- Trim any excess fabric or thread to clean up any rough edges or loose ends.
- Try on the mermaid bra top and make any final adjustments or tweaks to ensure a comfortable fit and desired look.
Take this opportunity to step back and admire your handiwork. Your unique, DIY mermaid bra top is now ready to be shown off!
Remember, this mermaid bra top is incredibly versatile. It can be worn as a standalone piece, paired with high-waisted skirts or shorts for a festival or beach look, or even incorporated into an elaborate mermaid costume for cosplay or themed events.
Now that you’ve completed all the steps and added the finishing touches, go ahead and try on your mermaid bra top to embrace the enchanting beauty of the sea. Be proud of your creativity and express your inner mermaid confidently!
And there you have it – a comprehensive guide on how to make a marvelous mermaid bra top. I hope you enjoyed this DIY project and found the instructions easy to follow. Share your creation with the world and inspire others to unleash their inner mermaids!
Conclusion
Congratulations on completing your very own mermaid bra top! Through this step-by-step guide, you have learned how to transform a plain bra into a dazzling piece of mermaid-inspired fashion. By customizing the fabric, sewing the side seams, creating the cups, attaching the straps, adding embellishments, and adding the finishing touches, you have created a unique and eye-catching mermaid bra top.
Remember, the beauty of this DIY project lies in your creativity and personal touch. Feel free to explore different colors, fabric textures, and embellishment designs that suit your individual style and preferences. You can even experiment with various techniques, such as embroidery or fabric painting, to further enhance the visual appeal of your mermaid bra top.
Whether you’re planning to wear your mermaid bra top to the beach, a music festival, or incorporating it into a mermaid-themed costume, be proud of your creation and show it off with confidence. Embrace the ethereal allure of the mermaid aesthetic and let your inner mermaid shine.
Now that you have the skills and knowledge to craft your own mermaid bra top, you can continue to explore and expand your creativity in your future projects. Stay inspired and keep dreaming up new ways to infuse the magic of the sea into your wardrobe.
We hope you enjoyed this DIY journey and found the instructions clear and helpful. Remember, the true magic lies in the process of bringing your imagination to life. So grab your materials, indulge in your creative spirit, and make a splash with your one-of-a-kind mermaid bra top!