Home>How-to Guides>For Women>How To Make A Tankini Out Of A Shirt
For Women
How To Make A Tankini Out Of A Shirt
Published: July 31, 2023
Learn how to turn any shirt into a stylish and comfortable tankini for women. Create a unique swimwear look that's perfect for the pool or beach.
(Many of the links in this article redirect to a specific reviewed product. Your purchase of these products through affiliate links helps to generate commission for Under-tec.com, at no extra cost. Learn more)
Table of Contents
Introduction
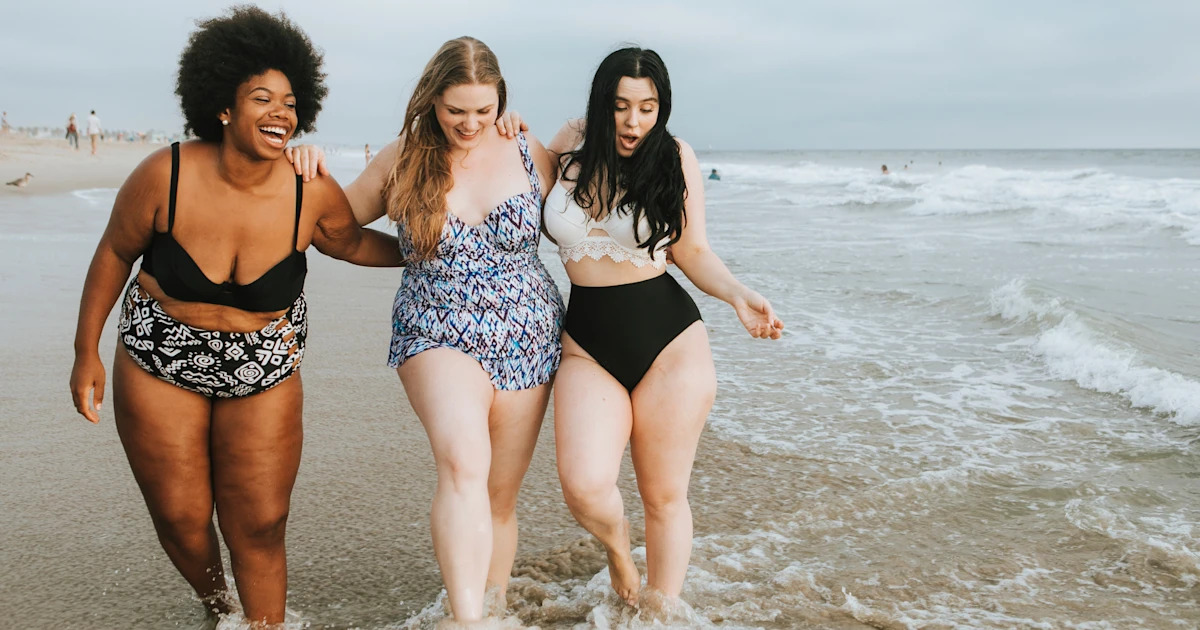
Welcome to our guide on how to make a tankini out of a shirt. If you’re looking for a trendy and unique swimwear option, repurposing an old shirt into a tankini is a fantastic DIY project that allows you to customize your own swimwear. It’s not only a fun and creative way to upcycle your wardrobe but also an opportunity to save some money.
Tankinis have become increasingly popular in recent years because they offer the perfect balance of coverage and style. By transforming a shirt into a tankini, you can design a swimsuit that suits your personal taste and body shape while reducing waste and contributing to a more sustainable fashion industry.
In this guide, we will take you through the step-by-step process of making a tankini out of a shirt. We will provide you with a list of materials you’ll need and walk you through each stage of the transformation. Whether you’re a seasoned DIY enthusiast or new to crafting, this guide is suitable for all skill levels.
So, why spend a fortune on store-bought tankinis when you can create your own unique piece? Get ready to unleash your creativity, save some money, and turn heads at the beach or pool with your fabulous homemade tankini!
Materials Needed
Before diving into the process of making a tankini out of a shirt, let’s gather the materials you’ll need for this DIY project. Don’t worry, you probably already have most of these items lying around in your home. Here’s what you’ll need:
- A shirt: Choose a shirt made of a stretchy fabric, such as cotton or spandex, to ensure a comfortable fit for your tankini. Make sure the shirt is long enough to cover your torso and provide the desired coverage.
- Fabric scissors: These will be essential for cutting and shaping the shirt according to your desired tankini style.
- Chalk or fabric marker: Used to mark the areas where you’ll be cutting the shirt.
- Needle and thread or sewing machine: Depending on your sewing skills and preferences, you can either hand-sew the edges or use a sewing machine for a more professional finish.
- Elastic band (optional): If you want to add extra support and ensure a snug fit, consider using an elastic band while sewing the edges of the tankini.
- Adjustable straps (optional): If you prefer extra support or want the flexibility of adjusting the strap length, you can also gather adjustable straps to attach to your tankini.
These are the basic materials you’ll need to get started on your tankini-making journey. Feel free to customize or add additional items based on your personal preferences and creativity. Once you have all the materials ready, let’s move on to the next step: choosing the right shirt for your tankini.
Step 1: Choosing the Right Shirt
The first step in making a tankini out of a shirt is selecting the perfect shirt to repurpose. Look for a shirt that is made of a stretchy and swimwear-appropriate fabric such as cotton or spandex. This will ensure that the shirt retains its shape and provides a comfortable fit as a tankini. Additionally, consider the length of the shirt – make sure it is long enough to cover your torso and provide the desired coverage. You can choose an old t-shirt or buy a new one specifically for this project – the choice is up to you!
It’s a good idea to try on the shirt to assess the fit and determine if any alterations are needed. Keep in mind that the shirt will be transformed into a tankini, so it may need some adjustments to achieve the desired style and fit. For example, you may want to consider narrowing the width of the shirt or cutting off excess fabric to create a more flattering shape. It’s also important to consider the neckline of the shirt – a crew neck or v-neck will be easier to work with, but feel free to experiment with different necklines for a unique look.
When choosing a shirt, think about your personal style and the image you want to project with your tankini. Do you prefer bold and bright colors, or more subtle and neutral tones? Are you looking for a solid-colored shirt or one with patterns or prints? The choice is yours! Remember, this is your opportunity to create a one-of-a-kind tankini that reflects your personality and taste.
Once you have your shirt selected, it’s time to move on to the next step: preparing the shirt for transformation into a tankini.
Step 2: Preparing the Shirt
After choosing the right shirt for your tankini project, it’s important to prepare it before making any cuts or alterations. Here are the steps to follow in order to prepare the shirt for transformation:
- Wash and iron the shirt: Start by giving the shirt a thorough wash and ironing it to remove any wrinkles or creases. This will ensure a smoother cutting and sewing process.
- Lay the shirt flat: Find a clean and flat surface to lay the shirt on, such as a table or the floor. Smooth out any wrinkles by gently pulling on the fabric, making sure it is completely flat and even.
- Mark your cutting lines: Use a chalk or fabric marker to mark the areas on the shirt where you will be making cuts. Carefully decide on the desired length and shape of your tankini top, taking your body measurements into account. Common options include crop top styles, high necklines, or halter necklines. Make sure the marks are clear and visible.
- Double-check the markings: Step back and take a look at the marked lines to ensure that they align with your vision for the tankini top. Adjust the markings if necessary to achieve the desired shape and fit. It’s better to double-check now than to regret it later!
- Consider the bottom hem: If you plan to keep the original bottom hem of the t-shirt, make sure it is aligned and straight. Otherwise, mark a new line for the bottom hem based on the desired length of your tankini.
Once you have completed these steps, you are ready to move on to the exciting part – cutting the shirt and transforming it into a tankini top.
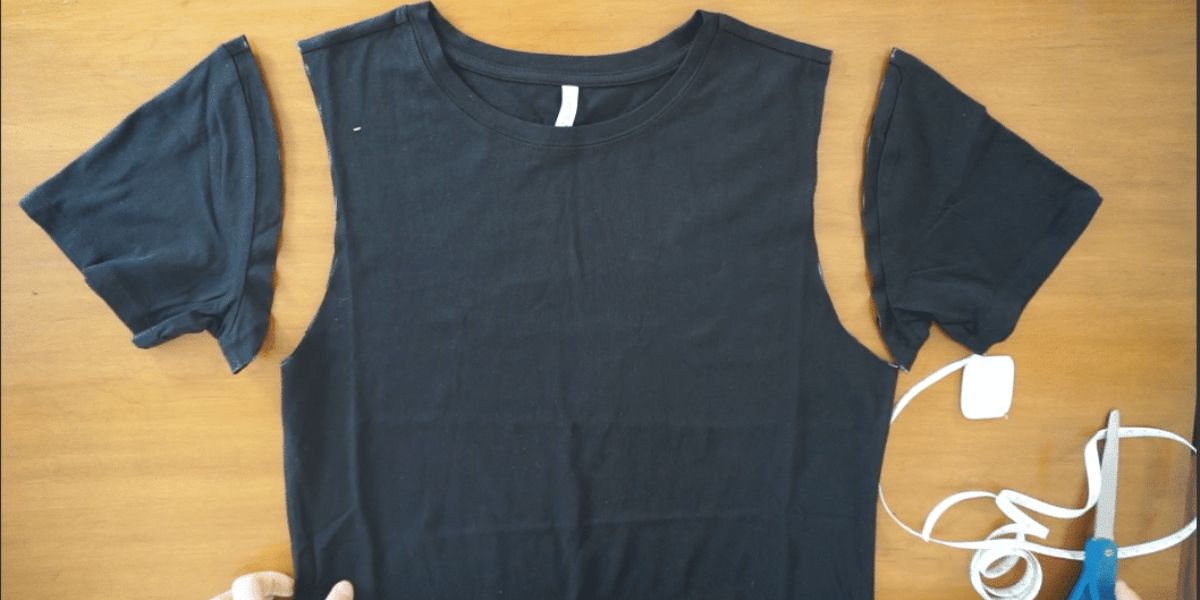
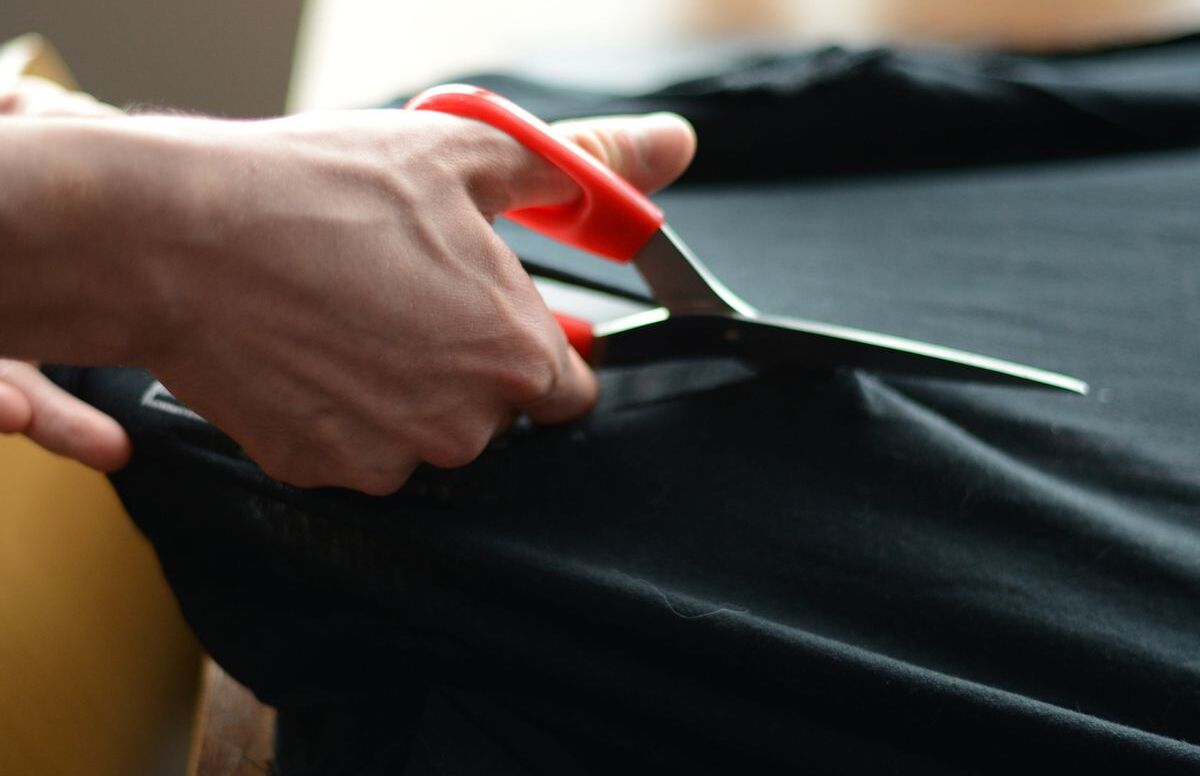
Step 3: Cutting the Shirt
Now that your shirt is prepared and the cutting lines are marked, it’s time to start transforming it into a tankini top. Follow these steps to cut the shirt:
- Position the shirt: Lay the shirt flat on your cutting surface, making sure the front and back layers are aligned properly. Smooth out any wrinkles or folds to ensure an accurate cut.
- Cut along the marked lines: Using fabric scissors, carefully cut along the marked lines, following the shape and style you want for your tankini top. Take your time to make clean and precise cuts, especially when working around curves and corners. If you’re unsure, it’s always better to start with a slightly longer length and make additional adjustments later.
- Try on the tankini top: After making the cuts, try on the tankini top to see how it fits and looks on your body. This will give you a better idea of any necessary adjustments that need to be made. Pay attention to the length, neckline, and overall fit of the top. If you’re satisfied with the initial cut, move on to the next step. If adjustments are needed, make note of where and how much fabric needs to be altered.
- Refine the cuts (optional): If you want to add some additional style to your tankini top, now is the time to get creative. Consider adding small cut-out details, such as a keyhole back or side cutouts, to personalize the design. Just make sure you are confident in your cutting skills before attempting any intricate patterns.
- Finalize the cuts: Once you’ve made any necessary adjustments or refinements, go ahead and finalize the cuts. Make sure all the edges are clean and even.
Cutting the shirt is a crucial step in the transformation process, so take your time and be patient. Remember, it’s easier to remove excess fabric later than to add it back. Once you’re satisfied with the cuts, it’s time to move on to the next step – sewing or hemming the edges of your tankini top.
Step 4: Sewing or Hemming the Edges
After cutting the shirt and transforming it into a tankini top, the next step is to sew or hem the edges to give it a polished and finished look. This step will not only enhance the durability of your tankini top but also provide a clean and professional appearance. Follow these steps to sew or hem the edges of your tankini top:
- Choose your sewing method: Depending on your sewing skills and resources, you can either hand-sew the edges or use a sewing machine. Both methods will give you great results, so choose the one that you’re most comfortable with.
- Thread your needle or prepare your sewing machine: If you opt for hand-sewing, thread your needle with a thread that matches the color of your fabric. For a sewing machine, make sure you have the appropriate thread loaded and ready to use.
- Start sewing or hemming: Begin by folding the cut edges of your tankini top inward, about half an inch, to create a clean edge. Pin or clip the fabric in place to secure it. Then, using a straight stitch, sew along the folded edge, making sure to catch both layers of fabric. Keep the stitch length consistent for a neat finish.
- Continue sewing all the way around: Sew or hem the edges along the entire perimeter of your tankini top, removing any pins or clips as you go along. Take your time to ensure that the stitching is even and secure. If you’re using a sewing machine, guide the fabric gently and carefully to avoid any puckering or uneven sewing.
- Finish the thread: Once you’ve completed sewing all the way around, secure the thread by tying a knot or backstitching a few stitches. Trim off any excess thread.
Remember, if you’re not confident in your sewing skills, you can always seek assistance from a friend or a local tailor. They can help you achieve a professional finish and ensure that your tankini top is ready to withstand the waves at the beach or the pool.
With the edges sewn or hemmed, your tankini top is almost complete. If you want to add adjustable straps for extra support or a different look, continue to the next step. Otherwise, you’re ready to try on your newly-created tankini top and admire your DIY skills!
Step 5: Adding Adjustable Straps (Optional)
Adding adjustable straps to your tankini can provide extra support and allow you to customize the fit according to your preference. If you decide to add adjustable straps to your tankini top, follow these steps:
- Measure and cut the straps: Determine the desired length of your straps and cut two pieces of fabric or elastic band accordingly. Make sure the width of the straps is comfortable to wear and can withstand the tension of supporting the tankini top.
- Attach the straps to the tankini: Position the straps on the inside of the tankini top, aligning them with the top edges near the shoulders. Pin or clip the straps in place to secure them temporarily.
- Try on the tankini top: Put on the tankini top with the temporarily attached straps to check the placement and length. Adjust the straps as necessary until you achieve the desired fit and comfort. The straps should provide support without digging into your shoulders or being too loose.
- Sew the straps: Once you’re satisfied with the placement and length of the straps, sew them securely to the tankini top. Use a straight stitch or reinforcing stitch to ensure they stay in place. Sew alongside the edges of the tankini top, following the attachment points of the straps.
- Test the adjustability: If you’re using elastic bands for the straps, consider adding adjustable sliders or hooks to allow for easy adjustment. This will give you the flexibility to make the straps longer or shorter as needed.
Adding adjustable straps can elevate the functionality of your tankini top, especially if you have different preferences for strap length or require extra support. Feel free to experiment with different strap styles and materials to add your personal flair to the tankini.
Once the adjustable straps are attached, step back and admire your transformed tankini top. It’s now time to try it on and make any final adjustments before hitting the beach or pool in style!
Step 6: Trying on the Tankini
Congratulations! You’ve made it to the final step of creating your DIY tankini. Now it’s time to try on your tankini and make any last-minute adjustments for the perfect fit. Here’s what you need to do:
- Put on the tankini top: Slip into your newly created tankini top and get a feel for how it fits on your body. Observe the overall coverage, neckline, and straps to ensure they align with your desired style and comfort level.
- Check the fit: Walk around and move your body to see how the tankini top moves and stays in place. Pay attention to areas that may require further adjustments, such as loose straps or areas where the fabric pulls.
- Make necessary alterations: If you find any areas that need tweaking, mark them with pins, clips, or fabric markers while wearing the tankini. This will help you pinpoint the precise spots that require alteration for a better fit.
- Remove the tankini top: Take off the tankini top and lay it flat on a surface once again. Make the necessary alterations based on the markings you made while wearing the top. This could include taking in the sides, adjusting the strap length, or hemming any excess fabric.
- Sew the final alterations: Using your sewing machine or needle and thread, make the final adjustments to the tankini top. Take your time to ensure that the alterations are precise and secure. Double-check the fit and appearance before moving on to the next step.
After making the final alterations, try on the tankini once more to confirm that the fit and look are as desired. Take a moment to appreciate your hard work and creativity in transforming a simple shirt into a stylish tankini. You now have a unique swimwear piece that reflects your personal style and fits perfectly to your body.
Now that you have completed all the steps, you’re ready to rock your homemade tankini with confidence. Head to the beach, lounge by the pool, or enjoy a refreshing swim knowing that you have a one-of-a-kind swimwear creation that showcases your creativity and resourcefulness.
Conclusion
You’ve reached the end of our guide on how to make a tankini out of a shirt. By transforming a simple shirt into a custom tankini, you’ve not only created a unique swimwear piece but also demonstrated your creativity and resourcefulness. Here’s a quick recap of the steps involved in this DIY project:
- Choose the right shirt for your tankini, considering fabric, length, and style.
- Prepare the shirt by washing, laying it flat, and marking the cutting lines.
- Carefully cut the shirt according to your desired tankini style and fit.
- Sew or hem the edges of the tankini top for a clean and finished look.
- Add adjustable straps if desired, for added support and personalized fit.
- Try on the tankini top, make any necessary adjustments, and sew the final alterations.
Throughout this process, you’ve been able to customize your tankini to your own taste, save money, and contribute to sustainable fashion practices by repurposing an old shirt. Creating your own tankini allows you to have a swimsuit that fits perfectly and reflects your personal style, giving you confidence and comfort when you wear it.
Remember, this guide serves as a starting point for your tankini-making journey. Feel free to unleash your creativity and experiment with different cutting styles, fabric choices, or embellishments to make your tankini even more unique and special. A DIY tankini not only offers exclusivity but also allows you to contribute to a more sustainable fashion industry by repurposing clothing items.
Now that you have the knowledge and expertise, it’s time to get started on creating your own fabulous tankini out of a shirt. Embrace your inner designer, enjoy the process, and revel in the satisfaction of wearing a swimwear piece that is truly one-of-a-kind. Happy crafting and happy swimming!